Let me guess. You’ve seen those gorgeous crochet houseplants all over Instagram and thought, "There’s no way I could make that." Maybe the fenestrations look too complicated. Maybe you’ve never crocheted anything that wasn’t flat. Maybe you’re convinced you’d end up with a sad, floppy leaf that looks nothing like the picture.
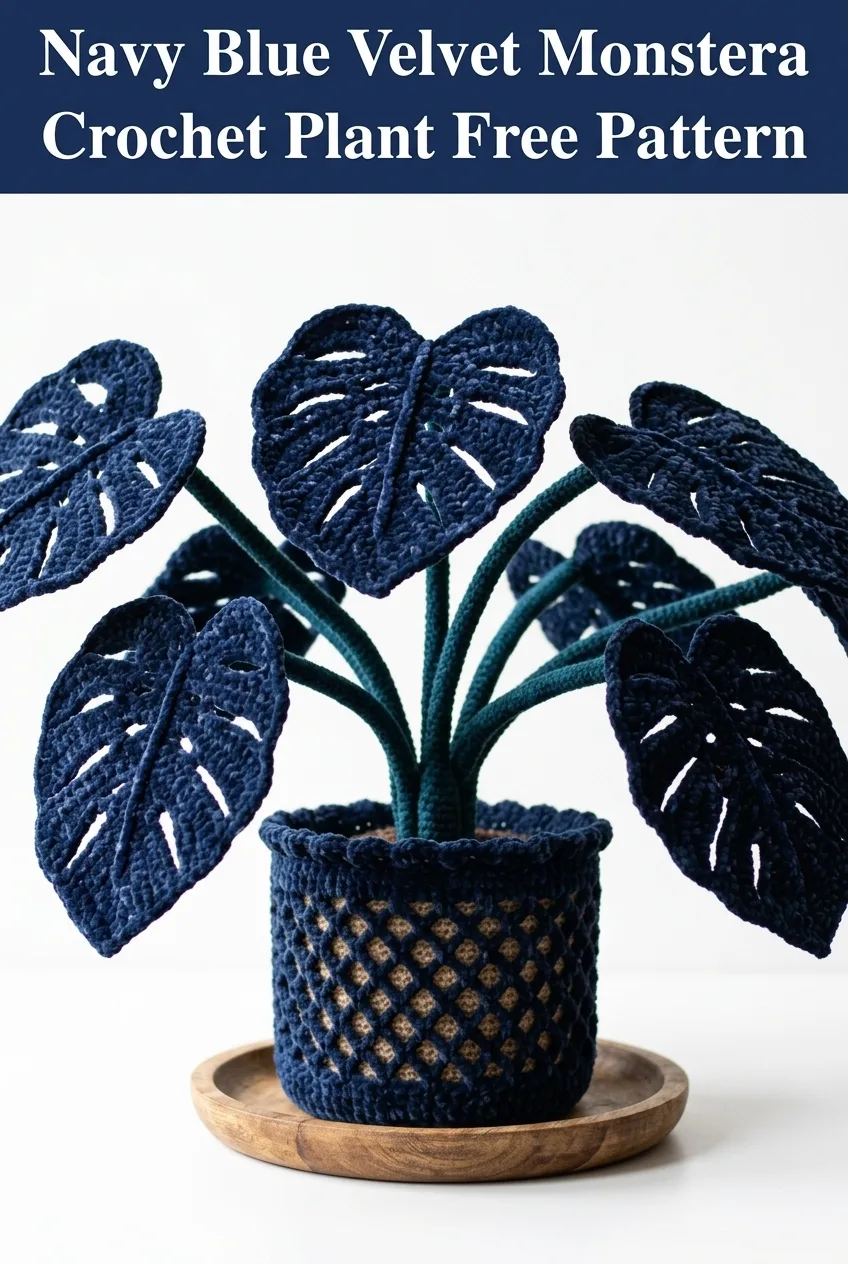
I’m here to tell you that you absolutely can make this stunning navy blue velvet monstera plant. Every single leaf is built using basic stitches you probably already know. The iconic split-leaf holes? They’re just strategic chains and skipped stitches. The pot? Simple increases in the round. If you can single crochet and chain, you can create this entire botanical masterpiece.
Whether you’re a confident crocheter looking for your next statement piece or a brave beginner ready to level up, this pattern breaks down every step in plain language. No confusing shortcuts. No assumed knowledge. Just clear instructions that will have you arranging your very own never-needs-watering monstera in no time.
Why Crochet a Monstera Plant?
This crochet monstera plant pattern solves so many problems at once. You get the trendy houseplant aesthetic without any of the guilt when you forget to water it. It’s pet-safe, kid-proof, and perfect for those dark corners where real plants would struggle.
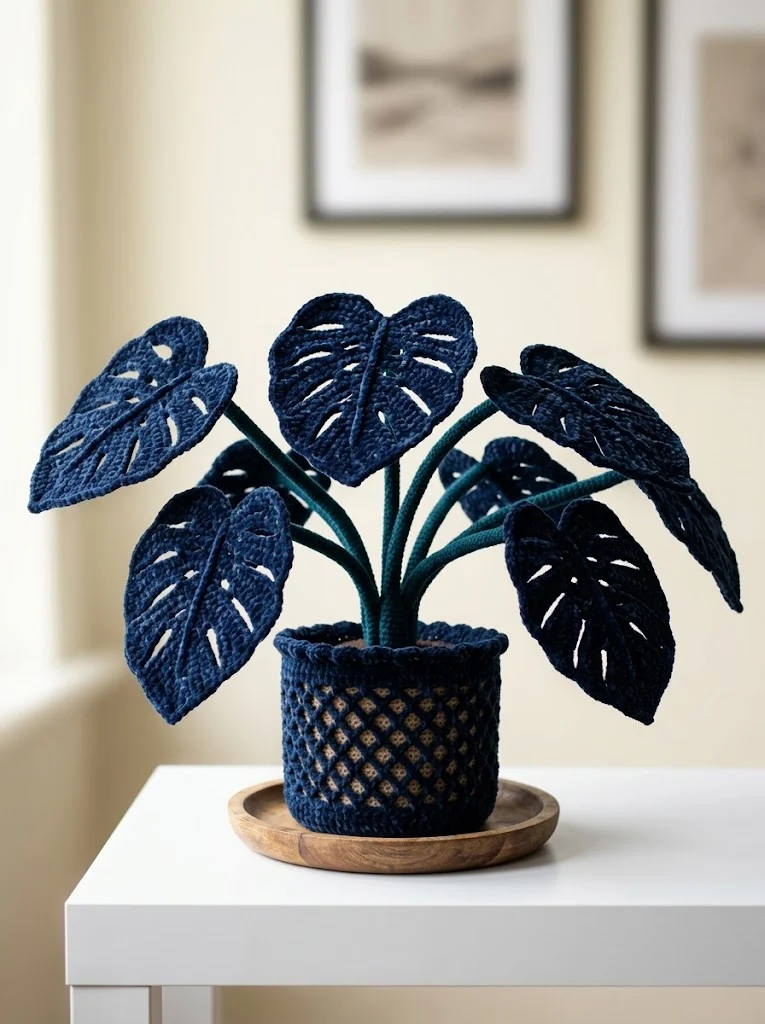
The navy blue colorway makes this version especially striking. Rather than mimicking nature exactly, we’re leaning into the craft and creating something that reads as intentional home décor. The deep blue pairs beautifully with the teal stems and creates a moody, sophisticated look that works in modern spaces.
This project also makes an incredible gift. Think housewarming presents, birthdays for the friend who kills every plant, or a unique Mother’s Day gift that will last forever.
Skill Level
Intermediate beginner to intermediate. You should be comfortable with basic stitches and working in the round. The leaves require some shaping and attention to stitch placement, but nothing here is truly advanced. If terms like "increase" and "working into the back loop" don’t scare you, you’re ready.
Finished Dimensions
Based on the proportions visible, this completed plant stands approximately 14 to 16 inches tall from the base of the pot to the tallest leaf tip. Individual leaves measure roughly 5 to 7 inches long depending on size variation. The pot measures approximately 4 inches tall and 4 inches in diameter at the rim.
Materials Needed
Yarn:
Hook:
Notions:
Abbreviations and Stitch Definitions
Before we dive into the step by step instructions, let’s define every stitch you’ll encounter:
The Monstera Leaf Pattern
You’ll make 6 to 8 leaves in varying sizes for a full, lush plant. I’m providing instructions for a medium leaf. For smaller leaves, reduce your starting chain by 4 to 6 stitches. For larger leaves, add 4 to 6 stitches. The construction method stays the same.
Each leaf is worked flat in rows, then edged and attached to a wire-reinforced stem.

Leaf Body (Make 6 to 8)
Using navy blue yarn and 4.0mm hook:
Row 1: Ch 20. Sc in 2nd ch from hook and in each ch across. (19 sts)
Row 2: Ch 1, turn. Sc in each st across. (19 sts)
Row 3: Ch 1, turn. 2 sc in first st, sc in each st to last st, 2 sc in last st. (21 sts)
Row 4: Ch 1, turn. Sc in each st across. (21 sts)
Row 5: Ch 1, turn. 2 sc in first st, sc in each st to last st, 2 sc in last st. (23 sts)
Rows 6 to 8: Ch 1, turn. Sc in each st across. (23 sts)
Row 9 (First Fenestration Row): Ch 1, turn. Sc in first 5 sts, ch 3, sk 3 sts, sc in next 7 sts, ch 3, sk 3 sts, sc in last 5 sts. (17 sc, 6 ch)
Row 10: Ch 1, turn. Sc in first 5 sts, 3 sc in ch-3 space, sc in next 7 sts, 3 sc in ch-3 space, sc in last 5 sts. (23 sts)
Rows 11 to 13: Ch 1, turn. Sc in each st across. (23 sts)
Row 14 (Second Fenestration Row): Ch 1, turn. Sc in first 4 sts, ch 4, sk 4 sts, sc in next 7 sts, ch 4, sk 4 sts, sc in last 4 sts. (15 sc, 8 ch)
Row 15: Ch 1, turn. Sc in first 4 sts, 4 sc in ch-4 space, sc in next 7 sts, 4 sc in ch-4 space, sc in last 4 sts. (23 sts)
Rows 16 to 18: Ch 1, turn. Sc in each st across. (23 sts)
Row 19 (Begin Decreases): Ch 1, turn. Dec over first 2 sts, sc to last 2 sts, dec over last 2 sts. (21 sts)
Row 20: Ch 1, turn. Sc in each st across. (21 sts)
Row 21: Ch 1, turn. Dec over first 2 sts, sc to last 2 sts, dec over last 2 sts. (19 sts)
Row 22: Ch 1, turn. Sc in each st across. (19 sts)
Row 23: Ch 1, turn. Dec over first 2 sts, sc to last 2 sts, dec over last 2 sts. (17 sts)
Rows 24 to 26: Continue decreasing every other row until you have 11 sts remaining.
Row 27 (Tip Shaping): Ch 1, turn. Dec, sc to last 2 sts, dec. (9 sts)
Row 28: Ch 1, turn. Dec, sc 5, dec. (7 sts)
Row 29: Ch 1, turn. Dec, sc 3, dec. (5 sts)
Row 30: Ch 1, turn. Dec, sc 1, dec. (3 sts)
Row 31: Ch 1, turn. Sc3tog. Fasten off, leaving a 6-inch tail for seaming.
Leaf Edging
This gives the leaves that lovely finished look and helps them hold their shape.
Join navy yarn at the base of the leaf with a sl st. Working around the entire perimeter:
Round 1: Ch 1. Sc evenly around the entire leaf, working approximately 2 sc per row end along the sides and 1 sc per stitch across the top and bottom. Work 3 sc in the tip point to create a smooth curve. Sl st to first sc to join.
Fasten off and weave in ends.
Central Vein Detail
Using a tapestry needle and the same navy yarn, create a raised central vein by working a line of chain stitch embroidery (or surface slip stitch) from the base of the leaf to the tip. This adds beautiful texture and mimics the natural structure of monstera leaves.
Stem Pattern (Make 6 to 8)
The stems are simple crochet tubes worked around floral wire for stability.
Using teal yarn and 4.0mm hook:
Round 1: Make a magic ring. Work 6 sc into the ring. Pull tight. Do not join. (6 sts)
Rounds 2 to 40: Working in a continuous spiral, sc in each st around. Place a stitch marker in your first stitch and move it up each round to track your progress. (6 sts)
Continue until stem measures approximately 6 to 8 inches, or desired length. Vary your stem lengths for a natural look.
Fasten off, leaving an 8-inch tail.
Wire Insertion
Cut a piece of floral wire 2 inches longer than your stem. Insert it through the center of the tube. The extra length will poke into the pot base for stability.
Using your yarn tail, sew the leaf base securely to the top of the stem, wrapping a few times for strength.
Pot Cover Pattern
This textured pot cover slips over a small plastic or terracotta pot for weight and structure.
Using navy blue yarn and 4.0mm hook:
Base
Round 1: Make a magic ring. Work 6 sc into the ring. Pull tight. Sl st to first sc to join. (6 sts)
Round 2: Ch 1. 2 sc in each st around. Sl st to join. (12 sts)
Round 3: Ch 1. *Sc in first st, 2 sc in next st.* Rep from * around. Sl st to join. (18 sts)
Round 4: Ch 1. *Sc in next 2 sts, 2 sc in next st.* Rep from * around. Sl st to join. (24 sts)
Round 5: Ch 1. *Sc in next 3 sts, 2 sc in next st.* Rep from * around. Sl st to join. (30 sts)
Round 6: Ch 1. *Sc in next 4 sts, 2 sc in next st.* Rep from * around. Sl st to join. (36 sts)
Round 7: Ch 1. *Sc in next 5 sts, 2 sc in next st.* Rep from * around. Sl st to join. (42 sts)
Continue increasing until base fits your pot diameter. For a 4-inch pot, you’ll likely need 48 to 54 stitches.
Sides
Rounds 8 to 10: Ch 1. Working in BLO, sc in each st around. Sl st to join. (This creates the crisp edge at the base.)
Rounds 11 to 22: Ch 1. Sc in each st around (through both loops now). Sl st to join.
Lattice Detail (Optional)
The pot in the image features a lovely diamond lattice pattern. To achieve this, you can work a separate mesh overlay using chain spaces, or use surface crochet to create the crossed lines after completing the solid pot.
For a simpler version, skip the lattice entirely. The solid navy pot looks beautiful on its own.
Rim
Round 23: Ch 1. *Sc in next 2 sts, hdc in next st, dc in next st, hdc in next st.* Rep from * around to create a gentle scalloped edge. Sl st to join.
Fasten off and weave in ends.
Assembly Instructions
Now for the satisfying part. Bringing your crochet monstera plant together.
Step 1: Insert your weighted pot or small container inside the crochet pot cover. Add some polyfill around the sides if needed for a snug fit.
Step 2: Fill the center of the pot with polyfill, crumpled paper, or floral foam. You need something that will hold the wire stems in place.
Step 3: Insert your wire-reinforced stems into the pot base, pushing them down into the filling. Arrange at varying heights and angles for a natural look.
Step 4: Bend and shape the leaves gently. Real monstera leaves droop and curve, so don’t be afraid to give yours some movement.
Step 5: Step back and admire your work. Adjust as needed until you’re happy with the fullness and balance.
Tips for Success
Tension matters for the leaves. A slightly tight tension helps the leaves hold their shape better. If your leaves are floppy, try going down a hook size.
Don’t stress about perfection. Real monstera leaves aren’t identical either. Variation in size and shape makes your plant look more organic and interesting.
Block your leaves if needed. You can wet block your finished leaves by pinning them flat and letting them dry for crisper edges.
Use quality wire. Flimsy wire won’t support the leaves over time. Invest in proper floral wire from a craft store.
Customization Ideas
This crochet plant tutorial is endlessly adaptable. Consider making your monstera in:
You can also adjust the pot size, add more leaves for extra fullness, or create a whole collection of crochet houseplants using similar techniques.
I really hope this navy blue velvet monstera brings some handmade beauty into your home. It’s such a rewarding project, and every time you walk past it, you’ll get that little thrill of "I made that."
If you love this pattern, please save it to your Pinterest boards so you can find it again whenever you’re ready to start. And if you do make one, I would absolutely love to see it. Drop a comment below or tag me on Instagram with your finished plant. Nothing makes my day quite like seeing your creations come to life!
