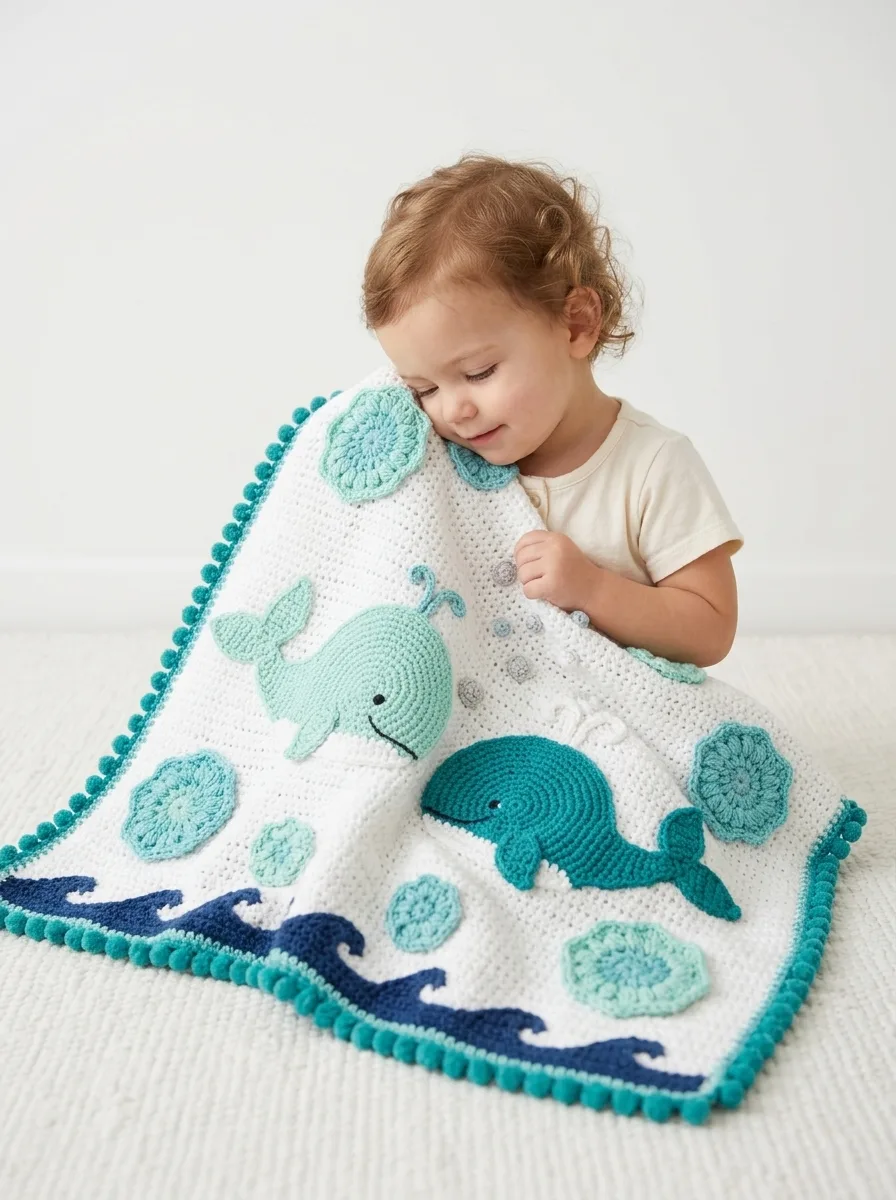
I designed this blanket for my best friend’s ocean-themed nursery, and honestly, I squealed a little when I finished it. I wanted something that felt whimsical but not overwhelming. Something a baby could grow with. The combination of sweet whale appliqués, playful bubbles, and that gorgeous wave border came together better than I ever imagined. I am SO pleased with how it turned out, and I cannot wait for you to make your own.
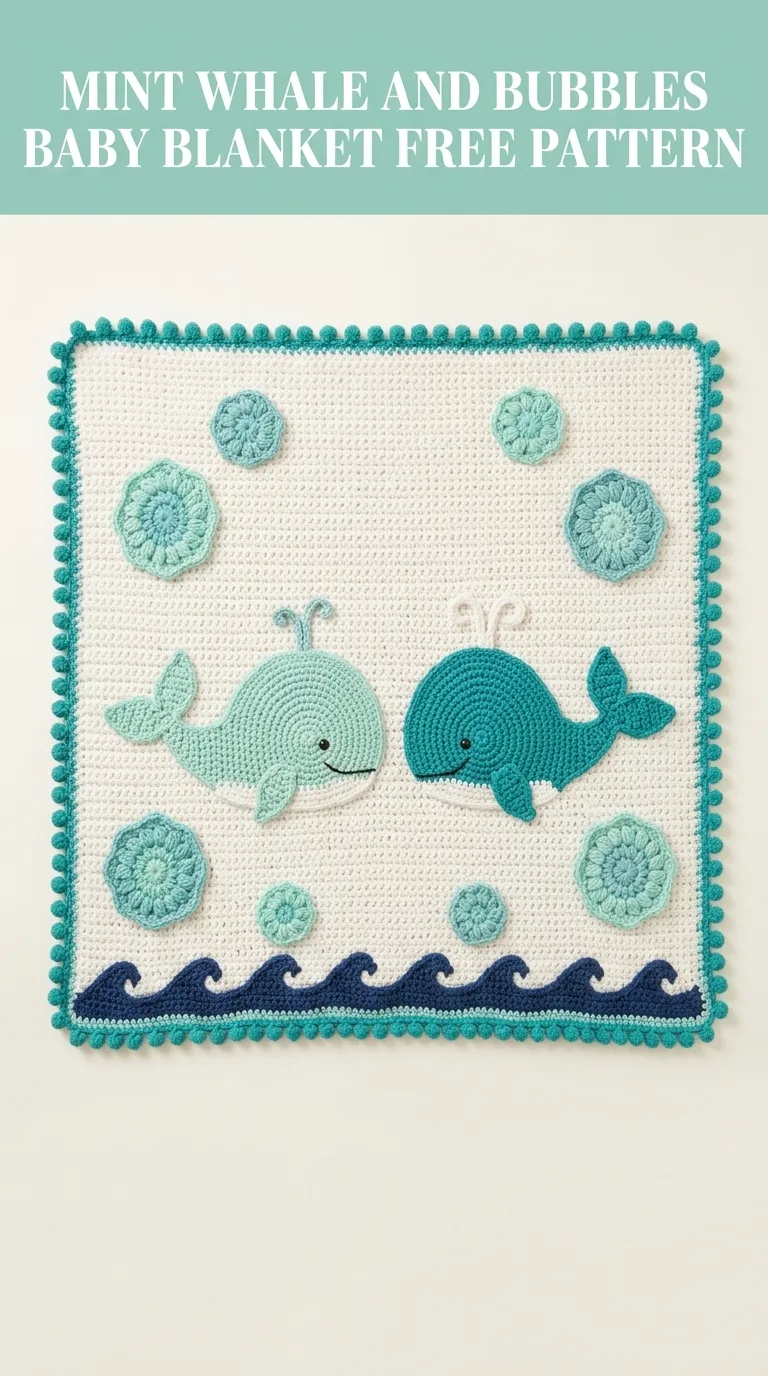
This mint whale and bubbles baby blanket crochet pattern combines a simple single crochet base with adorable appliqué elements that give it serious wow factor. The construction is beginner friendly with intermediate appliqué work, making it perfect for crocheters ready to level up their skills. Trust me when I say that if you can crochet a circle, you can absolutely make those whales.
Why This Baby Blanket Pattern Works
Let me tell you what makes this crochet tutorial special. The base blanket uses the most straightforward stitch in existence. Single crochet. That’s it. You’re building a beautiful canvas that showcases the appliqués without competing with them.
The cream or white background creates that clean, modern nursery aesthetic that parents love right now. The teal and mint color palette feels fresh and calming. Not too babyish, but definitely sweet enough for a little one.
The whales are worked in the round using basic increases. The bubbles are simple circles in varying sizes. And that wave border at the bottom? It’s easier than it looks. Promise.
Materials You Will Need
Before we dive in, gather these supplies. Having everything ready makes the whole process smoother.
Yarn:
I recommend a soft acrylic blend that washes well. Lion Brand Vanna’s Choice or Red Heart Soft work beautifully for baby items.
Tools:
Finished Dimensions:
Approximately 30 inches wide by 36 inches tall, perfect crib blanket size.
Gauge
Work 14 single crochet stitches and 16 rows to equal 4 inches using the 5.0mm hook. Check your gauge before starting. If your swatch is too big, go down a hook size. Too small? Go up a hook size.
Skill Level
Intermediate beginner. If you know how to single crochet and work in the round, you have the skills. The appliqué sewing requires patience but no special expertise.
Abbreviations and Stitch Definitions
Let me break down every stitch you need to know.
Ch = Chain. Wrap yarn over hook, pull through loop. This creates your foundation.
Sc = Single crochet. Insert hook into stitch, yarn over, pull up a loop (two loops on hook), yarn over, pull through both loops.
Inc = Increase. Work two single crochet stitches into the same stitch. This makes your circle grow.
Sl st = Slip stitch. Insert hook, yarn over, pull through stitch and loop on hook in one motion. Used for joining rounds.
Dc = Double crochet. Yarn over, insert hook, yarn over and pull up loop, yarn over and pull through two loops, yarn over and pull through remaining two loops.
Hdc = Half double crochet. Yarn over, insert hook, yarn over and pull up loop (three loops on hook), yarn over and pull through all three loops.
FO = Fasten off. Cut yarn, pull tail through last loop.
The Base Blanket Pattern
This is your foundation. Take your time here because everything else gets attached to this piece.
Using 5.0mm hook and cream yarn:
Row 1: Ch 106. Sc in second ch from hook and in each ch across. (105 sts)
Row 2: Ch 1, turn. Sc in each st across. (105 sts)
Rows 3 through 144: Repeat Row 2.
Your blanket should measure approximately 30 inches wide and 36 inches tall at this point. Don’t fasten off yet if you’re adding the wave border directly. If you prefer to add the border after attaching appliqués, fasten off and weave in your end.
Quick tip: Place a stitch marker at the beginning of every 20th row. This helps you keep count without constantly recounting from the bottom.
Large Whale Appliqué (Make 1 in Mint)
This is the mama whale. She’s worked from the center out in continuous rounds. Use a stitch marker to track your first stitch of each round.
Using 4.0mm hook and mint yarn:
Body:
Round 1: Magic ring, 6 sc into ring. Pull tight. (6 sts)
Round 2: Inc in each st around. (12 sts)
Round 3: *Sc 1, inc* repeat around. (18 sts)
Round 4: *Sc 2, inc* repeat around. (24 sts)
Round 5: *Sc 3, inc* repeat around. (30 sts)
Round 6: *Sc 4, inc* repeat around. (36 sts)
Round 7: *Sc 5, inc* repeat around. (42 sts)
Round 8: *Sc 6, inc* repeat around. (48 sts)
Round 9: Sc in each st around. (48 sts)
Round 10: Sc in each st around. (48 sts)
Sl st to first st. FO, leaving a long tail for sewing.
Tail fin (make 1):
Row 1: Ch 8. Sc in second ch from hook, hdc in next 2 sts, dc in next 2 sts, hdc in next st, 3 sc in last st. Working on opposite side of chain, hdc in next st, dc in next 2 sts, hdc in next 2 sts, sc in last st. (15 sts)
FO, leaving tail for sewing.
Side fin (make 1):
Round 1: Magic ring, 6 sc into ring. (6 sts)
Round 2: Inc in each st around. (12 sts)
Round 3: *Sc 1, inc* repeat around. (18 sts)
Sl st to join. FO, fold in half to create fin shape.
Water spout:
Ch 6. Sl st in second ch from hook. *Ch 4, sl st in same base st* repeat twice more.
FO, leaving tail.
Small Whale Appliqué (Make 1 in Teal)
Baby whale follows the same technique, just smaller.
Using 4.0mm hook and teal yarn:
Body:
Round 1: Magic ring, 6 sc into ring. (6 sts)
Round 2: Inc in each st around. (12 sts)
Round 3: *Sc 1, inc* repeat around. (18 sts)
Round 4: *Sc 2, inc* repeat around. (24 sts)
Round 5: *Sc 3, inc* repeat around. (30 sts)
Round 6: *Sc 4, inc* repeat around. (36 sts)
Round 7: Sc in each st around. (36 sts)
Sl st to first st. FO, leaving long tail.
Tail fin (make 1):
Row 1: Ch 6. Sc in second ch from hook, hdc in next st, dc in next st, hdc in next st, 3 sc in last st. Working on opposite side, hdc in next st, dc in next st, hdc in next st, sc in last st. (11 sts)
FO, leaving tail.
Side fin (make 1):
Round 1: Magic ring, 6 sc into ring. (6 sts)
Round 2: Inc in each st around. (12 sts)
Sl st to join. FO, fold in half.
Bubble Appliqués
Make these in varying sizes using mint and teal yarn. The visual interest comes from the different sizes scattered across the blanket.
Large bubbles (make 3):
Using 4.0mm hook:
Round 1: Magic ring, 6 sc into ring. (6 sts)
Round 2: Inc in each st around. (12 sts)
Round 3: *Sc 1, inc* repeat around. (18 sts)
Round 4: *Sc 2, inc* repeat around. (24 sts)
Sl st to join. FO, leaving tail.
Medium bubbles (make 3):
Round 1: Magic ring, 6 sc into ring. (6 sts)
Round 2: Inc in each st around. (12 sts)
Round 3: *Sc 1, inc* repeat around. (18 sts)
Sl st to join. FO, leaving tail.
Small bubbles (make 4):
Round 1: Magic ring, 6 sc into ring. (6 sts)
Round 2: Inc in each st around. (12 sts)
Sl st to join. FO, leaving tail.
Wave Border
This border runs along the bottom edge of the blanket and creates that beautiful ocean wave effect.
Using 5.0mm hook and navy yarn:
Join yarn to bottom right corner of blanket.
Row 1: Sc evenly across bottom edge, approximately 105 sts. Turn.
Row 2: Ch 1. *Sc 3, 3 dc in next st, sc 3* repeat across, adjusting final repeat to fit. Turn.
Row 3: Ch 1. Working in back loops only, sc in each st across. Turn.
Row 4: Repeat Row 2.
FO, weave in ends.
Pom Pom Border
The teal pom pom edging frames the entire blanket beautifully.
Using 5.0mm hook and teal yarn:
Join yarn to any corner.
Round 1: Sc evenly around entire blanket, working 3 sc in each corner. Sl st to join.
Round 2: Ch 3. *Skip 1 st, sl st in next st, ch 3* repeat around entire blanket.
Sl st to join. FO, weave in all ends.
Assembly Instructions
Now comes the fun part. Lay your blanket flat on a large surface.
Step 1: Position the large mint whale in the center left area of the blanket, slightly above the wave border.
Step 2: Place the small teal whale to the right and slightly below the large whale.
Step 3: Pin both whales in place.
Step 4: Scatter the bubble appliqués across the upper portion of the blanket. Group a few small bubbles near the water spout area. Place larger bubbles toward the corners.
Step 5: Pin everything and step back to evaluate the composition. Adjust as needed.
Step 6: Using matching yarn and a tapestry needle, whip stitch each appliqué to the blanket. Sew through the back loops of the appliqué edge only to keep stitches invisible from the front.
Step 7: Attach tail fins and side fins to each whale body.
Step 8: Using black yarn, embroider a small eye on each whale using a few satin stitches or a French knot.
Step 9: Stitch the water spout above the large whale’s head.
Step 10: Embroider a small curved smile on each whale using black yarn and a simple backstitch.
Finishing and Care
Weave in all remaining ends. Block your blanket by wetting it thoroughly, laying it flat on blocking mats, and pinning to measurements. Let dry completely.
For washing, use a gentle cycle with cold water. Tumble dry on low. The acrylic yarn will hold up beautifully to regular washing, which is essential for baby items.
Customization Ideas
Want to make this pattern your own? Here are some options.
Color swaps: Try coral and peach for a warmer palette. Or go bold with navy whales on a pale blue background.
Add more sea creatures: Small starfish or seashells would look adorable scattered among the bubbles.
Size adjustments: Add or subtract multiples of 10 to your foundation chain for a wider or narrower blanket. Adjust row count proportionally.
Skip the waves: If you want a simpler finish, a basic single crochet border in teal works perfectly.
Tips for Success
Start with the base blanket first. This gives you a chance to establish consistent tension before tackling the appliqués.
When working magic rings, pull that center tight. Loose centers look sloppy on appliqués.
Take photos of your appliqué placement before sewing. This lets you compare and adjust without removing stitches.
Use pins generously. Appliqués shift during sewing, and pins keep everything where you want it.
Work in good lighting. Those tiny embroidered eyes require precision.
I hope this mint whale and bubbles baby blanket crochet pattern brings as much joy to your crafting as it did to mine. This step by step tutorial covers everything you need to create a treasured baby gift that parents will absolutely adore. The combination of simple construction and charming details makes it impressive without being overwhelming.
Thank you so much for choosing this pattern for your next project. I genuinely appreciate you trusting me with your crafting time. If you make this blanket, I would love to see it. Tag me on Instagram or share in my Facebook group. Seeing your creations is honestly the best part of designing.
If this pattern caught your eye, go ahead and save it to your Pinterest boards so you can find it when you’re ready to start. And please drop a comment below if you make one. I read every single comment and love hearing how your projects turn out.
