These slipper boots are SUPER impressive and honestly one of the most satisfying projects you will make this season! I am talking cozy, stylish, and totally giftable in a weekend. The nautical vibe with that gorgeous braided cable detail looks like it took forever, but trust me when I say this works up faster than you would expect. If you want something that looks advanced but uses techniques you already know, this is your project. Perfect for holiday gifts, stocking stuffers, or just treating yourself to the coziest feet ever.

About This Navy Blue Nautical Slipper Boots Crochet Pattern
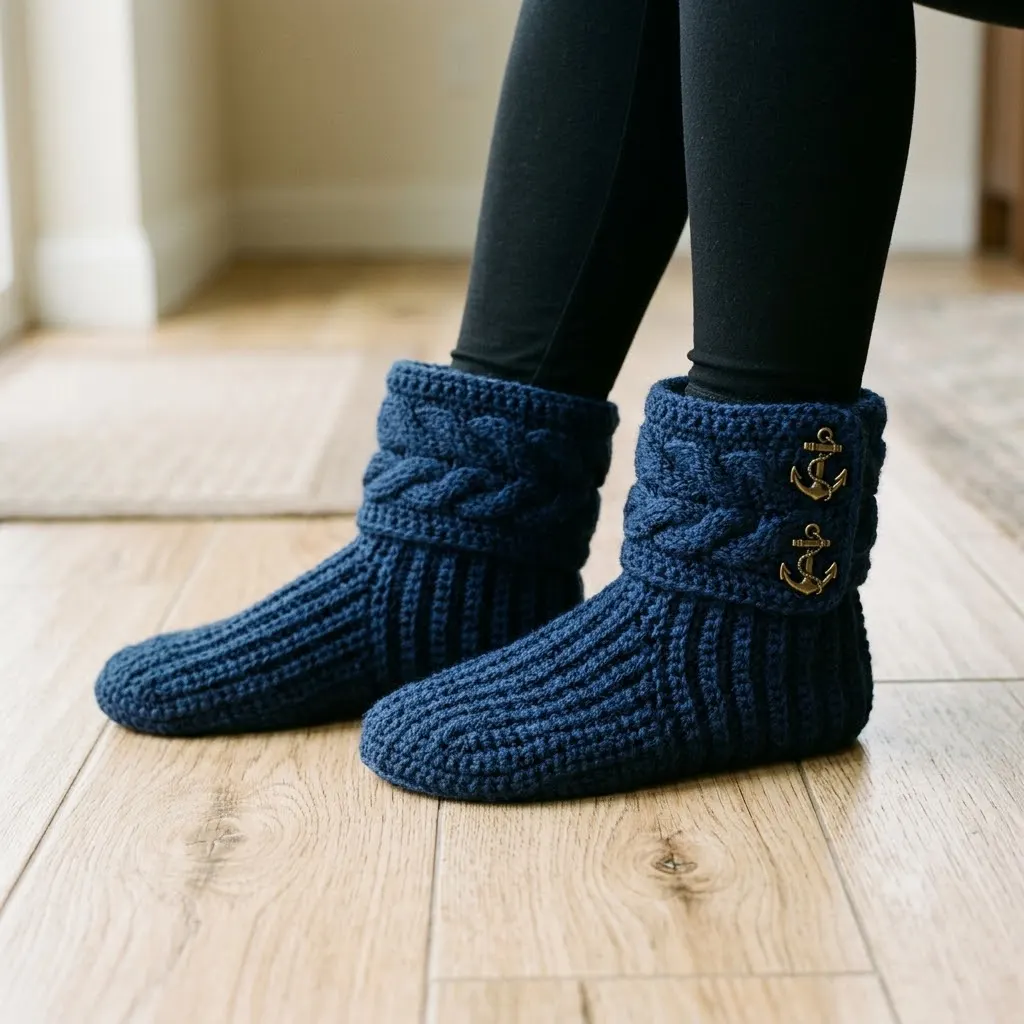
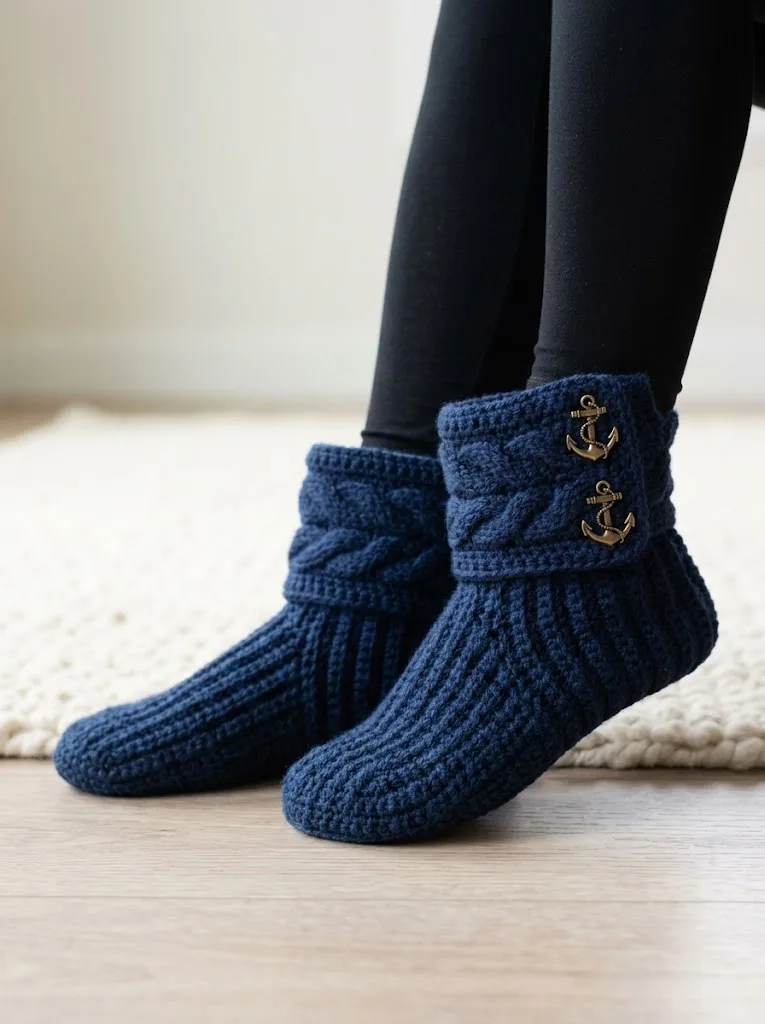
These slipper boots combine ribbed texture with a stunning braided cable accent around the ankle. The result is a structured, boot-style slipper that hugs your foot and looks absolutely gorgeous. I love how the navy blue color gives them that classic nautical feel, and the decorative anchor buttons are the perfect finishing touch.
The construction is clever. You work the sole first, then build up the sides using ribbing that creates stretch and a snug fit. The cable band is worked separately and attached, which makes the whole process much easier than trying to work cables into the main body.
Skill level: Intermediate. You should be comfortable with basic stitches and willing to try front post and back post stitches. The cable technique uses a simple braid method that I will walk you through step by step.
Materials You Will Need
Yarn:
Hook:
Notions:
Stitch Abbreviations and Definitions
Let me break down every stitch you will use in this crochet tutorial.
Ch = Chain. Wrap yarn over hook, pull through loop on hook. Your foundation for most projects.
Sl st = Slip stitch. Insert hook, yarn over, pull through both loops at once. Used for joining and invisible movement.
Sc = Single crochet. Insert hook, yarn over, pull up a loop (2 loops on hook), yarn over, pull through both loops. Creates a short, dense stitch.
Hdc = Half double crochet. Yarn over, insert hook, yarn over, pull up a loop (3 loops on hook), yarn over, pull through all 3 loops. Slightly taller than single crochet.
Dc = Double crochet. Yarn over, insert hook, yarn over, pull up a loop (3 loops on hook), yarn over, pull through 2 loops, yarn over, pull through remaining 2 loops. A tall versatile stitch.
FPdc = Front post double crochet. Yarn over, insert hook from front to back around the post of the stitch below (not through the top), yarn over, pull up a loop, complete as regular double crochet. Creates raised texture.
BPdc = Back post double crochet. Same as FPdc but insert hook from back to front around the post. Creates recessed texture.
Sk = Skip. Miss the indicated number of stitches.
Gauge
Gauge matters for fit! Work a test swatch before starting.
In ribbing pattern (alternating FPdc and BPdc):
If your swatch is too big, go down a hook size. Too small, go up a hook size.
Size Information
This pattern is written for Women’s Medium (US size 7 to 8). The finished slipper measures approximately 9.5 inches in length and 10 inches tall from sole to top of cuff.
To adjust size:
Step by Step Crochet Pattern
Part 1: The Sole
You will work the sole in rows using single crochet. This creates a firm, sturdy base.
Row 1: Ch 31. Sc in 2nd ch from hook and in each ch across. (30 sts)
Row 2: Ch 1, turn. Sc in each st across. (30 sts)
Rows 3 through 8: Repeat Row 2. (30 sts)
At this point you have a rectangular base. Now you will shape the heel and toe.
Heel Shaping:
Row 9: Ch 1, turn. Sc2tog over first 2 sts, sc across to last 2 sts, sc2tog. (28 sts)
Row 10: Ch 1, turn. Sc in each st across. (28 sts)
Row 11: Ch 1, turn. Sc2tog, sc across to last 2 sts, sc2tog. (26 sts)
Row 12: Ch 1, turn. Sc in each st across. (26 sts)
Toe Shaping:
Return to the beginning of Row 1 (the starting chain edge). Join yarn.
Row 1: Ch 1, sc in each st across foundation chain. (30 sts)
Row 2: Ch 1, turn. Sc2tog, sc across to last 2 sts, sc2tog. (28 sts)
Row 3: Ch 1, turn. Sc in each st across. (28 sts)
Row 4: Ch 1, turn. Sc2tog, sc across to last 2 sts, sc2tog. (26 sts)
Row 5: Ch 1, turn. Sc in each st across. (26 sts)
Fasten off and weave in ends.
Part 2: The Sides and Ribbed Body
Now comes the fun part. You will work around the entire edge of the sole to build up the slipper boot.
Round 1: Join yarn at center back heel. Ch 1, sc evenly around entire sole, placing approximately 60 to 66 sts total. Work 3 sc in each corner to help turn. Join with sl st to first sc. (approximately 64 sts)
Round 2: Ch 2 (counts as first dc here and throughout). Dc in each st around. Join with sl st to top of ch 2. (64 sts)
Round 3: Ch 2. *FPdc around next st, BPdc around next st.* Repeat from * to * around. Join with sl st. (64 sts)
This creates the beautiful ribbed texture you see in the finished slipper.
Rounds 4 through 12: Repeat Round 3, maintaining the rib pattern. Your FPdc stitches should stack directly above the previous FPdc stitches. (64 sts each round)
Do not fasten off. You will continue directly into the cuff.
Part 3: The Cuff
The cuff is a continuation of the ribbing but slightly looser for ease of putting on and taking off.
Round 13: Ch 2. Continue in established rib pattern (FPdc over FPdc, BPdc over BPdc). Join. (64 sts)
Rounds 14 through 20: Repeat Round 13. (64 sts each round)
After Round 20, your slipper boot body is complete. Fasten off and weave in ends.
Part 4: The Braided Cable Band
This is the showstopper detail! You will work three separate strips and braid them together.
Strip (Make 3):
Row 1: Ch 7. Dc in 4th ch from hook (skipped chains count as first dc) and in each remaining ch. (5 dc)
Rows 2 through 28: Ch 3, turn. Dc in each st across. (5 dc)
Fasten off, leaving a long tail on one strip for seaming.
Braiding the Cable:
Lay all three strips flat. Secure the ends together with a stitch marker or loose yarn tie.
Braid them together using a traditional three strand braid. Right strip over center, left strip over center. Continue until fully braided.
Secure the other end with a loose stitch. Try wrapping the braid around the cuff of your slipper to check length. Adjust if needed by adding or removing rows before finishing.
Finishing the Band:
Using your yarn needle, sew the ends of the braid together to form a circle. Position this circle around the cuff of the slipper, approximately 1 inch below the top edge.
Tack the braid to the cuff in several spots using small invisible stitches. You want it secure but not overly stitched down, so the braid texture remains visible.
Part 5: Attaching the Decorative Button
Position your anchor button (or any decorative button you choose) on the front of the braided band. Using matching thread or yarn, sew securely through all layers.
Tip: If you cannot find anchor buttons, any nautical themed button works beautifully. Rope designs, shells, or even plain brass buttons give a sophisticated look.
Helpful Tips for Success
Keeping your ribbing straight: After the first ribbing round, always work FPdc stitches around the raised stitches and BPdc around the recessed ones. If you get confused, just look at your work. The bumps go in front, the dips go in back.
Sole thickness: For extra durability and cushion, you can work two soles and stack them together before building up the sides. Some crafters also add a felt or leather sole to the bottom for grip on hard floors.
Fit adjustments: If the slipper feels too loose around your ankle, reduce your stitch count by 4 stitches on Round 1 of the sides. Too tight? Add 4 stitches.
Making both slippers match: I always recommend working both slippers at the same time, completing each round on both before moving on. This helps ensure consistent tension and identical sizing.
Why This Pattern Makes an Amazing Gift
Handmade slipper boots are one of those gifts that people actually use and love. They are practical, thoughtful, and show real effort. The nautical theme works for so many people, from beach lovers to anyone who appreciates classic style.
Work these up in different colors to suit different personalities. Cream with gold buttons for an elegant look. Red with silver anchors for a bold statement. Gray with wooden buttons for a cozy cabin vibe.
Care Instructions
Include these care instructions if you are gifting these slipper boots to someone:
I really hope you love making this Navy Blue Nautical Slipper Boots crochet pattern as much as I loved designing it. These work up into such satisfying finished projects and the braided cable detail always gets compliments. Thanks so much for choosing this pattern and trusting me to walk you through it. If you make a pair, I would absolutely love to see them! Share your photos on Instagram or Facebook and tag me so I can cheer you on.
If this pattern made your list of must-makes, go ahead and save it to your Pinterest boards so you can find it easily when you are ready to start. And if you do make these cozy slipper boots, drop a comment below. I love hearing how your projects turn out and seeing the color combinations you choose!
