
I don’t know about you, but I have a serious weakness for baby clothes that look like they belong in a storybook. There’s just something about a tiny dress covered in cheerful sunflowers that makes my heart do a little flip.
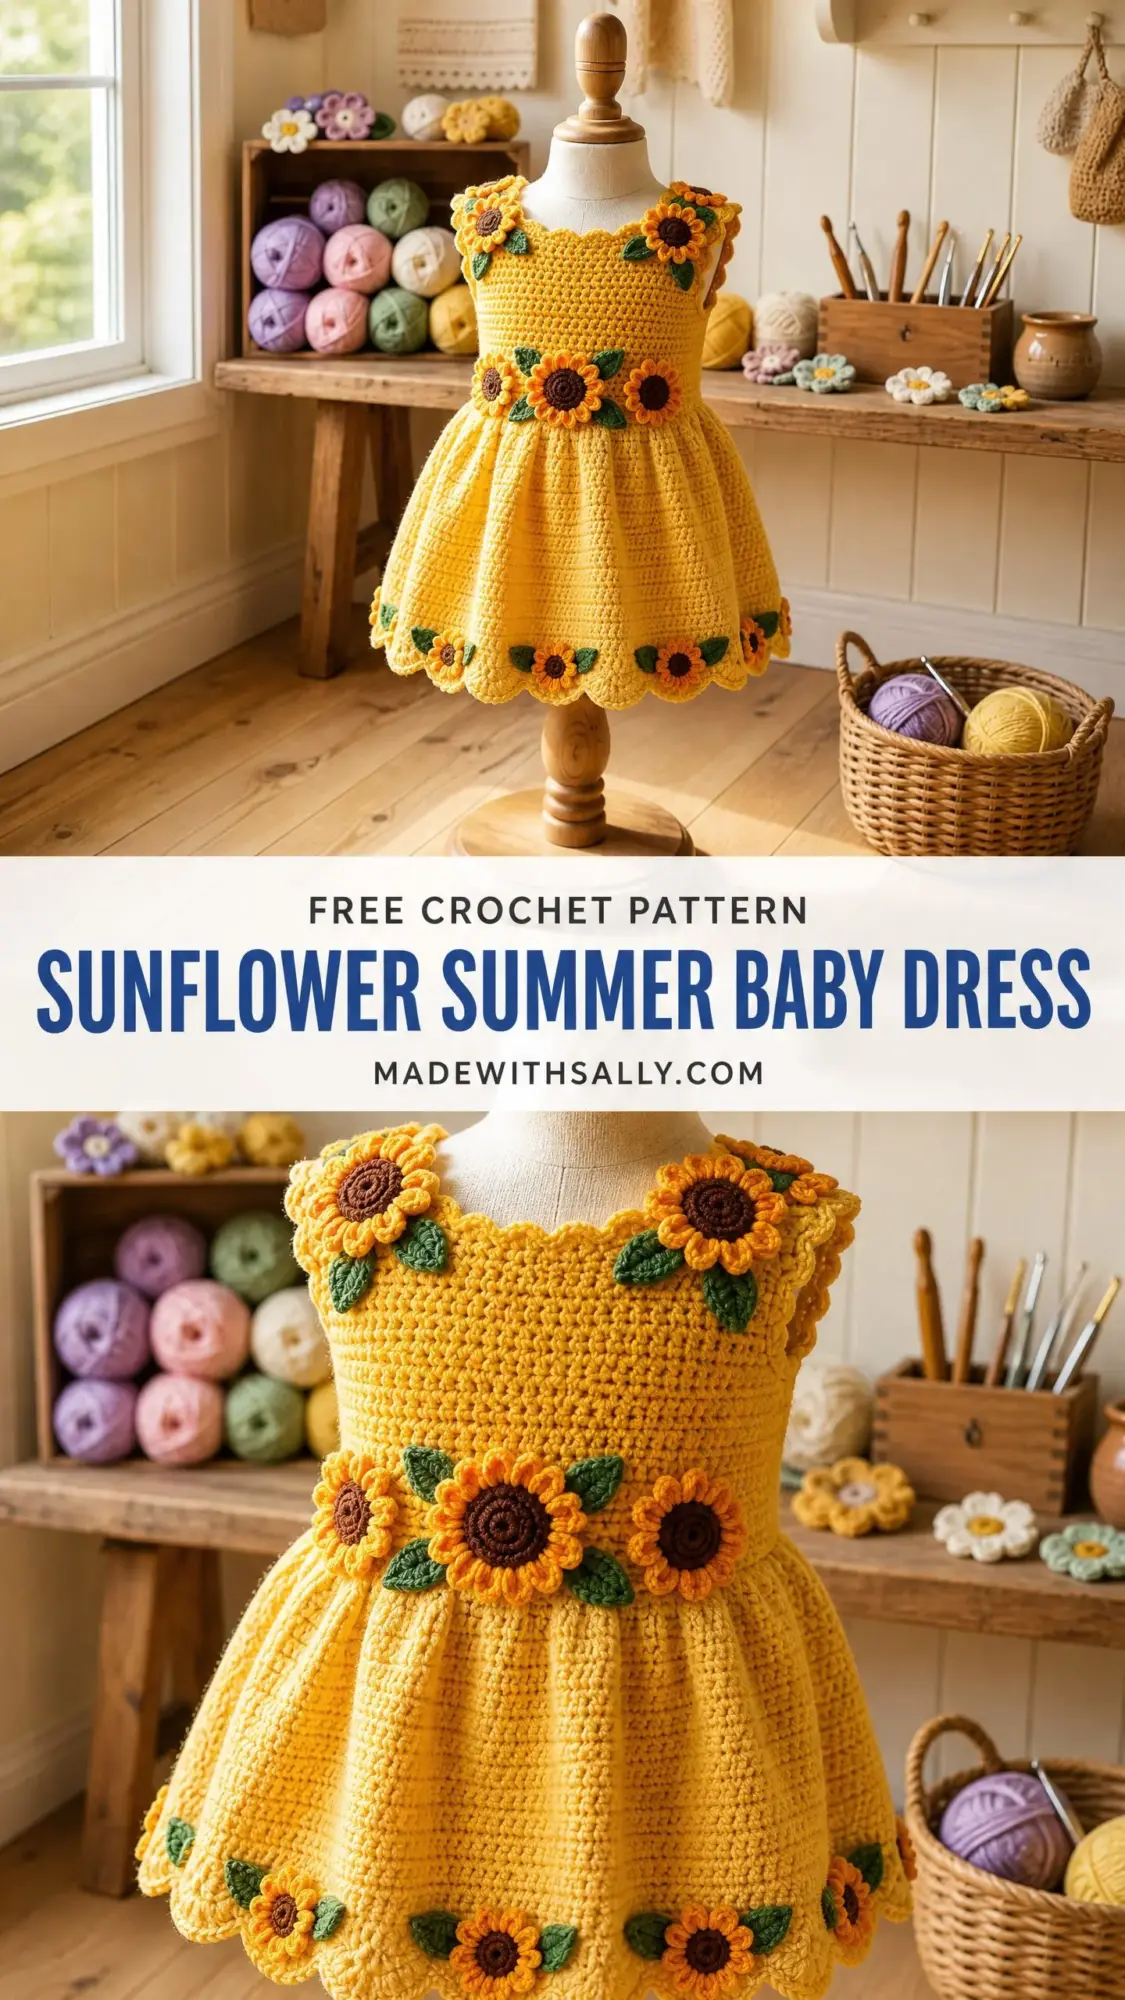
This sunflower baby dress delivers all the whimsy without the headache. Yes, it looks impressive. Yes, people will ask if you bought it at a fancy boutique. But the construction is straightforward once you break it down into manageable sections.
If you’ve been wanting to try your hand at a garment project that goes beyond basic rectangles, this is your sign. The top-down construction means you can try it on as you go, and those adorable sunflowers are worked separately and sewn on at the end. No complicated colorwork wizardry required.
Why This Sunflower Baby Dress Pattern Works
This crochet baby dress pattern combines a structured bodice with a flowy, gathered skirt that has just the right amount of twirl. The bodice uses tight single crochet (sc) stitches to create a dense, clean fabric that holds its shape beautifully. Meanwhile, the skirt opens up with shells and V-stitches that give it movement and a lovely drape.
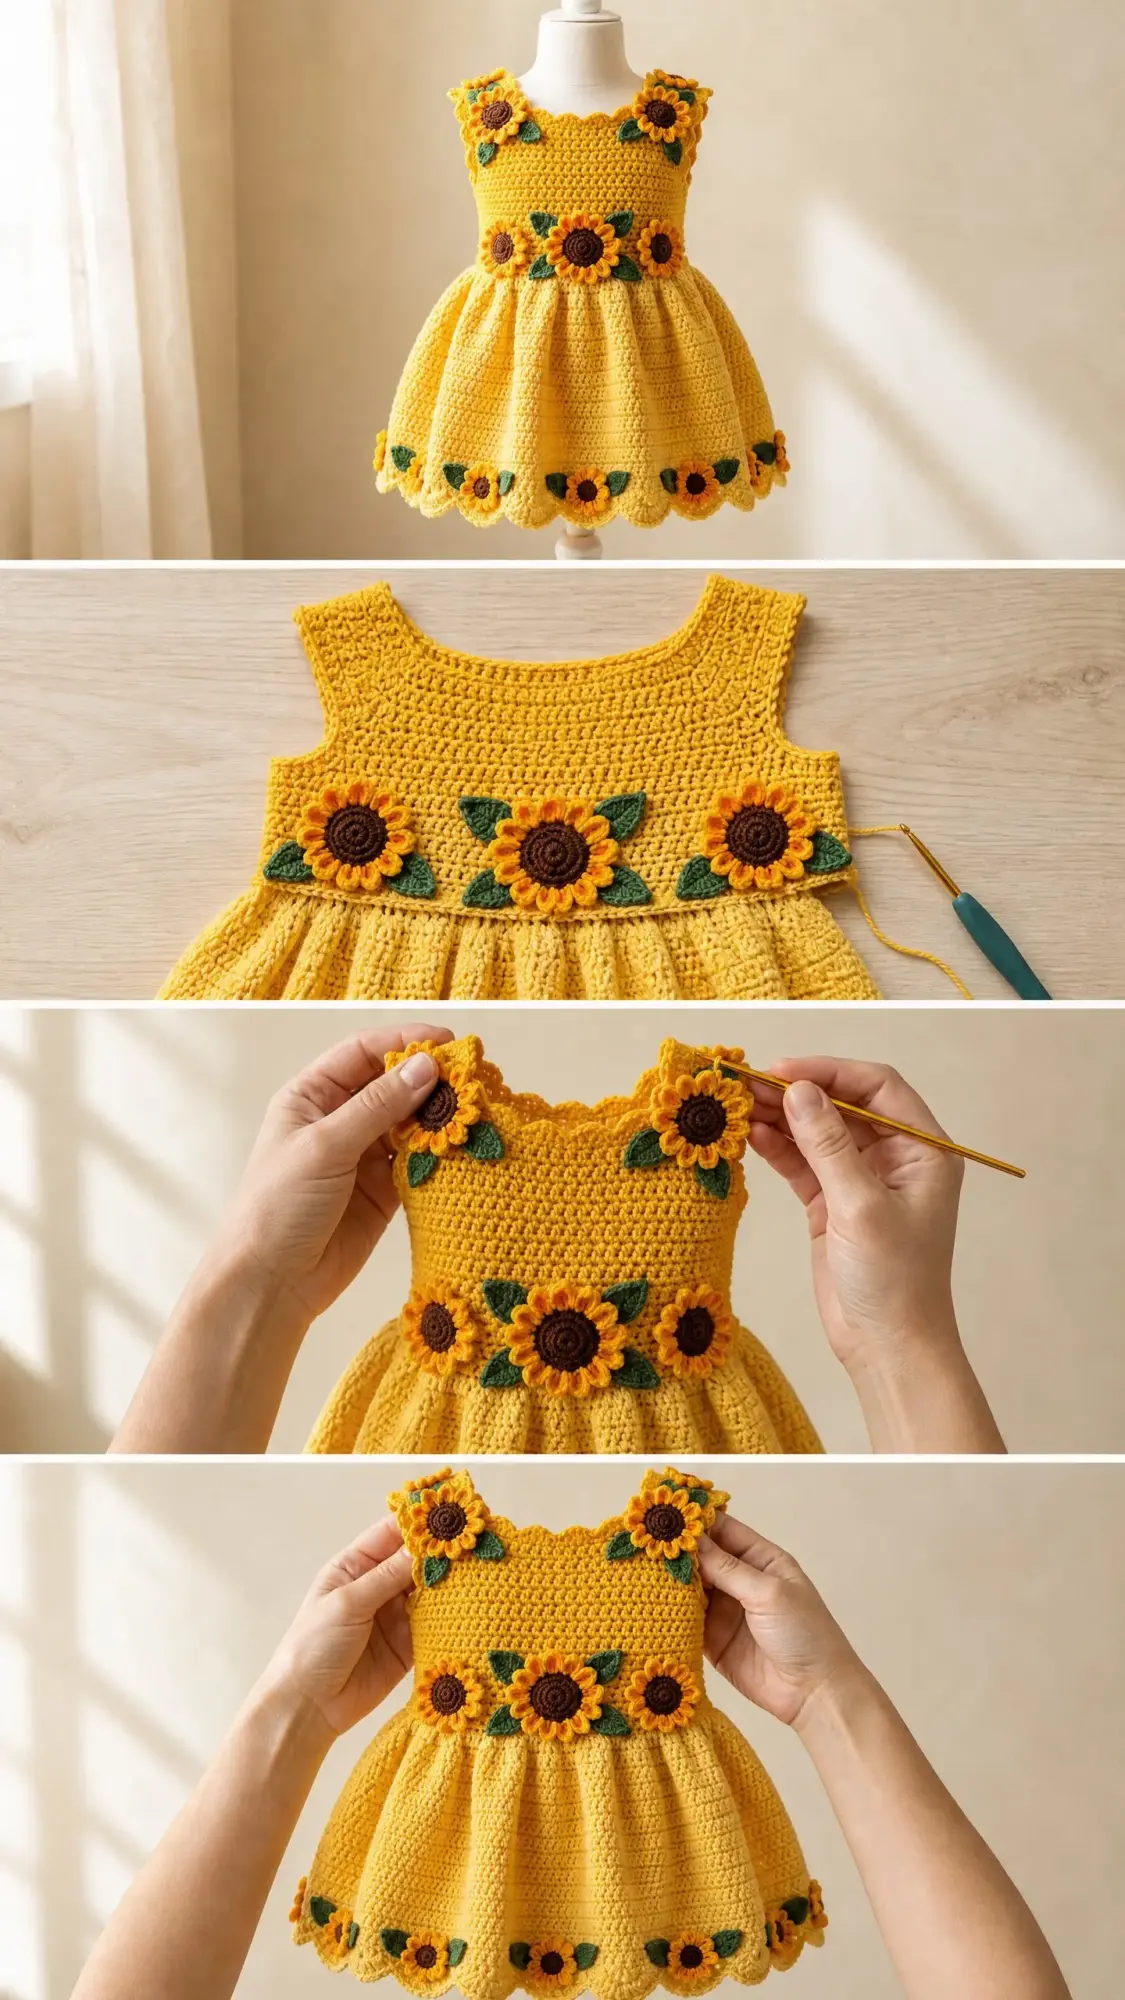
The dimensional sunflower motifs are the real showstoppers here. Three large sunflowers decorate the waistline, while smaller blooms create a sweet garland along the neckline and armholes. Each flower is crocheted separately and sewn on after blocking, so you can take your time perfecting them without any pressure.
The dress features a practical back button closure, making it easy to get on and off a wiggly baby. Trust me, anyone who has wrestled with a pullover dress on a squirmy infant will appreciate this detail.
Skill Level and Time Commitment
I’m going to be honest with you. This is an intermediate to advanced crochet pattern. It combines several techniques: top-down construction, flat back panels, seamless skirt expansion, textured stitch patterns, and three-dimensional flower motifs.
That said, if you’re comfortable working in the round, understand basic garment shaping, and have made applied motifs before, you’ll do just fine. The pattern breaks everything into clear sections, and I’ll walk you through each one.
Expect to spend approximately 18 to 26 hours on the size 12 months version. About 4 to 6 hours of that time goes toward the sunflower motifs. This isn’t a weekend project, but it’s absolutely worth the investment.
Finished Sizes
This crochet tutorial covers four sizes to fit babies from 6 to 24 months:
Size 6 months: chest 16 inches (40.5 cm), total length 13 inches (33 cm)
Size 12 months: chest 17.5 inches (44.5 cm), total length 14.5 inches (37 cm)
Size 18 months: chest 19 inches (48.5 cm), total length 16 inches (40.5 cm)
Size 24 months: chest 20.5 inches (52 cm), total length 17.5 inches (44.5 cm)
The instructions are written for size 12 months. Changes for other sizes appear in parentheses in this order: 6 months (12 months, 18 months, 24 months). When only one number appears, it applies to all sizes.
Materials Needed
Yarn
You’ll need DK weight yarn (CYCA 3 Light) in four colors:
Yarn A (Main body): Yellow or golden yellow, approximately 350 (400, 460, 520) yards / 320 (365, 420, 475) meters
Yarn B (Sunflower petals): Burnt orange or deep gold, approximately 60 yards / 55 meters
Yarn C (Sunflower centers): Dark brown, approximately 20 yards / 18 meters
Yarn D (Leaves): Medium green, approximately 40 yards / 37 meters
Yarn Suggestions
Lion Brand Pound of Love works beautifully for this project. It’s 100% acrylic, machine washable, and gentle on baby skin. Try Butterscotch for the main color, Pumpkin for petals, Espresso for centers, and Leaf for the greenery.
Paintbox Yarns Simply DK is another excellent choice. It’s soft, affordable, and comes in gorgeous colors.
Drops Safran (50% cotton, 50% acrylic) adds breathability for warm weather and gives the sunflower motifs excellent stitch definition.
When substituting yarn, look for something that gives you approximately 21 to 23 sc per 4 inches at gauge. Avoid fuzzy, bouclé, or overly stretchy yarns since they’ll obscure the stitch definition in the bodice and motifs.
Tools
Gauge
Getting gauge right is critical for correct sizing. Please make a swatch before diving in.
Bodice gauge (E-4 hook, single crochet in rounds):
22 sc = 4 inches (10 cm)
24 rows = 4 inches (10 cm)
Skirt gauge (F-5 hook, skirt stitch pattern):
20 sts = 4 inches (10 cm)
16 rows = 4 inches (10 cm)
Make a 5-inch square swatch in single crochet with the E-4 hook before beginning. Adjust hook size up if your swatch is too small, or down if it’s too large.
Abbreviations and Stitch Definitions
Let me break down all the stitches you’ll need for this step by step crochet pattern:
beg = beginning
BLO = back loop only (insert hook into just the back loop of the stitch instead of both loops)
ch = chain
ch-sp = chain space
dc = double crochet (yarn over, insert hook, pull up loop, yarn over and pull through 2 loops, yarn over and pull through remaining 2 loops)
hdc = half double crochet
inc = increase (work 2 single crochet in same stitch)
mc = magic circle (adjustable ring)
rep = repeat
rnd = round
RS = right side
sc = single crochet (insert hook, pull up loop, yarn over and pull through both loops)
sc2tog = single crochet 2 together (a decrease: insert hook in first stitch, pull up loop, insert hook in next stitch, pull up loop, yarn over and pull through all 3 loops)
sk = skip
sl st = slip stitch
sp = space
st(s) = stitch(es)
WS = wrong side
yo = yarn over
Special Stitches
Shell Stitch
Work 5 dc all into the same stitch or space. This creates a fan-shaped cluster and is used throughout the skirt.
V-stitch
Work (1 dc, ch 1, 1 dc) all into the same stitch or space.
Scallop Stitch
Work (sl st, ch 2, 4 dc, ch 2, sl st) into the same stitch. Used for the hem border.
Pattern Notes Before You Begin
1. The dress is worked from the top down. You’ll establish the yoke and neckline first, then shape the bodice, then attach and work the skirt downward.
2. The back bodice is worked flat in two separate panels to create the button opening. After the bodice is complete, all sections join to work the skirt in the round.
3. Stitch markers are essential. Place them at the four yoke division points and move them up each round.
4. All stitch counts in parentheses at the end of rows and rounds represent the TOTAL number of stitches.
5. Sunflower motifs are crocheted separately and sewn on after blocking. Do not attach motifs before blocking the dress.
6. The right back (as worn) overlaps the left back. Button loops go on the right back edge. Buttons are sewn to the left back edge.
7. US crochet terminology is used throughout.
Step By Step Instructions
Section 1: Yoke and Neckline
The yoke is worked flat, back and forth, starting at the back neck edge.
Using Yarn A and E-4 hook, chain 68 (72, 78, 84).
Row 1 (WS): Sc in 2nd ch from hook and in each ch across. Turn. (67, 71, 77, 83 sc)
Row 2 (RS): Ch 1, sc in each st across. Turn. (67, 71, 77, 83 sc)
Row 3: Ch 1, sc in each st across. Turn. (67, 71, 77, 83 sc)
Now divide for yoke sections. The neckline chain represents: Left back edge 7 (7, 8, 8) sts, left sleeve 10 (11, 12, 13) sts, front 33 (35, 37, 41) sts, right sleeve 10 (11, 12, 13) sts, right back edge 7 (7, 8, 8) sts.
Place markers after st 7 (7, 8, 8), after st 17 (18, 20, 21), after st 50 (53, 57, 62), and after st 60 (64, 69, 75).
Yoke Increase Row (RS): Ch 1, sc to 1 st before first marker, inc in next 2 sts (straddling marker), sc across front to 1 st before next marker, inc in next 2 sts, sc across front to 1 st before next marker, inc in next 2 sts, sc across to 1 st before next marker, inc in next 2 sts, sc to end. Turn. (75, 79, 85, 91 sc)
Repeat the increase row every RS row, moving markers each row:
Row 4 (WS): Ch 1, sc across. Turn. (75, 79, 85, 91 sc)
Row 5 (RS, inc row): Inc at each of the 4 marker positions (8 inc total). Turn. (83, 87, 93, 99 sc)
Row 6 (WS): Ch 1, sc across. Turn. (83, 87, 93, 99 sc)
Row 7 (RS, inc row): 8 inc total. Turn. (91, 95, 101, 107 sc)
Row 8 (WS): Ch 1, sc across. Turn. (91, 95, 101, 107 sc)
Row 9 (RS, inc row): 8 inc total. Turn. (99, 103, 109, 115 sc)
Row 10 (WS): Ch 1, sc across. Turn. (99, 103, 109, 115 sc)
Row 11 (RS, inc row): 8 inc total. Turn. (107, 111, 117, 123 sc)
Row 12 (WS): Ch 1, sc across. Turn. (107, 111, 117, 123 sc)
Row 13 (RS, inc row): 8 inc total. Turn. (115, 119, 125, 131 sc)
Row 14 (WS): Ch 1, sc across. Turn. (115, 119, 125, 131 sc)
Row 15 (RS, inc row): 8 inc total. Turn. (123, 127, 133, 139 sc)
After Row 15, verify your yoke sections measure: Left back 13 (13, 14, 14) sts, left sleeve 22 (23, 24, 25) sts, front 53 (55, 57, 61) sts, right sleeve 22 (23, 24, 25) sts, right back 13 (13, 14, 14) sts.
Checkpoint: The piece should measure approximately 3 inches (7.5 cm) from the foundation chain to Row 15.
Section 2: Separate Sleeves and Join Body
Here you’ll place sleeve stitches on holders and add underarm chains to join front and back.
Row 16 / Joining Round: Ch 1, sc across 13 (13, 14, 14) right back sts, skip next 22 (23, 24, 25) sleeve sts (place on holder or length of yarn), ch 4 (4, 5, 5) for underarm, sc across 53 (55, 57, 61) front sts, skip next 22 (23, 24, 25) sleeve sts (place on holder), ch 4 (4, 5, 5) for underarm, sc across 13 (13, 14, 14) left back sts. Turn.
Stitch count: (87, 89, 95, 99 sc)
Do not join. The back opening remains open and flat throughout the bodice.
Section 3: Bodice
Continue with Yarn A and E-4 hook.
Row 17 (WS): Ch 1, sc across all sts including underarm chains. Turn. (87, 89, 95, 99 sc)
Row 18 (RS): Ch 1, sc across. Turn. (87, 89, 95, 99 sc)
Rows 19 through 30: Rep Row 18, alternating WS and RS rows, working sc across every row. Turn at end of each row. (87, 89, 95, 99 sc throughout)
Work even until bodice measures 3.5 (4, 4.5, 5) inches / 9 (10, 11.5, 12.5) cm from the underarm join.
Checkpoint: After the bodice section, total piece (yoke plus bodice) should measure approximately 6.5 (7, 7.5, 8) inches from shoulder to waist edge.
Section 4: Waist Join Round and Skirt Setup
Switch to F-5 hook.
Overlap back edges by approximately 1 inch (2.5 cm) and work a sl st join to begin working in the round.
Waist Join Round (RS): Ch 1. Work the waist increase round: \Sc in next 2 sts, inc in next st\ across, spacing increases to reach the target count.
Target stitch count: For size 12 months, increase from 87 to 96 sts (multiple of 6).
Size 6 months: Work 9 inc evenly across 87 sts to reach 96. (96 sc)
Size 12 months: Work (sc in next 8 sts, inc in next st) 9 times, then sc in rem sts, sl st to join. (96 sc)
Size 18 months: Work 1 inc at single even point across 95 sts to reach 96. (96 sc)
Size 24 months: Work 3 inc evenly across 99 sts to reach 102. (102 sc)
Checkpoint: You should now have 96 (96, 96, 102) sts joined in a round at the waist.
Section 5: Skirt
The skirt is worked in the round from waist to hem. All rounds are worked with RS facing, joined with sl st at end of each round.
Skirt Round 1: Ch 3 (counts as first dc), dc in next st, \sk 2 sts, shell in next st, sk 2 sts, V-st in next st\, rep from \ to \ around, sl st to top of ch-3 to join. (16 shells and 16 V-sts for 96 sts / 17 shells and 17 V-sts for 102 sts)
Skirt Round 2: Ch 1, \sc in each dc of shell (5 sc), sc in sp of V-st (1 sc)\, rep around, sl st to join. (96, 96, 96, 102 sc)
Skirt Round 3: Ch 3, dc in next st, \sk 2 sts, shell in next st, sk 2 sts, V-st in next st\, rep around, sl st to join.
Skirt Round 4: Same as Round 2. (96, 96, 96, 102 sc)
Skirt Round 5 (Increase Round): Ch 1, \sc in next 5 sts, inc in next st\, rep around, sl st to join. (112, 112, 112, 119 sc)
Skirt Round 6: Ch 1, sc in next 26 sts, sc2tog, sc in next 26 sts, sc2tog, sc in next 26 sts, sc2tog, sc in next 26 sts, sc2tog, sl st to join. (108 sc)
Skirt Round 7: Ch 3, dc in next st, \sk 2 sts, shell in next st, sk 2 sts, V-st in next st\, rep 18 times, sl st to join. (18 shells, 18 V-sts)
Skirt Round 8: Ch 1, \5 sc across shell, 1 sc in V-st sp\, rep 18 times, sl st to join. (108 sc)
Skirt Rounds 9 and 10: Repeat Rounds 7 and 8.
Skirt Round 11 (Increase Round): Ch 1, \sc in next 5 sts, inc in next st\, rep 18 times, sl st to join. (126 sc)
Skirt Round 12: Ch 3, \sk 2 sts, shell in next st, sk 2 sts, V-st in next st\, rep 21 times, sl st to join. (21 shells, 21 V-sts)
Skirt Rounds 13 through 15: Continue alternating shell and sc rounds. (126 sc)
Skirt Round 16 (Increase Round): Ch 1, \sc in next 6 sts, inc in next st\, rep 18 times, sl st to join. (144 sc)
Skirt Rounds 17 through 22: Continue alternating shell rounds (24 shells, 24 V-sts) and sc rounds (144 sc).
Checkpoint: After Round 22, skirt should measure approximately 5.5 (6.5, 7.5, 8.5) inches from waist join.
Section 6: Hem Border and Scallop
Border Round 1: Ch 1, sc in each sc around. Sl st to join. (144 sc)
Border Round 2: Ch 1, sc in each st around, sl st to join. (144 sc)
Scallop Round: \Sk 2 sts, (5 dc in next st), sk 2 sts, sl st in next st\, rep 24 times around, sl st to join. Fasten off. (24 scallops)
Section 7: Armhole Edges
Join Yarn A at underarm with E-4 hook.
Round 1: Ch 1, sc evenly around armhole opening, approximately 42 sc. Sl st to join. (42 sc)
Round 2: \Sk 2 sts, (4 dc in next st), sk 2 sts, sl st in next st\, rep 7 times around, sl st to join. Fasten off. (7 small armhole scallops)
Repeat for second armhole.
Section 8: Neckline Edge
Join Yarn A at right back neck edge with E-4 hook.
Round 1: Ch 1, sc evenly along right back edge, across back neck foundation chain, and down left back edge. Approximately 72 sc. Turn.
Round 2: Work (sk 2 sts, 4 dc in next st, sk 2 sts, sl st in next st) rep across. Fasten off. (12 neckline scallops)
Section 9: Back Button Band
Right Back Band Row 1: Join Yarn A at bottom right back edge. Ch 1, sc evenly up right back opening edge. Approximately 18 sc. Turn.
Right Back Band Row 2 (Button Loop Row): Ch 1, sc in first 2 sts, \ch 3, sk 2 sts, sc in next 4 sts\, rep 2 more times, ch 3, sk 2 sts, sc in rem sts. Turn. (3 button loops)
Right Back Band Row 3: Ch 1, sc in each st and 3 sc in each ch-3 sp across. Fasten off.
Left Back Band Rows 1 through 3: Join Yarn A at top left back edge. Work 3 rows of sc to match right back band. Fasten off.
Sew 3 buttons to left back band aligned with button loops.
Sunflower Motifs
Large Sunflowers (make 3)
Center (using Yarn C and E-4 hook):
Rnd 1: Make a magic circle, ch 1, 6 sc in ring, pull closed, sl st to join. (6 sc)
Rnd 2: Ch 1, 2 sc in each st around, sl st to join. (12 sc)
Rnd 3: Ch 1, (sc in next st, 2 sc in next st) 6 times, sl st to join. (18 sc)
Rnd 4: Ch 1, (sc in next 2 sts, 2 sc in next st) 6 times, sl st to join. (24 sc)
Fasten off, leaving a long tail.
Petals (using Yarn B):
Join Yarn B with sl st in any st of final round. (Ch 3, 3 dc in same st, ch 3, sl st in same st, sl st in next st) repeat around until all sts are used. Fasten off.
Small Sunflowers (make 10 to 12)
Work center Rounds 1 through 3 only (18 sc). For petals: (Ch 2, 2 dc in same st, ch 2, sl st in same st, sl st in next st) repeat around. (9 petals)
Leaves (make 20 to 24)
Using Yarn D and E-4 hook:
Ch 9. Starting in 2nd ch from hook: sc, hdc, dc in next 3 ch, hdc, sc, 3 sc in final ch (tip of leaf). Working back along opposite side: sc, hdc, dc in next 3 ch, hdc, sc. Sl st to first sc to close. Fasten off.
Finishing and Assembly
1. Weave in all ends on the dress body.
2. Block the dress and all motifs to measurements using blocking mats and pins. Allow to dry completely.
3. Position 3 large sunflowers across the front waistline, evenly spaced. Pin in place.
4. Arrange small sunflowers in a garland along the neckline and armhole edges. Pin in place.
5. Tuck leaves behind and around the sunflowers. Pin in place.
6. Using yarn needle and matching yarn tails, sew all motifs securely to the dress.
7. Give the finished dress a final steam or light press if needed.
Tips for Success
Take your time with gauge. This is a garment, and sizing matters. Don’t skip the swatch.
Use stitch markers generously. They’re your best friend during the yoke shaping.
Block before attaching motifs. The dress will look ten times more polished, and your flowers will sit better.
Try on as you go if you have a baby model available. Top-down construction makes this easy.
The skirt correction rounds are intentional. They keep your stitch count compatible with the shell pattern. Trust the math.
This sunflower summer baby dress crochet pattern creates a truly special piece that’s perfect for photo sessions, summer outings, or gifting to new parents who appreciate handmade treasures. The combination of structured bodice, flowy skirt, and cheerful sunflower embellishments makes it a standout project you’ll be proud to share.
I really hope you love making this sweet little dress as much as I loved designing it. If you’d like to find this pattern again later, save it to your Pinterest boards so it’s always within reach. And if you make one, please leave a comment below. I’d absolutely love to see your finished sunflower dress and hear which color combinations you chose.
