
I don’t know about you, but I have been searching for the perfect crochet crop top for what feels like forever. Something that looks impressive and boutique-worthy, but doesn’t require a degree in advanced fiber arts to complete.
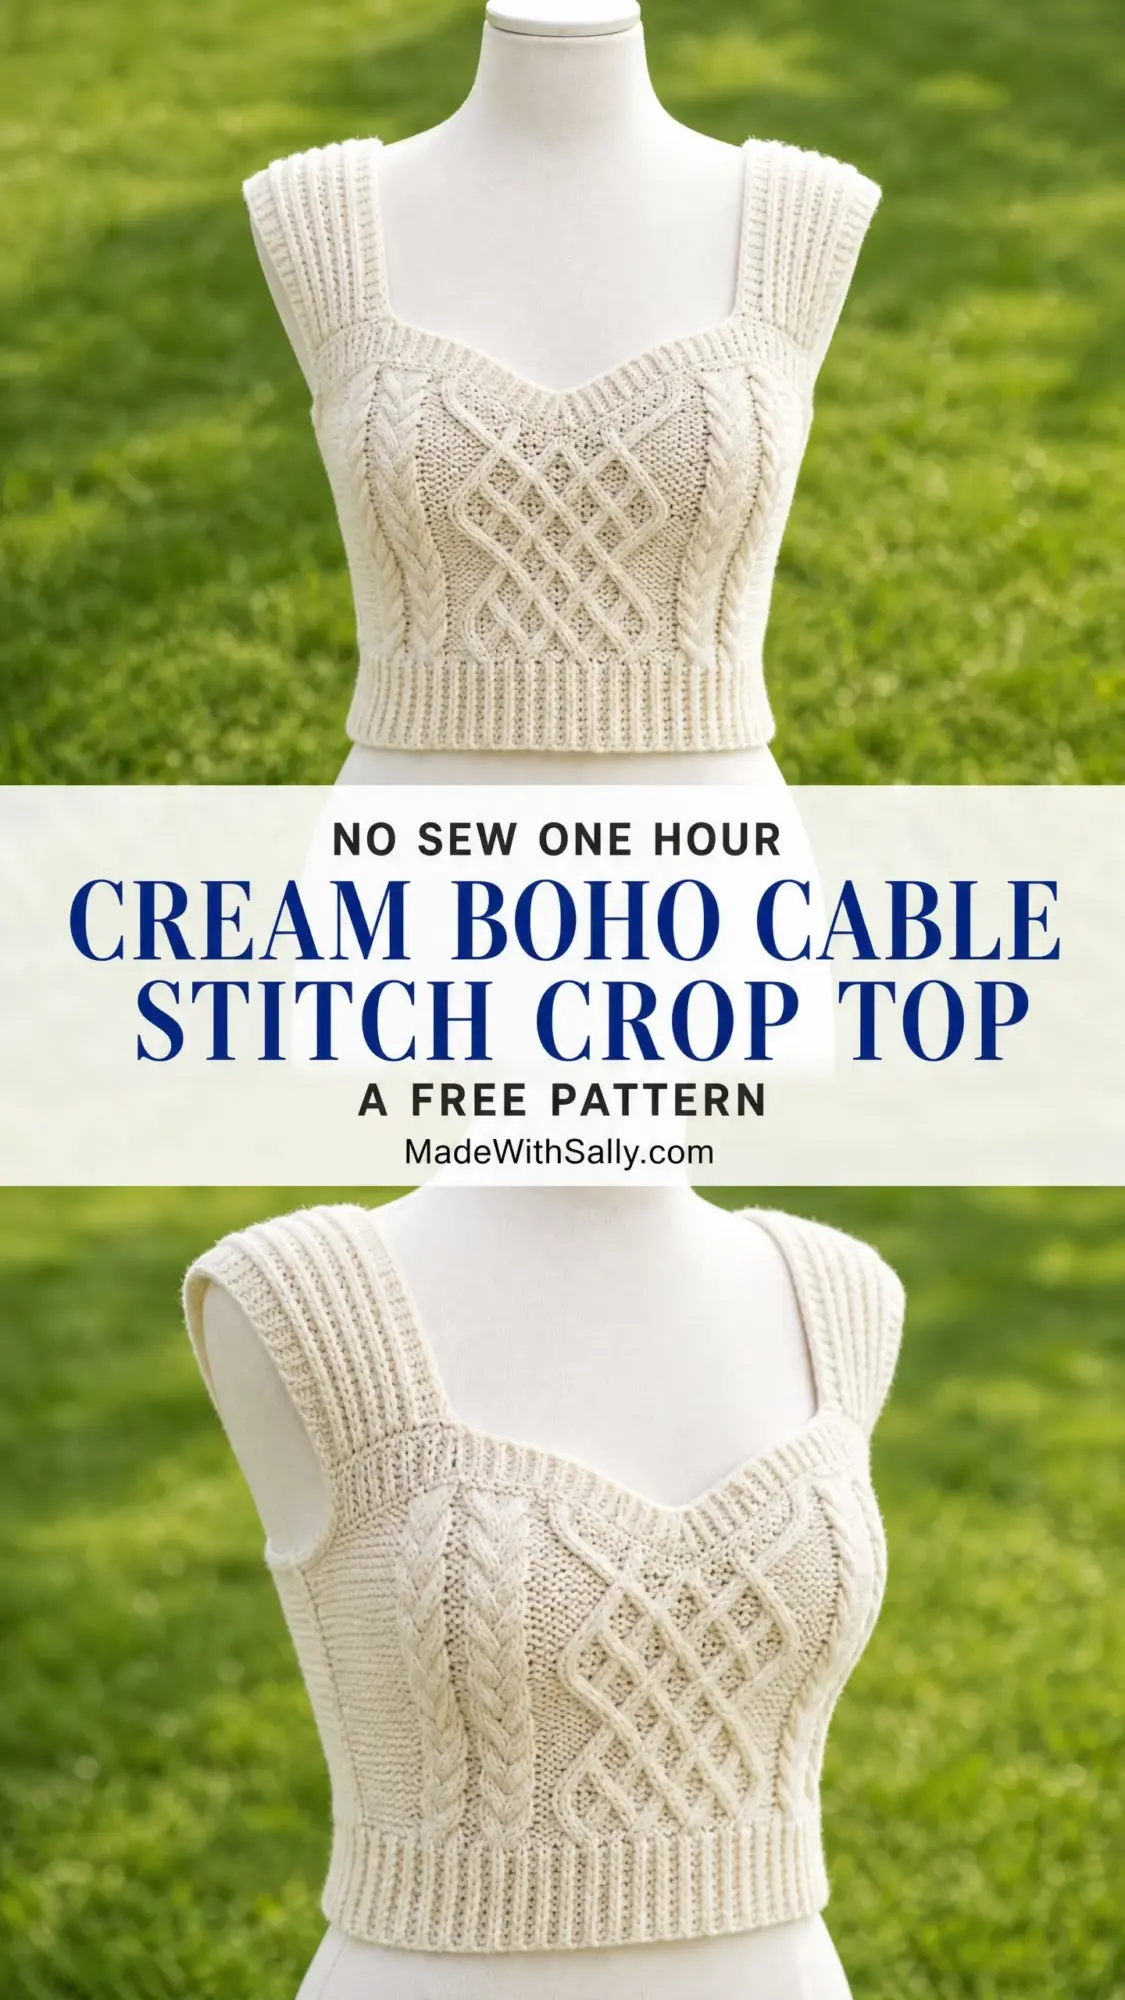
This cream boho cable stitch crop top is exactly that find. The sweetheart neckline, the gorgeous diamond lace panels, those satisfying cable crosses. It looks like it belongs on a high-end clothing rack, yet the techniques are completely manageable if you’ve made a simple garment before.
The best part? No cable needle required. We’re using a clever chain-space method that makes those beautiful cable twists surprisingly straightforward. Let’s dig in.
Why This Crochet Crop Top Pattern Works
This cropped sweater vest hits all the right notes for a modern boho wardrobe. The cream colorway keeps all that beautiful texture front and center. You get a fitted sweetheart neckline that’s flattering without being fussy, wide ribbed shoulder straps that actually stay put, and a deep ribbed hem band that hugs your waist in the best way.
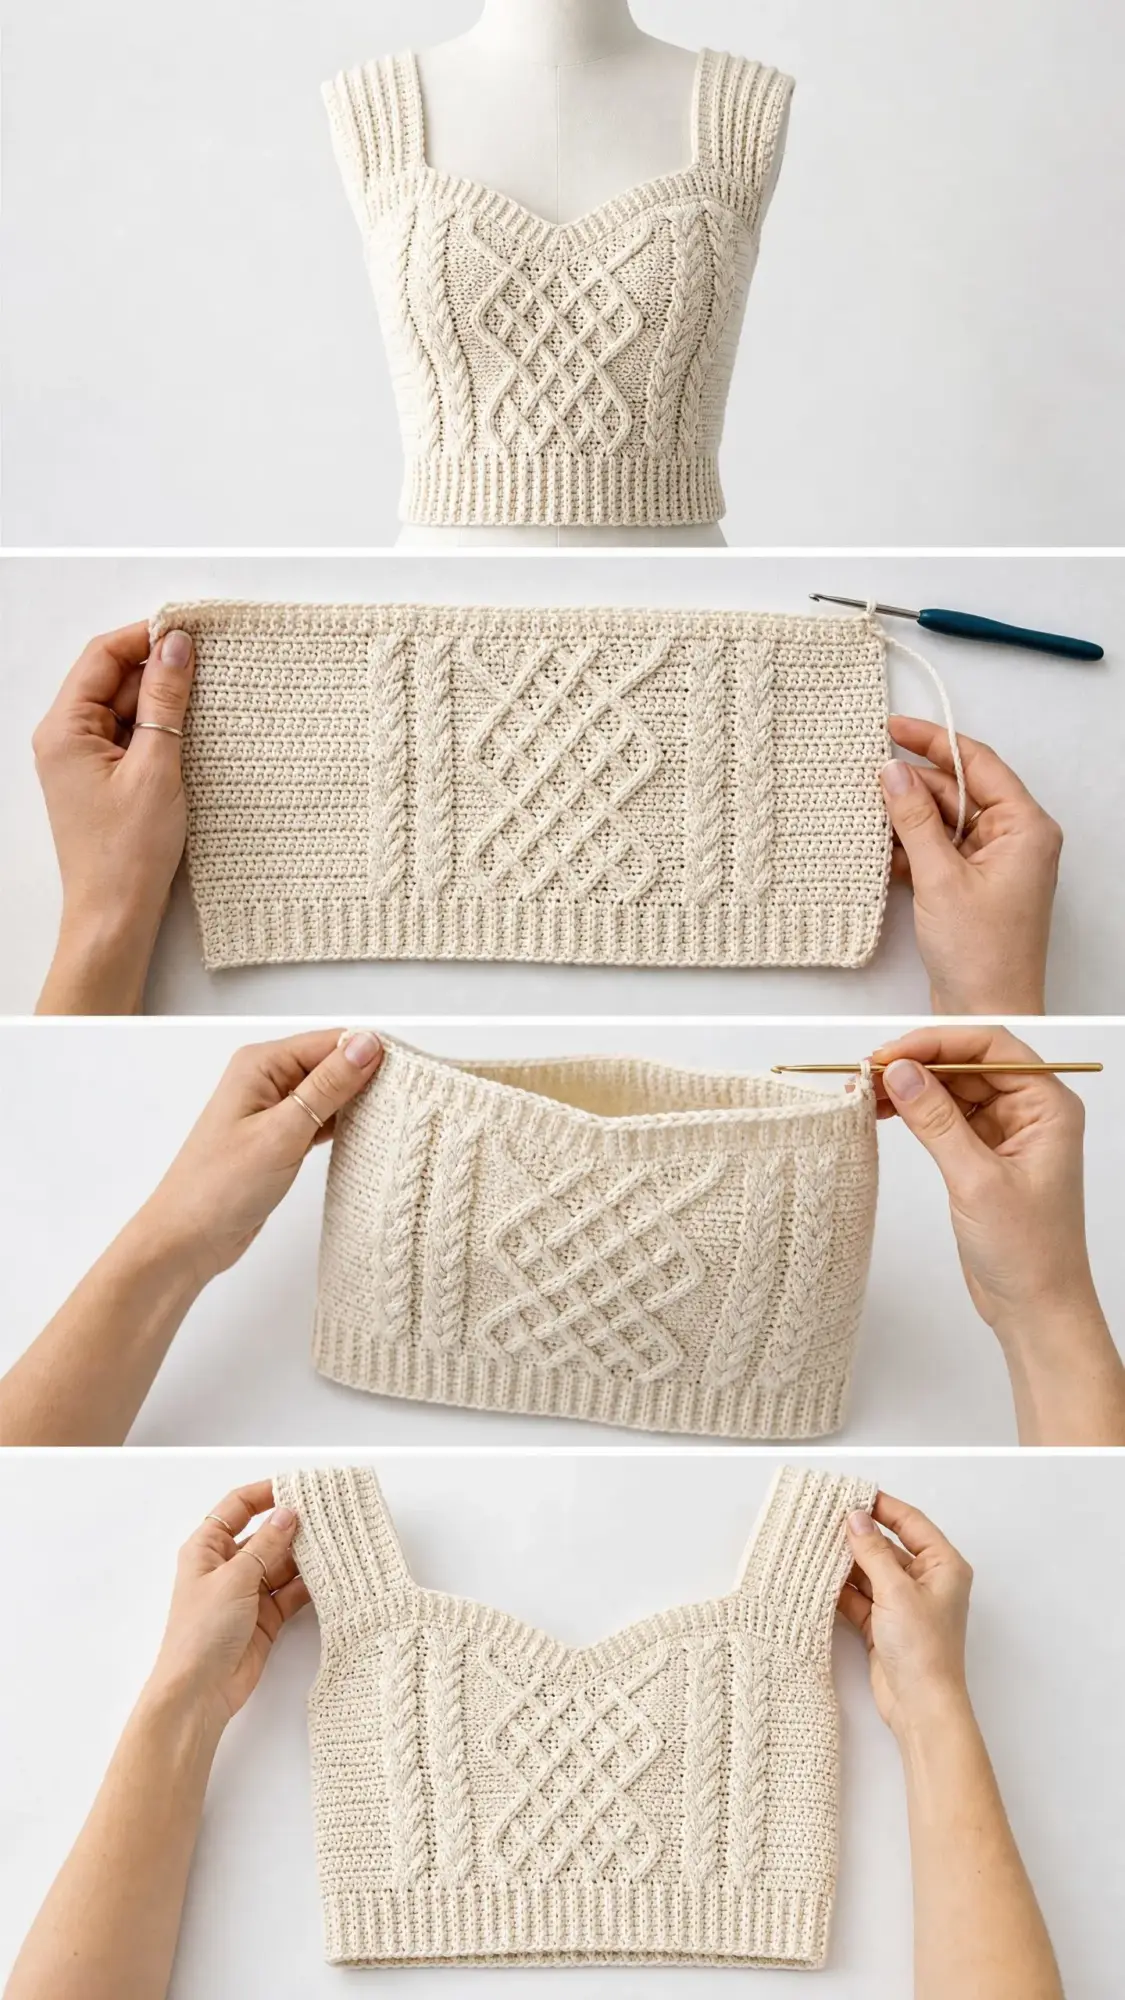
The front panel showcases an allover cable and diamond lace design that will have everyone asking where you bought it. The back features clean vertical ribbing for a streamlined look. Both panels are worked flat and seamed together, which means no complicated in-the-round shaping to worry about.
Skill level: Advanced beginner to intermediate. If you’ve completed a simple garment and worked a textured stitch swatch before, you can absolutely do this.
Time estimate: Approximately 15 to 22 hours depending on your working speed.
Finished Size and Fit
This pattern is written for a size Small/Medium with a finished bust measurement of 34 inches (86 cm). The crop length from underarm to hem is approximately 10 inches (25.5 cm), and the full garment length from top of shoulder strap to hem is approximately 16 inches (40.5 cm).
Don’t worry if you need a different size. I’ve included customization tips at the end of the pattern to help you adjust.
Materials You’ll Need
Yarn: Approximately 500 to 600 yards (460 to 550 meters) of DK weight yarn, which is CYCA category 3. I recommend 100 percent cotton or a cotton blend for the best stitch definition and breathability.
Hook: US size G-6 (4.0 mm)
Notions:
Yarn Recommendations
Lion Brand 24/7 Cotton in Ecru is my top pick. This 100 percent mercerized cotton has excellent stitch definition and washes beautifully. It shows cable texture with crisp clarity.
Paintbox Yarns Cotton DK in Vanilla Cream is a smooth, affordable option with consistent twist and a slight sheen that enhances the diamond motifs.
Paintbox Yarns Simply DK in Paper White works as a soft acrylic-blend alternative for those who prefer easier care, though blocking results will differ from pure cotton.
Substitution note: Any smooth DK weight yarn at gauge will work. Avoid fuzzy or textured novelty yarns as they obscure the cable and diamond patterning. Cotton or linen blends block flatter and hold garment shape better than pure acrylics.
Gauge (Please Don’t Skip This)
In the Main Cable Panel stitch pattern: 20 stitches and 22 rows equals 4 inches (10 cm), blocked.
In the Back Rib pattern using back loop only single crochet: 18 stitches and 22 rows equals 4 inches (10 cm), blocked.
I know swatching isn’t the most exciting part of a project, but gauge is mandatory for a fitted garment. Trust me on this one. Work a swatch, block it, measure it, and adjust your hook size up or down as needed before you start the actual top.
Abbreviations
Let me walk you through all the abbreviations you’ll encounter:
Special Stitches Explained
These are the building blocks of the gorgeous texture on this top. Read through them carefully before starting.
Front Post Double Crochet (FPdc)
This stitch creates raised ridges on the front of your fabric. Insert your hook from front to back to front around the post (that’s the vertical bar) of the indicated stitch in the row below. Yarn over and pull up a loop. Yarn over and pull through two loops. Yarn over and pull through the remaining two loops. The stitch will sit on the front face of the fabric, creating that beautiful raised ridge.
Back Post Double Crochet (BPdc)
This is the opposite of FPdc. Insert your hook from back to front to back around the post of the indicated stitch in the row below. Complete it as a standard double crochet. The stitch recedes to the back, creating a valley alongside your FPdc columns.
Cable Cross (CL)
This is a right-leaning four-stitch cable worked without a cable needle. Here’s the magic:
Step 1: Skip the next 2 stitches.
Step 2: FPdc around the 3rd stitch from the skipped position.
Step 3: FPdc around the 4th stitch.
Step 4: Working back over the two completed FPdc, FPdc around the 1st skipped stitch.
Step 5: FPdc around the 2nd skipped stitch.
You’ve now worked four FPdc total, and the front pair crosses over the back pair to the right. That’s your cable!
Back Loop Only Rib (BLO Rib)
On every row, insert your hook into the back loop only of each stitch. This creates a stretchy, vertically ridged fabric that mimics knit ribbing beautifully.
Diamond Motif (DM)
The diamond is built over 8 rows using chain spaces and strategic dc placement. The full diamond panel instructions are detailed in the front panel section below.
Important Pattern Notes
Before you dive in, keep these points in mind:
1. The front and back are worked flat (back and forth in rows) separately and then seamed.
2. Right side (RS) is always the public-facing side. Mark it with a locking stitch marker so you don’t lose track.
3. Turning chains: For sc rows, ch 1 and turn. The ch 1 does NOT count as a stitch. For dc rows, ch 2 and turn. The ch 2 does NOT count as a stitch. Stitch counts reflect working stitches only.
4. The hem ribbing is worked lengthwise (short rows) and then attached to the main body.
5. The shoulder straps are ribbed extensions of the front and back body, sewn together at the top.
6. Read all shaping notes before beginning. The sweetheart neckline is shaped by dividing at center and working each cup separately.
Hem Band Instructions (Make 2)
You’ll make one hem band for the front and one for the back.
Foundation: Ch 13.
Row 1: Sc in 2nd ch from hook and in each ch across. Turn. (12 sc)
Row 2 onward: Ch 1, turn. Sc in BLO of each st across. (12 sc)
Repeat Row 2 until band measures 17 inches (43 cm) slightly stretched. This gives approximately 86 stitches along the long edge when attached at gauge.
Fasten off and set aside. Make a second identical band.
Back Panel Instructions
The back is a simple BLO ribbed rectangle with shoulder strap extensions. Much easier than the front!
Back Body
Foundation: Ch 87.
Row 1 (RS): Sc in 2nd ch from hook and in each ch across. Turn. (86 sc)
Rows 2 to 54: Ch 1, turn. Sc in BLO of each st across. (86 sc)
Checkpoint: After Row 54, the back body measures approximately 10 inches (25.5 cm) tall, not including hem band.
Back Armhole Shaping
Row 55: Ch 1, turn. Sl st across first 5 sts. Ch 1, sc in BLO of next 76 sts. Leave last 5 sts unworked. Turn. (76 sc)
Rows 56 to 60: Ch 1, turn. Sc2tog over first 2 sts. Sc in BLO to last 2 sts. Sc2tog. Turn.
After each row you’ll have: 74, 72, 70, 68, 66 sc respectively.
After Row 60: (66 sc)
Rows 61 to 96: Ch 1, turn. Sc in BLO of each st across. (66 sc)
Left Back Strap
Row 97: Ch 1, turn. Sc in BLO of first 18 sts. Turn. Leave remaining sts unworked. (18 sc)
Rows 98 to 122: Ch 1, turn. Sc in BLO of each st across. (18 sc)
Fasten off, leaving a 12-inch tail for seaming.
Right Back Strap
Skip center 30 sts of Row 96, rejoin yarn at next st.
Row 97: Ch 1, sc in BLO of next 18 sts. Turn. (18 sc)
Rows 98 to 122: Ch 1, turn. Sc in BLO of each st across. (18 sc)
Fasten off, leaving a 12-inch tail for seaming.
Front Panel Instructions
Here’s where the magic happens! The front features the cable and diamond panel.
The stitch layout from left to right on RS rows is: 2 edge sc, 4-st cable, 2 BPdc, 10-st diamond panel, 2 BPdc, 4-st cable, and this pattern continues across. Total: 86 sts.
Note: On WS rows, FPdc from RS become BPdc and vice versa to maintain the raised column appearance.
Diamond Panel (10 sts, worked over 8 rows)
Diamond Row 1 (RS): Dc in each of next 4 sts, ch 1, sk 1, dc in next st, ch 1, sk 1, dc in each of next 2 sts. (10 sts with 2 ch-1 sps embedded)
Diamond Row 2 (WS): Dc in first 3 sts, ch 1, sk 1, dc in ch-1 sp, dc in next dc, dc in ch-1 sp, ch 1, sk 1, dc in each of next 2 sts. (10 positions)
Diamond Row 3 (RS): Dc in first 2 sts, ch 1, sk 1, dc in ch-1 sp, dc in next 3 sts, dc in ch-1 sp, ch 1, sk 1, dc in last st. (10 positions, diamond widest)
Diamond Row 4 (WS): Dc in first st, ch 1, sk 1, dc in ch-1 sp, dc in next 5 sts, dc in ch-1 sp, ch 1, sk 1. (10 positions)
Diamond Row 5 (RS): Ch 1, sk 1, dc in ch-1 sp, dc in next 5 sts, dc in ch-1 sp, ch 1, sk 1, dc in last st. (10 positions, diamond closing)
Diamond Row 6 (WS): Dc in first 2 sts, dc in ch-1 sp, ch 1, sk 1, dc in next 3 sts, ch 1, sk 1, dc in ch-1 sp, dc in last 2 sts. (10 positions)
Diamond Row 7 (RS): Dc in first 3 sts, dc in ch-1 sp, ch 1, sk 1, dc in next dc, ch 1, sk 1, dc in ch-1 sp, dc in last 3 sts. (10 positions)
Diamond Row 8 (WS): Dc in all 10 sts (closing diamond). (10 dc)
Repeat Diamond Rows 1 to 8 for pattern throughout.
Cable Column (4 sts)
On RS rows where cable is not crossed: FPdc around each of the 4 cable post sts.
On RS cable rows (every 4th RS row, specifically rows 3, 7, 11, 15, 19, 23, 27, 31, 35, 39, 43, 47, 51): Work CL (Cable Cross) over these 4 sts.
On all WS rows: BPdc around each of the 4 cable post sts.
Front Body
Foundation: Ch 87.
Row 1 (RS): Sc in 2nd ch from hook and in each ch across. Turn. (86 sc)
Row 2 (WS): Ch 1, turn. Sc in each st across. Turn. (86 sc)
Row 3 (RS, establish pattern): Ch 2, turn. 2 dc in first 2 sts (edge). CL over next 4 sts. BPdc in next 2 sts. Work Diamond Row 1 over next 10 sts. BPdc in next 2 sts. CL over next 4 sts. BPdc in next 2 sts. Work Diamond Row 1 over next 10 sts. BPdc in next 2 sts. CL over next 4 sts. BPdc in next 2 sts. Work Diamond Row 1 over next 10 sts. BPdc in next 2 sts. CL over next 4 sts. BPdc in next 2 sts. Work Diamond Row 1 over next 10 sts. BPdc in next 2 sts. CL over next 4 sts. 2 dc in last 2 sts (edge). Turn. (86 sts)
Row 4 (WS): Ch 2, turn. 2 dc in first 2 sts (edge). BPdc in next 4 sts. FPdc in next 2 sts. Work Diamond Row 2 over next 10 sts. FPdc in next 2 sts. BPdc in next 4 sts. FPdc in next 2 sts. Work Diamond Row 2 over next 10 sts. FPdc in next 2 sts. BPdc in next 4 sts. FPdc in next 2 sts. Work Diamond Row 2 over next 10 sts. FPdc in next 2 sts. BPdc in next 4 sts. FPdc in next 2 sts. Work Diamond Row 2 over next 10 sts. FPdc in next 2 sts. BPdc in next 4 sts. 2 dc in last 2 sts (edge). Turn. (86 sts)
Continue in pattern as established, working Diamond Rows 1 to 8 in rotation and working CL on every 4th RS row. On all other RS rows, work FPdc over cable columns. On all WS rows, work BPdc over cable columns.
Work until front body measures 54 rows total.
Front Armhole Shaping
Row 55: Ch 1, turn. Sl st across first 5 sts. Ch 1, work in pattern across next 76 sts. Leave last 5 sts unworked. Turn. (76 sts)
Rows 56 to 60: Ch 1, turn. Sc2tog over first 2 sts. Work in pattern to last 2 sts. Sc2tog. Turn.
After Row 60: (66 sts)
Continue in pattern, no further side shaping, for Rows 61 to 76. (66 sts)
Sweetheart Neckline Shaping
The neckline is divided at center. Work left cup and right cup separately.
Left Cup:
Row 77: Work in pattern across first 33 sts. Turn. Leave remaining 33 sts on hold. (33 sts)
Row 78: Ch 1, turn. Sc2tog at neck edge. Work in pattern to end. (32 sts)
Row 79: Work in pattern to last 2 sts at neck edge. Sc2tog. (31 sts)
Row 80: Sc2tog at neck edge. Work in pattern to end. (30 sts)
Row 81: Work in pattern to last 2 sts. Sc2tog. (29 sts)
Row 82: Sc2tog. Work in pattern to end. (28 sts)
Row 83: Work in pattern to last 2 sts. Sc2tog. (27 sts)
Row 84: Sc2tog. Work in pattern to end. (26 sts)
Row 85: Work in pattern to last 2 sts. Sc2tog. (25 sts)
Row 86: Sc2tog. Work in pattern to end. (24 sts)
Rows 87 to 96: Work even in pattern, no more neckline decreases. (24 sts)
Left Front Strap:
Row 97: Work in pattern across outer 18 sts. Turn. (18 sts)
Rows 98 to 122: Work even in pattern. (18 sts)
Fasten off, leaving a 12-inch tail.
Right Cup:
Rejoin yarn at center 33 sts with RS facing, beginning at center.
Row 77: Work in pattern across 33 sts. Turn. (33 sts)
Row 78: Work in pattern to last 2 sts. Sc2tog at neck edge. (32 sts)
Row 79: Sc2tog. Work in pattern to end. (31 sts)
Row 80: Work in pattern to last 2 sts. Sc2tog. (30 sts)
Row 81: Sc2tog. Work in pattern to end. (29 sts)
Row 82: Work in pattern to last 2 sts. Sc2tog. (28 sts)
Row 83: Sc2tog. Work in pattern to end. (27 sts)
Row 84: Work in pattern to last 2 sts. Sc2tog. (26 sts)
Row 85: Sc2tog. Work in pattern to end. (25 sts)
Row 86: Work in pattern to last 2 sts. Sc2tog. (24 sts)
Rows 87 to 96: Work even. (24 sts)
Right Front Strap:
Row 97: Work in pattern across outer 18 sts. Turn. (18 sts)
Rows 98 to 122: Work even in pattern. (18 sts)
Fasten off, leaving a 12-inch tail.
Assembly Instructions
Shoulder Seams
Hold front left strap and back left strap with wrong sides together. Using your yarn needle and a whip stitch or mattress stitch, seam the 18 sts across the top edge together.
Repeat for front right strap and back right strap.
Side Seams
With wrong sides together, align front and back panels. Seam from hem edge upward to the armhole edge. The sample garment is fully seamed to the underarm.
Attaching Hem Bands
Pin one hem band to the bottom edge of the front body with wrong sides together, distributing the ribbing evenly. The long edge of the band aligns with the foundation chain edge of the body. Whip stitch or sc seam through both layers. Repeat for back hem band.
Neckline Finish
With RS facing, join yarn at right strap top corner. Work one row of sc evenly around the entire neckline opening, including across the sweetheart dip at center front and across the back top edge between the straps. Work approximately 1 sc per row end and 1 sc per stitch along horizontal edges. At the V-dip of the sweetheart center, sc3tog over the 3 center sts to maintain the pointed shape. Sl st to first sc to close. Fasten off and weave in end.
At each underarm, work one round of sc evenly around the armhole opening. Sl st to first sc. Fasten off and weave in end.
Size Customization Tips
To adjust width: The main panel repeat is 18 stitches per unit. Add or remove complete units of 18 sts to go up or down a size. Each 18-st unit adds approximately 3.6 inches (9 cm) to the total bust circumference.
To adjust length: Add or remove even-numbered rows from the straight body section (Rows 3 to 54) before armhole shaping. Every 11 rows adds approximately 2 inches (5 cm).
To adjust strap width: Add or subtract stitches in multiples of 2 from the strap width. Ensure the back strap width matches the front strap width for clean seaming.
Blocking and Care
Blocking: Wet blocking is strongly recommended. Soak the finished garment in cool water for 20 minutes. Gently press out excess water in a towel, but do not wring. Lay flat on a blocking mat, pin to finished measurements, and allow to dry fully. This opens the diamond motifs, evens tension, and sets the sweetheart neckline curve beautifully.
Care: Machine wash cold on gentle cycle if using cotton. Lay flat to dry. Do not tumble dry. Do not iron directly on cable sections.
You Did It!
Thank you so much for making this crochet crop top pattern with me! I hope you love wearing your finished boho cable stitch top as much as I loved designing it. There’s something so satisfying about creating a garment that looks like it came from a boutique.
If you make this top, I would absolutely love to see it! Tag me on Instagram or share a photo in my Facebook group. Seeing your creations honestly makes my entire week.
If you enjoyed this crochet tutorial, go ahead and save it to your Pinterest boards so you can find it easily when you’re ready to start. And please drop a comment below if you give this one a try. I love hearing how your projects turn out!
