
Last summer, I found myself standing in my closet, staring at the same boring tank tops I had been wearing for years. Every single one looked exactly like the next. I wanted something different, something handmade that actually felt special to wear. That frustration led me down a rabbit hole of designing this bralette, and honestly? It turned out better than I could have imagined. The bobble texture, the lace-up back, those delicate straps. This is the kind of project that makes you feel like a real maker when you finish it.
Get the Ad-Free PDF Pattern
You can find the free pattern below, or you can purchase the ad-free printable PDF from my shop.
Get the Printable PDF →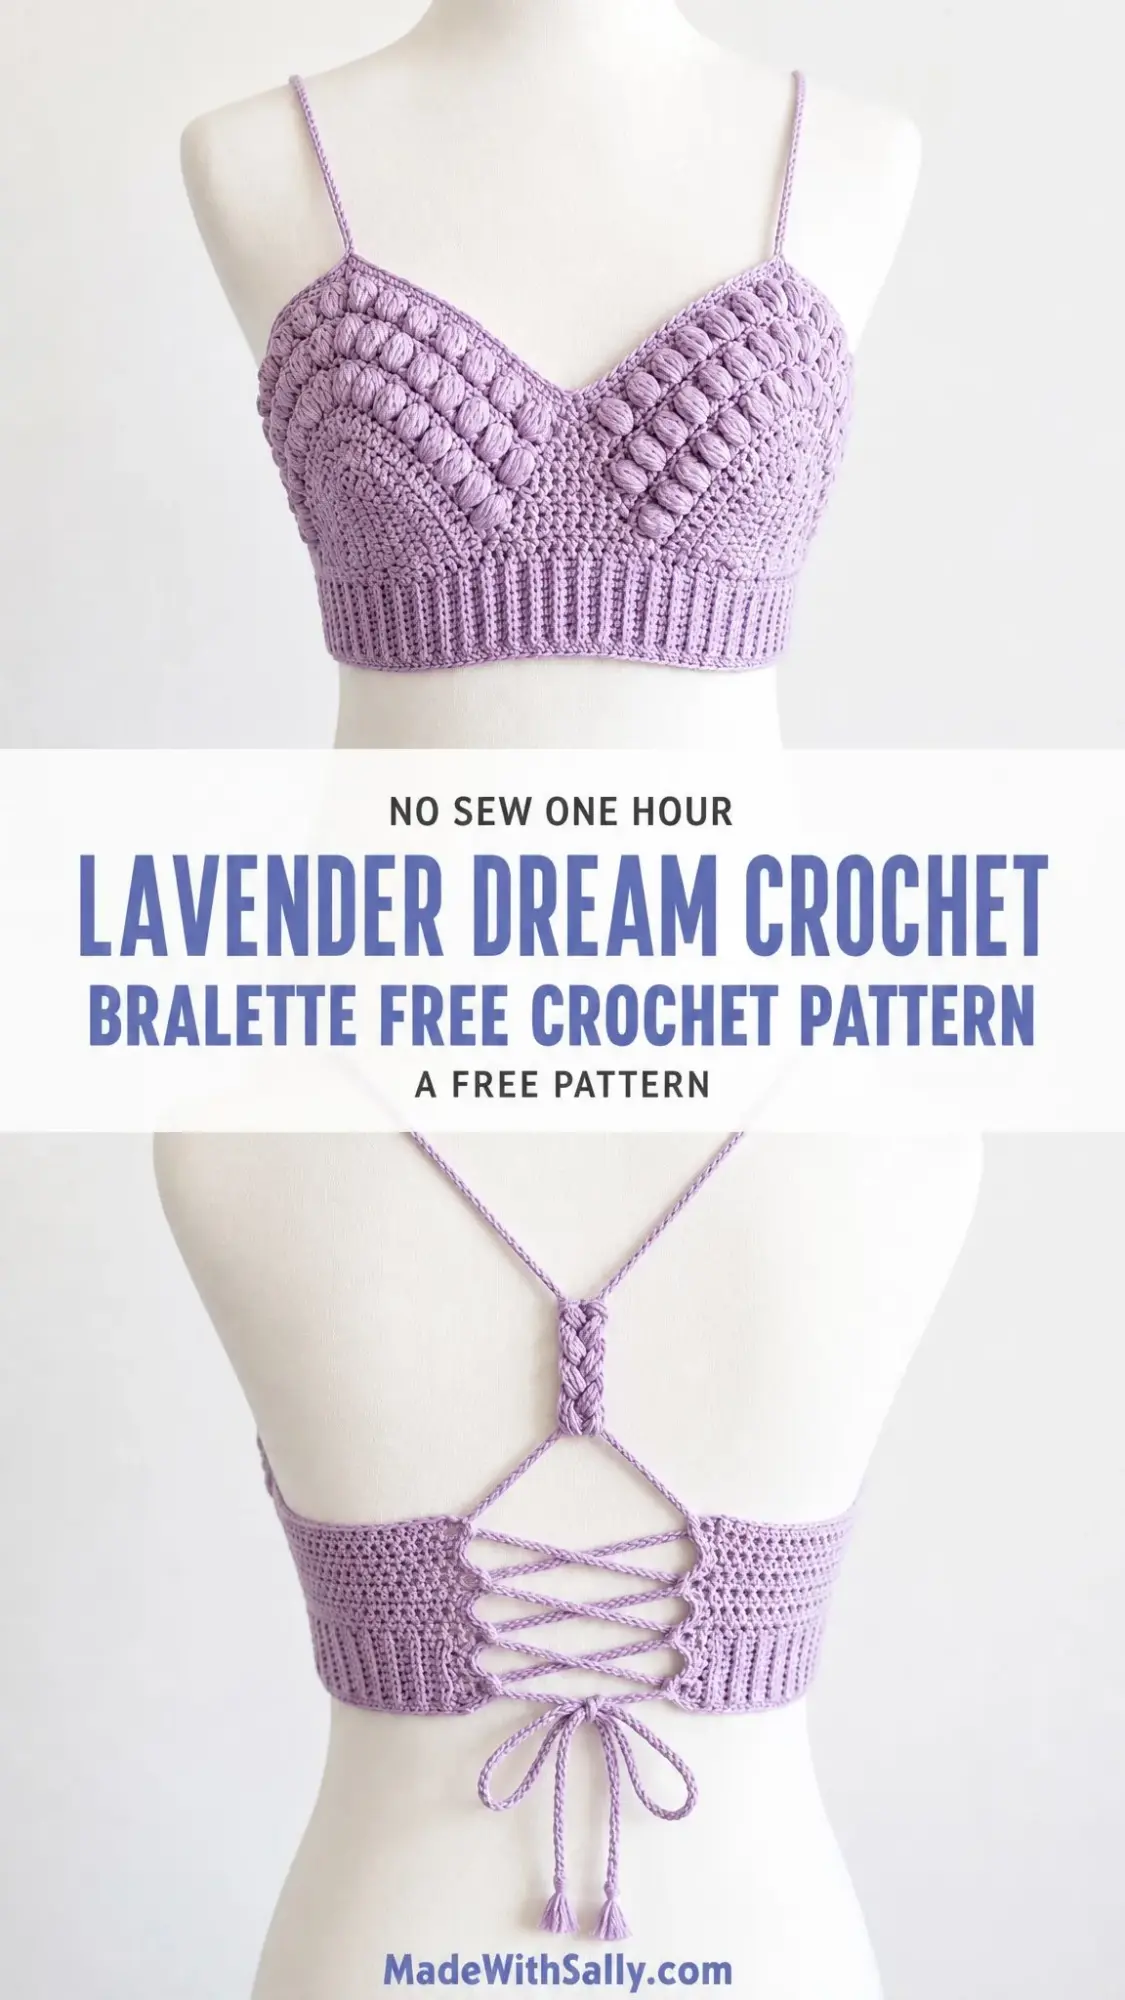
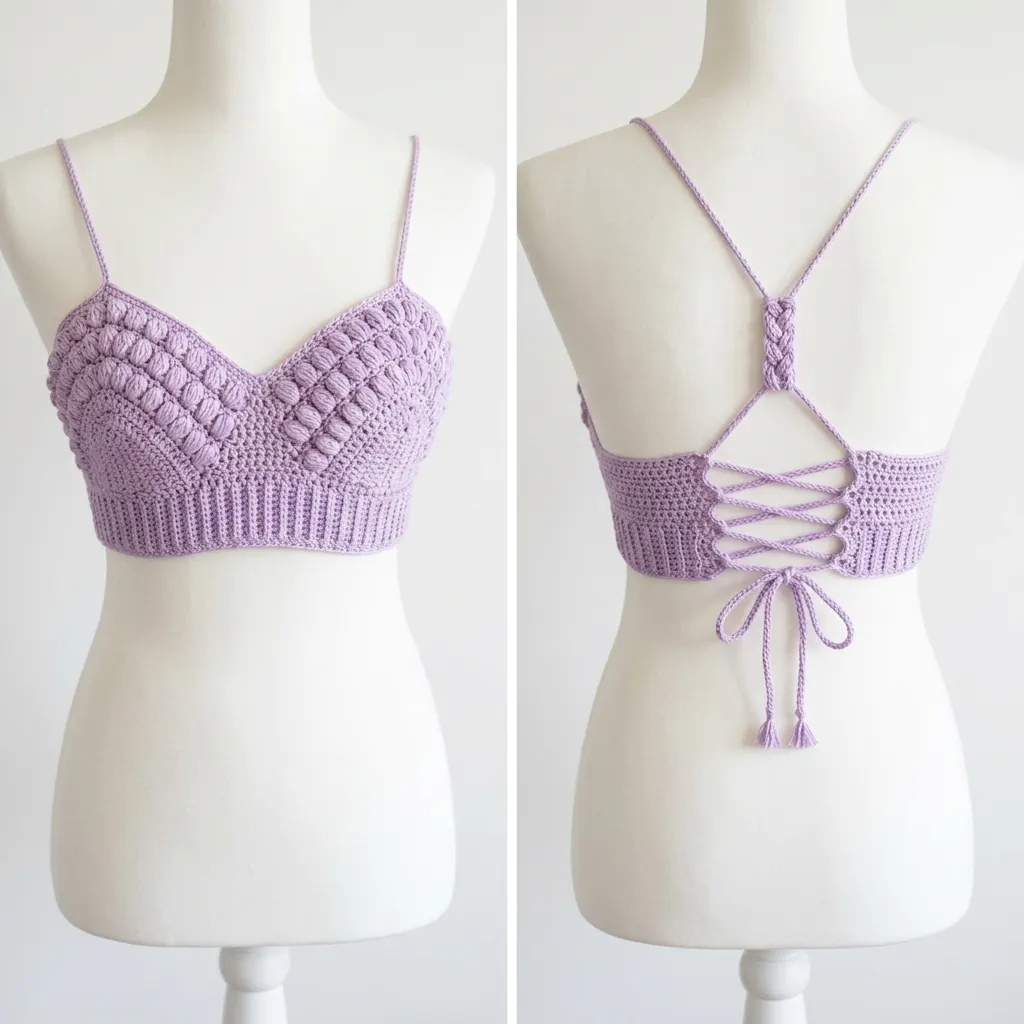
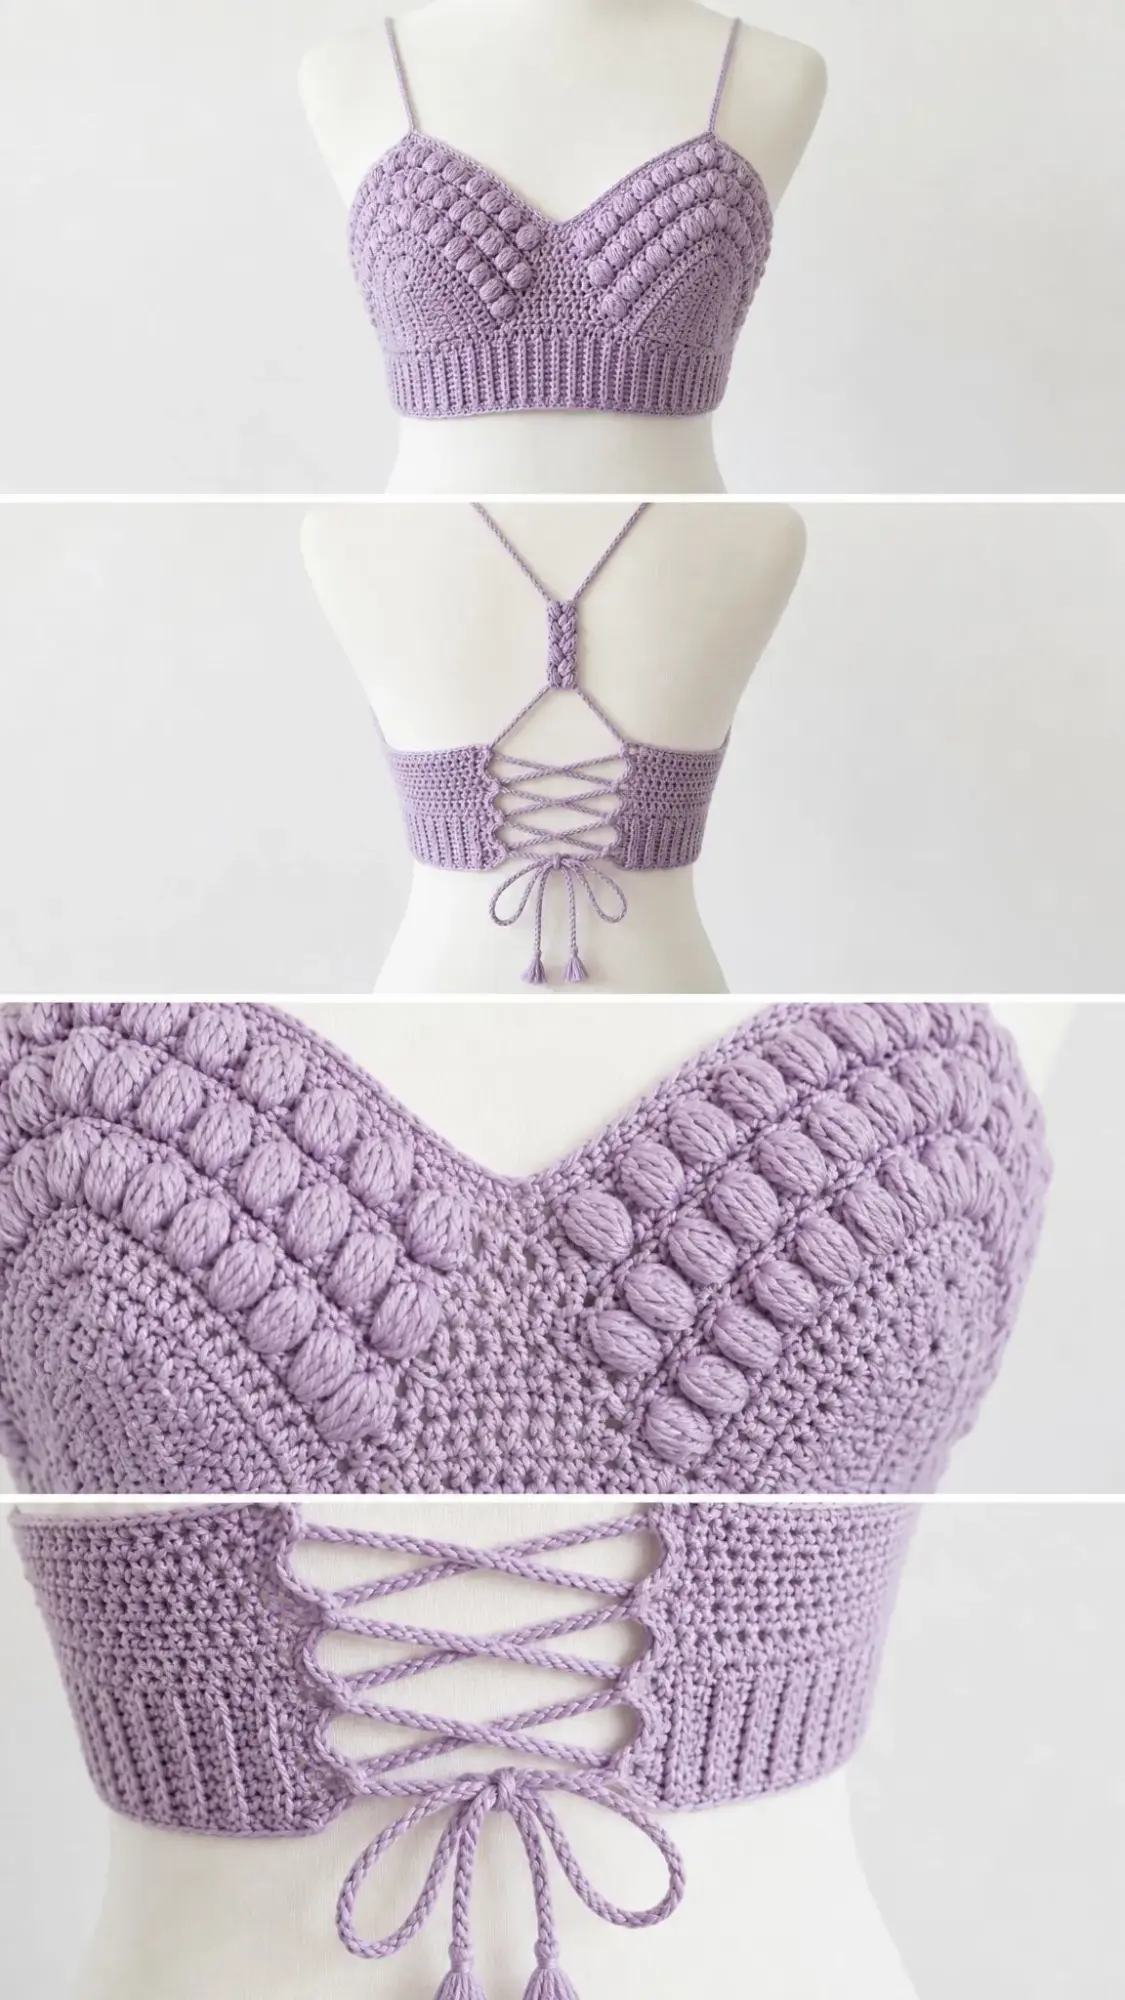
This Lavender Dream Crochet Bralette combines sculpted bobble cups with a ribbed underband and an adjustable tie-back closure. The construction is thoughtful but approachable, perfect for intermediate crocheters ready to level up their garment-making skills. You will work shaped triangular cups, place bobbles in a diagonal V pattern, create a stretchy ribbed band, and finish with a romantic lace-up back.
Let me walk you through every single step.
Why You Will Love This Crochet Bralette Pattern
This is not your average beginner project, but it is absolutely achievable if you have some crochet experience under your belt. The pattern uses familiar stitches in clever ways to create something that looks far more complicated than it actually is.
The bobble stitch creates that beautiful textured cup detail. The back loop only (BLO) ribbing gives the band stretch and recovery. And the lace-up back means you can adjust the fit to your body perfectly.
What I love most is how the pattern builds piece by piece. You make two cups, create a band, seam them together, add side panels, attach straps, and finish with a braided tie. Each section is manageable on its own, and before you know it, you have a complete wearable garment.
Materials You Will Need
Gather these supplies before you start:
| Supply | Details |
|---|---|
| Yarn | DK/light worsted cotton or cotton-bamboo, 180-230 yd / 165-210 m |
| Hook | 4.0 mm / US G-6, or size needed to match gauge |
| Notions | Tapestry needle, stitch markers, scissors, measuring tape, blocking pins |
| Optional | Soft lining fabric or removable cups for extra coverage |
Yarn suggestions: Try Paintbox Yarns Cotton DK, Lion Brand Coboo, or WeCrochet Comfy Worsted for a soft but structured fabric. Choose a smooth yarn with clear stitch definition so the bobbles stand proud. Substitute yarn by matching gauge and choosing a fiber that feels comfortable against skin.
Gauge Information
Getting gauge right matters for garments. Take the time to swatch before diving in.
Cup fabric: 22 half double crochet (hdc) stitches and 13 rows = 4 in / 10 cm after blocking
Ribbing: 18 BLO single crochet (sc) stitches and 18 rows = 4 in / 10 cm
The back tie gives adjustable fit. The underband is designed with 1-2 in / 2.5-5 cm negative ease so it hugs the body without gaping.
Finished Measurements
This pattern creates an adjustable S/M bralette with these dimensions:
Stitch Abbreviations and Definitions
BLO = back loop only (insert your hook under just the back loop of the stitch, not both loops)
Bob = bobble (a cluster of stitches worked into one stitch to create a raised bump)
ch = chain (the foundation stitch that creates a string of loops)
hdc = half double crochet (yarn over, insert hook, pull up loop, yarn over, pull through all 3 loops)
rep = repeat
RS = right side (the side that faces outward when worn)
sc = single crochet (insert hook, pull up loop, yarn over, pull through both loops)
sl st = slip stitch (insert hook, pull loop through stitch and loop on hook in one motion)
sp = space
st(s) = stitch(es)
WS = wrong side (the side that faces your body when worn)
UK note: This pattern uses US terms. US sc = UK dc, US hdc = UK htr, US dc = UK tr.
Special Stitches
Bobble Stitch
This creates those gorgeous raised bumps on the cups. Here is exactly how to work it:
Yarn over, insert hook in indicated stitch, yarn over and pull up a loop, yarn over and pull through 2 loops. Repeat in the same stitch until you have 5 unfinished hdc posts on the hook. Yarn over and pull through all loops. Work the next stitch firmly to pop the bobble to the right side.
Tip: If your bobbles keep sinking to the wrong side, push each bobble to the RS before working the next stitch and keep the following hdc firm.
BLO Ribbing
Work single crochet through the back loop only of each stitch. Turn every row. This creates the vertical rib texture used for the underband and lower back edges. It gives the band stretch and a professional finish.
Cord Chain
Use a firm chain for straps and ties. For a rounder cord, work a slip stitch back through the back bump of each chain before fastening off.
How to Make the Cups
Make 2. Chain 2 to begin. Row 1 is the bottom point. Chain 1 at the start of each row does not count as a stitch. Increase by working 2 hdc in the first and last stitch on every row. Bobbles replace hdc stitches and do not change the stitch count.
| Row | Instructions | Stitch Count |
|---|---|---|
| Row 1 | 3 hdc in 2nd ch from hook | 3 sts |
| Row 2 | 2 hdc in first st, hdc across to last st, 2 hdc in last st | 5 sts |
| Row 3 | 2 hdc in first st, hdc across to last st, 2 hdc in last st | 7 sts |
| Row 4 | 2 hdc in first st, hdc across to last st, 2 hdc in last st | 9 sts |
| Row 5 | 2 hdc in first st, work marked bobbles, hdc to last st, 2 hdc in last st | 11 sts |
| Row 6 | 2 hdc in first st, hdc across to last st, 2 hdc in last st | 13 sts |
| Row 7 | 2 hdc in first st, work marked bobbles, hdc to last st, 2 hdc in last st | 15 sts |
| Row 8 | 2 hdc in first st, hdc across to last st, 2 hdc in last st | 17 sts |
| Row 9 | 2 hdc in first st, work marked bobbles, hdc to last st, 2 hdc in last st | 19 sts |
| Row 10 | 2 hdc in first st, hdc across to last st, 2 hdc in last st | 21 sts |
| Row 11 | 2 hdc in first st, work marked bobbles, hdc to last st, 2 hdc in last st | 23 sts |
| Row 12 | 2 hdc in first st, hdc across to last st, 2 hdc in last st | 25 sts |
| Row 13 | 2 hdc in first st, work marked bobbles, hdc to last st, 2 hdc in last st | 27 sts |
| Row 14 | 2 hdc in first st, hdc across to last st, 2 hdc in last st | 29 sts |
| Row 15 | 2 hdc in first st, work marked bobbles, hdc to last st, 2 hdc in last st | 31 sts |
| Row 16 | 2 hdc in first st, hdc across to last st, 2 hdc in last st | 33 sts |
| Row 17 | 2 hdc in first st, work marked bobbles, hdc to last st, 2 hdc in last st | 35 sts |
| Row 18 | 2 hdc in first st, hdc across to last st, 2 hdc in last st | 37 sts |
| Row 19 | 2 hdc in first st, work marked bobbles, hdc to last st, 2 hdc in last st | 39 sts |
| Row 20 | 2 hdc in first st, hdc across to last st, 2 hdc in last st | 41 sts |
Bobble Placement Map
On rows 5, 7, 9, 11, 13, 15, 17, and 19, place bobbles in a diagonal V pattern.
For Cup A, place bobbles at these stitch numbers after the first increase is made:
For Cup B, count from the opposite edge for a mirror image.
Cup checkpoint: Each cup should measure about 6.25 in / 16 cm from point to top edge and 7.5 in / 19 cm across the final row after light blocking.
Left-handed note: Left-handed makers can follow the same row counts. For mirrored cup texture, read bobble positions from the opposite edge, or make two identical cups and flip one before seaming.
Underband and Cup Assembly
Ribbed Front Band
Chain 12.
Row 1: sc in 2nd ch from hook and each ch across. (11 sc)
Rows 2-74: ch 1, turn, sc BLO in each st across. (11 sc)
Fasten off, leaving a long tail. Band should measure about 16.5 in / 42 cm long and 2.25 in / 5.5 cm tall.
Seam Cups to Band
Lay the band horizontally with rib lines vertical. Mark the center of the band. Place the two cup points slightly overlapping at the center mark to form a neat V neckline. Pin the lower edge of each cup along the upper band edge for 7.25 in / 18.5 cm per cup. Use mattress stitch or whipstitch through matching loops. Leave the outer 1 in / 2.5 cm of band at each end unseamed for comfort at the side body.
Checkpoint: After seaming, the front should measure about 16.5 in / 42 cm wide. The deepest center V should sit 1.25-1.5 in / 3-4 cm above the lower band edge.
Decorative Cup Edging
With RS facing, join yarn at one outer upper cup edge. Sc evenly around the top edge of the first cup, work 1 sc in the center V join, then sc evenly around the second cup. Keep the edge smooth, not tight. Fasten off.
Back Panels, Straps, and Tie
Side-Back Panels
Right panel: Join yarn at one short end of the ribbed band. Work 11 sc evenly across the band height.
Rows 2-16: ch 1, turn, sc in each st across. (11 sc)
Do not fasten off after Row 16.
Eyelet edge: ch 1, rotate to work along the inner long edge of the panel. Work sc in next 3 row-ends, ch 2, skip next 2 row-ends; rep from twice more, sc in remaining row-ends. Fasten off.
Repeat for the left panel, mirroring the eyelet edge so the eyelets face the center back opening.
Panel checkpoint: Each panel adds about 3.5 in / 9 cm of width. The back opening should remain open for the lace-up tie.
Back Bridge
Chain 7.
Row 1: sc in 2nd ch from hook and each ch across. (6 sc)
Rows 2-8: ch 1, turn, sc BLO in each st across. (6 sc)
Fasten off. This small ribbed rectangle sits between the shoulder straps at upper back.
Shoulder Straps
Attach yarn to the top point of one cup. Chain 64, or the length needed to reach the back bridge comfortably. Slip stitch back along the chain for a stronger cord, then sew the end to the upper corner of the back bridge. Repeat for the second cup.
Lower Lacing Cord
Chain 150, then slip stitch back along the chain if desired. Weave through the side-panel eyelets from top to bottom in a crisscross pattern. Tie in a bow and trim tassels evenly.
Customization and Fit Adjustments
To widen the underband: Add ribbing rows in multiples of 2 before making side panels. Each 4 extra rows adds about 0.9 in / 2.3 cm.
To make a taller cup: Continue the cup increase sequence beyond Row 20, increasing at both ends every row. Each added row adds 2 stitches and about 0.3 in / 0.8 cm height.
To reduce cup depth: Stop at Row 18 for a smaller cup. Final count will be 37 sts. Seam and edge as written, easing the lower cup edge evenly across the band.
To adjust straps: Pin the bralette on a dress form or your body before sewing strap ends. The strap should feel secure but not dig into the shoulder.
Troubleshooting Common Issues
Bobbles sink to the wrong side: Push each bobble to the RS before working the next stitch, and keep the following hdc firm.
Band curls: Steam block gently and avoid over-tight slip stitches when seaming.
Back gapes: Shorten the lacing gap by adding 2-4 rows to each side panel or tying the cord more firmly.
Cups feel too shallow: Add 1-2 more increase rows before edging, then lengthen the strap chains.
Finishing and Care Instructions
Weave in all ends securely on the inside. Lightly wet block the bralette on a towel, shaping the cups into a smooth curve and pinning the band flat. Let dry completely before wearing.
Hand wash in cool water with mild soap. Press out water in a towel; do not wring. Lay flat to dry. Store folded rather than hanging to protect the straps.
You Did It!
Thank you so much for choosing this Lavender Dream Crochet Bralette pattern for your next project. I hope the step by step instructions made the construction feel manageable and even enjoyable. This bralette is one of those pieces that looks impressive but teaches you so many useful techniques along the way.
If you make one, I would absolutely love to see it! Tag me on Instagram or share a photo in my Facebook group. Seeing your finished projects genuinely makes my day.
Go ahead and save this crochet bralette pattern to your Pinterest boards so you can find it when you are ready to start. And if you have any questions or just want to share how yours turned out, drop a comment below. I read every single one and love hearing from you!
Want a Quick & Easy Printable Version?
Get a clean, beautifully formatted PDF of this pattern — easy to follow step by step, ready to print or save on any device. No scrolling, no distractions, just the pattern.
Get the Printable PDF →