
I pulled out my grandmother’s crochet notebook last spring while cleaning out the attic, and tucked between the yellowed pages was a sketch of a daisy blanket she never finished. She had written "for the next baby" in her loopy handwriting, with color notes in the margins. Peach background. White petals. A little coral at the center.
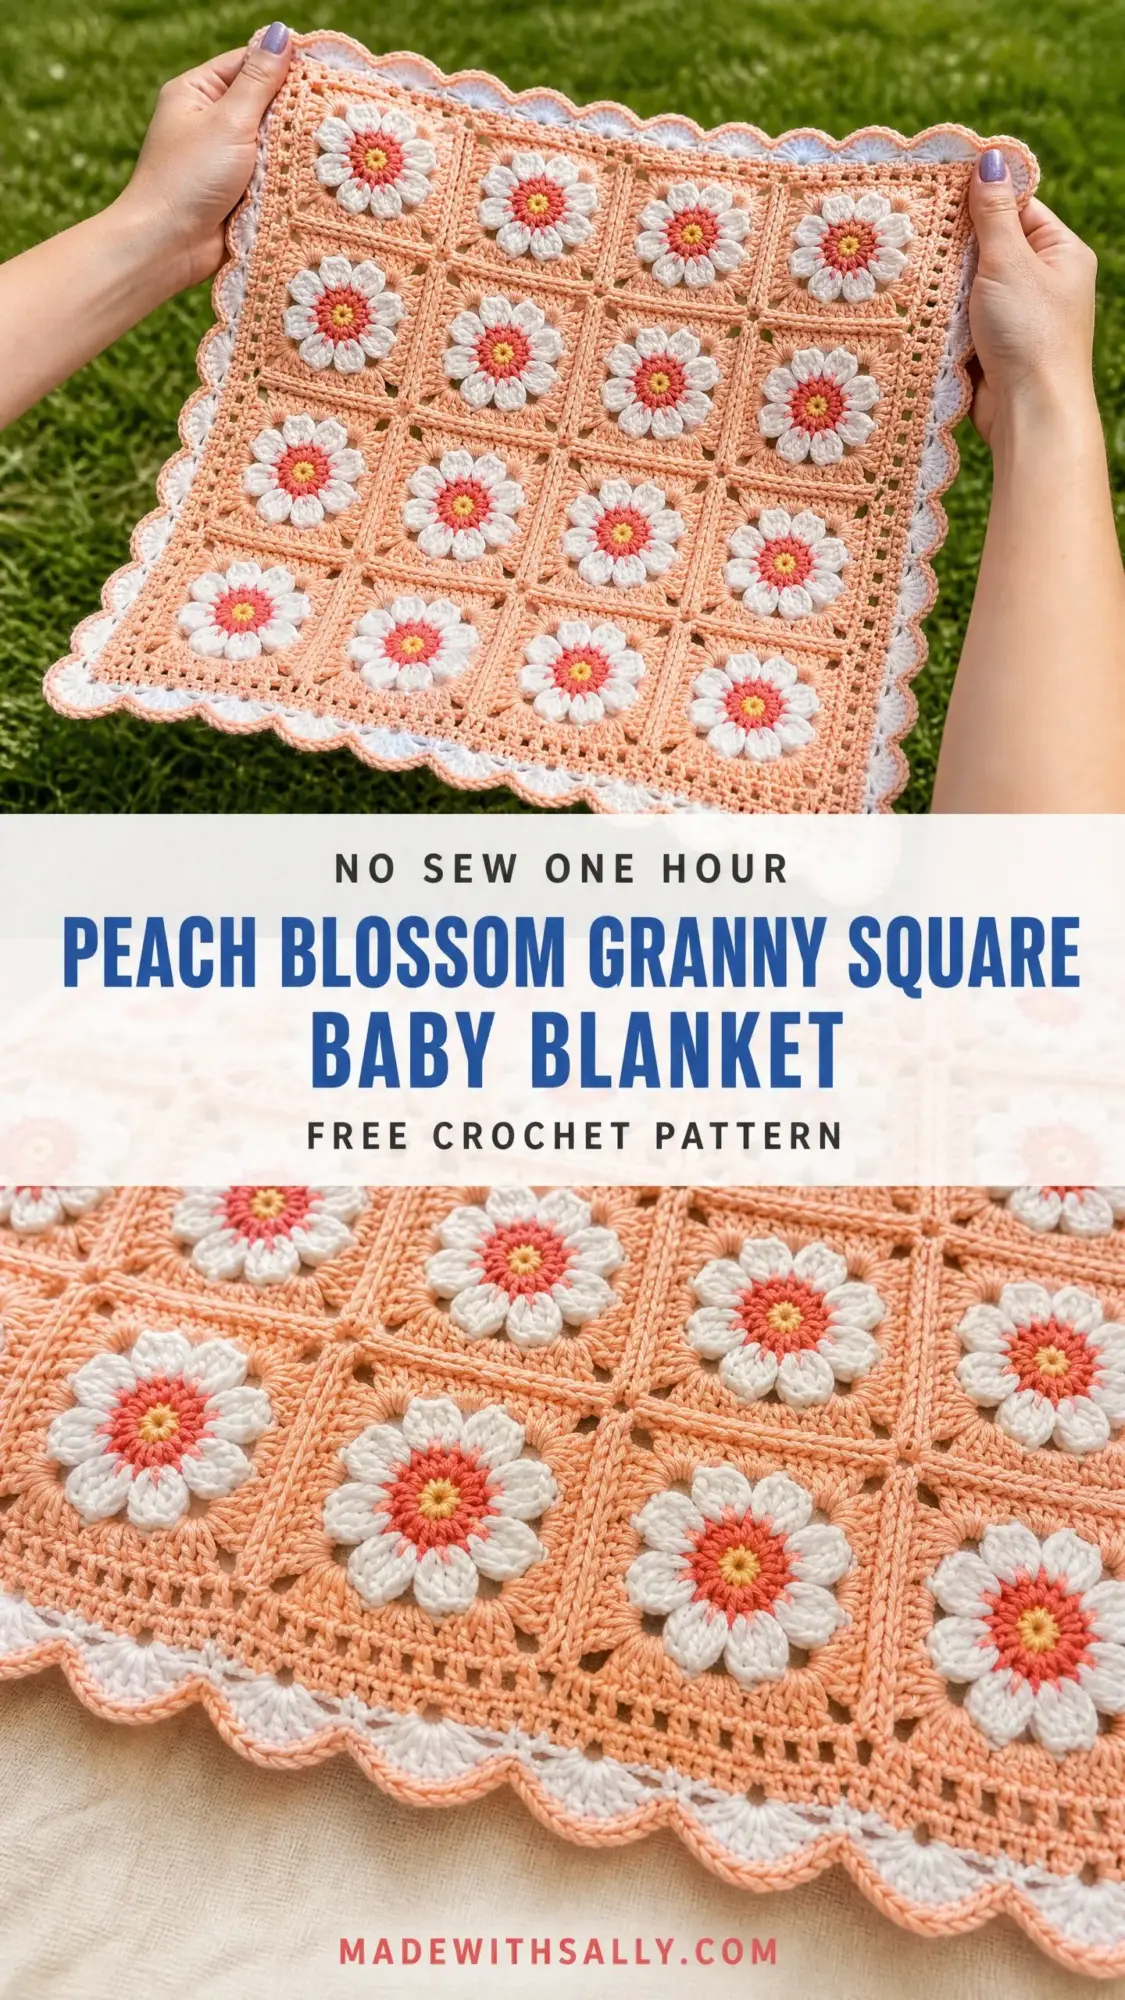
I spent weeks turning that sketch into a real pattern, testing and retesting until the dimensional flowers popped just right. The Peach Blossom blanket became my way of finishing what she started.
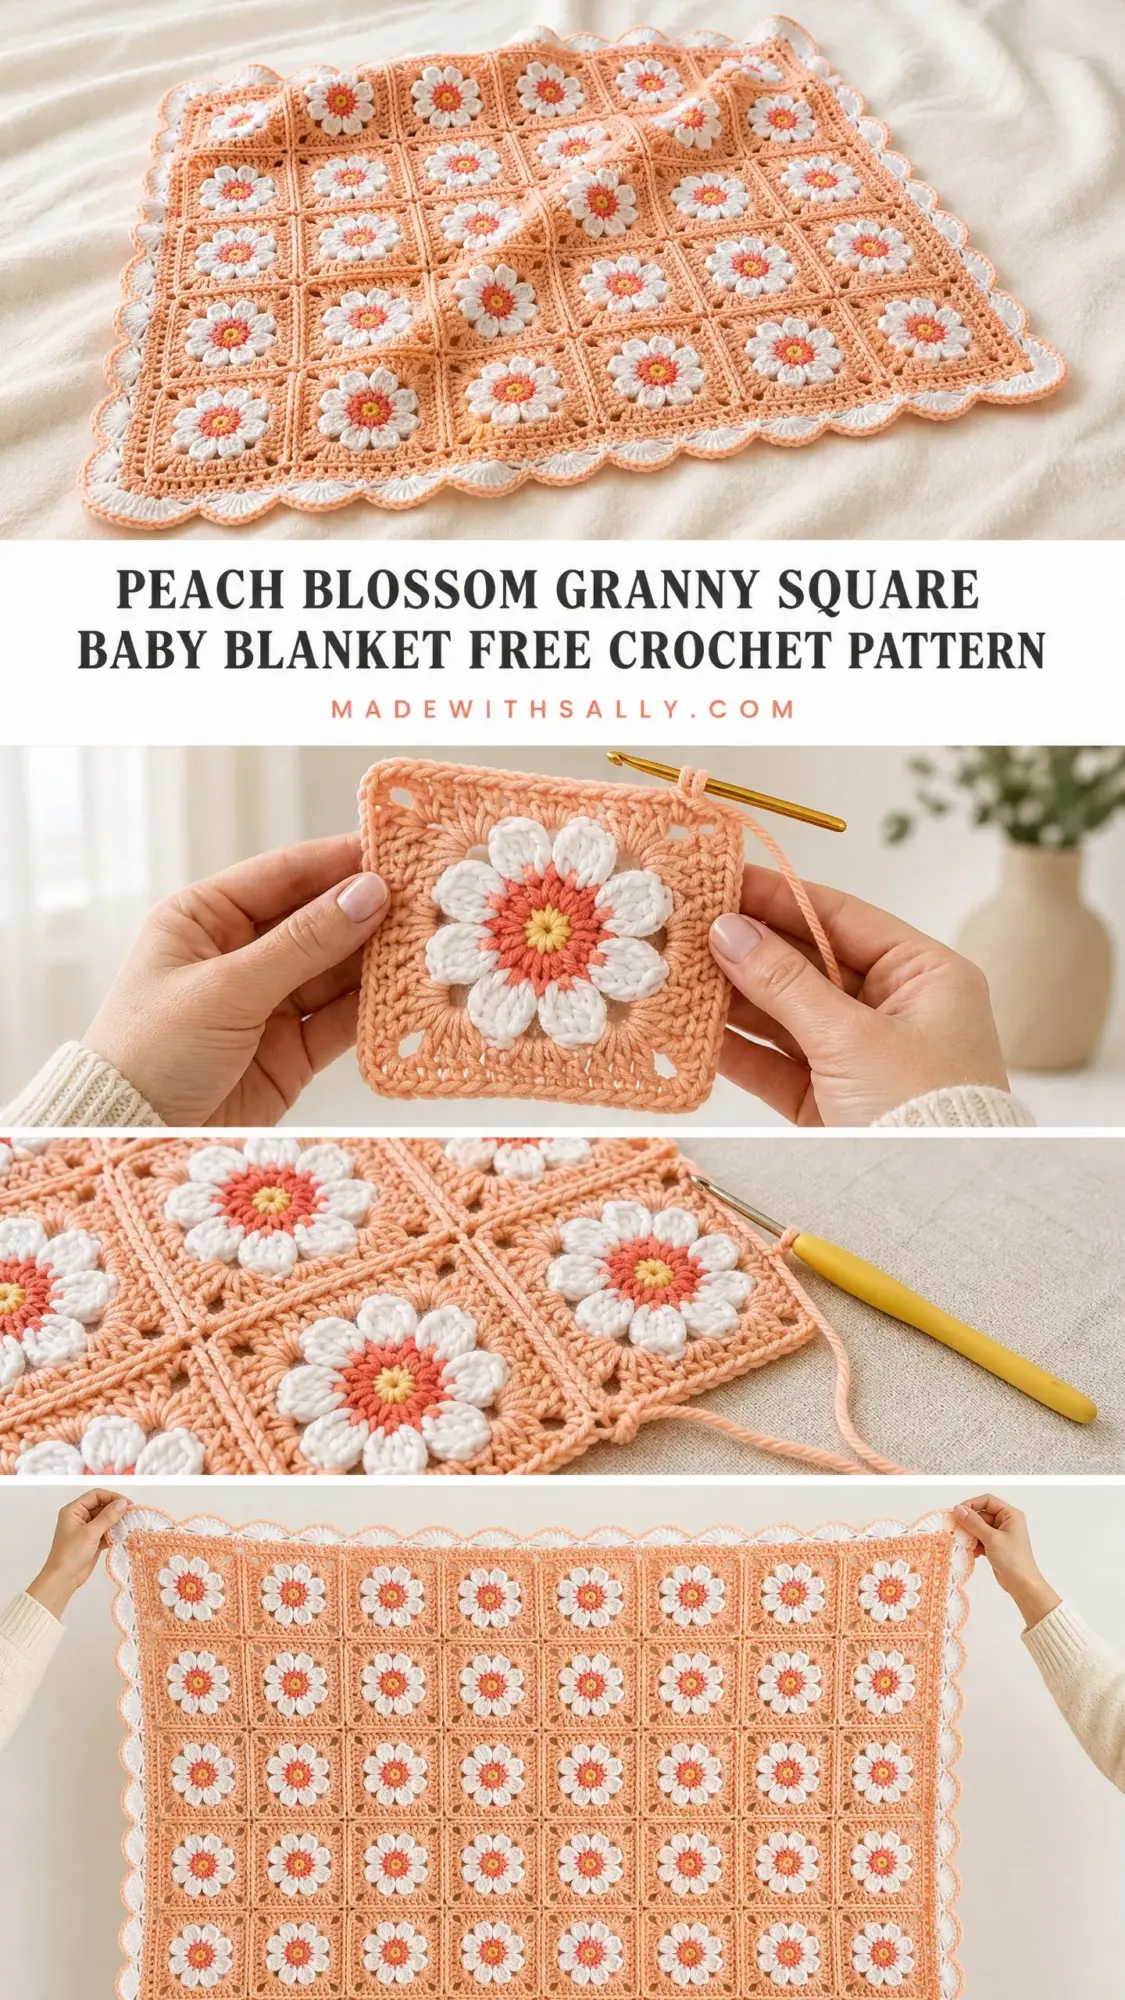
Now I get to share it with you. This heirloom baby blanket features 16 individual granny squares, each with a raised three-dimensional daisy at its heart. The construction is intermediate level, but I promise the techniques are learnable. If you can work a treble crochet and you are not afraid of a little color changing, you can absolutely make this.
Why This Granny Square Baby Blanket Pattern Works
The construction method here is clever. You work each square from the center outward, starting with a tiny yellow ring, then building coral and white petals that literally pop forward from the fabric. The petals are not flat. They curve up and out, creating texture you can feel with your fingernails.
The peach background frames each flower beautifully while hiding the joins between squares. When you assemble all 16 squares into a grid and add the scalloped white border, the whole thing looks like a garden.
From the back, you get a completely different effect. The reverse shows a clean filet-like grid pattern in peach, which is almost as pretty as the front. This blanket is reversible in the best way.
Skill Level and Time Commitment
This pattern is rated intermediate. You should be comfortable working in the round, changing colors mid-round, and creating dimensional stitches that insert behind previous rounds.
If you have made a few standard granny squares and feel good about your tension, you are ready for this. The special petal technique might feel awkward the first time, but by your third flower, your hands will know what to do.
Time estimate: Approximately 25 to 35 hours total. Each individual square takes roughly 45 to 60 minutes once you find your rhythm. Assembly and the border add another 4 to 6 hours. This is not a weekend project, but it is a perfect TV-watching project.
Finished Dimensions
The completed blanket measures approximately 30 inches by 30 inches (76 cm by 76 cm) after blocking. Each individual square measures approximately 7 inches by 7 inches (18 cm by 18 cm) before joining.
This size is perfect for newborns through the infant stage. It works as a stroller blanket, a tummy time mat, or a photo prop for those precious first pictures.
Materials You Will Need
Yarn: Worsted weight yarn (weight category 4) in four colors.
| Color | Name | Approximate Yardage |
|---|---|---|
| Color A | Peach | 800 yards (732 m) |
| Color B | White | 350 yards (320 m) |
| Color C | Coral/Salmon | 80 yards (73 m) |
| Color D | Yellow | 30 yards (27 m) |
Hook: US size G-6 (4.00 mm) crochet hook. Adjust as needed to match gauge.
Notions: Yarn needle for weaving ends and joining squares. Scissors. Rust-proof blocking pins. Blocking mat or towels.
Yarn Suggestions
Option 1: Lion Brand Pound of Love (100% premium acrylic, 1020 yards per 16 oz skein). Machine washable and ultra-soft for baby skin. One skein of Peach or Pastel Pink covers Color A.
Option 2: Paintbox Yarns Simply Worsted (100% acrylic, 218 yards per 100 g ball). Excellent stitch definition that showcases the dimensional petals beautifully. Purchase 4 balls peach, 2 balls white, 1 ball each coral and yellow.
Option 3: Drops Nepal (65% wool, 35% alpaca, 82 yards per 50 g ball) for a natural fiber heirloom version. Note this yarn is not machine washable.
Substitution tip: Any smooth worsted weight yarn works. Avoid fuzzy or textured yarns because they will obscure your beautiful petals.
Gauge
One completed granny square measures 7 inches by 7 inches (18 cm by 18 cm) after light blocking.
Work one complete square through Round 5 as your gauge swatch. Block lightly and measure. Adjust hook size up or down as needed before making all 16 squares. Getting gauge right matters here because your squares need to match for clean joins.
Abbreviations and Stitch Definitions
Let me walk you through every abbreviation used in this pattern. If you are newer to crochet patterns, bookmark this section.
ch = chain. Wrap yarn over hook, pull through loop on hook.
sl st = slip stitch. Insert hook, yarn over, pull through stitch and loop on hook in one motion.
sc = single crochet. Insert hook, yarn over, pull up loop, yarn over, pull through both loops.
dc = double crochet. Yarn over, insert hook, yarn over, pull up loop, yarn over, pull through 2 loops, yarn over, pull through remaining 2 loops.
tr = treble crochet. Yarn over twice, insert hook, yarn over, pull up loop, then yarn over and pull through 2 loops three times.
sp = space. The gap or hole created by chain stitches.
ch-sp = chain space. A specific space created by chains in the previous round.
st/sts = stitch/stitches.
RS = right side. The front of your work.
WS = wrong side. The back of your work.
rep = repeat.
sk = skip.
yo = yarn over. Wrap yarn over your hook.
Special Stitches
Dimensional Petal (Round 2)
This is the technique that makes the daisies pop. Each petal is a group of 5 treble crochets worked into a single chain-1 space of Round 1. The key is inserting your hook BEHIND the Round 1 chain stitches so the petals curl forward.
Step 1: Insert hook from front to back through the designated ch-1 sp of Round 1, going behind (underneath) the Round 1 chains.
Step 2: Yarn over and draw up a loop to the height of a treble crochet.
Step 3: Work a complete treble crochet.
Step 4: Work 4 more treble crochets in the same space in the same manner.
One petal equals 5 tr worked behind the Round 1 chains into one ch-1 sp. The completed petal will curl slightly forward and upward, creating the raised daisy effect.
Picot (Border)
Ch 3, sl st in the first ch made (the ch closest to the hook). This creates a small decorative loop.
Scallop (Border Round 2)
Work 5 dc all into the same stitch or space to create one shell unit.
Joining Slip Stitch (Assembly)
With WS of both squares facing each other (RS facing outward), insert hook through the back loops only of both corresponding stitches simultaneously, yarn over and draw through both loops and the loop on hook.
Pattern Notes Before You Begin
1. The blanket is constructed in stages. First make all 16 individual squares, then join them, then add the border.
2. Each square is worked in rounds from the center out. Do not turn your work. All rounds are worked with the RS facing.
3. Color sequence per square: Round 1 uses Color D (Yellow). Round 2 uses Color C (Coral) and Color B (White). Rounds 3 through 6 use Color A (Peach).
4. When working Round 2, the petals are worked into the Round 1 ch-1 spaces but BEHIND the chains of Round 1. This creates the dimensional raised flower.
5. Weave in all ends before joining squares. The blanket will be laundered, and you want those ends secure.
6. Count your stitches at the end of each round. If counts do not match, recount before moving on.
7. All corner ch-spaces in the granny square background rounds are ch-3 spaces.
Individual Square Instructions (Make 16)
Each square is worked in 6 rounds. Make all 16 squares before joining.
Round 1 (Color D, Yellow)
Make a magic ring (adjustable loop).
Ch 1 (does not count as st).
Work 8 sc into the magic ring.
Pull ring closed snugly.
Do NOT join. Do NOT turn.
Ch 1, sc in next sc, ch 1; rep from 7 more times.
Sl st to first sc to join.
(8 sc, 8 ch-1 sps)
Checkpoint: Your ring should look like a small 8-spoke wheel with 8 sc and 8 ch-1 spaces separating them.
Round 2 (Color C, Coral and Color B, White)
Join Color C with a sl st to any ch-1 sp of Round 1.
Ch 1. Work 1 sc into that same ch-1 sp (working on top of Round 1, not behind it). This sc is the coral inner connector.
Now for the petal: drop Color C (do not cut, carry loosely). Join Color B (White) with a sl st into the same ch-1 sp.
Work 5 tr into this ch-1 sp, inserting the hook BEHIND (underneath) the Round 1 chain stitches for each treble. (1 petal completed)
Drop Color B. Pick up Color C. Work 1 sc into the next ch-1 sp working on top of Round 1 (this is the coral connector between petals).
Drop Color C. Pick up Color B. Work 5 tr into the same ch-1 sp as the coral sc, inserting the hook behind the Round 1 chains. (1 petal completed)
Continue in this manner: 1 sc in Color C into next ch-1 sp, 5 tr in Color B (behind Round 1 chains) into same ch-1 sp; rep from around until all 8 ch-1 sps have been worked.
Sl st to first sc to join.
(8 petals of 5 tr each, 8 coral sc connectors = 48 sts total)
Checkpoint: You should have 8 raised white petals separated by single coral sc stitches. The flower should be clearly dimensional with petals curving forward.
Round 3 (Color A, Peach)
Note: This round creates the first background round and establishes the square shape. You will work INTO the Round 1 sc stitches (the original 8 sc of Round 1) rather than into the petal stitches of Round 2. Push the Round 2 petals toward the front so they lie forward and work behind them into the Round 1 foundation sc stitches.
Join Color A with a sl st to any Round 1 sc (behind a petal), working from the RS.
Ch 3 (counts as first dc).
Work 2 dc into the same Round 1 sc (behind the petal). This is a corner beginning.
Ch 3 (corner ch-sp).
Work 3 dc into the same Round 1 sc. (First corner completed: 3 dc, ch-3, 3 dc)
*Work 3 dc into the next Round 1 sc (behind the next petal). This is a side shell.
Work (3 dc, ch 3, 3 dc) into the following Round 1 sc. This is the next corner.
Rep from * 2 more times.
Work 3 dc into the last Round 1 sc.
Sl st to top of beginning ch-3 to join.
(24 dc total, 4 corner ch-3 sps)
Checkpoint: The piece should now be visibly square with 4 corners and 4 side shells.
Round 4 (Color A, Peach)
Sl st across top of next 2 dc and into corner ch-3 sp.
Ch 3 (counts as first dc).
Work (2 dc, ch 3, 3 dc) into same corner ch-3 sp.
Ch 1.
Work 3 dc into the space between the corner shell and the side shell.
Ch 1.
Work (3 dc, ch 3, 3 dc) into next corner ch-3 sp.
Rep from * around all 4 corners, working ch-1, 3 dc into the space, ch-1 between corner and the previous side group each time.
Sl st to top of beginning ch-3 to join.
(36 dc, 4 corner ch-3 sps, 8 ch-1 sps)
Checkpoint: Each side now has 2 shell groups of 3 dc separated by ch-1 sps plus corner shells. The square is growing with clean grid-like structure.
Round 5 (Color A, Peach)
Sl st to corner ch-3 sp.
Ch 3 (counts as first dc).
Work (2 dc, ch 3, 3 dc) into same corner sp.
*Ch 1, 3 dc into next ch-1 sp, ch 1, 3 dc into next ch-1 sp, ch 1, (3 dc, ch 3, 3 dc) into next corner ch-3 sp.
Rep from * 3 more times, ending last rep by sl st to top of beginning ch-3.
(60 dc, 4 corner ch-3 sps, 16 ch-1 sps)
Checkpoint: Each side now has 3 shell groups between corners. The square should measure approximately 5.5 to 6 inches across.
Round 6 (Color A, Peach)
Sl st to corner ch-3 sp.
Ch 3 (counts as first dc).
Work (2 dc, ch 3, 3 dc) into same corner sp.
*Ch 1, [3 dc into next ch-1 sp, ch 1] 4 times, (3 dc, ch 3, 3 dc) into next corner ch-3 sp.
Rep from * 3 more times.
Sl st to top of beginning ch-3 to join.
Fasten off and weave in all ends.
(72 dc, 4 corner ch-3 sps, 20 ch-1 sps)
Checkpoint: The completed square should measure approximately 7 inches by 7 inches after light blocking. Each side has 4 shell groups between corners.
Assembly: Joining Your 16 Squares
Arrange the 16 squares in a 4-column by 4-row grid on a flat surface with all RS facing up. Confirm all flowers face the same direction.
Step 1: Join Squares Into Rows
Hold two squares with WS together (RS facing outward) along the edge to be joined.
Attach Color A with a sl st through both corresponding corner ch-3 sps.
Work sl st through both back loops of each corresponding dc stitch and through both corresponding ch-1 sp loops along the entire edge, matching shell to shell and ch-sp to ch-sp.
At the far corner ch-3 sp, work sl st through both corner ch-3 sps.
Fasten off.
Complete all 4 horizontal rows (joining 4 squares per row).
Step 2: Join Rows Together
Join Row 1 to Row 2 along their bottom and top edges in the same WS sl st manner.
When reaching a point where squares from Row 1 meet squares from Row 2 (the intersection), sl st through all 4 corresponding corner ch-3 sps simultaneously to create a clean center join.
Join Row 2 to Row 3, then Row 3 to Row 4 in the same manner.
Checkpoint: The assembled blanket should measure approximately 28 inches by 28 inches before the border. The join lines should be nearly invisible from the RS.
Border Instructions
The border is worked in 2 rounds around the entire assembled blanket. It adds approximately 1 inch on each side.
Border Round 1 (Color A, Peach)
Join Color A with a sl st into any corner ch-3 sp of the assembled blanket.
Ch 3 (counts as first dc).
Work (2 dc, ch 3, 3 dc) into same corner sp.
Work along the first edge as follows:
Ch 1, 3 dc into next ch-1 sp or shell gap along the edge, rep from across each square’s edge shells (4 shells per square side), and when crossing a join seam between squares work 3 dc into the seam junction sp, ch 1, to maintain the shell rhythm.
At each corner of the blanket, work (3 dc, ch 3, 3 dc) into the corner ch-3 sp.
Continue around all 4 sides and all 4 corners.
Sl st to top of beginning ch-3 to join.
(Approximately 252 dc, 4 corner ch-3 sps)
Border Round 2 (Color B, White Scallop Edging)
Join Color B with a sl st into any corner ch-3 sp.
Ch 1 (does not count as st).
Work (sc, ch 3, sc) into corner ch-3 sp.
Work along the edge as follows:
Sk next dc, sk next dc, work 5 dc (scallop) into next ch-1 sp, sk next dc, sk next dc, sc into next dc (the center dc of the next shell); rep from along each side, adjusting as needed at seam junctions so that a scallop falls into each ch-1 sp and a sc falls between each scallop shell.
At each corner, work (sc, ch 3, sc) into the corner ch-3 sp.
Sl st to first sc to join.
Fasten off. Weave in all ends.
Checkpoint: The scalloped border should produce consistent 5-dc shells separated by single sc stitches around the entire perimeter, with (sc, ch-3, sc) at all 4 corners.
Blocking and Finishing
Weave in all remaining ends securely, weaving at least 1 inch in two different directions.
Wet Blocking (Recommended)
Submerge the finished blanket in cool water and gently press to saturate. Do not wring.
Roll in a clean dry towel and press firmly to remove excess water.
Lay flat on a blocking mat or clean surface.
Pin to 30 inches by 30 inches using rust-proof pins, especially at corners and along the scalloped border.
Allow to dry completely (12 to 24 hours).
Steam Blocking (For Acrylic)
Do not wet. Pin the blanket to dimensions.
Hold a steam iron 1 to 2 inches above the surface and apply steam without touching the yarn.
Do NOT press the iron over the dimensional petal flowers. This will flatten them.
Allow to cool before removing pins.
Size Customization Options
Want a bigger blanket? Add squares in multiples:
| Grid Size | Total Squares | Approximate Finished Size |
|---|---|---|
| 3×3 | 9 squares | 22 x 22 inches (56 x 56 cm) |
| 4×4 | 16 squares | 30 x 30 inches (76 x 76 cm) |
| 5×5 | 25 squares | 37 x 37 inches (94 x 94 cm) |
| 4×6 | 24 squares | 30 x 45 inches (76 x 114 cm) |
| 6×6 | 36 squares | 45 x 45 inches (114 x 114 cm) |
Multiply yarn quantities by the ratio of new square count to 16. Round up by 10% for safety.
Care Instructions
For acrylic yarns: Machine wash gentle cycle with cold water. Lay flat to dry or tumble dry on low. Do not iron directly on the blanket. Do not bleach.
For natural fiber yarns: Hand wash in cool water with gentle wool wash. Do not wring. Block and lay flat to dry.
Inspect the dimensional flowers periodically for yarn integrity, especially for items used by babies.
You Did It!
I hope you love making this Peach Blossom Baby Blanket as much as I loved designing it. Every time I look at mine, I think of my grandmother and that little sketch she left behind. Maybe your blanket will become an heirloom too, passed down with its own story.
Thank you for trusting me with your time and yarn. It means everything to know these patterns end up in your hands and in the hands of the babies you love.
If you make this crochet pattern, I would absolutely love to see it. Tag me on Instagram or share a photo in our Facebook group. Seeing your finished projects is the best part of my week.
This is one of those patterns worth saving for later. Pin it to your favorite Pinterest board so you can find it when you are ready to start. And if you make this Peach Blossom Granny Square Baby Blanket, please come back and leave a comment below. I read every single one, and your photos make my entire day.
