
I don’t know about you, but I have a serious weakness for dresses that look like they took months to make when they actually follow a logical, manageable structure. The kind of piece that makes people stop and ask "wait, you made that?" All the drama with none of the chaos.
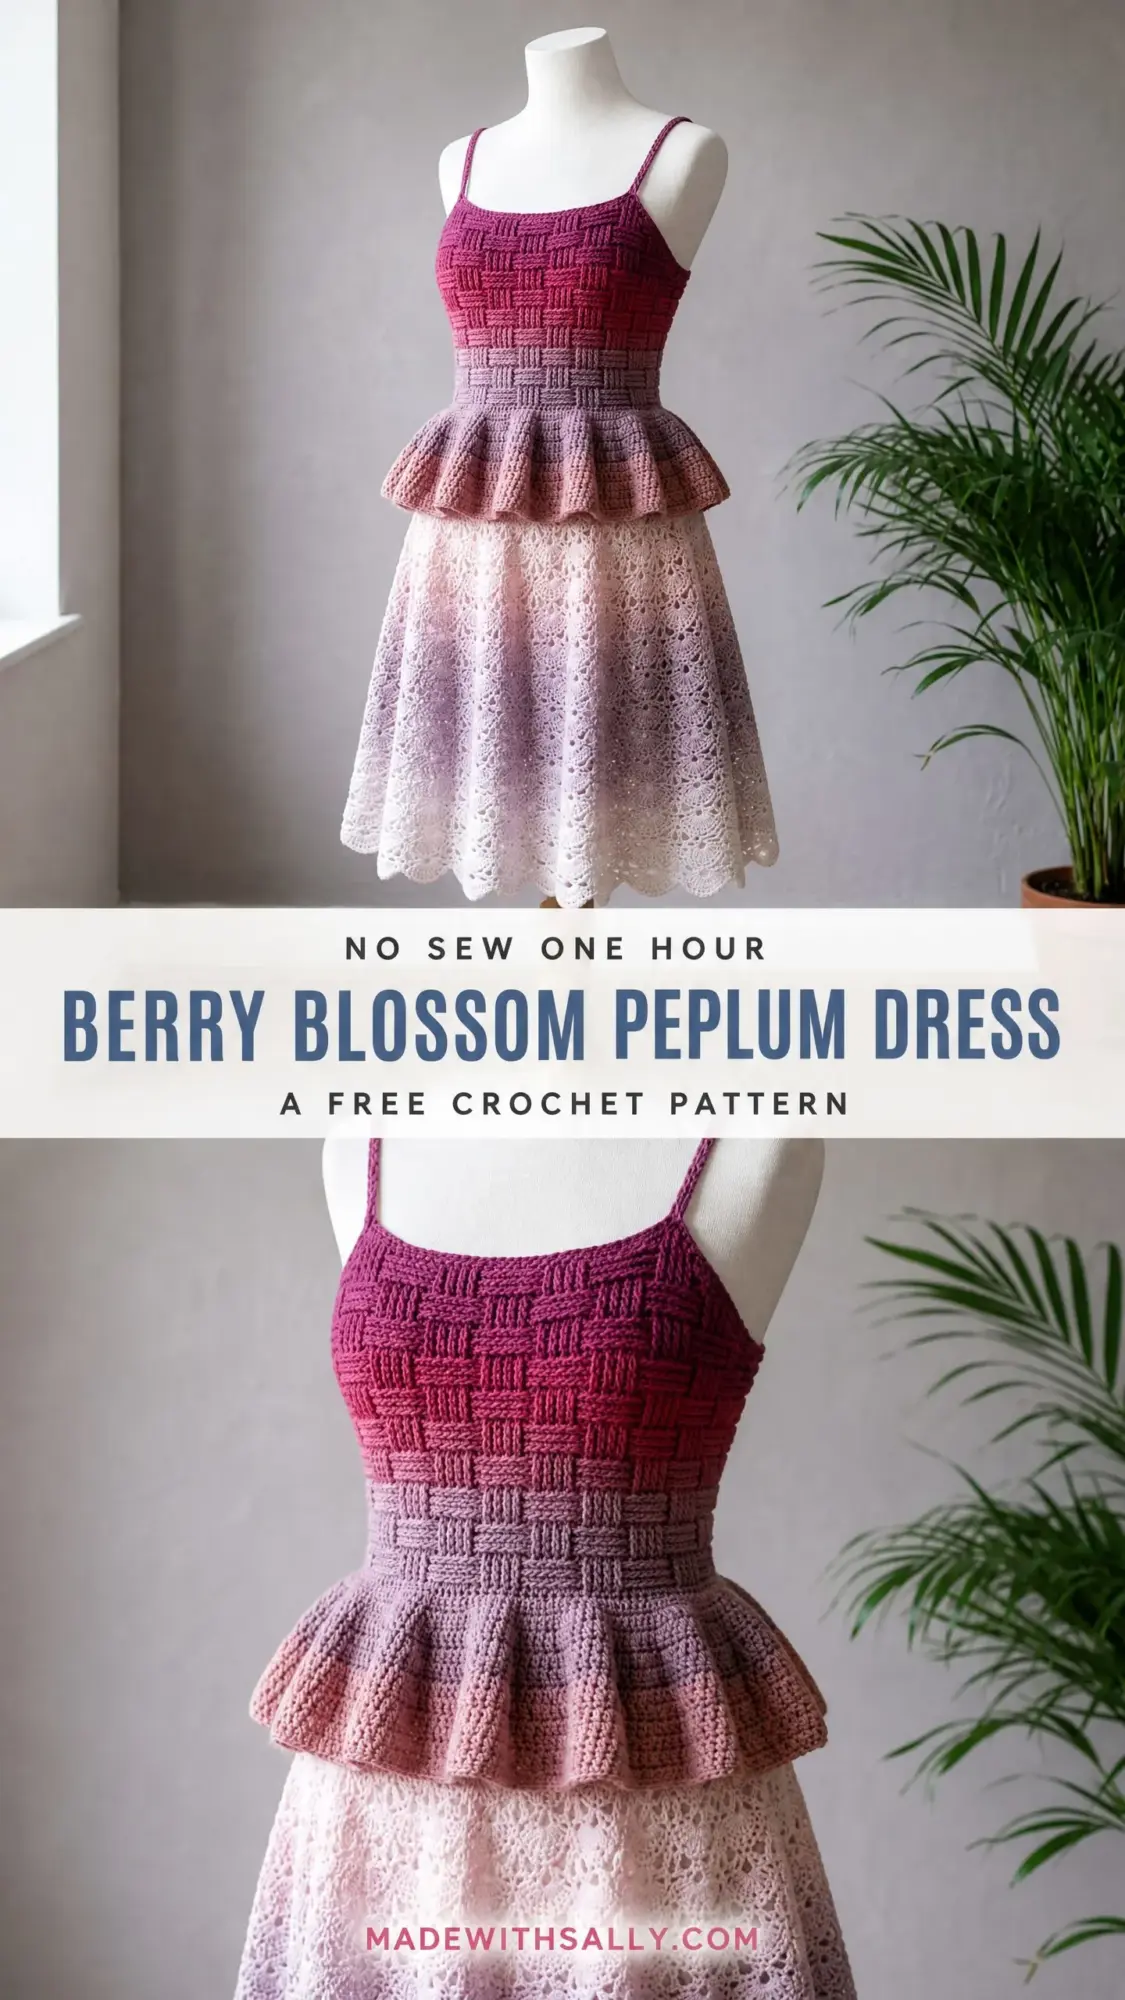
This Berry Blossom Peplum Dress is exactly that kind of project. It combines three distinct textures into one showstopping garment: a structured basketweave bodice, a flirty peplum ruffle at the waist, and a flowing lace skirt that practically floats when you walk. The gradient color story, moving from deep berry through dusty mauve to soft blush, ties everything together beautifully.
Yes, it requires some focus. Yes, you need to be comfortable with a few different techniques. But if you have made a lace shawl and a textured top before, you can absolutely do this. Let me walk you through every single step.
About This Crochet Pattern
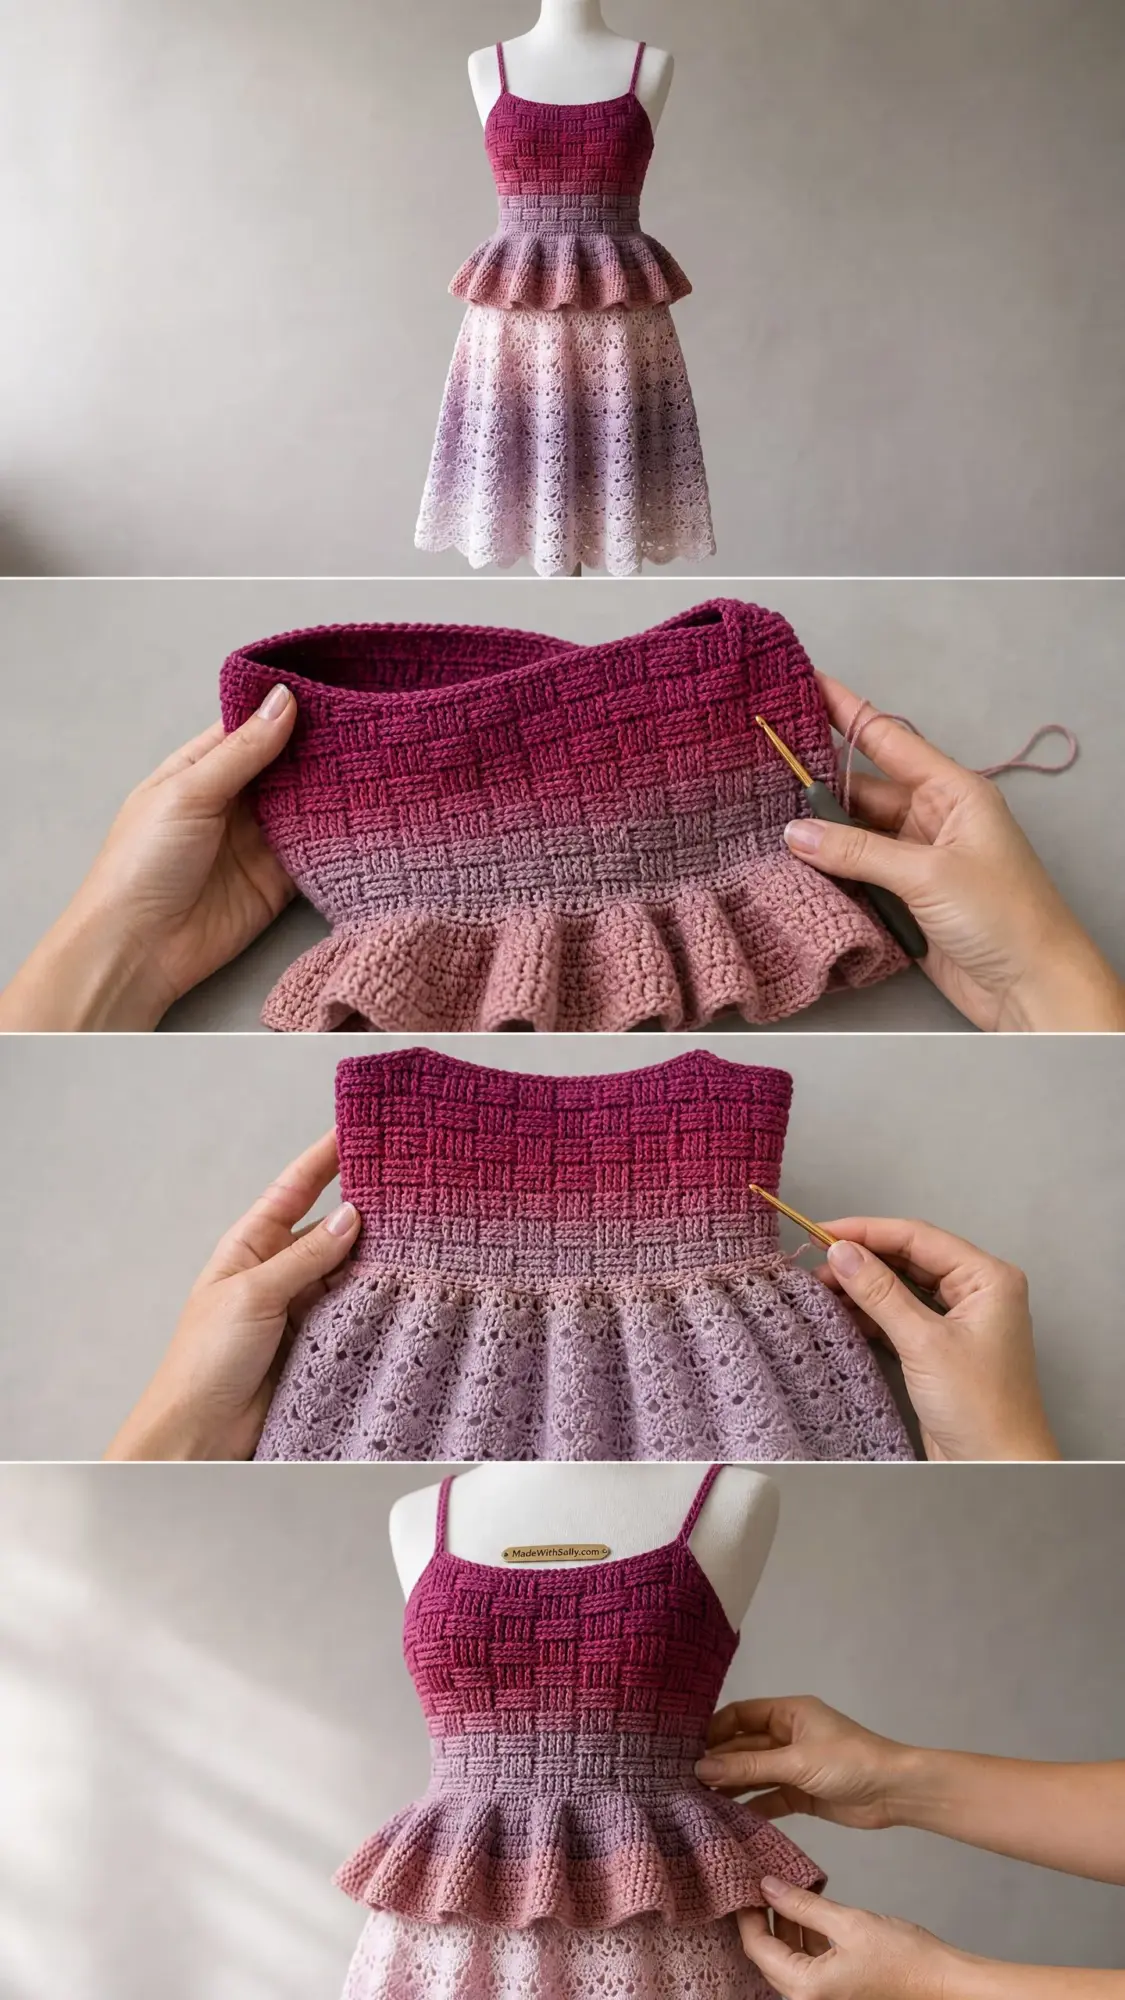
This dress is constructed in separate pieces that come together into one cohesive garment. You will work the bodice panels flat, seam them into a tube, add spaghetti straps, work a peplum ruffle in the round from the waist edge, and then create the lace skirt in the round from that same waist edge. The peplum sits as an overlay while the skirt hangs beneath it as a separate layer.
The color gradient can be achieved two ways. You can use an ombre or self-striping DK weight yarn that transitions naturally from dark to light. Or you can work with three to four coordinating solid colors and change them at designated points in the pattern.
Skill Level: Advanced Intermediate
Time Estimate: Approximately 40 to 55 hours depending on your working speed and experience with textured stitches.
Finished Measurements
This pattern is written for a size Medium with the following finished dimensions:
Size customization tips are included at the end of the instructions.
Materials Needed
Yarn: Approximately 1,200 yards (1,097 m) of DK weight yarn in an ombre colorway transitioning from deep berry through dusty mauve and rose to soft blush. Alternatively, use three coordinating DK solids.
Approximate yardage breakdown:
Hooks:
Notions:
Yarn Suggestions
Option 1: Malabrigo Rios in a hand-painted colorway such as Archangel or Bougainvillea. This superwash merino DK works beautifully for both structured stitch work and flowing lace. Purchase 6 skeins at 210 yards (192 m) per skein.
Option 2: WeCrochet Chroma DK. This self-striping yarn transitions through multiple colors in long gradients, making it ideal for this project. Purchase 6 skeins at 218 yards (199 m) per skein and align the gradient so the darkest section falls at the bodice rows.
Option 3: Paintbox Simply DK in three separate solid colors (Raspberry Pink, Dusty Rose, and Pale Blush). Purchase 2 skeins of each at approximately 220 yards (201 m) per skein.
Avoid overly fuzzy or halo yarns as they obscure the basketweave texture and lace openwork.
Gauge (Critical for Fit)
With E-4 hook and basketweave stitch pattern:
20 stitches and 20 rows = 4 inches (10 cm) in basketweave stitch, blocked
With F-5 hook and lace fan pattern:
One lace repeat (12 stitches) = 2.25 inches (5.7 cm)
8 rows of lace pattern = 4 inches (10 cm), blocked
Make a swatch of at least 6 inches in each stitch pattern. Wash and block before measuring. Adjust hook size as needed.
Abbreviations Used
All abbreviations are in US crochet terminology.
Special Stitches Explained
Front Post Double Crochet (FPdc)
This creates the raised texture in the basketweave pattern. Yarn over, insert your hook from front to back to front around the vertical post of the indicated stitch in the row below (wrapping around the post, not going through the top loops). Yarn over and pull up a loop, then yarn over and pull through 2 loops twice to complete the double crochet.
Back Post Double Crochet (BPdc)
The opposite of FPdc. Yarn over, insert your hook from back to front to back around the vertical post of the indicated stitch in the row below. Complete as a regular double crochet.
Basketweave Pattern
This stitch alternates raised post stitches to create a woven appearance. The pattern works in 4-stitch by 4-row blocks. Rows 1 and 2 of each block work FPdc over 4 stitches followed by BPdc over 4 stitches across. Rows 3 and 4 reverse this, working BPdc over the raised columns and FPdc over the recessed columns.
Shell Stitch
Work (dc, ch 1, dc, ch 1, dc, ch 1, dc, ch 1, dc) all in the same stitch or space. This creates a 5-dc shell with 4 chain-1 spaces between the double crochets.
V-Stitch
Work (dc, ch 2, dc) in the same stitch or space.
Step by Step Instructions
Section 1: Bodice Front
Using E-4 hook and MC (darkest berry), chain 92.
Foundation row (WS): Dc in 4th ch from hook and in each ch across. Turn. (90 dc)
The ch-3 at the start counts as the first dc.
Row 1 (RS): Ch 3, turn. FPdc around next 4 dc, (BPdc around next 4 dc, FPdc around next 4 dc) rep to last st, dc in top of t-ch. (90 sts)
Row 2 (WS): Ch 3, turn. BPdc around next 4 sts, (FPdc around next 4 sts, BPdc around next 4 sts) rep to last st, dc in top of t-ch. (90 sts)
Row 3 (RS): Ch 3, turn. BPdc around next 4 sts, (FPdc around next 4 sts, BPdc around next 4 sts) rep to last st, dc in top of t-ch. (90 sts)
Row 4 (WS): Ch 3, turn. FPdc around next 4 sts, (BPdc around next 4 sts, FPdc around next 4 sts) rep to last st, dc in top of t-ch. (90 sts)
Rows 5 through 8: Repeat rows 1 through 4 once more. (90 sts each row)
Rows 9 through 12: Repeat rows 1 through 4 once more. (90 sts each row)
Rows 13 through 16: Repeat rows 1 through 4 once more. (90 sts each row)
Rows 17 through 20: Repeat rows 1 through 4 once more. (90 sts each row)
Rows 21 through 24: Repeat rows 1 through 4 once more. (90 sts each row)
After Row 24, the bodice front measures approximately 6 inches (15 cm) tall. Fasten off.
Checkpoint: The bodice front panel should measure approximately 18 inches (46 cm) wide and 6 inches (15 cm) tall.
Section 2: Bodice Back
Work exactly as bodice front, Rows 1 through 24. (90 sts, 24 rows)
Section 3: Side Seams
Place bodice front and back with wrong sides together. Using yarn needle and MC, seam the side edges together using a whipstitch or mattress stitch. Leave the top 2 inches (5 cm) of each side open on both sides for armholes. The joined bodice now forms a tube. Turn right side out.
The combined bust circumference is now approximately 36 inches (91 cm).
Section 4: Shoulder Straps (Make 2)
Using E-4 hook and MC, chain 80.
Row 1: Sc in 2nd ch from hook and in each ch across. (79 sc)
Row 2: Ch 1, turn. Sc in each sc across. (79 sc)
Fasten off, leaving a 12-inch (30 cm) tail for attaching.
Position each strap approximately 2.5 inches (6 cm) in from the outer edge of the bodice at front and back top edges. Sew each strap end securely using 6 to 8 stitches through multiple layers. Position back strap attachment points approximately 1.5 inches (4 cm) in from center back so straps cross slightly.
Section 5: Peplum
Switch to F-5 hook. Join yarn with a sl st to any stitch along the bottom edge of the joined bodice tube (the foundation chain edge). The bottom edge has 180 stitches total around.
Setup round: Join yarn, ch 1, sc in each st around. Join with sl st to first sc. (180 sc)
Peplum Round 1 (increase round): Ch 3 (counts as dc), dc in same st as join, 2 dc in each st around. Join with sl st to top of ch-3. (360 dc)
This aggressive doubling forces the fabric to ruffle outward.
Peplum Round 2: Ch 3, dc in each dc around. Join with sl st to top of ch-3. (360 dc)
Peplum Round 3: Ch 3, (dc in next 2 dc, 2 dc in next dc, dc in next dc) 90 times. Join. (450 dc)
Peplum Round 4: Ch 3, dc in each dc around. Join with sl st to top of ch-3. (450 dc)
Peplum Round 5: Ch 3, (dc in next 4 dc, 2 dc in next dc) rep around. Join. (540 dc)
Peplum Round 6: Ch 3, dc in each dc around. Join. (540 dc)
Peplum Round 7: Ch 1, sc in each dc around. Join with sl st to first sc. (540 sc)
Peplum Round 8: Ch 1, sc in each sc around. Join. (540 sc)
Fasten off.
Checkpoint: The peplum should measure approximately 4 inches (10 cm) deep and flare broadly outward from the waist.
Section 6: Skirt
The skirt is joined at the waist of the bodice (the same bottom edge where the peplum was worked). It hangs beneath as a separate layer behind the peplum.
Switch to F-5 hook.
Skirt Setup Round: Join yarn with sl st to waist edge, ch 3, dc in each st around. Join. (180 dc)
Skirt Round 1 (begin lace pattern): Ch 1, sc in first dc, sk 2 dc, shell in next dc, sk 2 dc, sc in next dc, sk 2 dc, shell in next dc, sk 2 dc; rep around. Join with sl st to first sc. (15 shells, 15 sc)
Skirt Round 2: Sl st to center ch-1 sp of first shell (3rd ch-1 sp), ch 1, sc in same sp, ch 5, sc in next sc, ch 5, sc in center sp of next shell, ch 5; rep around. Join. (30 ch-5 arches, 30 sc)
Skirt Round 3: Sl st into first ch-5 arch, ch 3, work shell in same arch, sc in next sc, shell in next ch-5 arch, sc in next sc; rep around. Join to top of ch-3. (15 shells, 15 sc)
Skirt Round 4: Repeat Round 2. (30 ch-5 arches, 30 sc)
Increase Round A (Round 5): Work the lace pattern but for every 3rd arch, work 2 shells separated by a ch-2 instead of 1 shell. This adds 5 shells. New total: (20 shells, 20 sc)
Skirt Rounds 6 through 9: Work even in established lace pattern over 20 repeats. (20 shells, 20 sc each round)
Increase Round B (Round 10): Add 5 shells by doubling 1 shell in every 4th repeat. New total: (25 shells, 25 sc)
Skirt Rounds 11 through 14: Work even over 25 repeats. (25 shells, 25 sc each round)
Increase Round C (Round 15): Add 5 more shells by doubling 1 shell in every 5th repeat. New total: (30 shells, 30 sc)
Skirt Rounds 16 through 22: Work even over 30 repeats. (30 shells, 30 sc each round)
Color gradient note: If working with separate colors, change from mauve to blush at Round 8. Change from blush to near-white at Round 16.
Section 7: Scallop Hem Border
Work this section after Round 22 with the F-5 hook.
Border Round 1: Ch 1, work 10 sc across each shell span (across the 5 dc and 4 ch-sps combined) and 2 sc in each sc between shells. Join. (360 sc)
Border Round 2 (scallop): Sl st to first sc, ch 1, sc in same sc, (ch 3, sk 1 sc, sc in next sc) rep around. Join. (180 ch-3 loops)
Border Round 3: Sl st into first ch-3 sp, ch 1, (sc, hdc, 3 dc, hdc, sc) in each ch-3 sp around. Join. (180 scallops)
Fasten off and weave in end.
Size Customization Tips
To increase or decrease bodice width, add or subtract stitches in multiples of 8. Each 8-stitch change adds or removes approximately 1.5 to 1.75 inches (3.8 to 4.4 cm).
To lengthen or shorten the bodice, add or subtract multiples of 4 rows. Each 4-row change adds or removes approximately 1 inch (2.5 cm).
For the skirt, ensure your starting stitch count is divisible by 12 for the lace repeat.
Finishing and Blocking
Weave in all yarn ends through at least 2 inches (5 cm) of stitches before trimming.
Wet blocking: Submerge the entire dress in cool water with wool wash for 15 to 20 minutes. Gently press out water without wringing. Lay flat on blocking mats and pin to finished measurements. Pin out each scallop point individually. Allow to dry completely.
For the basketweave bodice, smooth it flat and pat into shape without over-blocking, which would flatten the raised texture.
Optional waist stabilization: Cut ribbon or twill tape to your actual waist measurement plus 1 inch (2.5 cm). Tack to the inside of the waist seam line using matching thread.
Care Instructions
Hand wash in cool water using gentle wool-compatible detergent. Do not wring or twist. Lay flat to dry away from direct sunlight. Store folded or on a padded hanger. Do not tumble dry.
There you have it, the complete Berry Blossom Peplum Dress crochet pattern from start to finish. This is the kind of project that feels like an accomplishment when you slip it over your head for the first time. Take your time with each section, trust the process, and do not skip blocking the lace skirt. That final step is what transforms everything.
If you are excited to make this dress, go ahead and pin it to your Pinterest boards so you can find it easily when you are ready to cast on. And please, I would absolutely love to see your finished version. Drop a comment below or tag me on social media when you complete yours. Happy crocheting!
