
A breezy summer top keeps you cool while looking effortlessly stylish. This halter top uses the classic pineapple stitch to create an airy lace fabric that is perfect for beach days, festivals, or layering over a tank. The construction moves from the top down, which means you can try it on as you go. It makes a gorgeous gift for someone who loves bohemian fashion or vintage-inspired pieces.
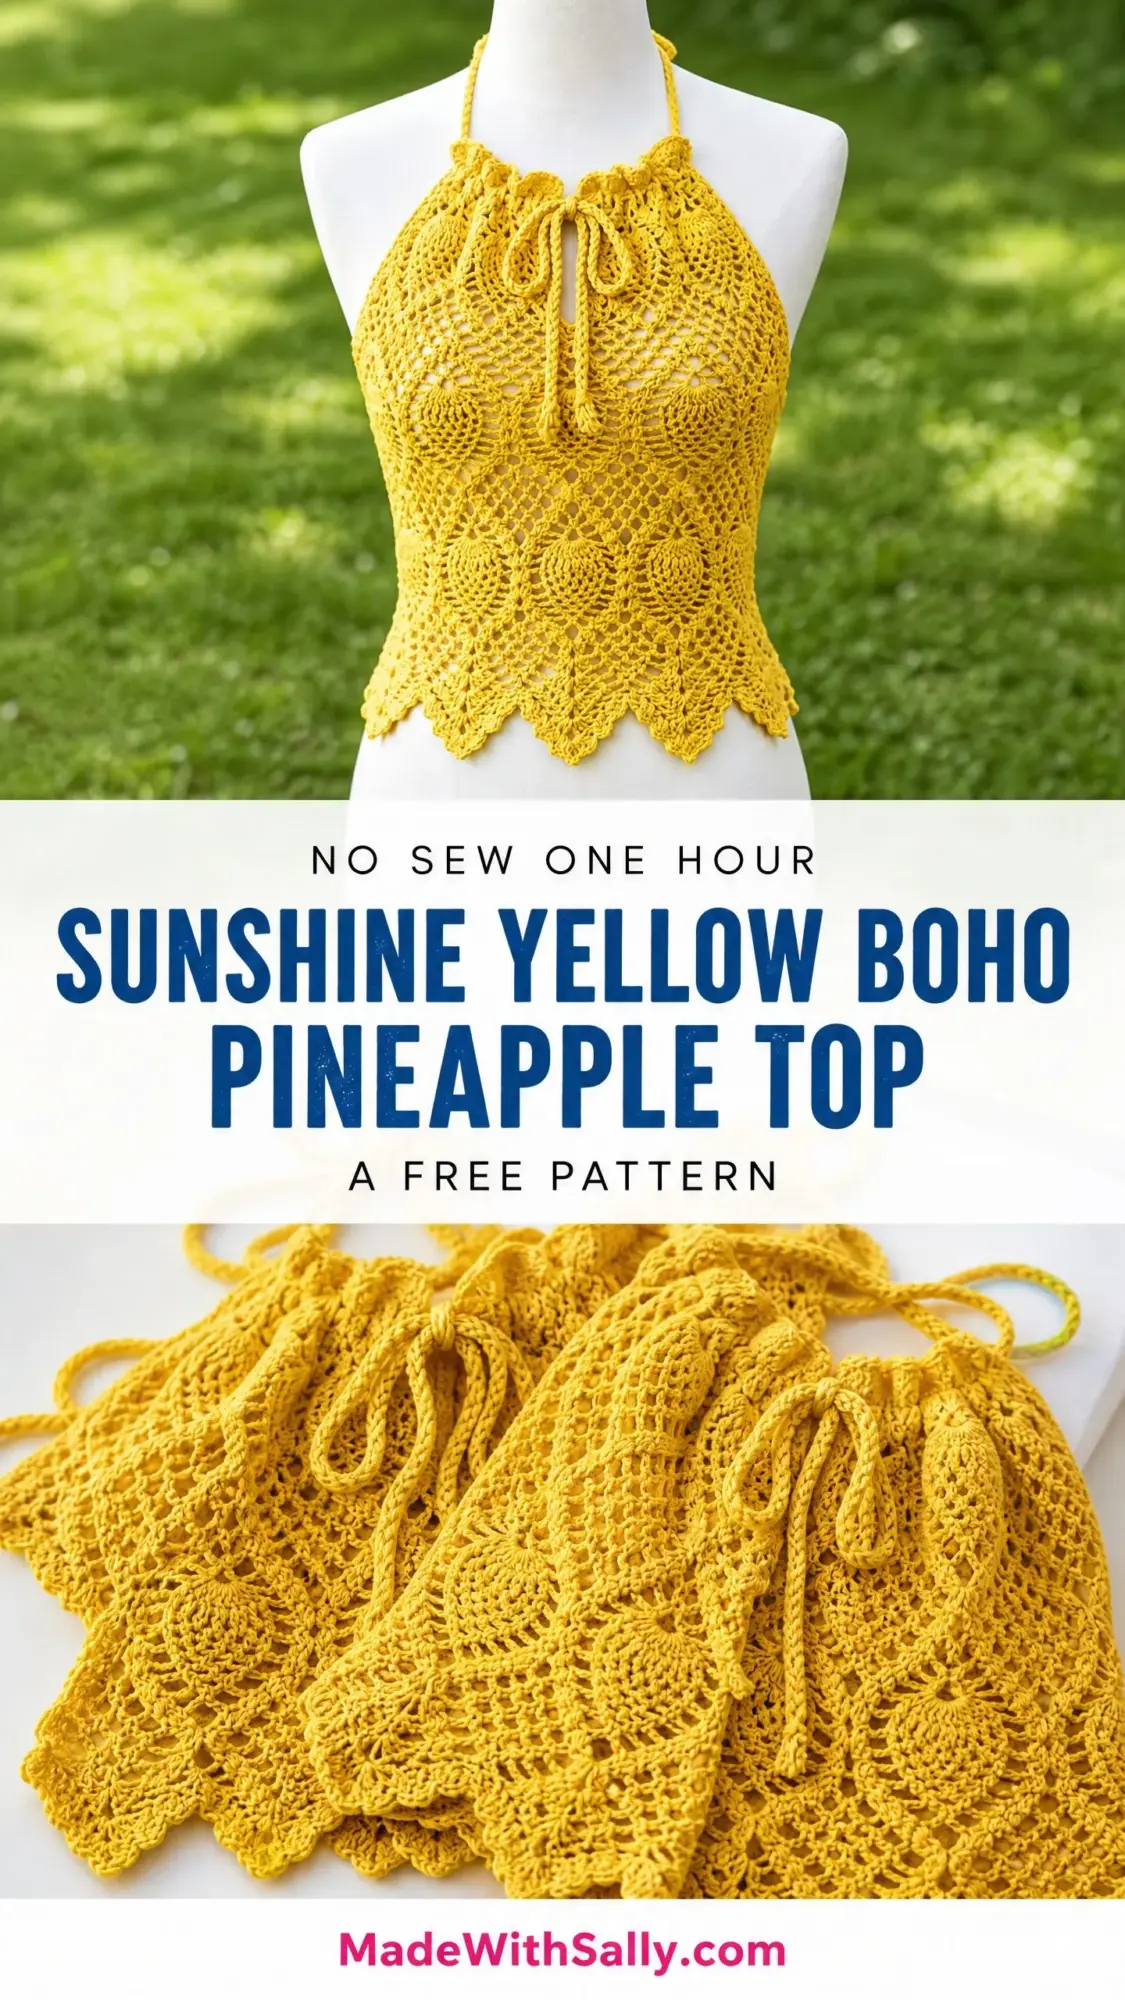
The pineapple stitch might look intimidating at first glance, but I promise it follows a logical rhythm once you get started. You will be working with double crochet (dc), chains (ch), and clusters, all combined in a repeating pattern that becomes almost meditative after the first tier. This pattern is written for intermediate to advanced crocheters, but a confident beginner who has mastered basic stitches can absolutely tackle it with patience.
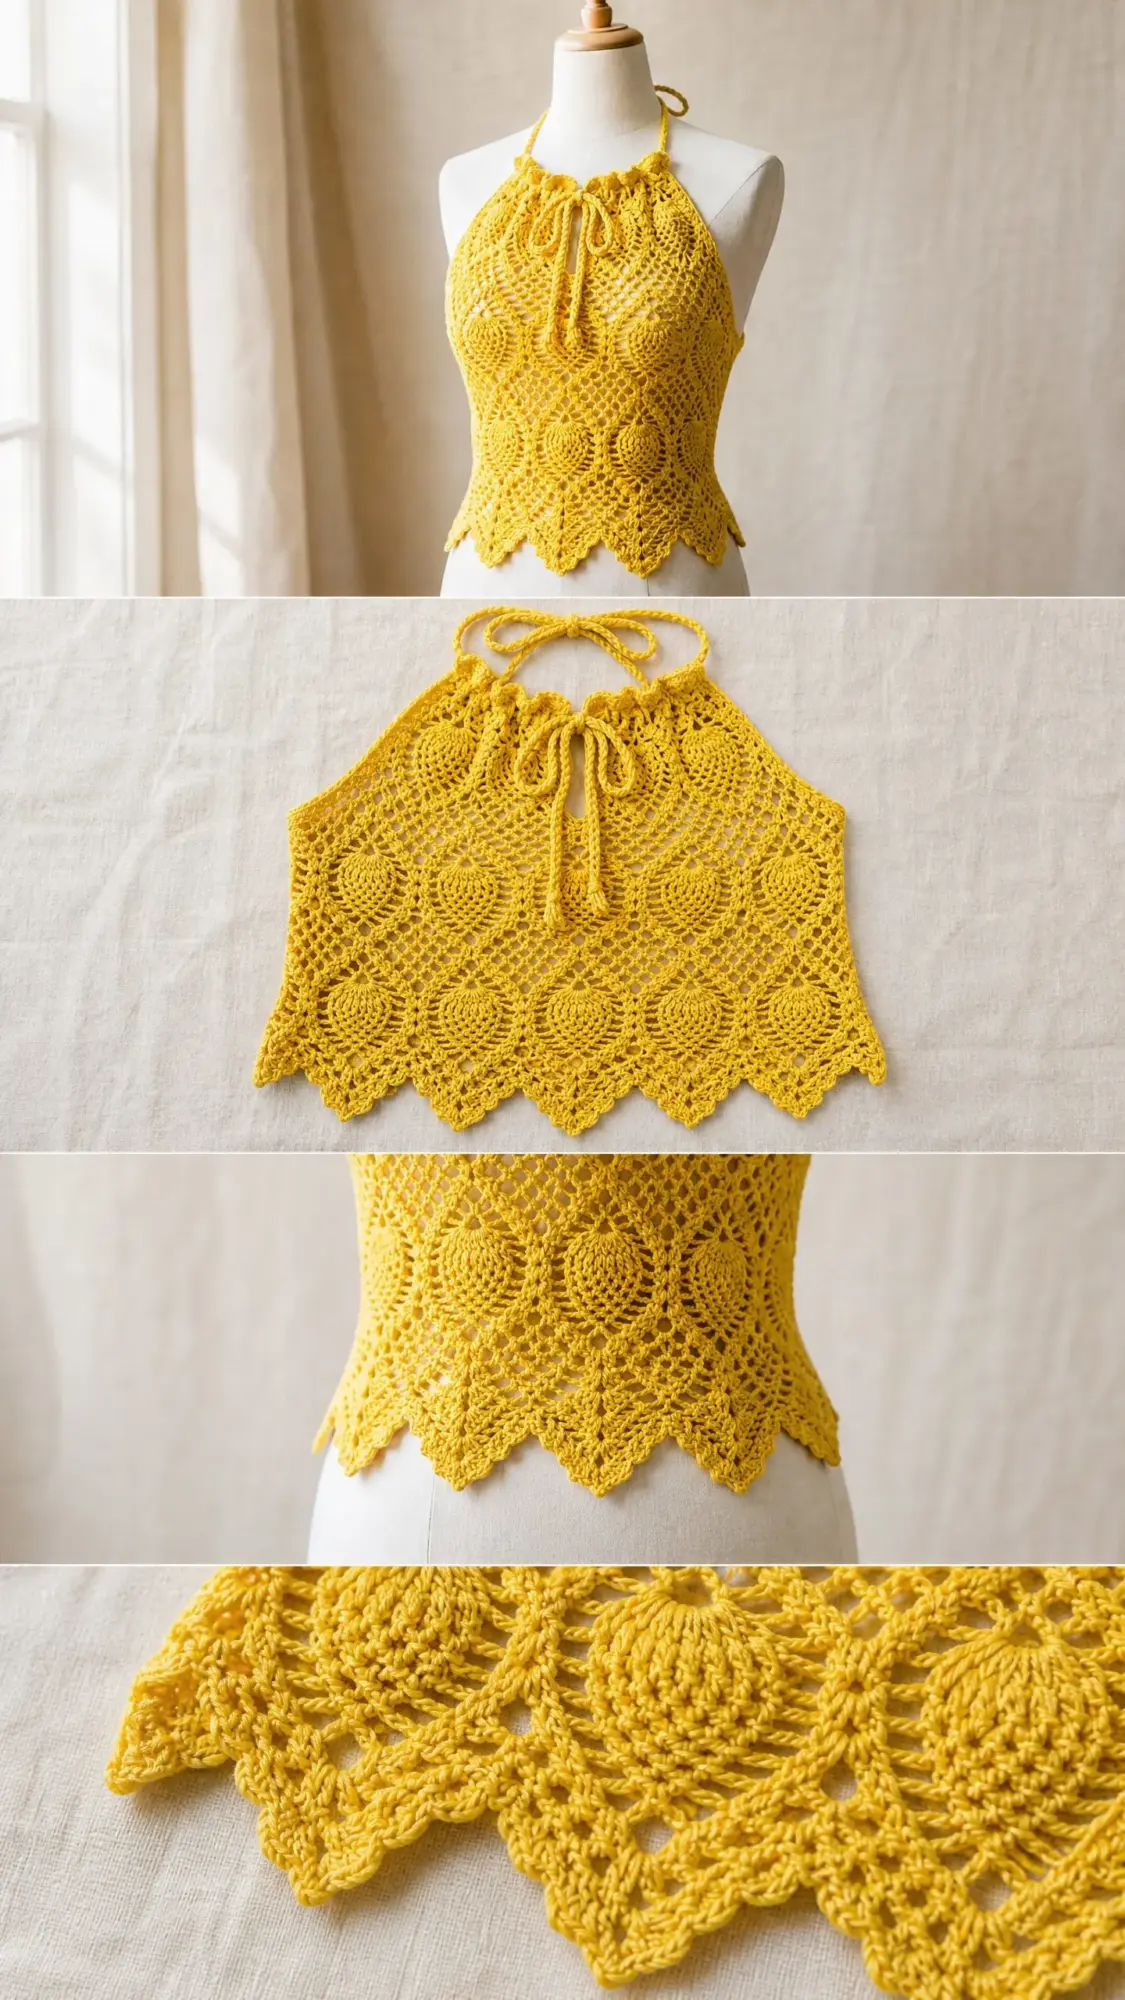
Working time runs about 18 to 25 hours depending on your pace. The finished top features a gathered drawstring neckline, scalloped hem with picot detail, and adjustable halter ties. Four sizes are included, from Small through Extra Large, with clear instructions for customizing fit.
Materials You Will Need
Gather these supplies before you begin your Sunshine Yellow Boho Pineapple Top crochet pattern:
Yarn: Approximately 600 yards for size Small, 650 yards for Medium, 700 yards for Large, or 750 yards for Extra Large. Use DK weight or light worsted weight 100 percent cotton yarn in golden yellow. Smooth, mercerized cotton works best for stitch definition. Fuzzy or textured yarns will hide the beautiful pineapple motif.
Hook: US size E-4 (3.5 mm) crochet hook, or the size needed to match gauge.
Notions: Tapestry needle for weaving in ends, rust-proof pins for blocking, measuring tape, and 4 stitch markers.
Yarn Suggestions
Lion Brand 24/7 Cotton in Goldenrod is an excellent choice. It is DK weight, 100 percent mercerized cotton, with 186 yards per 3.5 oz skein. You will need 4 skeins for all sizes.
Paintbox Yarns Simply DK in Mustard Yellow offers a soft, affordable alternative at 137 yards per 1.75 oz skein. Plan for 5 skeins.
Scheepjes Catona in Lemon Chiffon or Saffron creates a finer lace if you prefer fingering weight. Adjust to a US D-3 (3.25 mm) hook and reswatch.
Always buy one extra skein beyond your size requirement. Running out of yarn mid-project is heartbreaking.
Gauge Information
Getting gauge right is essential for a fitted garment like this one. With DK weight cotton and a US E-4 (3.5 mm) hook, blocked:
One complete pineapple repeat (18 stitches and 10 rows) measures 3.25 inches wide by 4 inches tall.
In basic double crochet fabric: 18 dc equals 4 inches, and 10 rows equals 4 inches.
Make a swatch of at least 4 pineapple repeats wide and 12 rows tall. Block it. Measure it. A difference of even half a stitch per inch will throw off the entire fit.
Finished Sizes
Size Small: Fits bust 32 to 34 inches. Finished garment measures 30 inches around.
Size Medium: Fits bust 34 to 36 inches. Finished garment measures 32 inches around.
Size Large: Fits bust 36 to 38 inches. Finished garment measures 34 inches around.
Size Extra Large: Fits bust 38 to 40 inches. Finished garment measures 36 inches around.
Length from neckline to hem for all sizes: approximately 14.5 inches.
The pattern is written for size Medium. Size adjustments appear in parentheses as Small (Medium, Large, Extra Large). When only one number appears, it applies to all sizes.
Abbreviations and Special Stitches
Let me walk you through every stitch before we begin. Understanding these definitions will make the pattern much easier to follow.
ch = chain. Wrap yarn over hook and pull through the loop on your hook.
sl st = slip stitch. Insert hook, yarn over, pull through both the stitch and the loop on your hook in one motion.
sc = single crochet. Insert hook, yarn over and pull up a loop, yarn over and pull through both loops.
dc = double crochet. Yarn over, insert hook, yarn over and pull up a loop, yarn over and pull through 2 loops, yarn over and pull through remaining 2 loops.
dc2tog = double crochet two together. A decrease that joins two stitches into one.
tr = treble crochet. Yarn over twice before inserting hook, then work off loops two at a time.
sk = skip. Pass over the indicated stitch without working into it.
ch-sp = chain space. The gap created by a chain in the previous row.
t-ch = turning chain. The chain worked at the beginning of a row to bring your hook up to the correct height.
RS = right side. The front of your work.
WS = wrong side. The back of your work.
Special Stitches Defined
Pineapple Cluster (PC): Yarn over, insert hook into the designated stitch or chain space, yarn over and pull up a loop, yarn over and draw through 2 loops. You now have 2 loops on your hook. This is one unfinished double crochet. Work 4 more unfinished double crochets into the same space. You will have 6 loops on your hook. Yarn over and draw through all 6 loops. Chain 1 to close. This creates the rounded top of each pineapple segment.
Shell: Work 5 double crochet stitches all into the same stitch or chain space. This forms a fan shape and appears at the top and bottom of each pineapple.
V-Stitch (V-st): Work 1 double crochet, chain 2, 1 double crochet all into the same stitch or chain space. This creates the diamond lattice framework between pineapple columns.
Picot: Chain 3, slip stitch into the first of those 3 chains. This small decorative loop appears at the hem edge peaks.
Beginning Shell (beg-shell): Chain 3 (this counts as your first dc), then work 4 dc into the same stitch or space.
Pattern Notes Before You Begin
The top is worked in two flat panels. The front panel and back panel are constructed separately from the top down, starting at the neckline. You will seam them together at the sides afterward.
The pineapple pattern is a traditional tiered design. Each pineapple begins as a shell at its base, narrows through progressive rows of clusters with chain spaces, and ends at a single closing stitch at the top. The motifs are arranged so that half-pineapples appear at each side edge for clean seaming.
The front panel is wider than the back panel to provide full bust coverage. The back is largely open above the waist ties.
All turning chains are noted within each row. The turning chain at the beginning of each double crochet row counts as 1 dc unless stated otherwise.
The drawstring neckline is created by working the foundation chain loosely, then threading a separately crocheted cord through the top loops afterward.
Front Panel Instructions
Foundation Chain
Chain 109 (109, 127, 127). This creates your neckline edge. The working stitch count across Row 1 will be 108 (108, 126, 126) stitches.
The pineapple repeat is 18 stitches wide. The front panel uses 6 (6, 7, 7) full repeats.
Row 1 (RS): Ch 1 (does not count as a stitch), sc across the foundation chain. (108, 108, 126, 126 sc)
Row 2 (WS): Ch 3 (counts as dc), turn. Dc in each sc across. (108, 108, 126, 126 dc)
Row 3 (RS): Ch 3, turn. Dc in each of next 2 dc. Ch 2, sk 2 dc, dc in next dc. Repeat (ch 2, sk 2 dc, dc in next dc) across, ending with dc in top of t-ch. You are establishing a lattice of V-stitch columns. (54, 54, 63, 63 dc and 54, 54, 63, 63 ch-2 sp)
Pineapple Tier 1 (Rows 4 through 13)
From this point, each 18-stitch repeat forms one pineapple column. Row 4 begins the base shell of each pineapple.
Row 4 (WS): Ch 3, turn. Dc in first st. (Ch 1, sk 1 sp, Shell in next ch-2 sp, ch 1, sk 1 ch-2 sp, dc in next dc) repeat across, placing final dc in top of t-ch. (108, 108, 126, 126 sts)
Row 5 (RS): Ch 4 (counts as dc plus ch 1), turn. Sc in center dc of shell (3rd dc of shell). Ch 1, dc in next dc. (Ch 1, sc in ch-1 sp, ch 1, sc in next sc, ch 1, sc in ch-1 sp, ch 1, dc in next dc) repeat to end. (108, 108, 126, 126 counted positions)
Row 6 (WS): Ch 3, turn. (Work PC into center sc of the 3-sc group, ch 3, sc into the dc, ch 3) repeat across, ending dc in top of t-ch. (6, 6, 7, 7 clusters)
Row 7 (RS): Ch 1, turn. Sc in first dc. (Ch 3, PC in center of prior PC cluster, ch 3, sc in next sc) repeat across, placing final sc in top of t-ch. (6, 6, 7, 7 PC)
Row 8 (WS): Ch 5 (counts as dc plus ch 2), turn. (Sc in top of PC, ch 2, V-st in next sc, ch 2) repeat across, placing final dc into last sc. (6, 6, 7, 7 V-sts and 6, 6, 7, 7 sc)
Row 9 (RS): Ch 3, turn. (Shell in ch-2 sp of V-st, dc in next sc) repeat across, ending dc in top of t-ch. (6, 6, 7, 7 shells)
Row 10 (WS): Ch 4, turn. (Sc in 3rd dc of shell, ch 1, dc in next dc, ch 1) repeat across. (108, 108, 126, 126 count)
Row 11 (RS): Ch 3, turn. (PC into sc, ch 3, sc in dc, ch 3) repeat across, dc in last st. (6, 6, 7, 7 PC)
Row 12 (WS): Ch 1, turn. Sc in dc. (Ch 2, V-st in top of PC, ch 2, sc in next sc) repeat across. (6, 6, 7, 7 V-sts)
Row 13 (RS): Ch 3, turn. Dc in first st. (Ch 1, Shell in ch-2 sp of V-st, ch 1, dc in next sc) repeat across. (6, 6, 7, 7 shells; 108, 108, 126, 126 count)
Checkpoint 1: Your front panel should measure approximately 4.5 inches from the foundation chain edge. Six (six, seven, seven) pineapple shapes should be visible, each beginning as a wide shell and tapering to a narrow cluster peak.
Pineapple Tier 2 (Rows 14 through 26)
This tier is identical in structure to Tier 1, but the pineapples are offset horizontally by half a repeat.
Row 14 (WS): Ch 4, turn. (Sc in 3rd dc of shell, ch 1, dc in next dc, ch 1) repeat across, ending dc in t-ch. (108, 108, 126, 126 count)
Row 15 (RS): Ch 3, turn. (PC into sc, ch 3, sc in dc, ch 3) repeat across, ending dc in last st. (6, 6, 7, 7 PC)
Row 16 (WS): Ch 1, turn. Sc across tops of PC, placing 1 sc per cluster and 1 sc per chain gap proportionally. (108, 108, 126, 126 sc)
Row 17 (RS): Ch 3, turn. Dc across. (108, 108, 126, 126 dc)
Row 18 (WS): Ch 3, turn. (Dc, ch 2, sk 2, dc) repeat to create V-stitch lattice. (54, 54, 63, 63 V-sts)
Row 19 (RS): Ch 3, turn. Shell in each V-st ch-2 sp, dc between shells. (6, 6, 7, 7 shells; 108, 108, 126, 126 count)
Rows 20 through 26 repeat the pineapple narrowing sequence from Rows 5 through 13.
Row 20: Ch 4, turn. (Sc in 3rd dc of shell, ch 1, dc in next dc, ch 1) repeat. (108, 108, 126, 126 count)
Row 21: Ch 3, turn. (PC into sc, ch 3, sc in dc, ch 3) repeat, dc in last st. (6, 6, 7, 7 PC)
Row 22: Ch 1, turn. Sc in dc. (Ch 3, PC in top of PC, ch 3, sc in next sc) repeat. (6, 6, 7, 7 PC)
Row 23: Ch 5, turn. (Sc in top of PC, ch 2, V-st in sc, ch 2) repeat, dc in last st. (6, 6, 7, 7 V-sts)
Row 24: Ch 3, turn. Shell in each V-st sp, dc between shells. (6, 6, 7, 7 shells; 108, 108, 126, 126 count)
Row 25: Ch 4, turn. (Sc in 3rd dc of shell, ch 1, dc in next dc, ch 1) repeat. (108, 108, 126, 126 count)
Row 26: Ch 3, turn. (PC into sc, ch 3, sc in dc, ch 3) repeat, dc in last st. (6, 6, 7, 7 PC)
Checkpoint 2: Your front panel should measure approximately 9.5 inches from the neckline edge. Two full tiers of pineapple motifs are visible. Width should be 16 (16, 18, 18) inches.
Pineapple Tier 3 and Hem (Rows 27 through 38)
Row 27: Ch 1, turn. Sc in dc. (Ch 3, PC in top of PC, ch 3, sc in sc) repeat across. (6, 6, 7, 7 PC)
Row 28: Ch 5, turn. (Sc in PC top, ch 2, V-st in sc, ch 2) repeat, dc in last st. (6, 6, 7, 7 V-sts)
Row 29: Ch 3, turn. Shell in each V-st sp, dc between. (6, 6, 7, 7 shells; 108, 108, 126, 126 count)
Row 30: Ch 4, turn. (Sc in 3rd dc of shell, ch 1, dc in next dc, ch 1) repeat. (108, 108, 126, 126 count)
Row 31: Ch 3, turn. (PC into sc, ch 3, sc in dc, ch 3) repeat, dc in last st. (6, 6, 7, 7 PC)
Row 32: Ch 1, turn. (Ch 3, PC in PC top, ch 3, sc in sc) repeat. (6, 6, 7, 7 PC)
Row 33: Ch 1, turn. (Ch 3, PC in PC top, ch 3, sc in sc) repeat. (6, 6, 7, 7 PC)
Row 34: Ch 5, turn. (Sc in PC top, ch 2, V-st in sc, ch 2) repeat, dc in last st. (6, 6, 7, 7 V-sts)
Row 35: Ch 3, turn. Shell in each V-st sp, dc between. (6, 6, 7, 7 shells; 108, 108, 126, 126 count)
Row 36 (Hem Scallop Row 1): Ch 1, turn. Sc in first dc. (Ch 2, sc in ch-1 sp between shells, ch 2, sc in center dc of shell) repeat across, sc in last dc. (36, 36, 42, 42 ch-2 sps)
Row 37 (Hem Scallop Row 2): Ch 1, turn. (Sc in sc, Shell in ch-2 sp, sc in next sc, Shell in next ch-2 sp) repeat across, sc in last sc. (12, 12, 14, 14 shells)
Row 38 (Hem Picot Edging): Ch 1, do not turn. Work from right to left: sc in first sc, (sc in each dc of shell, working Picot at the center dc of each shell, sc to next sc) repeat across. Fasten off. (108, 108, 126, 126 sc plus 12, 12, 14, 14 picots)
Checkpoint 3: The completed front panel should measure 14.5 inches from neckline to hem. The scalloped hem should show 12 (12, 14, 14) arched shell scallops with a picot at each peak.
Back Panel Instructions
The back panel provides coverage for the lower torso and creates side seam continuity.
Foundation Chain: Chain 91 (91, 109, 109). Working stitch count: 90 (90, 108, 108). This represents 5 (5, 6, 6) pineapple repeats.
Row 1 (RS): Ch 1, sc across. (90, 90, 108, 108 sc)
Row 2 (WS): Ch 3, dc across. (90, 90, 108, 108 dc)
Work Rows 3 through 38 exactly as for the Front Panel, substituting 5 (5, 6, 6) pineapple repeats wherever 6 (6, 7, 7) repeats appear.
Checkpoint 4: The completed back panel should measure 14.5 inches tall and approximately 14.5 (14.5, 17, 17) inches wide.
Assembly
Place the front and back panels together with wrong sides facing outward. Align the side edges. Using a tapestry needle and yarn, work a slip stitch seam along each side edge from the hem upward for 8 (8, 8.5, 8.5) inches. The remaining upper portion stays open for arm openings.
Turn the garment right side out.
Neckline Finishing
With RS facing, attach yarn at the right corner of the front panel neckline. Work 1 row of sc evenly across the top of the foundation chain. (108, 108, 126, 126 sc)
Neckline Ruffle: Ch 1, turn. (Sc in next sc, ch 2, sk 1 sc) repeat across. (54, 54, 63, 63 ch-2 sps)
Next Ruffle Row: Ch 1, turn. (Sc in sc, 3 sc in ch-2 sp) repeat across. (162, 162, 189, 189 sc)
Fasten off and weave in ends.
Neckline Drawstring Cord
Chain 110. Sl st across the entire chain. Fasten off, leaving a 6-inch tail on each end.
Thread the cord through the sc row at the neckline top, weaving in and out of every other stitch. Pull both ends to gather the neckline and tie in a bow at center front.
Halter Neck Ties
Make 2. Chain 80. Sl st across. Attach one cord to each upper corner of the front panel neckline. These loop around the neck and tie at the back.
Back Waist Ties
Make 2. Chain 60. Sl st across. Attach one tie to each upper corner of the back panel. These cross at the back and tie in a bow.
Blocking Your Pineapple Top
Wet blocking is essential. Submerge the completed top in cool water and gently press out excess water without wringing. Lay flat on a blocking mat or towels. Pin the hem scallops to shape, placing one pin at each picot peak. Pin the side edges straight and the neckline ruffle open.
Allow to dry completely, which may take 24 to 48 hours. Do not apply heat. Once dry, the pineapple lace motifs will be fully open and the garment will hold its shape beautifully.
Size Customization Tips
To add a size, add one full pineapple repeat (18 stitches) to both foundation chains. Each additional repeat adds approximately 3.25 inches of width.
To shorten the top into a crop style, omit Tier 3 (Rows 27 through 34) and proceed directly to the hem scallop rows. This produces a top approximately 10 inches long.
To lengthen, add a fourth pineapple tier by repeating Rows 14 through 26 once more before the hem. This adds approximately 4.5 inches.
Care Instructions
Machine wash on the delicate cycle in cold water using a mesh laundry bag. Alternatively, hand wash in cool water with mild detergent. Reshape while damp and lay flat to dry. Do not tumble dry or iron directly on the fabric.
Store folded rather than hung to prevent stretching.
Thank you so much for choosing this pattern! I had such a wonderful time putting together this step-by-step crochet tutorial, and I truly hope you love making your own Sunshine Yellow Boho Pineapple Top. If you have questions along the way, drop them in the comments and I will do my best to help.
If you make this top, I would absolutely love to see it! Tag me on Instagram or share a photo in our Facebook group. Seeing your finished projects genuinely makes my day.
Go ahead and pin this pattern to your crochet board on Pinterest so you can find it when you are ready to start. And please leave a comment below once you finish yours. I cannot wait to see the beautiful tops you create!
