
Let me guess. You saw this sweater and thought, "There is no way I can make that." A dimensional deer head? Snowflakes scattered across an open mesh body? Antlers that actually stand up? It looks like something from a high-end boutique or a professional crochet designer’s portfolio.
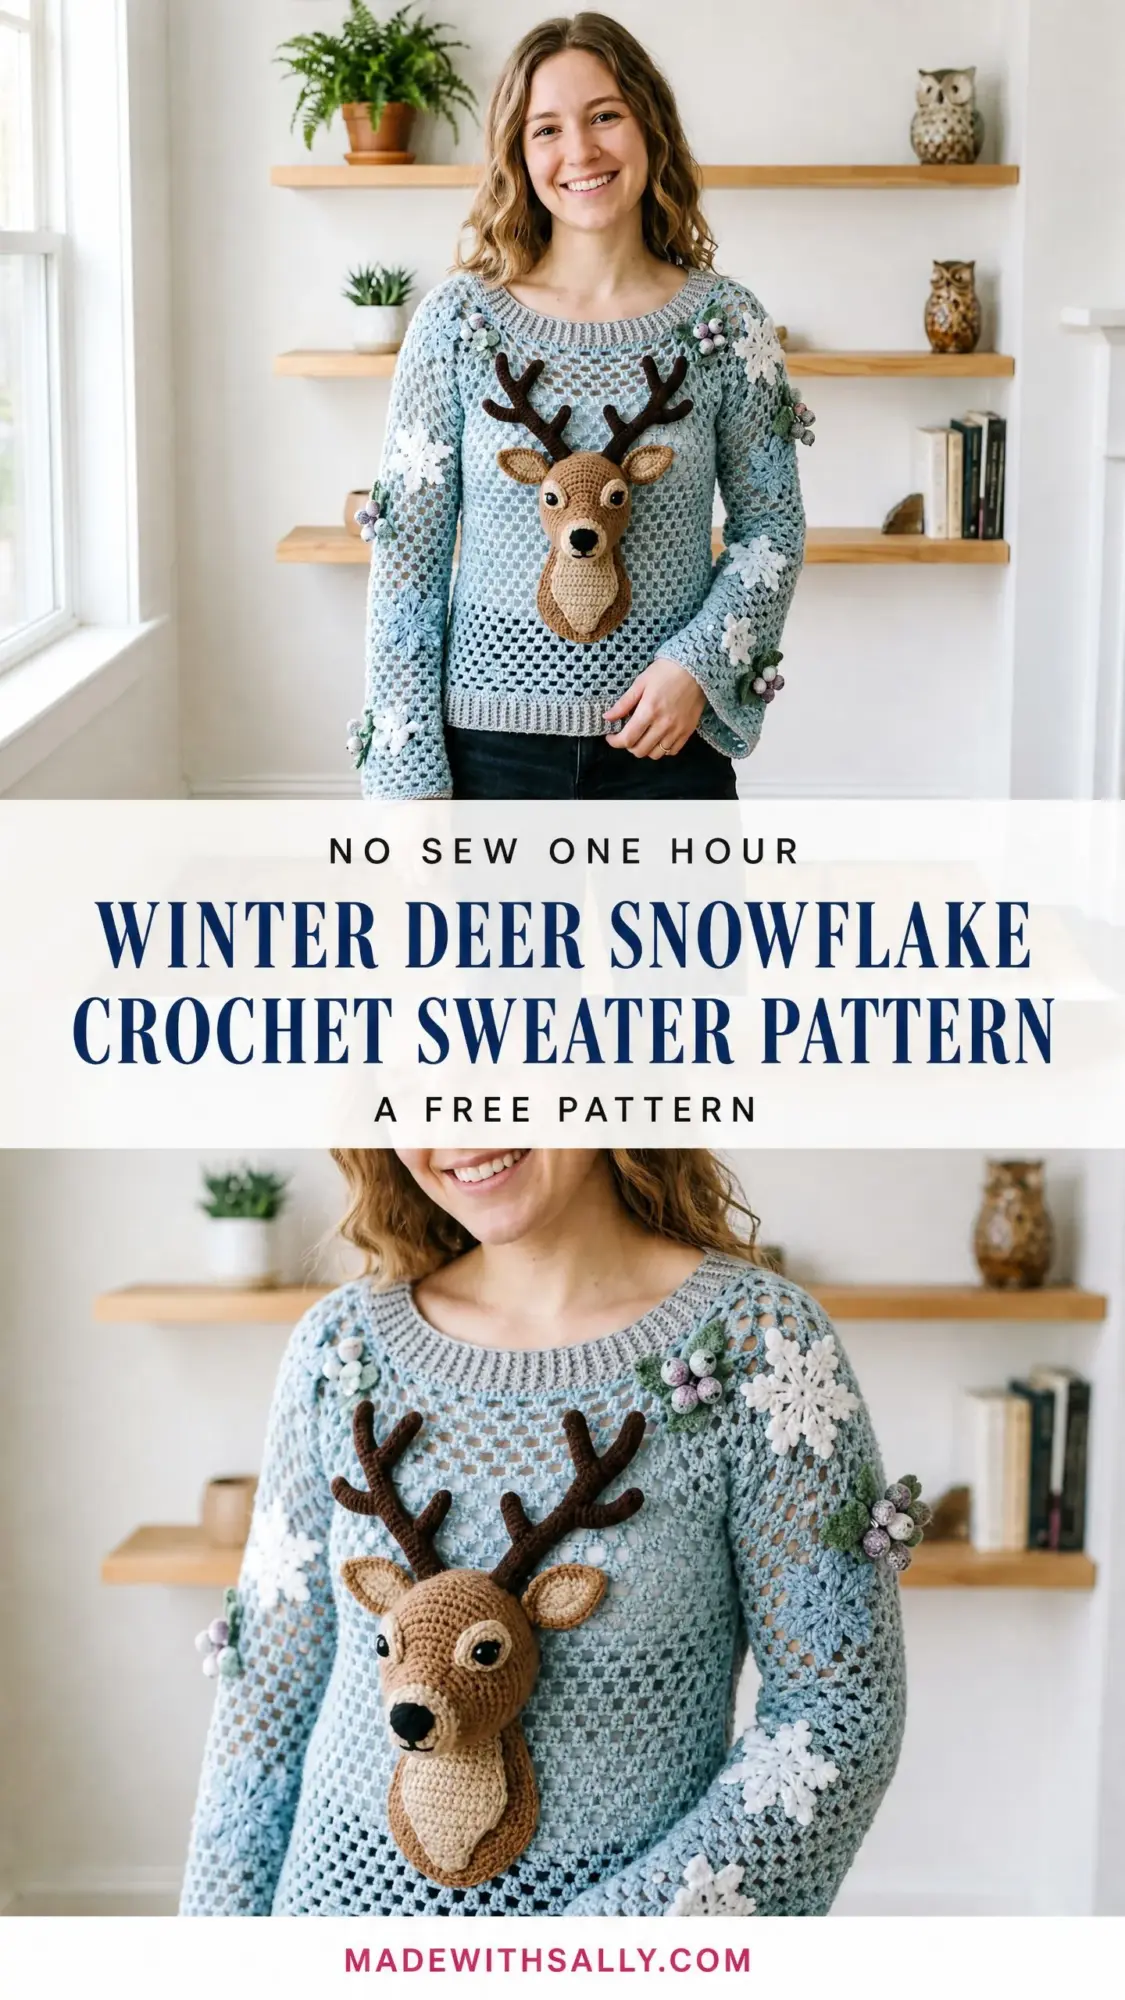
Here is the truth. Yes, this is an advanced project. But if you can crochet in the round, work basic increases and decreases, and follow a pattern step by step, you can absolutely make this sweater. Every single element breaks down into techniques you probably already know. The deer head is just amigurumi. The body is a simple repeating mesh stitch. The snowflakes are quick little motifs you have likely made before.
I am going to walk you through this entire Winter Deer Snowflake Crochet Sweater pattern piece by piece. By the end, you will see that what looks impossibly complex is really just a collection of manageable parts sewn together beautifully.
About This Crochet Sweater Pattern
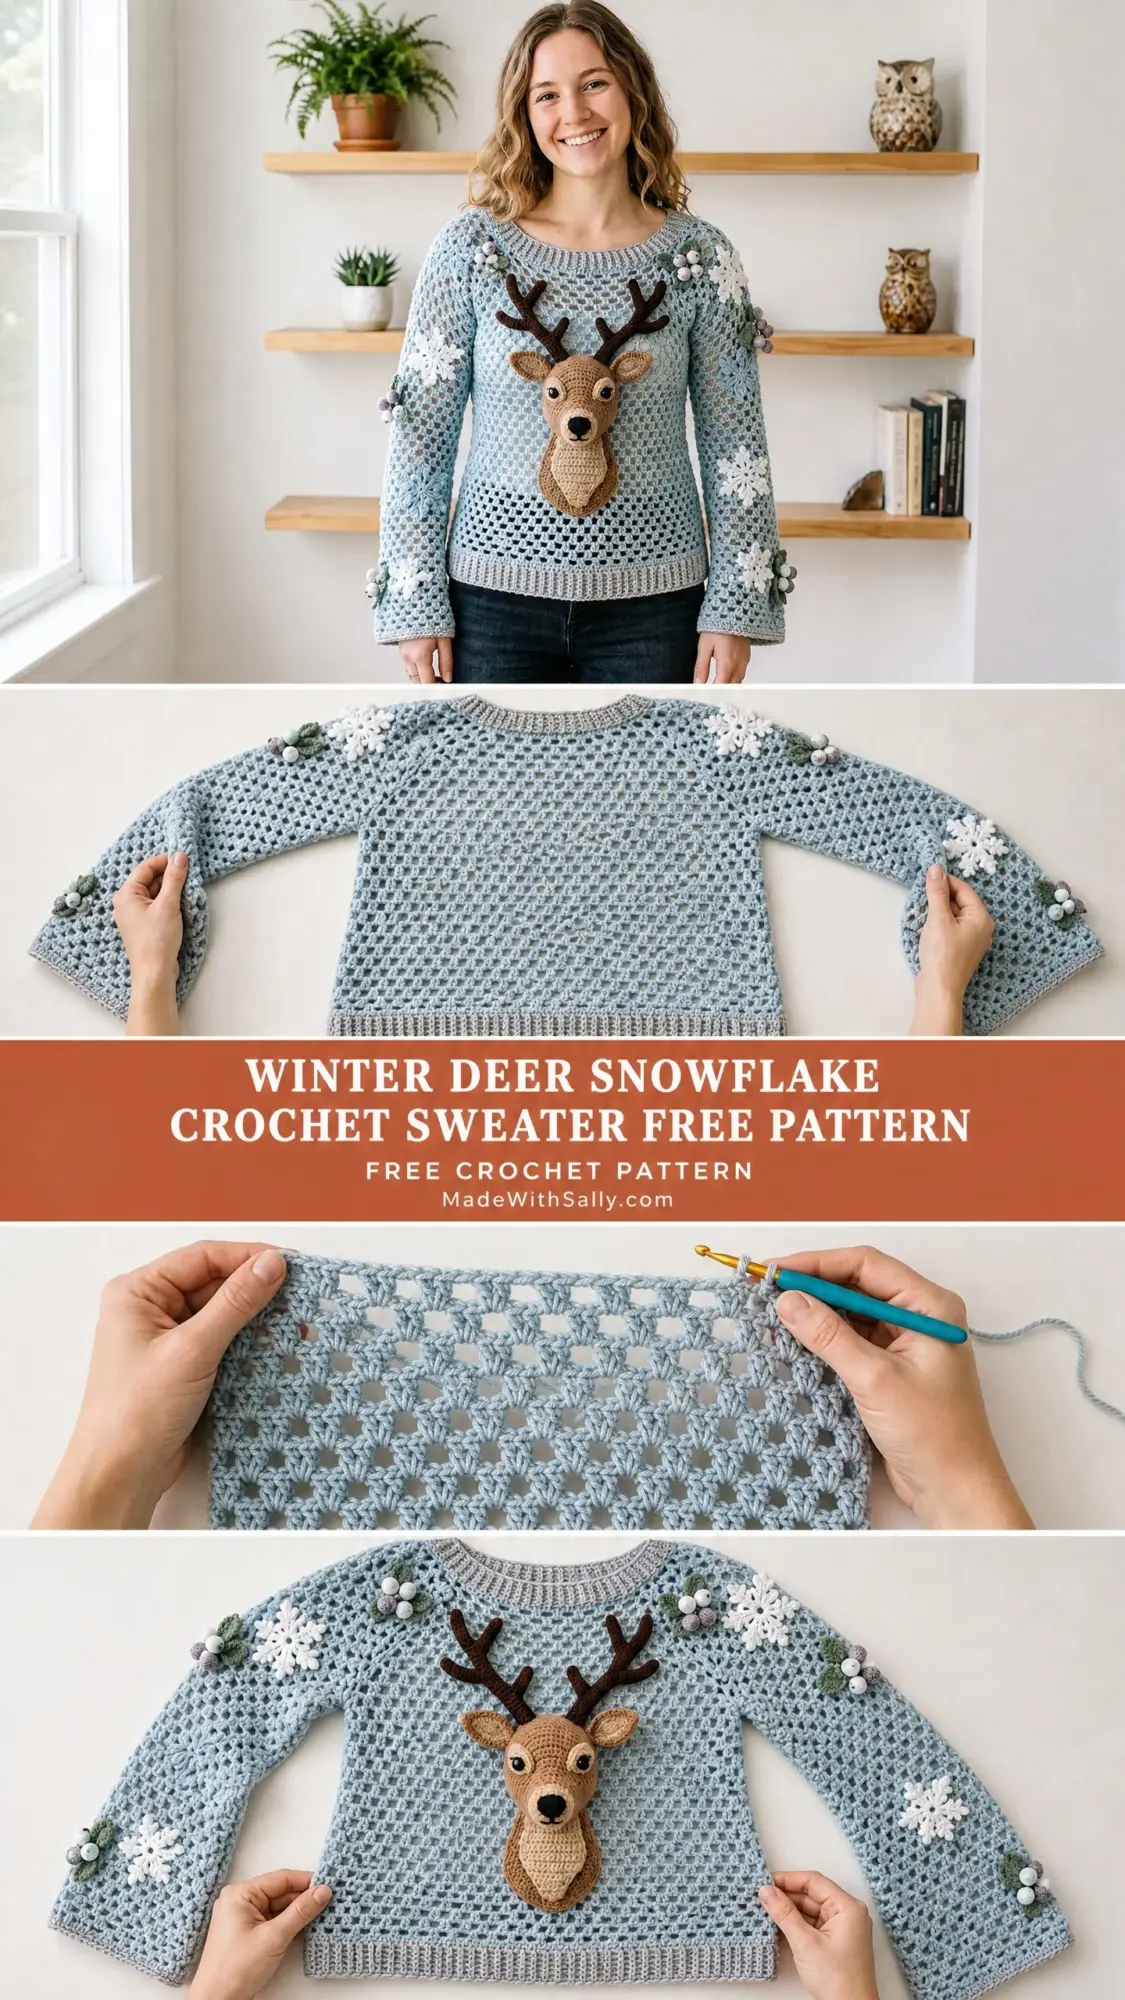
This cozy pullover features an open linen lattice mesh body, a three-dimensional amigurumi deer head applique, delicate crochet snowflake appliques, berry cluster embellishments, and leaf sprigs. The silhouette is relaxed with a wide round neckline, long bell-flared sleeves, and ribbed cuffs and hem band.
The finished size for the written instructions is a Medium with a 40 inch bust measurement and 24 inch body length from shoulder to hem. The sweater has 4 inches of positive ease for a comfortable, relaxed fit.
Skill Level: Advanced. You should be comfortable with working in the round, seaming, gauge-critical garment shaping, and amigurumi construction.
Time Estimate: Approximately 60 to 90 hours total. The deer head and embellishments alone account for roughly 12 to 18 hours.
Materials You Will Need
Yarn
You will need DK weight yarn in several colors:
Recommended Yarns:
Hooks
Notions
Gauge
Getting gauge right is critical for a wearable garment. Please swatch before starting.
In Linen Lattice Mesh pattern with G-6 hook:
In single crochet ribbing with E-4 hook:
Make a swatch at least 6 x 6 inches, wash and block it, then measure.
Abbreviations and Special Stitches
Let me define every stitch you will encounter:
Linen Lattice Mesh (Special Stitch)
This creates the beautiful open diagonal lattice of the sweater body. It requires a stitch count divisible by 4 plus 2.
Row 1 (RS): Ch 1 (does not count as st), sc in first st, ch 2, sk 2 sts, sc in next st rep across, sc in last st. Turn.
Row 2 (WS): Ch 3 (counts as first dc), 2 dc in ch-2 sp rep across, dc in last sc. Turn.
Row 3 (RS): Ch 1, sc in first dc, ch 2, sk 2 dc, sc in next dc rep across placing final sc in top of t-ch. Turn.
Repeat Rows 2 and 3 for the pattern.
Ribbing Stitch
Row 1: Ch 1 (does not count as st), BPsc in first st, FPsc in next st, BPsc, FPsc rep to end. Turn.
Repeat Row 1 for all ribbing sections.
Construction Order
Before diving in, here is how this sweater comes together:
1. Back Panel
2. Front Panel
3. Shoulder seams
4. Side seams
5. Sleeve Panels (make 2)
6. Sleeve seams
7. Set-in sleeves
8. Hem Ribbing Band
9. Cuff Ribbing Bands (make 2)
10. Neckline Ribbing
11. Deer Head
12. Deer Antlers
13. Snowflake Appliques (make 6)
14. Berry Clusters (make 8)
15. Leaf Sprigs (make 10)
16. Assembly and blocking
Step-by-Step Crochet Pattern Instructions
Back Panel
Using MC and US size G-6 / 4.0 mm hook, ch 82.
Foundation Row (RS): Sc in second ch from hook and in each ch across. Turn. (81 sc)
Transition Row 1 (WS): Ch 3 (counts as dc), dc in next st, 2 dc in next st, dc in following st rep across to last st, dc in last st. Turn. (82 dc)
Row 2 (RS): Ch 1, sc in first dc, ch 2, sk 2 dc, sc in next dc rep across to end, placing final sc in top of t-ch. Turn. (21 sc anchors, 20 ch-2 spaces)
Row 3 (WS): Ch 3 (counts as first dc), 2 dc in ch-2 sp rep across, dc in last sc. Turn. (42 dc)
Row 4 (RS): Ch 1, sc in first dc, ch 2, sk 2 dc, sc in next dc rep across, final sc in top of t-ch. Turn. (21 sc anchors, 20 ch-2 spaces)
Repeat Rows 3 and 4 for a total of 40 rows of mesh pattern (20 repetitions of the Row 3/Row 4 pair). This measures approximately 20 inches in body length.
Checkpoint: Your Back Panel should measure approximately 20 inches tall and 20 inches wide.
Armhole Shaping for Back Panel
Armhole Row 1 (RS): Sl st across first 4 sts, ch 1, sc in same st as last sl st, continue in mesh pattern to last 4 sts, leave last 4 sts unworked. Turn. (17 sc anchors, 16 ch-2 spaces)
Continue in Linen Lattice Mesh pattern for 16 more rows (8 repetitions of the Row 3/Row 4 pair). This equals approximately 8 inches of armhole depth.
Shoulder and Neck Shaping for Back Panel
Left Shoulder: Work mesh across first 5 sc anchors (4 mesh repeats). Turn. Work 2 more rows on these 5 sc anchors only. Fasten off.
Right Shoulder: Rejoin yarn at opposite edge. Work mesh across last 5 sc anchors. Work 2 more rows. Fasten off.
The center 7 sc anchors form the back neck opening, approximately 7 inches wide.
Front Panel
Work exactly as Back Panel through the end of armhole shaping.
Neck Shaping for Front Panel
Work only 10 rows of the armhole section before beginning neck shaping (instead of 16).
Left Front Shoulder: Work mesh across first 5 sc anchors. Turn. Continue for 8 more rows. Fasten off.
Right Front Shoulder: Rejoin yarn at opposite edge. Work mesh across last 5 sc anchors. Work 8 more rows straight. Fasten off.
Seaming the Body
Shoulder Seams: With RS together, whip stitch or mattress stitch across each shoulder seam.
Side Seams: With RS together, mattress stitch side seams from hem to armhole. Leave armhole open.
Sleeves (Make 2)
Using MC and G-6 hook, ch 58.
Foundation Row: Sc in second ch from hook and in each ch across. Turn. (57 sc)
Transition Row: Ch 3, dc in next st, 2 dc in next st, dc in following st rep to last st, dc in last st. Turn. (58 dc)
Sleeve Row 1 (RS): Ch 1, sc in first dc, ch 2, sk 2 dc, sc in next dc rep across, final sc in top of t-ch. Turn. (15 sc anchors, 14 ch-2 spaces)
Sleeve Row 2 (WS): Ch 3, 2 dc in ch-2 sp rep across, dc in last sc. Turn. (30 dc)
Repeat Sleeve Rows 1 and 2 for 4 rows (2 rep pairs).
Sleeve Flare Increases
Increase Row (RS): Ch 1, sc in first dc, ch 2, sc in same dc (increase at beginning), ch 2, sk 2 dc, sc in next dc rep to last dc, ch 2, sc in same dc, ch 2, sc in top of t-ch (increase at end). Turn. (17 sc anchors, 16 ch-2 spaces)
Work 4 rows straight. Work another Increase Row. (19 sc anchors)
Work 4 rows straight. Work another Increase Row. (21 sc anchors)
Work 4 rows straight.
Sleeve Cap Shaping
Sleeve Cap Row 1 (RS): Sl st across first 2 sc anchors, ch 1, sc in same, continue mesh pattern to last 2 sc anchors, leave unworked. Turn. (11 sc anchors)
Sleeve Cap Row 2 (WS): Sl st across first 4 dc, ch 3, continue filled mesh to last 4 dc, leave unworked. Turn. (18 dc)
Sleeve Cap Row 3 (RS): Sl st 2 sts, continue open mesh, leave 2 sts unworked. Turn. (9 sc anchors)
Continue decreasing 1 sc anchor per side every RS row until 1 sc anchor remains. Fasten off with a long tail.
Sleeve Assembly
Fold sleeve panel so long edges meet. Mattress stitch from cuff to shoulder, creating a tube. Pin sleeve cap to armhole, matching center to shoulder seam. Sew around entire armhole. Repeat for second sleeve.
Hem Ribbing Band
Using MC and E-4 hook, ch 9.
Row 1: Sc in second ch from hook and in each ch across. Turn. (8 sc)
Row 2: Ch 1, BPsc in first st, FPsc in next st, BPsc, FPsc rep across. Turn.
Repeat Row 2 until strip measures 40 inches (approximately 120 rows). Seam short ends together. Whip stitch to lower edge of sweater body.
Cuff Ribbing Bands (Make 2)
Work exactly as Hem Ribbing Band until strip measures 14 inches. Seam short ends and attach to lower edge of each sleeve.
Neckline Ribbing
With RS facing, join MC at left shoulder seam using E-4 hook.
Round 1: Work sc evenly around neckline, approximately 64 sc total. Join with sl st. (64 sc)
Round 2: Ch 1, FPsc in next sc, BPsc in next sc rep around. Join with sl st.
Repeat Round 2 for 6 more rounds (8 rounds total). Fasten off.
Deer Head Crochet Tutorial
This is the showstopper. Work in continuous rounds using CC-A and E-4 hook.
Main Head Piece
Rnd 1: MR, 6 sc into ring. (6 sc)
Rnd 2: Inc in each st around. (12 sc)
Rnd 3: Sc 1, inc rep around. (18 sc)
Rnd 4: Sc 2, inc rep around. (24 sc)
Rnd 5: Sc 3, inc rep around. (30 sc)
Rnd 6: Sc 4, inc rep around. (36 sc)
Rnd 7: Sc 5, inc rep around. (42 sc)
Rnd 8: Sc 6, inc rep around. (48 sc)
Rnds 9-10: Sc around even. (48 sc)
Rnd 11: Sc 6, invdec rep around. (42 sc)
Rnd 12: Sc around even. (42 sc)
Rnd 13: Sc 5, invdec rep around. (36 sc)
Rnd 14: Sc around even. (36 sc)
Rnd 15: Sc 4, invdec rep around. (30 sc)
Insert safety eyes between Rounds 9 and 10, spaced 10 sc apart. Begin stuffing firmly.
Rnd 16: Sc 3, invdec rep around. (24 sc)
Rnd 17: Sc 2, invdec rep around. (18 sc)
Rnd 18: Sc 1, invdec rep around. (12 sc)
Rnd 19: Invdec around. (6 sc)
Fasten off with long tail. Thread through front loops of remaining 6 stitches and pull tight to close.
Deer Snout
Using CC-A:
Rnd 1: MR, 6 sc into ring. (6 sc)
Rnd 2: Inc in each st. (12 sc)
Rnd 3: Sc 1, inc rep. (18 sc)
Rnd 4: Sc around even. (18 sc)
Fasten off. Do not stuff. Pin flat and sew to lower center of deer head. Using CC-F, embroider nose and Y-shaped mouth.
Deer Ears (Make 2)
Outer Ear (CC-A):
Row 1: Ch 2, 3 sc in second ch from hook. Turn. (3 sc)
Row 2: Ch 1, inc in first st, sc 1, inc in last st. Turn. (5 sc)
Row 3: Ch 1, inc, sc 3, inc. Turn. (7 sc)
Row 4: Ch 1, sc across even. Turn. (7 sc)
Row 5: Ch 1, sc2tog, sc 3, sc2tog. Turn. (5 sc)
Row 6: Ch 1, sc2tog, sc 1, sc2tog. Turn. (3 sc)
Fasten off.
Inner Ear (CC-G): Work Rows 1 through 4 only. Fasten off.
Place inner ear on outer ear, whip stitch around edges. Pinch base and sew to sides of deer head.
Deer Antlers (Make 2)
Using CC-B:
Main Shaft: Ch 2, work 3 sc in second ch from hook. Work sc in the round for 10 rounds. (3 sc per round)
Branch 1: Attach yarn at Round 5. Ch 2, sc in second ch, sl st back to shaft. Repeat for second tine.
Branch 2: At top of shaft, work 3 sc in a small ring for 4 rounds. Fasten off.
Snowflake Appliques (Make 6)
Using CC-C and E-4 hook:
Rnd 1: MR, ch 3 (counts as dc), 11 dc into ring, join with sl st. (12 dc)
Rnd 2: Ch 1, sc in first dc, ch 4, sc in same dc, sk 1 dc, sc in next dc rep around ending with sl st. (6 ch-4 arches)
Rnd 3: Into ch-4 arch work (sc, hdc, dc, ch 3, sl st in first ch to form picot, dc, hdc, sc) rep for each arch around. Join. Fasten off.
Each snowflake measures approximately 3 inches point to point.
Berry Clusters (Make 8 Clusters)
Using CC-D:
Individual Berry:
Rnd 1: MR, 6 sc into ring. (6 sc)
Rnd 2: Inc in each st. (12 sc)
Rnd 3: Sc 1, invdec rep. (8 sc)
Rnd 4: Invdec around. (4 sc)
Stuff lightly. Fasten off. For each cluster, make 3 berries. Thread CC-E yarn through all 3 and knot together.
Leaf Sprigs (Make 10)
Using CC-E:
Ch 8.
Row 1: Sl st in second ch from hook, sc in next ch, hdc in next ch, dc in next ch, hdc in next ch, sc in next ch, sl st in last ch. Do not turn. Working back along opposite side: sl st, sc, hdc, dc, hdc, sc, sl st. Join to beginning. Fasten off.
Final Assembly
Deer head: Center on front panel approximately 6 inches below neckline. Sew securely around entire perimeter.
Antlers: Sew to top of head after head is attached.
Snowflakes: Place 2 on front panel (one each side of deer), 2 on sleeves (one per sleeve), 2 along front neckline/shoulder area.
Berry clusters and leaves: Distribute 2 clusters on neckline yoke (one each side), 2 near deer head shoulders, 2 on sleeves.
Block your finished sweater gently using steam or wet blocking on foam mats.
Tips for Success
Take your time with the deer head. This is the centerpiece. Make sure to stuff it firmly so it holds its dimensional shape.
Pin everything before sewing. Lay out all your embellishments on the finished sweater and step back to check placement before committing.
The mesh creates an open fabric. If you want more coverage, wear a camisole or slip underneath.
Block aggressively. The snowflakes especially benefit from blocking to open up their points.
I hope this crochet tutorial gives you the confidence to tackle this stunning Winter Deer Snowflake Crochet Sweater. It is a labor of love, but the finished result is absolutely worth every stitch. You will have a one-of-a-kind wearable art piece that will turn heads at every holiday gathering.
If you make this sweater, I would absolutely love to see it! Tag me on Instagram or share a photo in our Facebook group. Seeing your finished projects genuinely makes my day.
Before you go, save this pattern to your Pinterest boards so you can find it when you are ready to start. And please drop a comment below if you give this one a try. I love hearing how your projects turn out!
