
My best friend called me in tears three weeks before her wedding. The vintage lace capelet she had ordered online arrived looking nothing like the photos. Thin, cheap, and falling apart at the seams. She asked if I could make something, anything, to replace it. I stayed up late sketching designs, digging through my thread stash, and remembering every lace doily my grandmother ever taught me to make.
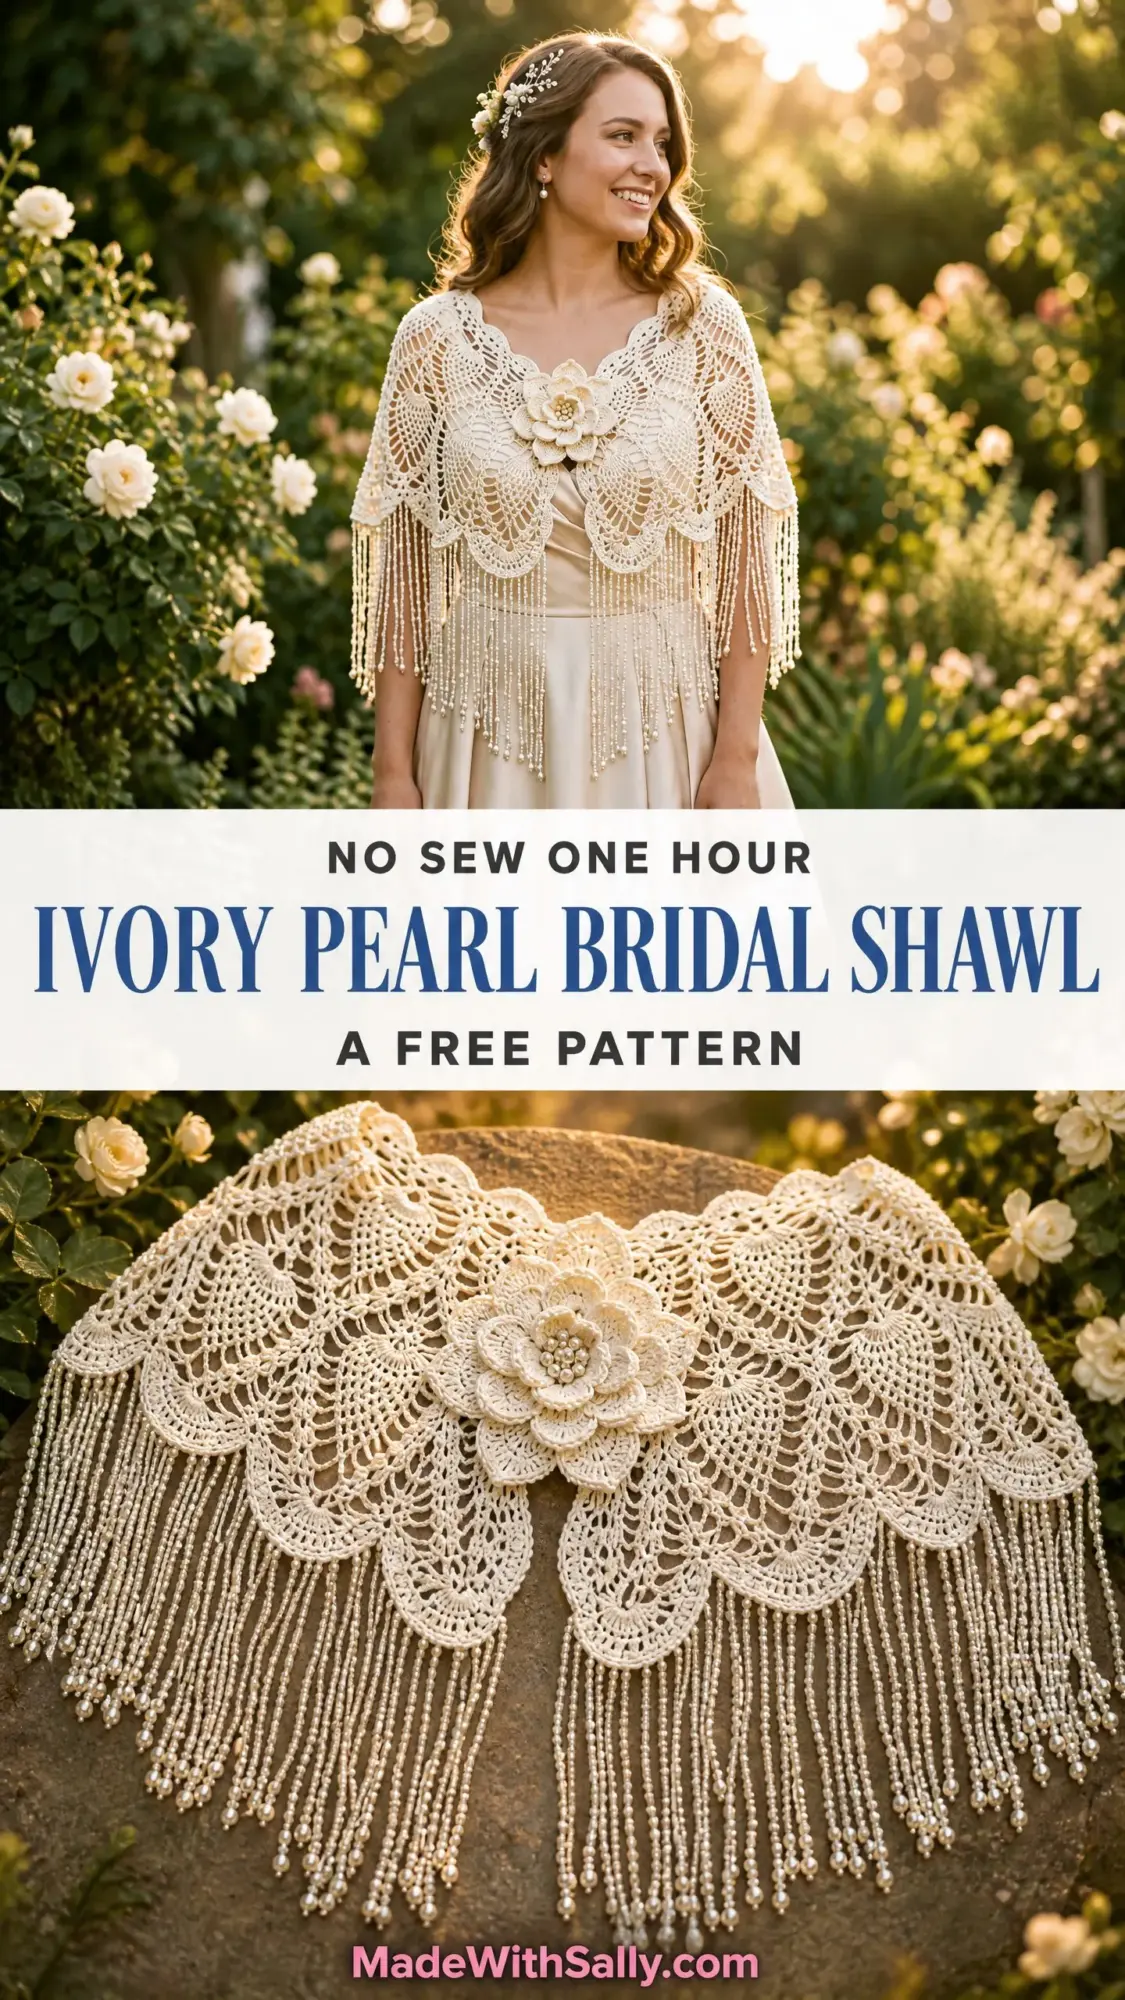
That panicked phone call turned into one of the most beautiful pieces I have ever crocheted. When she walked down the aisle with this ivory capelet draped over her shoulders, beaded fringe catching the light, I cried harder than she did.
Now I am sharing this pattern with you. Whether you are making it for your own wedding, crafting a gift for a bride you love, or simply challenging yourself with heirloom lace techniques, this capelet will become a treasured keepsake for generations.
About This Ivory Pearl Bridal Shawl Pattern
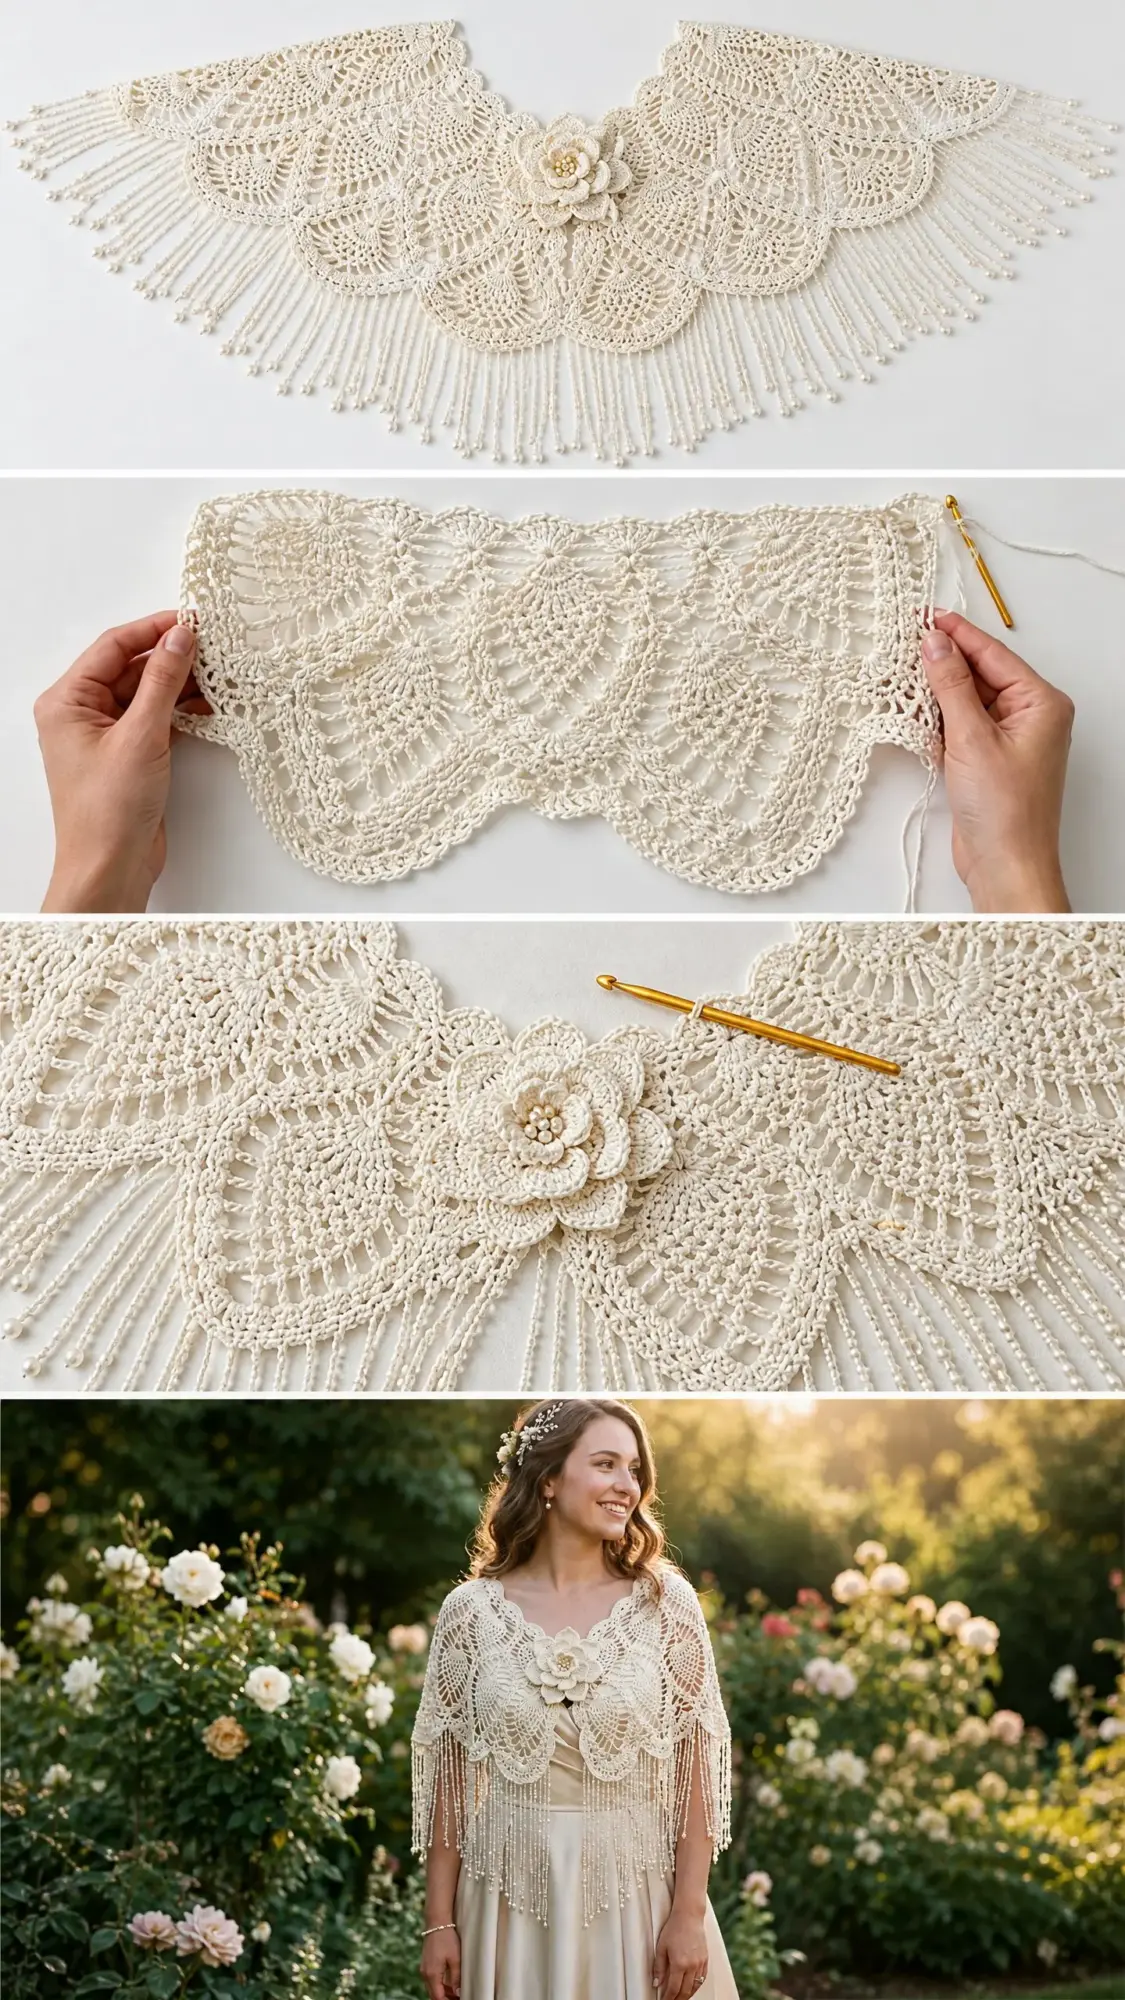
This stunning bridal capelet drapes gracefully over the shoulders and upper arms. It falls to approximately mid-torso at the front and back, creating an elegant silhouette that flatters every body type. The body features a classic pineapple stitch motif arranged in 12 repeating panels, worked in the round from the neckline downward.
The scalloped lower edge transitions into long beaded fringe strands that hang approximately 6 to 7 inches below the body hem. A dimensional crocheted camellia flower serves as both a decorative accent and a closure at center front. The entire piece is worked in a single ivory or cream cotton thread, giving it the appearance of antique lace that looks like it belongs in a museum.
Skill Level: Advanced. This crochet pattern requires confident understanding of working in the round, reading multi-step stitch pattern repeats, executing pineapple fan motifs, constructing dimensional applique flowers, and pre-stringing and attaching beaded fringe. If you have completed at least two lace doily or shawl projects in thread-weight yarn, you will find this accessible with patience.
Time Estimate: Approximately 40 to 60 hours for an experienced lace crocheter, including the flower and fringe.
Finished Measurements
Materials Needed for This Crochet Tutorial
Thread: Size 10 crochet cotton thread (also called bedspread-weight thread), approximately 1,800 to 2,000 yards / 1,645 to 1,830 meters total. Color: ivory or natural cream.
Hook: US Steel Hook Size 7 (1.65 mm). Have a US Steel Hook Size 6 (1.80 mm) available as an optional looser-tension hook for the foundation chain.
Notions:
Recommended Yarn Options
Aunt Lydia’s Classic Crochet Thread Size 10 in Cream or Natural. Widely available, consistent twist, takes blocking beautifully. Approximately 350 yards per ball. Purchase 6 balls.
DMC Traditions Crochet Cotton Size 10 in Ecru. Slightly smoother finish that gives excellent stitch definition in pineapple patterns. Approximately 400 yards per ball. Purchase 5 balls.
Coats and Clark South Maid Crochet Thread Size 10 in Cream. Budget-friendly, widely available, reliable for large lace projects. Approximately 400 yards per ball. Purchase 5 balls.
Substitution Note: Any size 10 crochet cotton with similar yardage and a tightly plied construction will substitute. Avoid loosely spun thread as it will not hold chain-space structure crisp enough for pineapple motifs. Mercerized cotton gives the best sheen for a bridal piece. Do not substitute with acrylic thread as it will not block to shape.
Gauge
Using size 7 steel hook and size 10 crochet cotton:
One complete pineapple fan motif repeat (14 stitches wide at base, as established in Round 9 of body) measures approximately 2.25 inches / 5.7 cm across.
10 rows of dc/ch pattern in pineapple section = approximately 2 inches / 5 cm in height.
Gauge swatch method: Work Rounds 1 through 6 of the pattern instructions. The finished swatch circle should measure approximately 4.5 inches / 11.4 cm in diameter after light blocking. Adjust hook size up or down as needed. Gauge is critical for achieving correct neckline fit and overall drape.
Abbreviations
Before we dive into the step by step instructions, let me walk you through every abbreviation you will encounter. I know this list looks long, but I promise each term will make sense as you work.
Special Stitches Explained
These special techniques are what give this bridal shawl pattern its distinctive lace appearance. Take your time learning them before starting.
Treble Crochet Cluster (tr-cl)
A cluster worked over a specified number of treble crochets, all joined at the top.
Step 1: Yarn over twice, insert hook into designated stitch or space.
Step 2: Yarn over, pull up a loop (4 loops on hook).
Step 3: Yarn over, pull through 2 loops (3 loops on hook).
Step 4: Yarn over, pull through 2 loops (2 loops on hook). One incomplete treble crochet made.
Step 5: Repeat Steps 1 through 4 for each additional treble in the cluster, always beginning with "yarn over twice, insert hook" into the same stitch or space. After the last incomplete treble, yarn over and pull through all remaining loops on hook to close the cluster.
For a 3-tr-cl: complete Steps 1 through 4 three times, then close. For a 5-tr-cl: repeat five times.
Double Crochet Cluster (dc-cl)
Same method as tr-cl but using double crochet (yarn over once).
Step 1: Yarn over once, insert hook into designated space.
Step 2: Yarn over, pull up loop (3 loops on hook).
Step 3: Yarn over, pull through 2 loops (2 loops on hook). One incomplete dc made.
Step 4: Repeat Steps 1 through 3 in same space. After second incomplete dc, yarn over and pull through all 3 loops to close.
Pineapple Fan
A wedge-shaped lace motif formed by working a fan of 9 double crochet stitches into a single chain space at the base. In subsequent rounds, you work decreasing treble crochet clusters across the fan to create the tapered "pineapple" shape.
Shell
5 dc worked into the same stitch or chain space unless otherwise noted.
Picot
Ch 3, sl st into the first ch of ch-3. Creates a small decorative loop at the tip of a scallop.
V-Stitch (V-st)
(Dc, ch 2, dc) worked into the same stitch or chain space.
Pattern Notes Before You Begin
Please read these notes carefully. They will save you hours of confusion and frogging.
1. The capelet is worked in joined rounds from the neckline downward. Do not turn work unless specifically instructed.
2. The right side faces outward throughout construction. Join each round with a slip stitch to the top of the beginning chain (or to the first stitch of the round as noted), then work a beginning chain to begin the next round.
3. Beginning chain substitutions: ch 3 counts as dc throughout. Ch 4 counts as tr throughout. Ch 5 counts as dtr throughout.
4. Stitch markers: Place a marker in the first stitch of each round and move it up each round. Additionally, place markers at each pineapple fan apex beginning in Round 9 to track repeat boundaries.
5. Pineapple construction overview: Rounds 1 through 8 establish the neckline circle with increasing dc and V-stitch rounds. Rounds 9 through 11 set up the 12 pineapple fan bases. Rounds 12 through 22 develop the pineapples upward (narrowing by one tr each right-side round). Round 23 works the scalloped hem. The fringe is attached after blocking.
6. The beaded fringe is created by cutting thread lengths, folding them, pre-threading pearl beads onto each strand, and attaching the folded ends to the scallop chain spaces along the hem.
7. The camellia flower is worked flat in spiraling rounds and then shaped into a dimensional bloom.
8. Block aggressively before attaching fringe and flower. Pinning open each pineapple fan to its full width is essential for the finished look.
9. All chain counts include the turning/standing chain where noted. Read each round carefully before beginning.
10. Bead hole test: Thread a single strand of your chosen size 10 cotton through the bead before purchasing or pre-stringing. Some pearl beads labeled 6/0 have narrow holes that will not pass size 10 thread. If needed, use a fine twisted-wire beading needle to assist threading.
How to Crochet the Ivory Pearl Bridal Shawl: Step by Step Instructions
Section 1: Neckline Foundation and Increase Rounds (Rounds 1-8)
The neckline is worked as a circle that expands to fit the neck and upper shoulder area. The beginning magic ring (or tight chain ring) is closed tightly and will sit at center back neckline.
Round 1:
Make a magic ring (or ch 6, sl st to first ch to form a ring).
Ch 3 (counts as dc), work 23 dc into ring. Join with sl st to top of ch-3.
(24 dc)
Round 2:
Ch 5 (counts as dc, ch 2). Sk first dc. Dc in next dc, ch 2. Rep from around. Join with sl st to 3rd ch of beg ch-5.
(24 dc, 24 ch-2 spaces)
Round 3:
Sl st into first ch-2 sp. Ch 3 (counts as dc). Work 2 more dc in same ch-2 sp (3 dc total in first sp). Work 3 dc in each ch-2 sp around. Join with sl st to top of ch-3.
(72 dc)
Round 4:
Ch 1. Sc in same st as join. Ch 5, sk 2 dc, sc in next dc. Rep from around, ending ch 5, sk 2. Join with sl st to first sc.
(24 sc, 24 ch-5 loops)
Round 5:
Sl st into first ch-5 sp. Ch 3 (counts as dc). Work 4 more dc in same sp (5 dc total, first shell made). Ch 1. Work 5 dc (shell) in next ch-5 sp, ch 1. Rep from around. Join with sl st to top of ch-3.
(24 shells of 5 dc each = 120 dc, 24 ch-1 spaces)
Round 6:
Sl st to 3rd dc (center) of first shell. Ch 5 (counts as dc, ch 2). Dc in center dc of next shell, ch 2. Rep from around. Join with sl st to 3rd ch of beg ch-5.
(24 dc, 24 ch-2 spaces)
Round 7:
Sl st into first ch-2 sp. Ch 3 (counts as dc). Work 1 dc in same sp. Ch 1. Work 2 dc in next ch-2 sp, ch 1. Rep from around. Join with sl st to top of ch-3.
(48 dc, 24 ch-1 spaces)
Round 8:
Ch 3 (counts as dc). Dc in next dc. Ch 2, dc in next ch-1 sp, ch 2, dc in each of next 2 dc. Rep from around, ending ch 2, dc in ch-1 sp, ch 2. Join with sl st to top of ch-3.
(72 dc, 48 ch-2 spaces)
Checkpoint 1: After Round 8, your neckline circle should measure approximately 7 inches / 17.8 cm in diameter (before blocking) and approximately 22 inches / 56 cm in circumference. If your circle is smaller, switch to a larger hook. If it is larger, switch to a smaller hook.
Section 2: Pineapple Fan Base Setup (Rounds 9-11)
These rounds establish 12 pineapple fan positions evenly distributed around the circle. Each fan base will receive 9 dc in Round 10, creating the wide lower portion of each pineapple.
Round 9:
Ch 4 (counts as tr). Work 2 more tr in same st (first base 3-tr-cl made). Ch 5, sk 5 sts and ch-sps (counting each dc and each ch-2 as one unit), work 3-tr-cl in next dc, ch 5, sk 5 units, work 3-tr-cl in next dc. Rep from 5 more times, ending last rep: ch 5, sk 5 units, work 3-tr-cl. Ch 5. Join with sl st to top of beg ch-4.
(12 tr-cl, 12 ch-5 spaces)
Note: In Round 9, you are grouping and bridging the existing dc and ch-2 spaces to create evenly spaced anchor points for 12 pineapple fans. If your stitch count from Round 8 (72 dc plus 48 ch-2 spaces = 120 working positions) does not divide cleanly as described, place stitch markers at every 10th working position before beginning this round to confirm even spacing of 12 fans.
Round 10:
Sl st into first ch-5 sp. Ch 3 (counts as dc). Work 8 more dc in same ch-5 sp (9 dc total = first pineapple base). Ch 3, sc in top of next tr-cl, ch 3, work 9 dc in next ch-5 sp. Rep from around, ending ch 3, sc in last tr-cl, ch 3. Join with sl st to top of ch-3.
(12 groups of 9 dc = 108 dc, 24 ch-3 spaces, 12 sc)
Round 11:
Ch 4 (counts as tr). Tr in same st. Tr in next dc, ch 1. Rep this (tr, ch 1) across the 9-dc fan, finishing with 2 tr in last dc of fan (total across one fan: 2 tr, then 7 sets of tr-ch1, then 2 tr = 11 tr and 7 ch-1 spaces across the fan). Ch 3, sk the sc and both ch-3 spaces. Rep from around, working each 9-dc fan the same way. Join with sl st to top of ch-4.
(Each fan: 11 tr, 7 ch-1 spaces. 12 fans total = 132 tr, 84 ch-1 spaces within fans, 12 ch-3 bridges between fans)
Checkpoint 2: After Round 11, the piece should measure approximately 4 inches / 10 cm from foundation to current edge. The 12 fan bases should be clearly visible as open combed sections.
Section 3: Pineapple Body Development (Rounds 12-22)
The pineapple fans narrow by working decreases that reduce the fan width by 1 stitch each round. The ch-3 bridges between fans remain constant, anchoring the interstitial space.
Round 12:
Join in first ch-3 bridge between fans. Ch 1. Sc in same bridge. Ch 5. (Sc in next ch-1 sp of fan, ch 3) 7 times across fan. Sc in last ch-1 sp. Ch 5. Sc in ch-3 bridge. Ch 5. Rep from around. Join with sl st to first sc.
(Each fan: 8 sc and 7 ch-3 arches. 12 fans. 12 ch-5 arches between fans.)
Round 13:
Sl st into first ch-5 sp. Ch 1. Sc in same sp. Ch 5. (Sc in next ch-3 arch of fan, ch 3) 6 times. Sc in last ch-3 arch of fan. Ch 5. Sc in ch-5 bridge. Ch 5. Rep from around. Join.
(Each fan: 7 sc, 6 ch-3 arches)
Round 14:
Sl st into first ch-5 sp. Ch 1. Sc in same sp. Ch 5. (Sc in next ch-3 arch, ch 3) 5 times. Sc in last ch-3 arch. Ch 5. Sc in ch-5 bridge. Ch 5. Rep from around. Join.
(Each fan: 6 sc, 5 ch-3 arches)
Round 15:
Sl st into ch-5 sp. Sc in same sp. Ch 5. (Sc in next ch-3 arch, ch 3) 4 times. Sc in last arch. Ch 5. Sc in ch-5 bridge. Ch 5. Rep from around. Join.
(Each fan: 5 sc, 4 ch-3 arches)
Round 16:
Sl st into ch-5 sp. Sc in same sp. Ch 5. (Sc in next ch-3 arch, ch 3) 3 times. Sc in last arch. Ch 5. Sc in ch-5 bridge. Ch 5. Rep from around. Join.
(Each fan: 4 sc, 3 ch-3 arches)
Round 17:
Sl st into ch-5 sp. Sc in same sp. Ch 5. (Sc in next ch-3 arch, ch 3) twice. Sc in last arch. Ch 5. Sc in ch-5 bridge. Ch 5. Rep from around. Join.
(Each fan: 3 sc, 2 ch-3 arches)
Round 18:
Sl st into ch-5 sp. Sc in same sp. Ch 5. Sc in first ch-3 arch. Ch 3. Sc in second ch-3 arch. Ch 5. Sc in ch-5 bridge. Ch 5. Rep from around. Join.
(Each fan: 2 sc, 1 ch-3 arch at apex)
Round 19:
Sl st into ch-5 sp. Sc in same sp. Ch 5. Sc in single ch-3 arch (pineapple apex). Ch 5. Sc in ch-5 bridge. Ch 5. Rep from around. Join.
(Each fan reduced to 1 apex sc. 12 apex sc, 24 ch-5 arches)
Round 20:
Sl st into ch-5 sp. Sc in same sp. Ch 7. Sc in next ch-5 sp. Rep from around. Join.
(24 sc, 24 ch-7 arches)
Round 21:
Sl st into ch-7 sp. Ch 3 (counts as dc). Work 6 more dc in same sp (7 dc shell). Ch 3. Work 7 dc in next ch-7 sp. Rep from around. End ch 3. Join with sl st to top of ch-3.
(24 shells of 7 dc = 168 dc, 24 ch-3 spaces between shells)
Round 22:
Ch 1. Sc in same st. Sc in each of next 6 dc of shell. Ch 5. Sc in 3 dc of ch-3 space (working 1 sc in each side dc and 1 in the center if possible, or work 3 sc across the ch-3 arch). Ch 5. Rep from around. Join.
(168 sc in shells, 24 groups of 3 sc between, 48 ch-5 arches)
Checkpoint 3: After Round 22, the body of the capelet (excluding fringe) should measure approximately 9.5 to 10 inches / 24 to 25.5 cm from neckline to current working edge. The 12 pineapple points should be clearly tapered and visible.
Section 4: Scalloped Hem (Round 23)
Round 23:
Sl st to first ch-5 arch. Ch 1. Sc in same arch. Ch 3, picot (ch 3, sl st in first ch of ch-3), ch 3, sc in next ch-5 arch. Ch 3, picot, ch 3, sc in next ch-5 arch. Rep from around, working each ch-5 arch across the round. Join with sl st to first sc.
(48 sc, 48 picot points, 96 ch-3 spaces)
The hem should form gentle continuous scallops all around the lower edge.
Section 5: Beaded Fringe
Materials for fringe: Approximately 300 additional yards / 274 meters of size 10 crochet cotton (same brand as body, for a seamless look). 600 to 700 size 6/0 or 8/0 pearl beads.
Fringe strand preparation:
Cut 96 strands of thread, each 18 inches / 45.7 cm long. You will fold each strand in half and attach it folded, making each finished fringe strand approximately 8 to 9 inches long before beading trimming.
Bead threading:
For each pair of strands (which form one folded fringe unit), pre-string beads onto both individual strand tails as follows: Thread 3 to 5 beads onto each of the 4 individual tail ends (2 tails per strand fold, 2 strands per anchor point), sliding beads to approximately 0.5 inches from the end. Tie a small overhand knot below the lowest bead on each tail to hold beads in place. This creates the clustered pearl drop effect visible at the fringe tips.
Attachment:
Fold one prepared strand in half. Insert the crochet hook through a ch-3 space on the hem (or through a picot loop). Pull the fold through approximately 0.5 inches. Pass both tails through the folded loop and pull tight (lark’s head knot). Attach one folded strand (2 working tails) to every ch-3 space around the hem.
With 96 ch-3 spaces in Round 23, attach 96 folded strands total. Trim all fringe ends evenly to 6 inches / 15.2 cm from the attachment point (before bead knots). Beads should cascade freely from the lower 2 to 3 inches of each tail.
Section 6: Camellia Flower (Worked Separately)
The camellia is worked in a series of petal layers built on top of each other to create a dimensional, slightly cupped bloom approximately 3.5 to 4 inches / 9 to 10 cm across.
Flower Center Ring:
Ch 6. Join with sl st to form a ring.
Inner Petals (Layer 1):
Rnd 1: Ch 1. Work 10 sc into ring. Join. (10 sc)
Rnd 2: Ch 1. Sc in next sc, ch 1. Rep from around. Join. (10 sc, 10 ch-1 sps)
Rnd 3 (first petal layer): (Sc, hdc, 3 dc, hdc, sc) all in next ch-1 sp. Rep from around all 10 ch-1 spaces. Join. (10 small petals)
Middle Petals (Layer 2):
Working behind the Layer 1 petals into the sc of Round 2:
Rnd 4: Insert hook from the right side going behind and into each sc of Round 2. Ch 2, sl st in next sc of Rnd 2. Rep from around to create 10 new ch-2 arches behind the first petal layer. (10 ch-2 arches)
Rnd 5: (Sc, hdc, 5 dc, hdc, sc) all in next ch-2 arch. Rep from 10 times. Join. (10 medium petals)
Outer Petals (Layer 3):
Rnd 6: Working behind the Layer 2 petals into the sl sts of Round 4: Ch 3, sl st in next sl st of Rnd 4. Rep from around. (10 ch-3 arches)
Rnd 7: (Sc, hdc, dc, 3 tr, dc, hdc, sc) all in each ch-3 arch. Rep from 10 times. Join. (10 large petals)
Fasten off, leaving a long tail for sewing.
Flower Finishing:
Shape the flower by gently curling the outer petals backward (away from the side that faces up) and the inner petals slightly forward, forming a cupped camellia shape. If desired, sew or glue a single flat-back pearl or crystal button to the center. Weave in end at back, leaving the long tail for attachment.
Attach flower to center front of the capelet at approximately the neckline-to-pineapple base transition (between Rounds 8 and 9), positioning it so it overlaps the front opening slightly and covers approximately 2 inches of the center front vertical space. Sew securely through all layers with the long tail and a tapestry needle.
Finishing and Blocking Your Bridal Capelet
Weave in all ends securely before blocking. Use a fine tapestry needle and weave each end in two opposing directions for at least 1 inch in each direction through the thread structure.
Wet blocking:
Submerge the capelet body (before attaching fringe) in cool water with a small amount of wool wash or gentle soap. Press gently. Do not wring. Roll in a clean towel to remove excess moisture. Lay flat on blocking board.
Pinning:
Pin the neckline circumference to the correct measurement (22 inches / 56 cm) using a circle of pins. Pin each of the 12 pineapple fans open to their full fan width, stretching each apex toward the outer edge. Pin each hem scallop to its full arc. Pin the overall body diameter (across shoulders) to 26 inches / 66 cm. Allow to dry completely, 24 to 48 hours depending on humidity.
Attach fringe after the body is fully dry and removed from blocking board.
Size Customization Tips
For a larger neckline (up to 26 inches / 66 cm): In Round 1, work 30 dc instead of 24. Adjust all subsequent rounds proportionally. In Round 3, work 3 dc per ch-2 space (90 dc total). In Round 4, ch 3 to skip 2 dc (30 loops). Continue adjusting so that Round 9 still establishes 12 even fan positions.
For a longer body: After Round 19 (pineapple apex round), work 2 additional rounds of ch-5 mesh (sc in each arch, ch 5) before beginning Round 20, adding approximately 0.75 to 1 inch per additional mesh round.
For shorter fringe: Cut fringe strands to 14 inches / 35.6 cm instead of 18 inches, resulting in approximately 5-inch finished fringe.
For fewer beads: String only 2 beads per tail end instead of 3 to 5, reducing the bead requirement by approximately 40 percent.
Care Instructions
Final Thoughts on This Ivory Pearl Bridal Shawl Crochet Pattern
Thank you so much for choosing this pattern for your special project. I know the hours you will pour into this piece, and I promise every single one is worth it. When you see the finished capelet draped over a bride’s shoulders, catching the light just right, you will understand why lace crochet has been treasured for generations.
This crochet tutorial has been a labor of love to write, and I hope it guides you smoothly through every round. Do not rush yourself. Take breaks when your eyes get tired. And remember that even the most experienced lace crocheters sometimes need to frog a few rounds.
If you make this bridal shawl, I would absolutely love to see it! Tag me on Instagram or share your photos in my Facebook group. There is nothing that makes my day brighter than seeing your finished projects.
I hope you will save this pattern to your Pinterest boards so you can find it easily when you are ready to start. And please drop a comment below if you make this capelet. I would love to hear about your experience, see your color choices, and celebrate your finished heirloom piece with you!
