
Go ahead. Pull out that gorgeous dusty rose cotton you have been saving for the perfect project. This is the one. This boho mini dress combines two completely different construction techniques in one stunning garment. The bodice features a diagonal mesh lattice worked top down from the V-neckline, while the skirt showcases joined floral granny-style motifs that create an eye-catching lace effect.
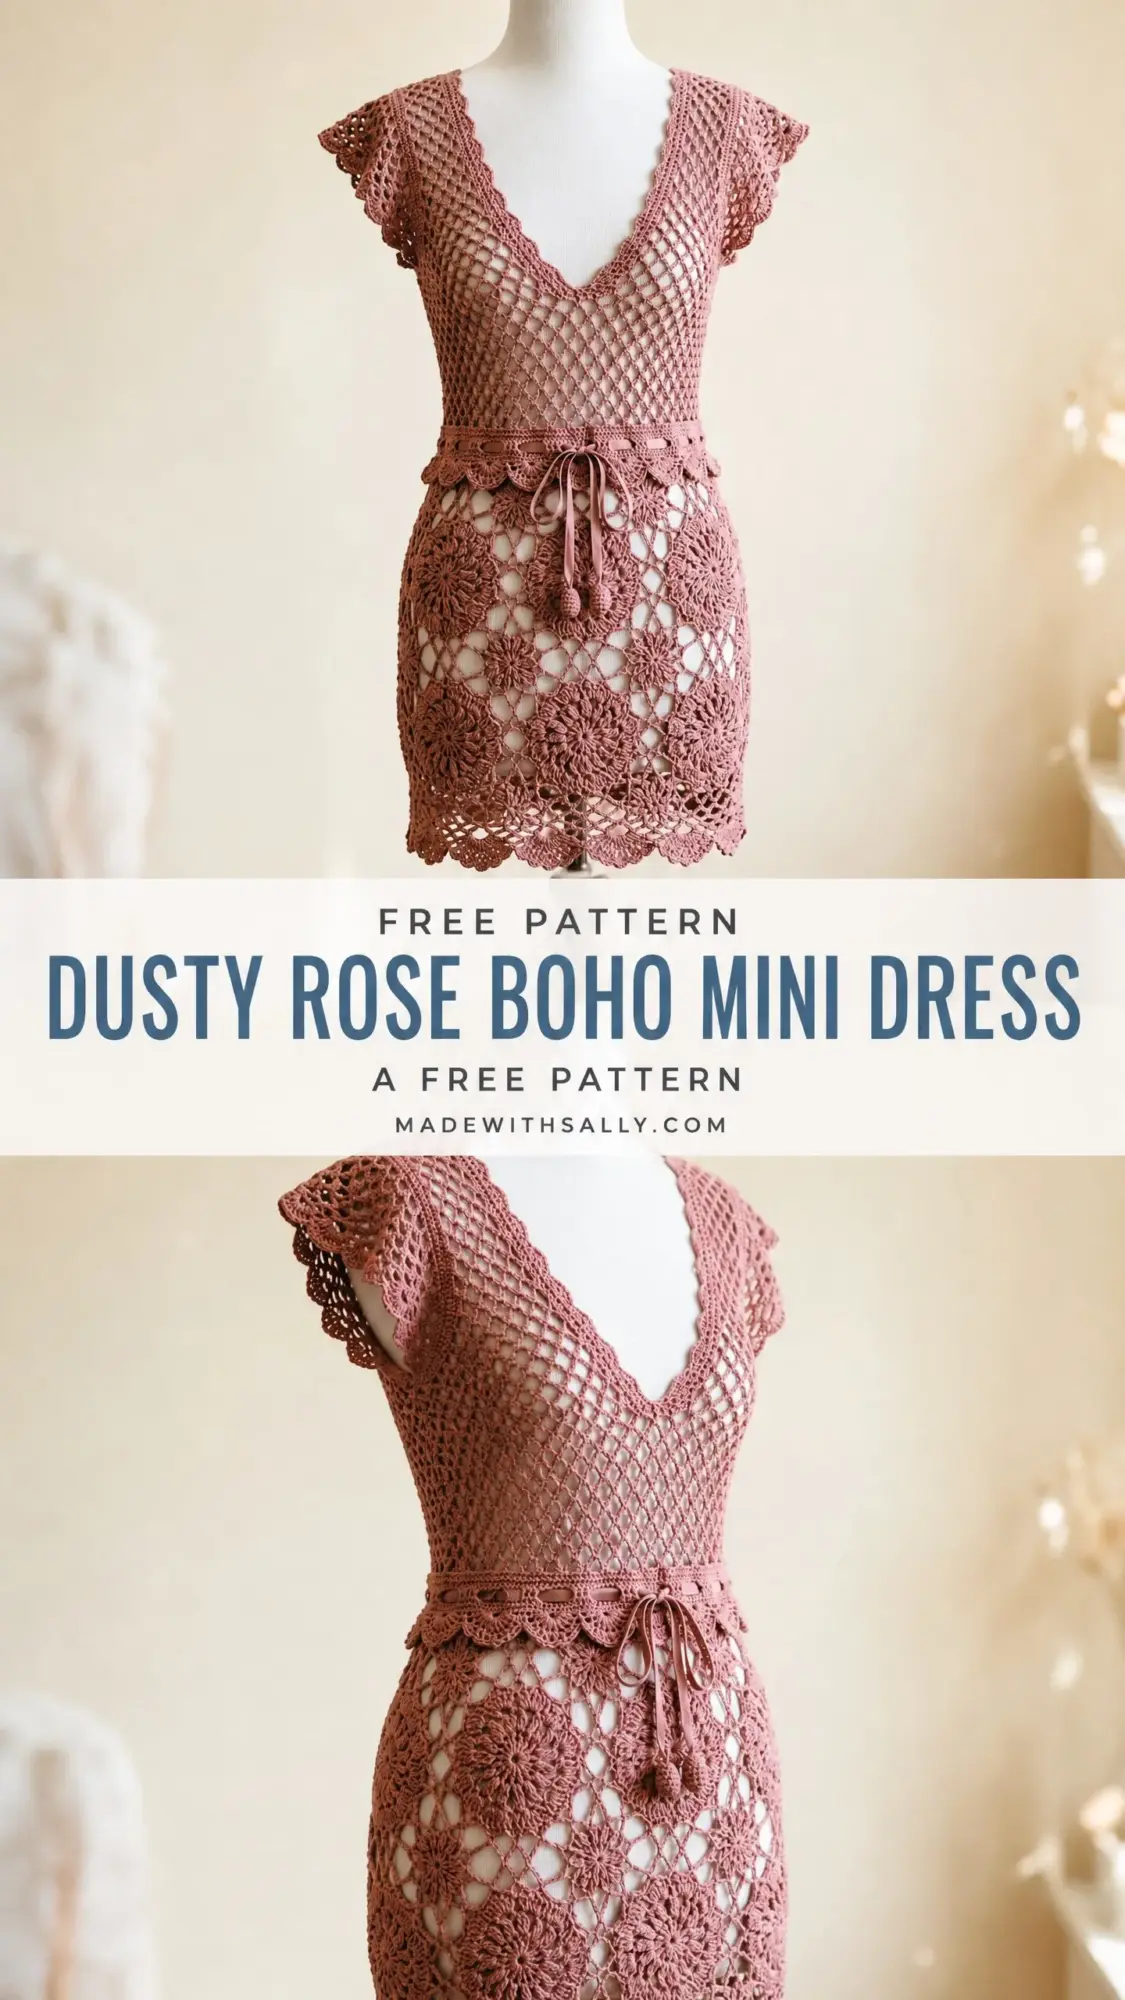
I will be honest with you. This is not a quick weekend project. You are looking at 35 to 55 hours of work depending on your experience level. But every single hour shows in the finished piece. The combination of the airy diamond mesh bodice and those beautiful six-petal flower squares creates a dress that looks like something you would find in a high-end boutique.
If you are comfortable with granny squares and basic lace mesh, you can absolutely tackle this pattern. The individual techniques are straightforward. The challenge comes from keeping consistent gauge across two different stitch textures and managing the join-as-you-go assembly for 40 motifs. Take it section by section, and you will have a showstopper cover-up perfect for beach days, summer festivals, or layering over a slip for warmer weather.
About This Boho Mini Dress Crochet Pattern
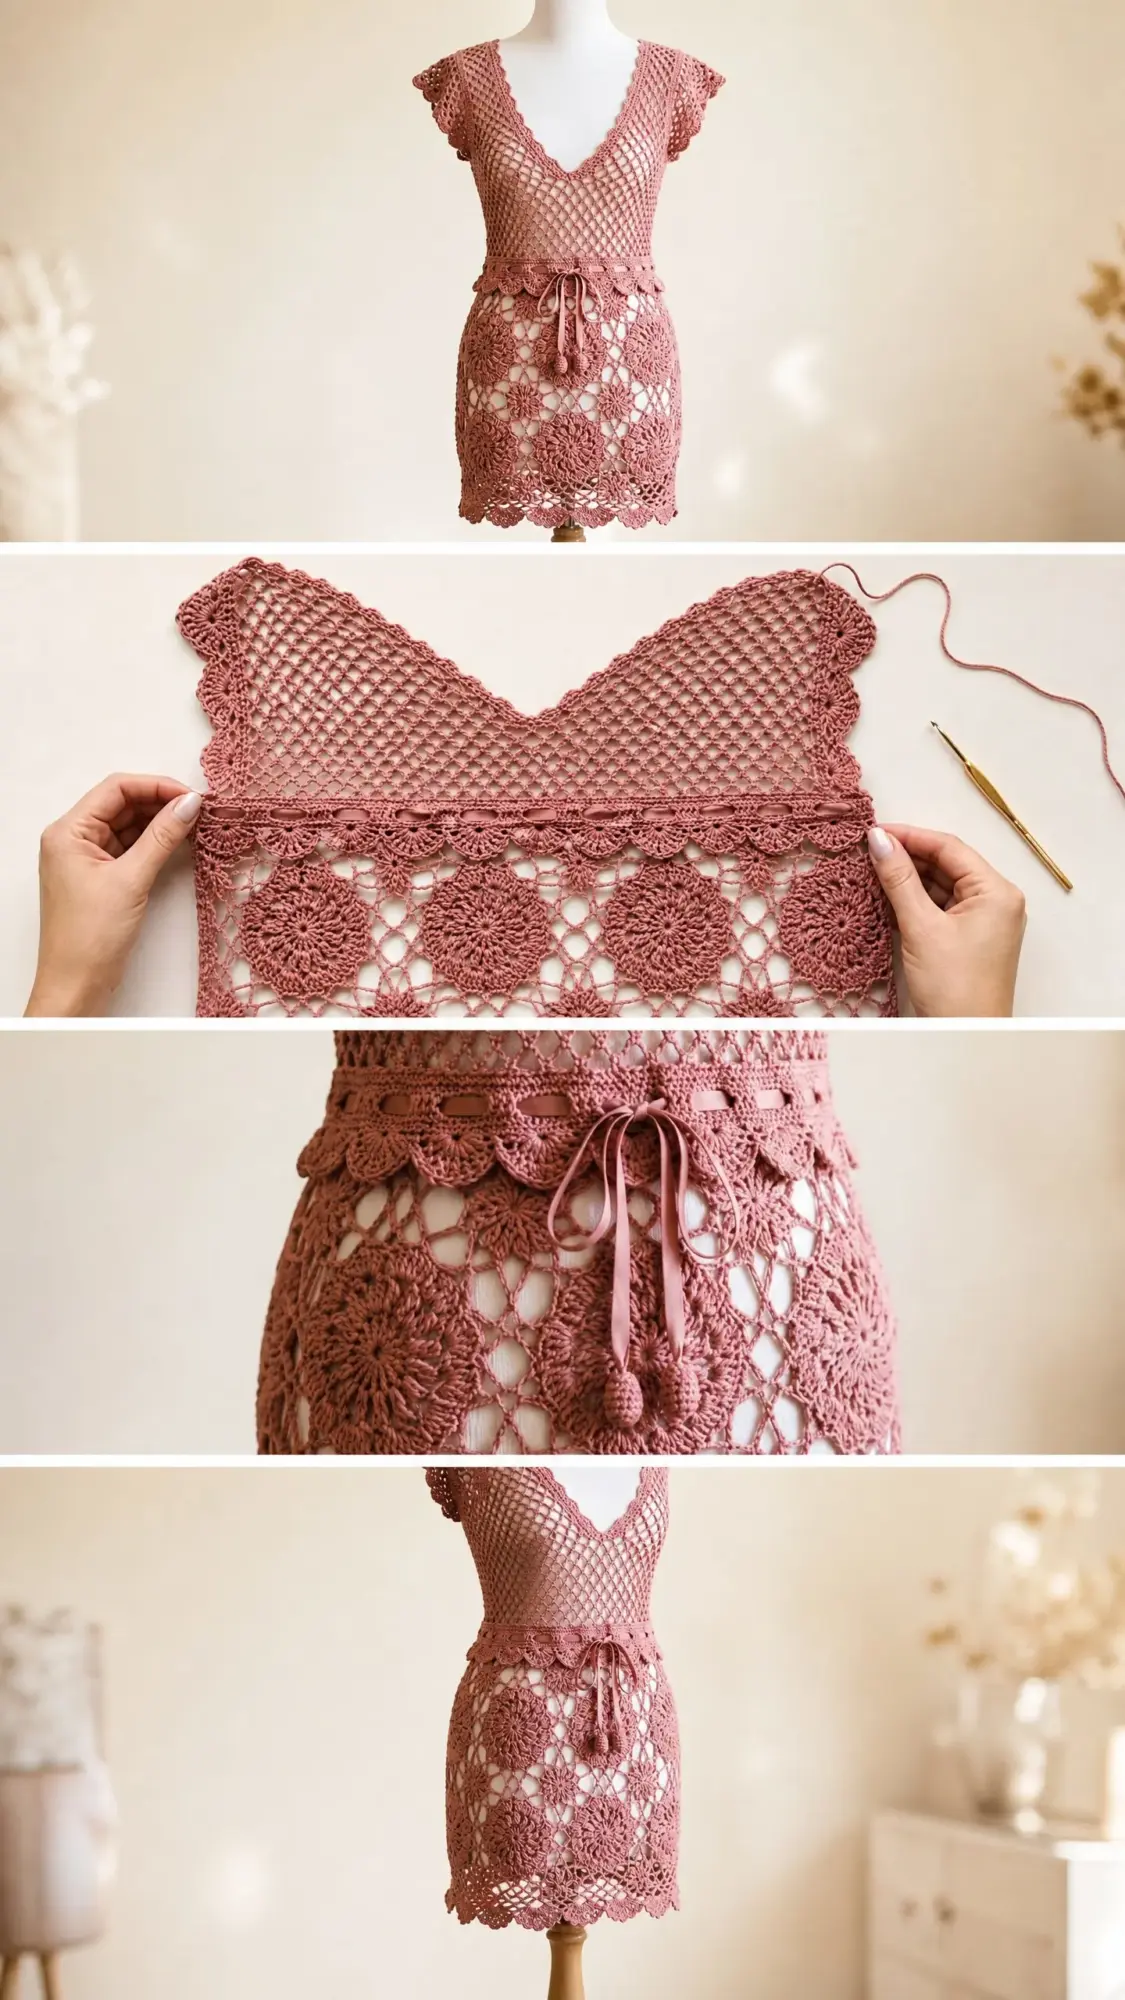
This dress features a clever construction approach that breaks the garment into manageable sections. You will work the bodice in two flat panels starting at the center V-neckline, increasing outward to shape the shoulders and cap sleeves. These panels join at the shoulders and sides to create a fitted upper section.
The skirt is built from 40 individual flower motifs. Each motif starts as a six-petal flower worked in the round, then transforms into a square frame on the final rounds. These squares connect using the join-as-you-go method (JAYG), which means you attach each new motif to its neighbors as you work the final round. No tedious sewing required.
A decorative waistband connects everything. It features a subtle vertical rib texture and eyelet holes for threading a crocheted tie cord. Little bobbles at the tie ends add a playful finishing touch.
The dress is designed as a cover-up with intentionally open, lacy construction throughout. Plan to wear it over a slip, swimsuit, or fitted undergarment.
Skill Level
This pattern suits advanced beginners to intermediate crocheters. You should feel comfortable with these skills:
If you have made granny squares and worked basic lace or mesh patterns before, you have the foundation you need. True beginners should build experience with simpler garment projects first.
Finished Measurements
The pattern is written for size Small with these dimensions:
Size customization tips are included at the end of the pattern.
Materials Needed
Yarn
You will need fingering weight to light DK weight 100% cotton or cotton-blend yarn. For size Small, gather approximately 1,000 to 1,200 yards / 915 to 1,095 meters total.
Recommended yarn options:
Option 1: Lion Brand 24/7 Cotton in Dusty Pink or Blush. At 186 yards per 3.5 oz skein, you will need 6 skeins. This yarn offers excellent stitch definition and holds its shape beautifully after blocking.
Option 2: Paintbox Yarns Simply DK in Dusty Rose. At 137 yards per 1.76 oz skein, you will need 8 to 9 skeins. This option has a slightly softer hand.
Option 3: WeCrochet Dishie in Blossom. At 190 yards per 3.5 oz skein, you will need 6 skeins. The mercerized cotton creates a lovely sheen that enhances the lacy appearance.
Substitution note: Choose yarn with low elasticity and high stitch definition. Avoid yarns with significant stretch, as the mesh and motifs will distort with wear. The finished dress should drape lightly. Always match gauge before beginning.
Hooks
Have both hooks available throughout the project.
Notions
Gauge
Gauge is mandatory for this garment. Even small deviations multiply across dozens of mesh rows and 40 motifs. Swatch both sections and adjust hook size as needed.
Bodice mesh gauge (using E-4 / 3.5 mm hook, after blocking):
Skirt motif gauge (using F-5 / 3.75 mm hook, after blocking):
Abbreviations
Here are all the abbreviations used in this crochet tutorial, with plain-English definitions:
Special Stitches
Before diving into the step-by-step instructions, let me explain the special techniques you will use.
Mesh Diamond Stitch (worked in rows)
This creates the open lattice pattern for the bodice. Each unit consists of one double crochet (dc) separated by a chain-2 space (ch-2 sp).
RS rows: Ch 5 (counts as dc + ch 2), skip 2 stitches or ch-2 space, dc in next dc. Repeat across.
WS rows: Same construction, worked back across.
The mesh creates diamond-shaped openings when alternate rows offset. The full row-by-row instructions below clarify exact placement.
Scallop Edging
Working across a foundation edge or row of stitches:
Step 1: Slip stitch (sl st) into first stitch.
Step 2: Chain 3 (ch 3), work 4 dc into the same stitch (5 dc total in one stitch = one scallop shell base).
Step 3: Sl st into the next stitch or ch-sp (skip 2 stitches between scallops on a dense edge, or work into next available stitch along a mesh edge).
Step 4: Repeat Steps 2 and 3 across.
Note: Scallops along mesh edges are worked one shell per ch-2 space, with a sl st into the base dc between each space.
Floral Motif Square (worked in rounds)
This creates the flower squares for the skirt. Each motif is a six-petal flower enclosed in a square frame.
Round 1: Magic ring or ch 4 joined with sl st. Ch 1, work 12 sc into the ring. Join with sl st to first sc. (12 sc)
Round 2: Ch 1, sc in first stitch. Ch 3, skip 1 stitch, sc in next stitch, ch 3, repeat around (6 petals formed). Join with sl st to first sc. (6 sc, 6 ch-3 spaces)
Round 3: Sl st into first ch-3 sp. (Ch 3, 2 dc, ch 2, 3 dc) into same ch-3 sp. Ch 1. Repeat (3 dc, ch 2, 3 dc, ch 1) into each remaining ch-3 sp around. Join with sl st to top of ch-3. (6 shell clusters)
Round 4: Sl st to corner ch-2 sp. This round collapses the hexagonal shape into a square with 4 defined corners.
Detailed Round 4 construction: Treat petals 1 and 4 as side midpoints, petals 2 and 5 as corner base 1 and 3, petals 3 and 6 as corner base 2 and 4.
Into petal 2 ch-2 sp: (3 dc, ch 2, 3 dc). Ch 2. Into petal 3 ch-2 sp: (3 dc, ch 2, 3 dc). Ch 2. Into petal 5 ch-2 sp: (3 dc, ch 2, 3 dc). Ch 2. Into petal 6 ch-2 sp: (3 dc, ch 2, 3 dc). Ch 2. Into petal 1 and petal 4 ch-2 sps (side midpoints): 3 dc, ch 2 (no corner). Join with sl st to top of ch-3. (4 corners with ch-2 sp, 2 side midpoints with ch-2 sp, dc clusters throughout)
Round 5 (Finish square, add edging arches): Ch 1. Sc into top of first dc. (Sc, ch 3, sc) into corner ch-2 sp. Sc across cluster to next ch-2 sp. Work 4 sc over ch-2 bridge. Continue around all 4 sides, working (sc, ch 3, sc) at each of the 4 corner ch-2 sps. Join with sl st to first sc. Fasten off, leaving a tail for JAYG.
Finished motif: 4-sided square with 4 corner ch-3 sps and straight sc edges between corners.
Bobble (used on tie ends)
Step 1: Yarn over (yo), insert hook into stitch, yo, pull up loop, yo, pull through 2 loops (leaving 2 loops on hook). Repeat 4 more times into same stitch (6 loops on hook).
Step 2: Yo, pull through all 6 loops. Ch 1 to close. One bobble made.
Join-As-You-Go (JAYG) for Motifs
When working the final round of each new motif, replace the ch-3 corner loop with: ch 1, sc into the corresponding corner ch-3 sp of the adjacent already-finished motif, ch 1. Replace the sc-bridge sections along shared sides with: sc into corresponding sc on adjacent motif edge. This joins motifs flat during construction.
Pattern Notes Before You Begin
1. The bodice is worked in two separate flat panels (left and right), each starting at the lower point of the V-neckline. These increase to shape the shoulder and cap sleeve, then join across the back and under the arms.
2. The mesh diamond pattern naturally biases slightly. Blocking is essential to square everything up before assembly.
3. All turning chains in the mesh bodice count as one dc throughout. Ch-5 at the beginning of a row counts as dc + ch-2 sp.
4. Right Side (RS) is the side facing you when working Row 1.
5. Make all 40 motifs before beginning JAYG assembly, or JAYG as you complete each one. Either method works.
6. The waistband is a short strip of dc ribbing worked in back loops only with ch-2 eyelets at intervals for threading the tie.
7. The dress is designed to fit with negative ease at the bust. The mesh stretches comfortably.
8. Stitch counts appear in parentheses at the end of each row or round.
9. At the beginning of every row, ch 5 (= dc + ch 2 sp). At the end of every row, work the final dc into the 3rd ch of the turning ch-5 from the previous row.
Step-by-Step Instructions
Section 1: Bodice
Work two bodice halves identically. Each half forms one front/back panel.
Left/Right Panel (make 2):
Begin at the V-neck center point and work downward and outward.
Foundation: Ch 4. Join with sl st to form a ring (or begin with a magic ring and ch 3).
Row 1 (RS): Ch 5 (counts as dc + ch 2). Into ring: (dc, ch 2) 3 times, dc. Turn. (4 dc, 3 ch-2 sps)
Row 2 (WS): Ch 5. (Dc, ch 2, dc) into first ch-2 sp [corner increase made]. Ch 2. Dc in next dc. Ch 2. (Dc, ch 2, dc) into next ch-2 sp [second corner increase]. Ch 2. Dc into 3rd ch of t-ch. Turn. (6 dc, 5 ch-2 sps)
Row 3 (RS): Ch 5. (Dc, ch 2, dc) into first ch-2 sp [increase]. Ch 2. Dc into next dc. Ch 2. Dc into next ch-2 sp. Ch 2. Dc into next dc. Ch 2. (Dc, ch 2, dc) into next ch-2 sp [increase]. Ch 2. Dc in 3rd ch of t-ch. Turn. (8 dc, 7 ch-2 sps)
Row 4 (WS): Ch 5. (Dc, ch 2, dc) into first ch-2 sp [increase]. (Ch 2, dc into next dc) across to last ch-2 sp. (Dc, ch 2, dc) into last ch-2 sp [increase]. Ch 2. Dc into 3rd ch of t-ch. Turn. (10 dc, 9 ch-2 sps)
Rows 5 through 12: Repeat the Row 4 pattern, increasing 1 unit at each end every row.
CHECKPOINT: After Row 12, each panel should measure approximately 9 inches / 23 cm wide at the widest point and approximately 5 to 5.5 inches tall from the bottom point of the V to the working edge.
Cap Sleeve Shaping (Rows 13 to 16):
In these rows, increase ONLY at the outer shoulder edge (left edge when looking at the RS). Work straight at the inner/center edge.
Row 13 (RS): Ch 5. (Dc, ch 2, dc) into first ch-2 sp [outer increase]. Work mesh across in pattern to last dc. Dc into 3rd ch of t-ch (no increase at inner edge). Turn. (27 dc, 26 ch-2 sps)
Row 14 (WS): Ch 5. Work mesh straight across (no increases). Dc into 3rd ch of t-ch. Turn. (27 dc, 26 ch-2 sps)
Row 15 (RS): Ch 5. (Dc, ch 2, dc) into first ch-2 sp [outer increase]. Work mesh across straight. Dc into 3rd ch of t-ch. Turn. (28 dc, 27 ch-2 sps)
Row 16 (WS): Ch 5. Work mesh straight across. Dc into 3rd ch of t-ch. Turn. (28 dc, 27 ch-2 sps)
Leave working yarn attached and set panel aside. Make a second identical panel.
Joining the Panels:
Place the two panels with RS facing up. Orient so the narrow V-point of each is at center front/back and the wider edges are at the shoulders and sides.
With RS together, sl st the two panels together along 4 dc units (approximately 3 inches) at each outer shoulder edge to form the shoulder seams. Do not seam the side edges yet.
Sleeve Edging:
Working around each armhole opening, join yarn at the underarm. Work one round of scallop edging around the full armhole opening. Finish with a sl st to join. Fasten off.
Side Seaming (Lower Bodice):
With RS together, sl st the side edges of both panels together from Row 1 (the lower bodice working edge) upward approximately 6 rows / approximately 4.5 inches. Leave the remaining side open as the armhole. Repeat on the other side.
Neckline Edging:
Join yarn at the lowest point of one V-neck. Work scallop edging around the full neckline, placing one shell per ch-2 sp around the diagonal V edges, and sl st between each shell. Join and fasten off.
CHECKPOINT: The completed bodice should measure approximately 17 to 18 inches around the bust and approximately 10 to 11 inches in length from shoulder to lower working edge.
Section 2: Waistband
The waistband is a narrow horizontal band worked flat in rows of dc-BLO ribbing with eyelet holes for the tie.
With E-4 / 3.5 mm hook, ch 9.
Row 1: Dc in 4th ch from hook and in each ch across. Turn. (7 dc, including t-ch)
Row 2: Ch 3. Dc in bl of each dc across. Dc in top of t-ch. Turn. (7 dc)
Repeat Row 2 until the waistband strip measures 28 inches (the waist circumference). This will take approximately 74 to 78 rows.
Eyelet row (work approximately every 4 inches along the length, 6 eyelets total):
On one RS row: Ch 3. Dc in bl of next 2 dc. Ch 2, sk 2 dc, dc in bl of next dc. Dc in top of t-ch. Turn.
Next row: Ch 3. Dc in bl of next dc. 2 dc into ch-2 sp. Dc in bl of next dc. Dc in top of t-ch. Turn. (7 dc, eyelet complete)
After all 6 eyelets are placed and strip is full length, work one row of scallop edging along one long edge of the waistband strip (this becomes the lower edge, facing the skirt). Fasten off.
With RS facing, whipstitch the plain upper edge of the waistband to the lower working edge of the bodice. The waistband ends meet at one side seam.
Section 3: Skirt Motifs
Using F-5 / 3.75 mm hook throughout.
Each motif = 3.5 inches square after blocking.
Skirt grid: 10 motifs wide x 4 motifs tall.
Total motifs needed: 40.
This creates a skirt panel 35 inches wide x 14 inches tall (before hem edging).
Make all 40 floral motifs following the Floral Motif Square instructions in the Special Stitches section. Fasten off each with a long tail.
JAYG Assembly:
Arrange motifs in a grid 10 wide and 4 tall.
Row 1 of assembly: Work motifs 1 through 10 in a horizontal line.
Complete Motif 1 fully. For Motif 2, work Rounds 1 through 4. On Round 5, when reaching the left side edge (shared with Motif 1), work JAYG joins:
At corner ch-3 sp on Motif 2 (shared corner): ch 1, insert hook into corresponding corner ch-3 sp of Motif 1, sc, ch 1.
Along the shared side: for each sc on Motif 2 edge, insert hook into corresponding sc on Motif 1 edge, sc together.
At second shared corner: ch 1, sc into Motif 1 corner sp, ch 1.
Continue around remaining 3 sides normally. Fasten off.
Repeat for Motifs 3 through 10.
Assembly Rows 2 through 4: Motif 11 joins to Motif 1 along its bottom edge. Motif 12 joins to Motif 11 on its left side AND to Motif 2 on its bottom edge simultaneously. At shared corner points where four motifs meet, work (ch 1, sc into junction point, ch 1).
After all 40 motifs are joined, fold panel RS together and seam the back with sl st. Turn RS out.
Hem Edging:
Join yarn at the bottom edge of any motif. Work one full round of scallop edging around the bottom hem. Join and fasten off.
Top edge of skirt:
Work one row of sc evenly around the top opening of the skirt tube. Approximately 100 to 104 sc total. Fasten off.
CHECKPOINT: The skirt tube should measure approximately 35 inches around and approximately 14 to 15 inches tall including the scallop hem.
Attaching Skirt to Waistband:
With RS facing, pin the sc edge of the skirt top to the lower scalloped edge of the waistband. Whipstitch together. Back seam of skirt aligns with one side seam of bodice.
Section 4: Tie Cord and Bobble Ends
Tie Cord:
Ch 120 (approximately 28 inches when relaxed). Sl st in each ch back to beginning to form a flat cord. Do not fasten off.
Bobble End:
At one end: ch 1, work 1 bobble into the sl st chain at the tip. Ch 1, sl st to secure. Fasten off, weave in end.
At the other end: Join yarn and work 1 bobble. Fasten off, weave in end.
Thread the tie through the 6 eyelets of the waistband, beginning and ending at the center front. Tie in a bow.
Section 5: Final Edging Check
Review all edges:
If any edge appears uneven, work a single round of sc before the scallop row to normalize stitch counts.
Size Customization Tips
To adjust bodice width: Each additional row of mesh increases the panel width by approximately 0.75 inches. Add or remove rows of increases in pairs to adjust the total bust circumference by approximately 1.5 inches per added row pair.
To adjust bodice length: After completing the increases and before sleeve shaping, work additional straight rows. Each added row adds approximately 0.75 inches of length.
To adjust skirt circumference: Add or remove motifs horizontally. Each motif adds or removes 3.5 inches. For size Medium (38-inch hip), use 11 motifs wide. For size Large (42-inch hip), use 12 motifs wide.
To adjust skirt length: Add or remove rows of motifs vertically. Each row adds 3.5 inches.
To adjust waistband length: The waistband should match the skirt top circumference. Add corresponding length when adding width to the skirt.
Blocking and Finishing
Blocking is critical for this garment. Both the mesh bodice and floral motifs will look dramatically better after wet blocking.
Step 1: Wet-block the bodice and skirt separately before joining. Submerge in cool water until saturated. Gently press out excess water without wringing. Lay flat on blocking mats.
Step 2: Pin the bodice to schematic measurements. Use blocking wires along side edges if available.
Step 3: Pin each skirt motif into its square shape (3.5 inches on each side), opening the flower petals gently. Allow all pieces to dry completely, at least 24 hours.
Step 4: After all seams and attachments are complete, lightly steam the finished garment or wet-block once more. Do not apply iron heat directly to the yarn without a pressing cloth.
Weave in all ends securely. Each floral motif generates one or two tails. For 40 motifs, budget time for this step.
Care Instructions
Machine wash on gentle/delicate cycle in cool water. Place the dress inside a mesh laundry bag to protect the lace structure. Use gentle detergent formulated for delicates. Lay flat to dry. Do not tumble dry, as heat will cause cotton to shrink and distort the motifs. Do not hang to dry, as the open mesh will stretch under the weight of wet yarn. Store folded, not on a hanger.
You Did It!
Thank you so much for choosing this boho mini dress crochet pattern. I know it is a commitment, but the result is absolutely worth the effort. You have created something truly special that you will reach for again and again.
I would love to see your finished dress! Tag me on Instagram or share a photo in my Facebook group. Seeing your creations always makes my day.
If you found this crochet tutorial helpful, go ahead and save it to your Pinterest boards so you can find it easily when you are ready to start. And please drop a comment below if you make this dress. I love hearing how your projects turn out, and your tips might help another crocheter along the way!
