
I call this one the "October Keepsake" because it came straight from a sketch in my old notebook from three years ago. I was sitting on my porch watching the maple tree in my front yard drop the most gorgeous red and orange leaves, and I thought, what if I could wear one? That little drawing sat untouched until last fall when I finally pulled it out, grabbed some cotton yarn, and brought it to life.
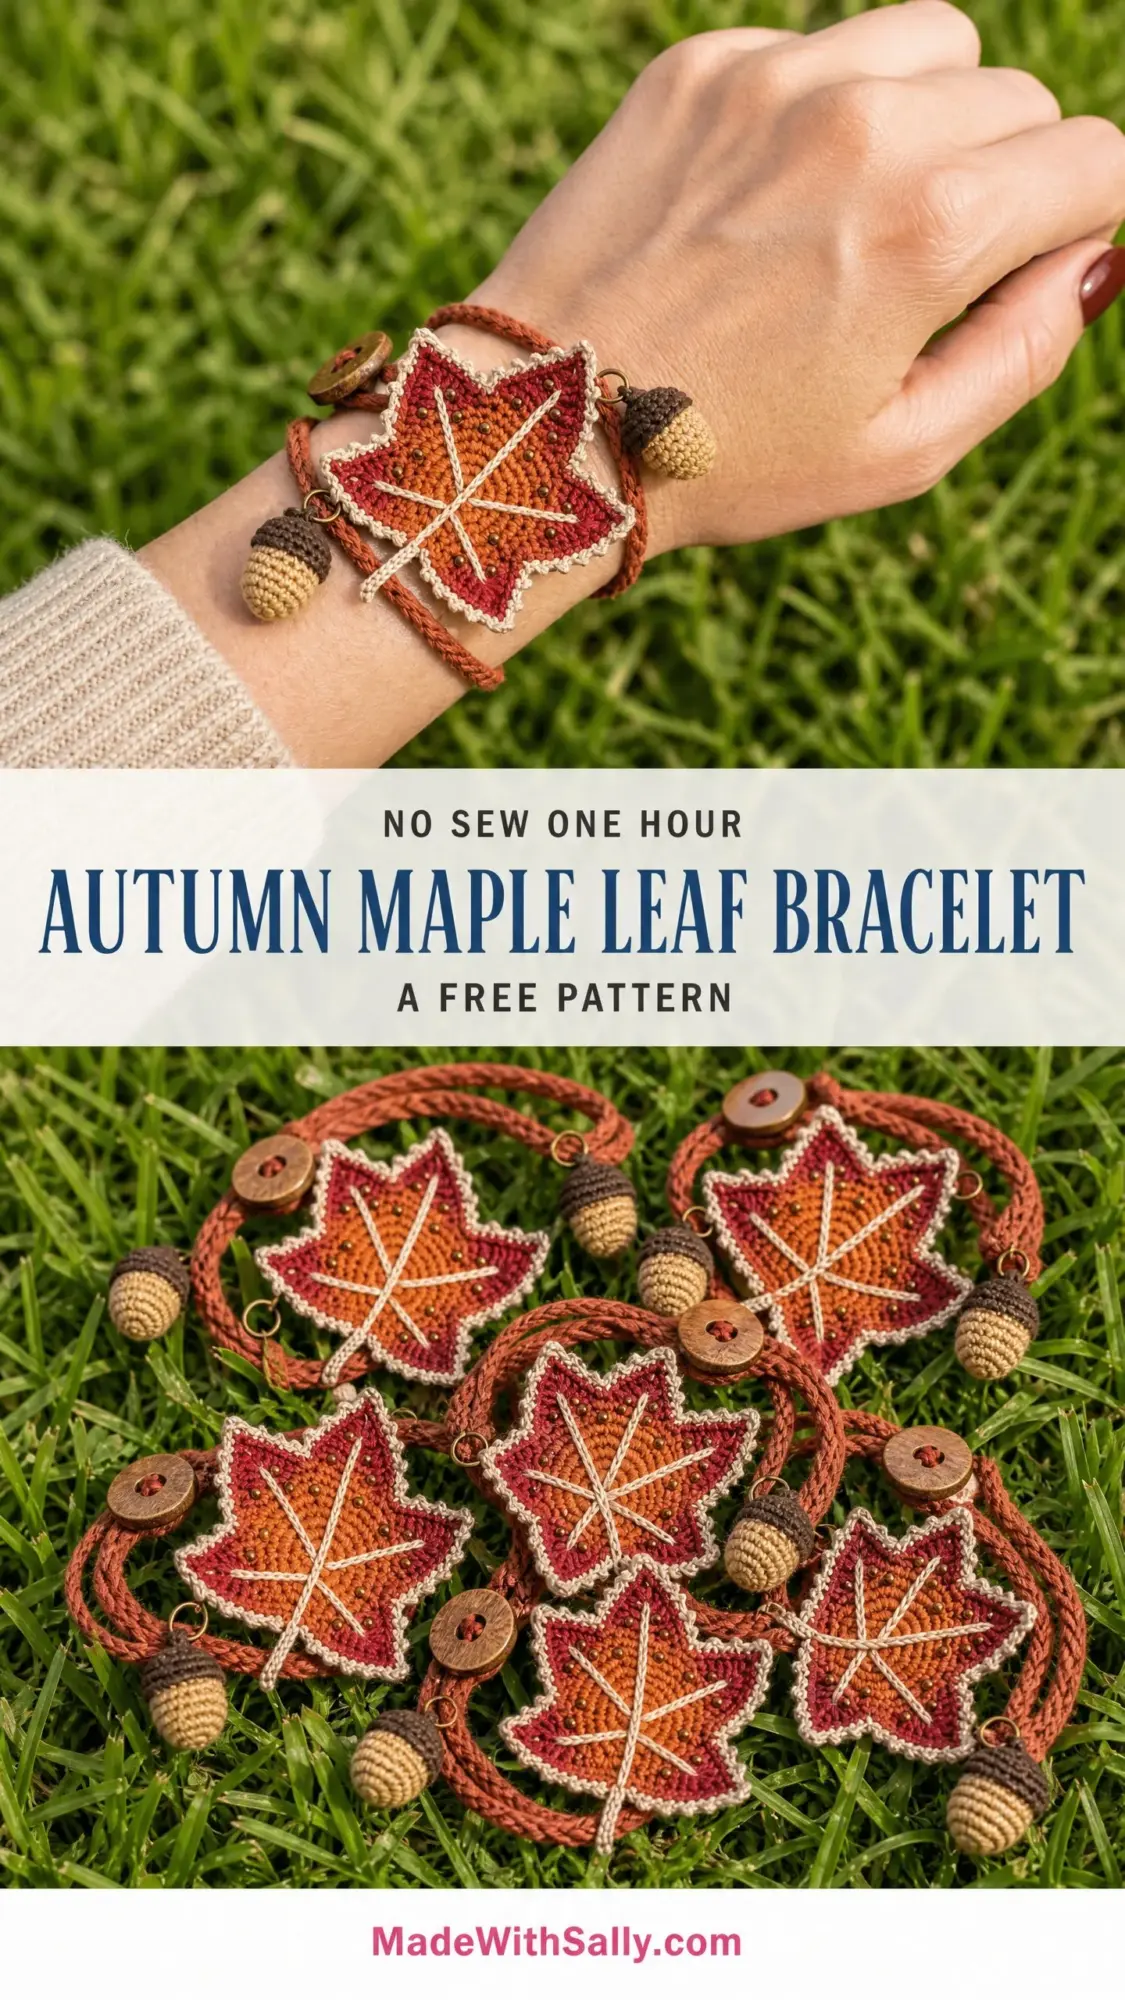
The result is this crocheted maple leaf bracelet with tiny acorn charms that dangle from the sides. It reminds me of those perfect autumn afternoons every time I put it on.
If you have been wanting to try something a little different from scarves and blankets, this is your project. It combines flat motif work, basic amigurumi, and a simple cord technique into one wearable piece that feels special without being fussy.
About This Autumn Maple Leaf Bracelet Pattern
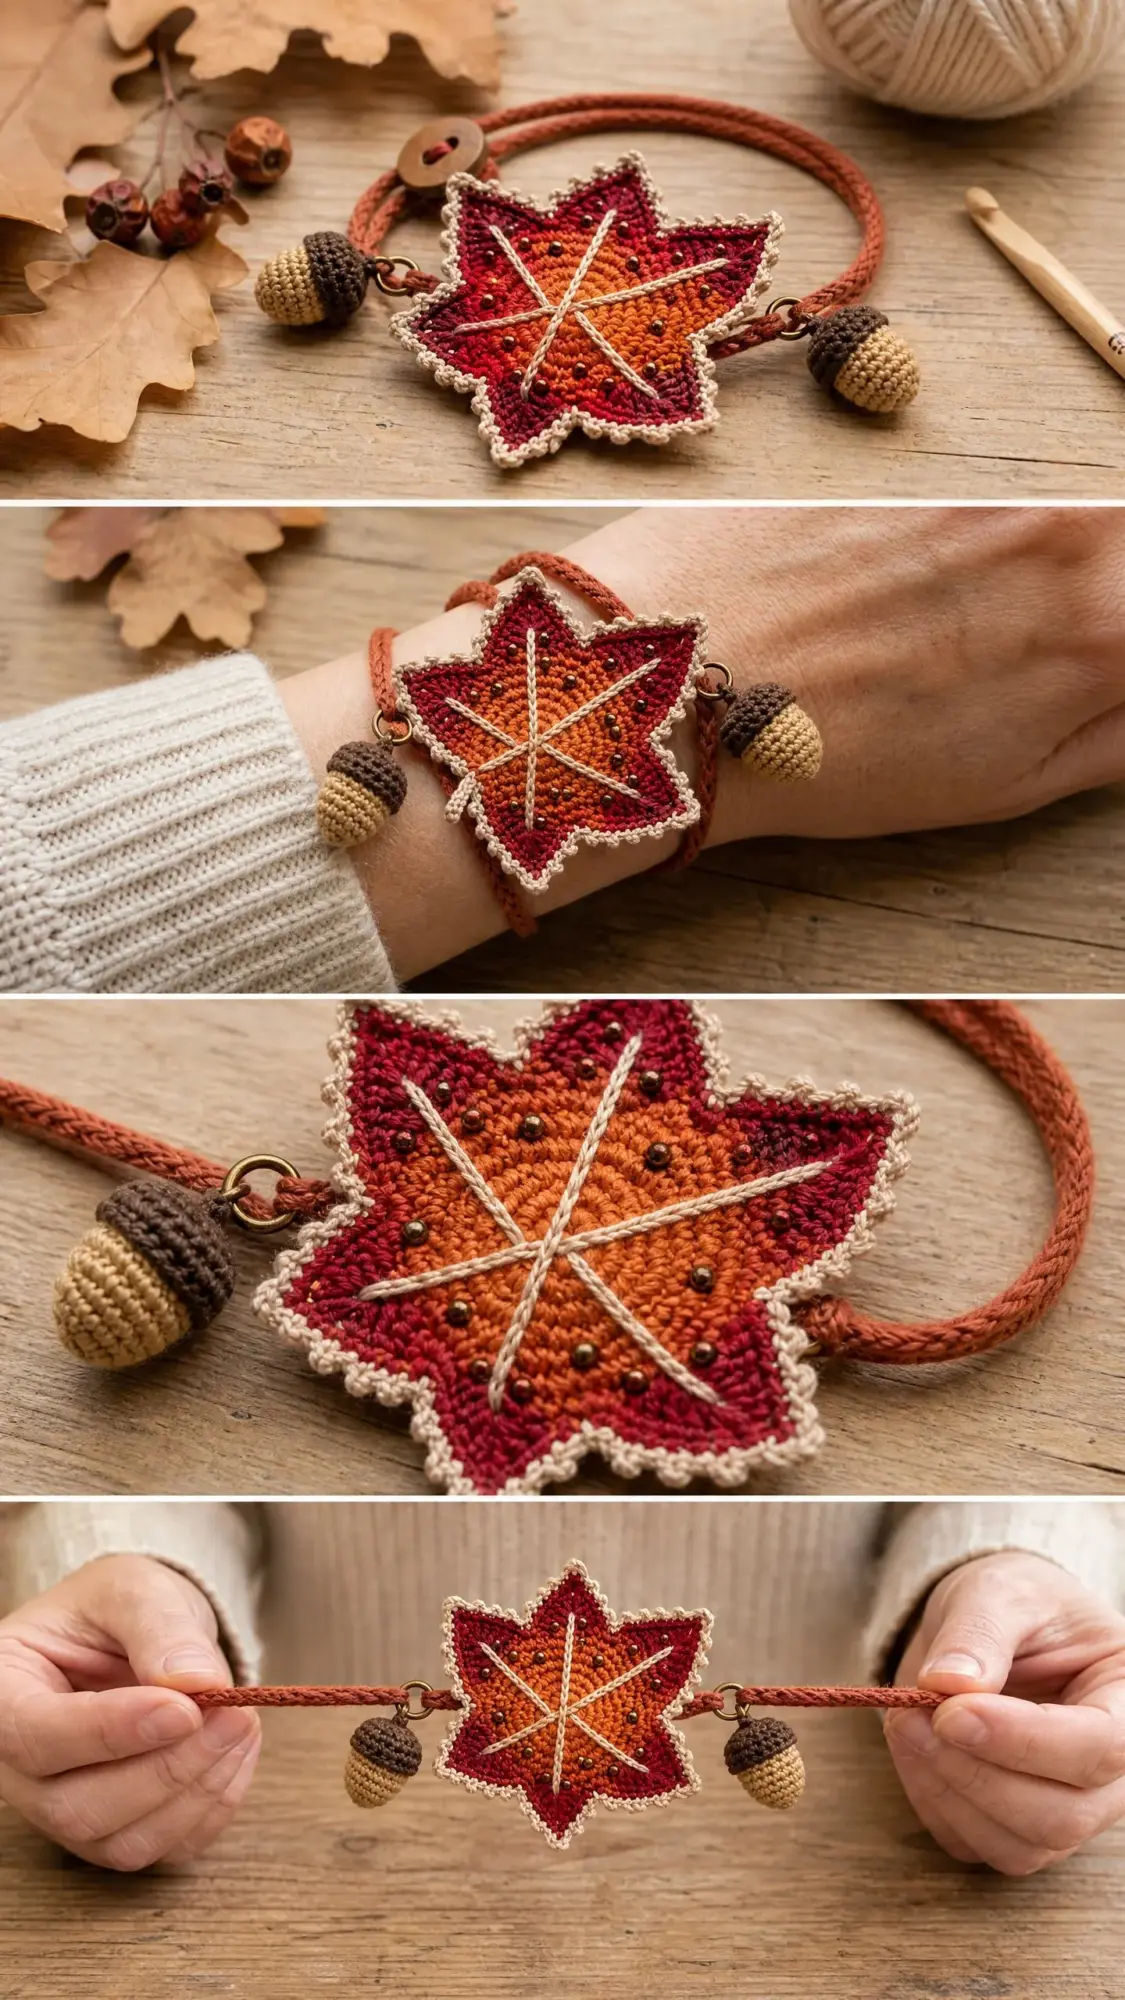
This bracelet features three separate crocheted components that come together into one cohesive design. The centerpiece is a six-pointed star motif that creates a stylized maple leaf shape. Two small amigurumi acorns hang as charms from brass jump rings on each side. A slip stitch cord forms the band, and a wooden button provides the closure.
The leaf motif uses color changes to create that beautiful pinwheel effect you see in the finished piece. Deep burgundy alternates with rust orange across the six points, while a terracotta center and cream border tie everything together. Cream yarn embroidered on the surface mimics the veins of a real leaf. Scattered seed beads add just a touch of sparkle.
Skill level: Intermediate. You should be comfortable working in rounds, changing colors, and doing basic amigurumi shaping. The techniques are not complicated on their own, but this project asks you to combine several different skills into one piece.
Time estimate: About 4 to 6 hours total. Expect 2 to 3 hours for the leaf motif, 1 hour for both acorns, and another hour for the band and final assembly.
Finished Dimensions
Bracelet band length: approximately 7 inches / 18 cm (adjustable based on your cord length)
Leaf centerpiece: approximately 2.75 inches / 7 cm wide at the widest point, 2.5 inches / 6.5 cm tall
Acorn charms: approximately 0.75 inch / 2 cm tall each
Materials You Will Need
Yarn (all fingering weight cotton):
Hooks:
Additional materials:
Yarn Suggestions
DMC Natura Just Cotton works beautifully here. The matte finish and wide range of autumn colors make it ideal. Look for shades Tournesol, Lobster, and Safran for Colors A through C.
Paintbox Yarns Cotton Fingering has a consistent plied structure that holds the flat motif without curling. It is widely available and affordable.
Scheepjes Catona has a slightly shinier mercerized finish. The Autumn color collection includes Rust, Brick Red, and Caramel that work perfectly.
Any smooth, tightly plied fingering or lace weight cotton will work. Avoid fuzzy or halo yarns because they will obscure the stitch definition in the leaf motif.
Gauge
With US B-1 / 2.25 mm hook and fingering weight cotton:
10 single crochet = 1 inch / 2.5 cm
10 rows of single crochet = 1 inch / 2.5 cm
Work a 15 st x 15 row rectangle in single crochet (sc) to check gauge. Block lightly. Measure the center 10 sts and 10 rows.
Gauge matters here. If your leaf comes out larger than 2.75 inches wide, try a smaller hook. If it is smaller, try a larger hook.
Abbreviations
Special Stitches for This Crochet Pattern
Invisible Decrease (inv dec)
This creates smoother decreases in amigurumi. Insert your hook into the front loop only of the next stitch. Then insert your hook into the front loop only of the following stitch. You now have two front loops on your hook. Yarn over and draw through both front loops. Yarn over and draw through the remaining 2 loops on your hook. This counts as 1 stitch.
Slip Stitch Cord
This technique creates the rope-like bracelet band.
Chain 3. Turn. Insert your hook into the back bump of the first chain (the very first chain you made). Yarn over, pull up a loop, yarn over, pull through both loops. That is 1 slip stitch.
Do not turn. Rotate the work slightly and insert your hook into the left side of the stitch you just made. Yarn over, pull up a loop, yarn over, pull through both loops.
Repeat this rotate-and-work process continuously. Always insert into the left side bar of the previous stitch. The cord grows in a spiral, creating a twisted round rope.
Surface Slip Stitch Embroidery
This creates the raised vein lines on the leaf. Thread your tapestry needle with cream yarn or use a fine hook. Bring the yarn up from the back of the leaf to the front at the center point. Work slip stitches along the surface by inserting the hook or needle under a stitch bar on the surface, drawing a loop of cream yarn through, then drawing the working yarn through the loop. This creates a raised chain line that looks like a leaf vein.
Pattern Notes Before You Begin
The maple leaf is worked as a six-pointed star motif. Each point is worked separately from a shared center ring. The points are joined by a final border round worked in cream.
Color placement matters. Points 1, 3, and 5 are worked in Color A (dark red). Points 2, 4, and 6 are worked in Color B (rust orange). Color C (terracotta) fills the center after all six points are joined. This creates the multi-tone pinwheel effect.
The leaf is worked flat, not stuffed. The wrong side shows the spiral of the magic circle. Do not weave in center ring tails until after joining is complete.
Seed beads are sewn onto the leaf surface after crocheting but before final assembly.
All rounds in the leaf motif begin with ch 1, which does not count as a stitch unless noted otherwise.
Stitch counts in parentheses at the end of each row reflect total working stitches at that point.
Section 1: Maple Leaf Motif Instructions
Work all six segments before working the center fill and border.
Segment 1 (Color A, Dark Red)
Make a magic circle (MC). All six segments will be worked into this same ring. Do not close the ring until all six segments are anchored.
Row 1: Into the MC, ch 1, work 2 sc. Turn. (2 sc)
Row 2: Ch 1, inc in first st, inc in second st. Turn. (4 sc)
Row 3: Ch 1, inc in first st, sc in next 2 sts, inc in last st. Turn. (6 sc)
Row 4: Ch 1, inc in first st, sc in next 4 sts, inc in last st. Turn. (8 sc)
Row 5: Ch 1, sc in each st across. Turn. (8 sc)
Row 6: Ch 1, inc in first st, sc in next 6 sts, inc in last st. Turn. (10 sc)
Row 7: Ch 1, sc in each st across. Turn. (10 sc)
Row 8: Ch 1, sc2tog over first 2 sts, sc in next 6 sts, sc2tog over last 2 sts. Turn. (8 sc)
Row 9: Ch 1, sc2tog over first 2 sts, sc in next 4 sts, sc2tog over last 2 sts. Turn. (6 sc)
Row 10: Ch 1, sc2tog over first 2 sts, sc in next 2 sts, sc2tog over last 2 sts. Turn. (4 sc)
Row 11: Ch 1, sc2tog, sc2tog. Turn. (2 sc)
Row 12: Ch 1, sc2tog. Do not turn. (1 sc)
Fasten off Color A leaving a 4-inch tail. The segment is a narrow elongated diamond shape pointing upward from the magic circle.
Checkpoint: Each segment should measure approximately 1.25 inches / 3.2 cm long from the center ring to the tip, and approximately 0.9 inch / 2.3 cm wide at the widest point.
Segments 2, 4, and 6 (Color B, Rust Orange)
For each of these segments, re-join Color B into the magic circle. Leave a small gap between the previous segment’s base and the new segment’s starting stitches, approximately 2 sc-widths apart in the ring. Work Rows 1 through 12 exactly as Segment 1. Fasten off between each segment.
Segments 3 and 5 (Color A, Dark Red)
Work Rows 1 to 12 in Color A for each.
After all six segments are complete, pull the magic circle ring tight and secure by weaving the tail through several center stitches. You now have a six-pointed star with alternating red and orange points.
Center Fill Round (Color C, Terracotta)
Join Color C with a sl st to the inner corner junction between any two adjacent segments at the base of the points.
Rnd 1: Ch 1, work 1 sc into the side edge of each row along the inner edge of each segment as you travel around the center. Work approximately 3 sc along each segment’s inner edge. (18 sc total) Sl st to first sc to join.
Rnd 2: Ch 1, sc in each st around. Sl st to join. (18 sc)
Fasten off Color C and weave in ends.
Border Round (Color D, Cream)
Join Color D with a sl st to the tip of any segment.
Rnd 1: Ch 1. Work the border around the entire outer perimeter of the star shape.
For each segment point, repeat the following 6 times:
Travel up the right edge of the point: sc in each row-end st up the right side of the segment (approximately 12 sc).
At the outer tip: work 3 sc into the tip stitch.
Travel down the left edge of the point: sc in each row-end st down the left side of the segment (approximately 12 sc).
At the valley between two segments: sc2tog, inserting into the last st of one segment edge and the first st of the next segment edge.
After all 6 points: sl st to the first sc of the round to join. Fasten off Color D.
Checkpoint: The leaf should lie flat without curling. Block lightly if needed. It should measure approximately 2.75 inches / 7 cm across the widest span.
Vein Embroidery
Thread a length of Color D (cream) onto a tapestry needle. Using surface slip stitch embroidery, embroider the following lines:
One central vertical vein running from the center ring outward to the tip of one Color A point (this becomes the main vein).
Six secondary veins, one running from the center toward the tip of each remaining point.
The veins should cross at the center, creating a six-spoked wheel pattern.
Bead Application
Thread a beading needle with thread. Sew 3 to 5 seed beads onto each dark red (Color A) segment point, scattered across the upper half. Sew 2 to 3 beads onto each rust orange (Color B) point. Knot thread securely on the wrong side.
Section 2: Acorn Charms (Make 2)
Acorn Body (Color E, Tan)
Using MC and Color E:
Rnd 1: 6 sc into MC. Pull ring closed. (6 sc)
Rnd 2: Inc in each st around. (12 sc)
Rnd 3: (Sc in next st, inc in next st) 6 times. (18 sc)
Rnd 4: Sc in each st around. (18 sc)
Rnd 5: Sc in each st around. (18 sc)
Rnd 6: (Sc in next st, inv dec) 6 times. (12 sc)
Begin lightly stuffing with fiberfill now.
Rnd 7: (Inv dec) 6 times. (6 sc)
Fasten off leaving a 6-inch tail. Thread tail through remaining 6 sts, pull tight to close. Knot and weave in end.
Acorn Cap (Color F, Dark Brown)
Using MC and Color F:
Rnd 1: 6 sc into MC. Pull ring closed. (6 sc)
Rnd 2: Inc in each st around. (12 sc)
Rnd 3: Working in BLO: sc in each st around. (12 sc) This creates a visible ridge line between cap and body.
Rnd 4: Sc in each st around. (12 sc)
Rnd 5: (Sc in next st, inv dec) 4 times. (8 sc)
Fasten off leaving an 8-inch tail for sewing.
Acorn cap stem: With Color F, ch 5, sl st back into the 2nd ch from hook and each ch back to the cap top. Fasten off.
Joining Acorn Body and Cap
Place the open end of the cap over the top rounded end of the body. The BLO ridge of Round 3 creates a textured lip. Whip stitch the cap to the body using the tail and a tapestry needle.
Before closing completely, loop a small brass jump ring through two stitches at the top of the cap at the stem base. This attaches the acorn to the bracelet later.
Checkpoint: Each completed acorn should measure approximately 0.75 inch / 2 cm tall.
Section 3: Bracelet Band
Using Color B (rust orange) and the US B-1 / 2.25 mm hook:
Foundation: Ch 3.
Work the Slip Stitch Cord continuously until the cord measures 14 inches / 35.5 cm in total length.
Fasten off leaving a 6-inch tail at each end.
Fold the cord in half. The fold creates a loop approximately 0.75 inch / 2 cm across. This loop is your buttonhole.
At the folded loop end: Whip stitch the two strands together for approximately 0.5 inch / 1.3 cm from the fold to keep the loop tidy and circular.
Leave the two tail strands at the open ends separate for now.
Section 4: Assembly
Step 1: Attach jump rings to the leaf. On the left and right side edges of the completed leaf at approximately the widest point, sew one brass jump ring to each side using Color D yarn or matching thread. Reinforce each ring with several passes of thread and knot securely.
Step 2: Thread the band through the leaf. Pass both strands of the folded cord through the left jump ring from back to front, then across the back of the leaf, then through the right jump ring from front to back. Pull to center the leaf on the band.
Step 3: Attach acorn charms. Connect one acorn to the left leaf jump ring and one to the right leaf jump ring. The acorns hang freely from the sides of the leaf.
Step 4: Attach the button. At the two open tail ends of the band, bring both tails together. Thread both through the two holes of the wooden button so the button sits flat. Knot the tails several times behind the button to secure. The button should sit approximately 0.5 inch / 1.3 cm from the cut end of the band.
Step 5: Test the closure. Loop the fold-end loop over the wooden button to close the bracelet. The loop should be snug enough to hold the button but loose enough to pass easily. Adjust stitching if needed.
Size Customization Tips
For a smaller wrist (under 6.5 inches / 16.5 cm): Make the slip stitch cord 13 inches / 33 cm before folding.
For a larger wrist (up to 8 inches / 20.5 cm): Make the cord 16 inches / 40.5 cm before folding.
Finishing and Care
Wet block the leaf motif by soaking in cool water for 10 minutes. Press out excess water in a towel, then pin each point of the star to a blocking mat. Allow to dry fully. This flattens any curl and sharpens the point tips.
Hand wash only in cool water with gentle soap. Do not wring. Press flat between clean towels and reshape the leaf points while damp. Lay flat to dry.
Store the bracelet flat or loosely coiled to avoid distorting the leaf motif.
Thank you so much for making it all the way through this pattern. I genuinely hope this little autumn bracelet brings you as much joy to make as it brought me to design. If you complete one, I would absolutely love to see it! Tag me on Instagram or share a photo in my Facebook group.
And if you are planning to make this later, go ahead and save this page to your Pinterest boards so you can find it when those cozy autumn crafting days roll around. Drop a comment below if you have any questions or just want to share how yours turned out. Happy hooking!
