I don’t know about you, but I have a soft spot for crochet accessories that look way more complicated than they actually are. This romantic rose bracelet delivers all the elegance of Irish crochet without making you want to throw your hook across the room. The delicate spiral roses, textured leaves, and sweet ribbon closure come together in a piece that looks like it belongs in a vintage jewelry box.
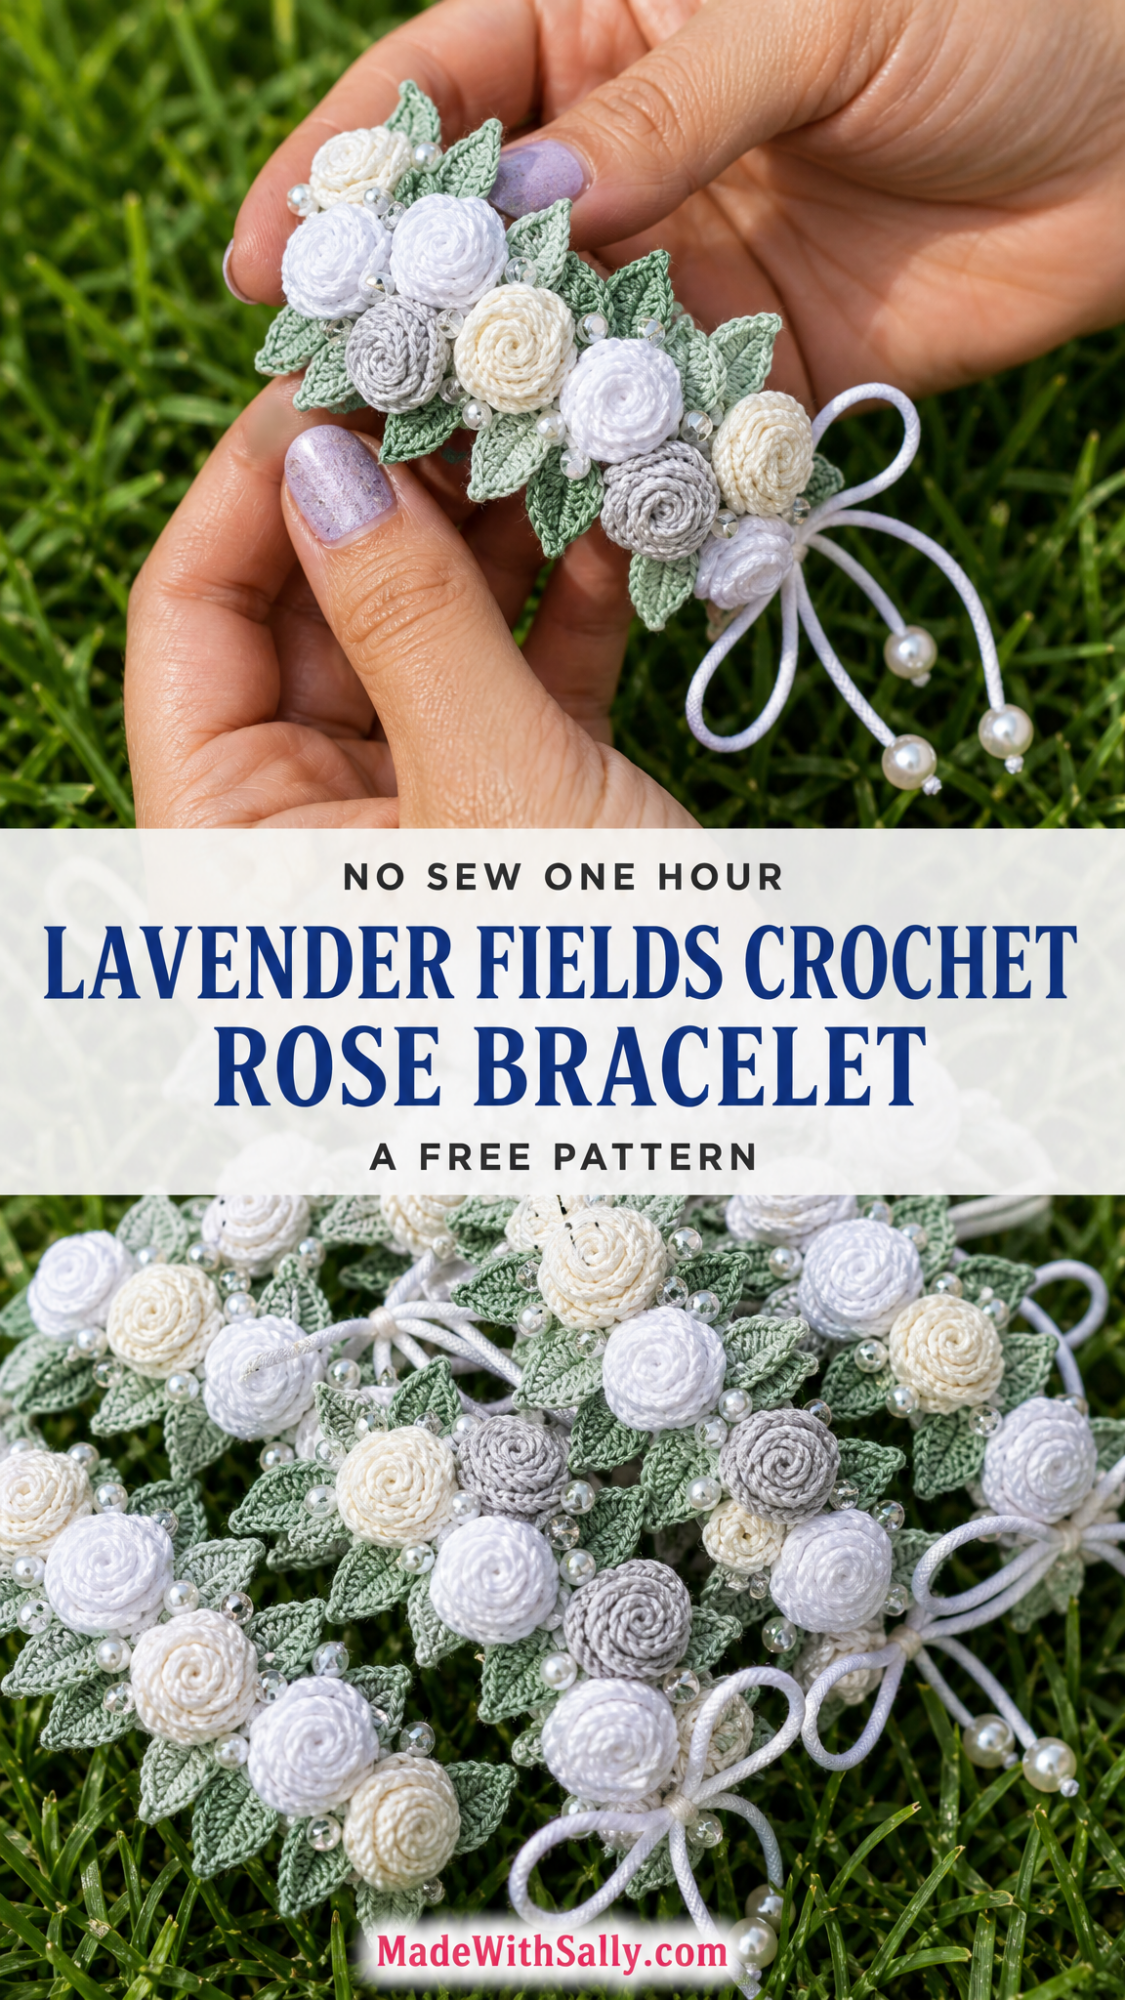
When I finished this bracelet, I actually gasped. It photographs beautifully, fits comfortably on the wrist, and makes the perfect handmade gift for weddings, Mother’s Day, or anyone who appreciates wearable art. Let me walk you through exactly how to create your own.
Why You’ll Love This Crochet Rose Bracelet Pattern
This crochet bracelet pattern combines several techniques into one stunning accessory. You’ll create individual spiral roses in varying sizes, stitch delicate pointed leaves with visible vein texture, and assemble everything onto a sturdy base with a ribbon tie closure.
The construction is modular, meaning you make each component separately before joining them. This approach keeps the project portable and lets you work on roses during lunch breaks or while watching television. If one rose doesn’t turn out perfectly, you simply make another without starting the whole project over.
The finished bracelet measures approximately 6 inches long and 2.5 inches wide at the center, with ribbon ties that adjust to fit most wrist sizes. The soft neutral color palette of cream, white, silver gray, sage green, and dusty mint creates a romantic aesthetic perfect for special occasions.
Materials Needed for Your Crochet Bracelet
Yarn:
Hook:
Notions:
Gauge:
With size 7 steel hook and lace weight cotton, one small rose measures approximately 0.75 inches in diameter. Gauge is not critical but will affect finished size.
Skill Level and Techniques
This pattern is intermediate level. You should be comfortable with basic crochet stitches and working in small scale with fine thread.
Stitches and abbreviations used:
How to Crochet the Spiral Roses
The roses are created using a simple strip method. You crochet a long curved strip, then roll it tightly to form the spiral rose shape. Make roses in three sizes for visual interest.
Large Rose (Make 3, one in each flower color)
Row 1: Ch 40.
Row 2: Sc in 2nd ch from hook, *sk 1 ch, 5 dc in next ch (shell made), sk 1 ch, sc in next ch*. Repeat from * across. You will have approximately 9 to 10 shell shapes. Fasten off, leaving a 12 inch tail for sewing. (39 sts worked into chain)
To form the rose: Starting at the beginning of the strip (where you made your first sc), begin rolling the strip tightly. The shells will naturally curve outward, creating petal layers. Use the yarn tail and tapestry needle to secure the bottom of the rose with small whip stitches as you roll. Continue rolling until the entire strip forms a spiral. Secure the end with several stitches through the base.
Medium Rose (Make 4, mixing colors)
Row 1: Ch 30.
Row 2: Sc in 2nd ch from hook, *sk 1 ch, 4 dc in next ch, sk 1 ch, sc in next ch*. Repeat from * across. Fasten off, leaving a 10 inch tail. (29 sts)
Roll and secure using the same method as the large rose. The smaller shells create a slightly tighter spiral.
Small Rose (Make 2 to 3)
Row 1: Ch 22.
Row 2: Sc in 2nd ch from hook, *sk 1 ch, 3 dc in next ch, sk 1 ch, sc in next ch*. Repeat from * across. Fasten off, leaving an 8 inch tail. (21 sts)
Roll and secure as before. These small roses fill gaps beautifully in the final arrangement.
Rose troubleshooting: If your roses look flat rather than dimensional, try rolling more tightly at the center and loosening slightly as you work outward. The center should be snug while the outer petals have room to bloom open.
How to Crochet the Textured Leaves
The leaves feature a central vein created by working into the back loops, giving them beautiful texture and dimension. Make leaves in two sizes and both green colors.
Large Leaf (Make 8 to 10, mixed greens)
Ch 12.
Row 1: Sl st in 2nd ch from hook, sc in next ch, hdc in next ch, dc in next 2 ch, tr in next 2 ch, dc in next 2 ch, hdc in next ch, 3 sc in last ch (this creates the leaf tip). (11 sts plus tip)
Do not turn. Continue working down the opposite side of your foundation chain.
Row 2: Working into the unused loops of your starting chain, hdc in first st, dc in next 2 sts, tr in next 2 sts, dc in next 2 sts, hdc in next st, sc in next st, sl st in last st. Fasten off, leaving a 6 inch tail. (11 sts on second side)
The leaf should have a natural curve and pointed tip. If it curls too much, try loosening your tension slightly.
Small Leaf (Make 6 to 8, mixed greens)
Ch 9.
Row 1: Sl st in 2nd ch from hook, sc in next ch, hdc in next ch, dc in next 2 ch, hdc in next ch, sc in next ch, 3 sc in last ch (leaf tip). (8 sts plus tip)
Row 2: Working down the other side of chain, sc in first st, hdc in next st, dc in next 2 sts, hdc in next st, sc in next st, sl st in last st. Fasten off, leaving a 6 inch tail. (8 sts)
Creating the Bracelet Base
The base provides structure and a surface for attaching your roses and leaves.
Using sage green yarn:
Row 1: Ch 6, sc in 2nd ch from hook and in each ch across. (5 sc)
Rows 2 through 32: Ch 1, turn, sc in each st across. (5 sc)
This creates a rectangular base approximately 5 to 6 inches long. Adjust the number of rows for a larger or smaller wrist.
Edging (optional but recommended):
Join yarn at any corner, sc evenly around the entire rectangle, working 3 sc in each corner. Sl st to first sc to join. Fasten off.
Assembly Instructions
Gather your completed roses, leaves, and base. You will also need your sewing needle, thread, ribbon, and beads.
Step 1: Plan your layout. Arrange the roses on the base without attaching them. Place the largest roses toward the center, medium roses around them, and small roses filling gaps. Tuck leaves underneath and around the roses, extending beyond the edges of the base for a flowing, organic look. Take a photo of your arrangement so you can reference it during assembly.
Step 2: Attach the leaves first. Using matching green thread and a sharp sewing needle, stitch the leaves to the base. Position them so they peek out from behind where the roses will sit. Secure each leaf with several small stitches at the base (stem end) of the leaf.
Step 3: Attach the roses. Starting with the largest roses, sew them securely to the base. Stitch through the bottom of each rose several times, making sure they are firmly attached. Layer the medium and small roses around them, stitching each in place.
Step 4: Add the ribbon closure. Cut two pieces of ribbon, each approximately 6 inches long. Fold one end of each ribbon under by half an inch and stitch it securely to each short end of the bracelet base. The ribbons should extend outward so they can tie in a bow when the bracelet is worn.
Step 5: Add bead accents. Thread pearl beads onto the ribbon ends and knot to secure them. These add weight and elegance to the ribbon ties. Optionally, sew small crystal or silver beads randomly among the roses for sparkle.
Step 6: Final touches. Check that all elements are secure. Trim any visible thread tails. Gently shape the leaves and rose petals with your fingers.
Styling and Care Tips
This crochet rose bracelet works beautifully for weddings as a bridesmaid gift or bridal accessory. The ribbon tie means one size fits most wrists comfortably.
For a hair accessory version, attach the completed flower arrangement to a hair clip base or large barrette. The construction is identical, just mounted differently.
To clean your bracelet, spot clean with mild soap and cool water. Lay flat to dry and reshape while damp. Avoid machine washing, which can crush the delicate rose shapes.
Storage tip: Store your bracelet in a small box or fabric pouch to prevent crushing. A tissue paper nest helps the roses keep their shape.
Customization Ideas for Your Bracelet
This pattern adapts beautifully to different color schemes and occasions.
For a boho look: Use dusty rose, terracotta, and mustard yellow with olive green leaves.
For a winter wedding: Try icy blue, silver, and white with frosted green leaves. Add silver bead accents for sparkle.
For everyday wear: Create the roses in a single color for a more subtle statement piece.
For a child’s size: Reduce the base length to 18 to 20 rows and use one fewer large rose.
I hope this crochet rose bracelet brings you as much joy to make as it did for me to design. The individual components work up quickly, and watching the arrangement come together feels like creating a tiny garden.
If you make this bracelet, I would absolutely love to see your version. Tag me on Instagram or share a photo in my Facebook group. Seeing your creativity always makes my day.
Save this pattern to your Pinterest boards so you can find it when you’re ready to start. And please drop a comment below if you have any questions or just want to share your color choices. Happy crocheting, friend!
