
I’ve been looking for the perfect bohemian accessory pattern for months, and this sage green lace choker is absolutely my favourite find. The combination of delicate crochet lacework, wooden beads, and bronze charms creates something that looks like it belongs in a boutique. If you love jewelry that tells a story and shows off your handmade skills, this is the one.
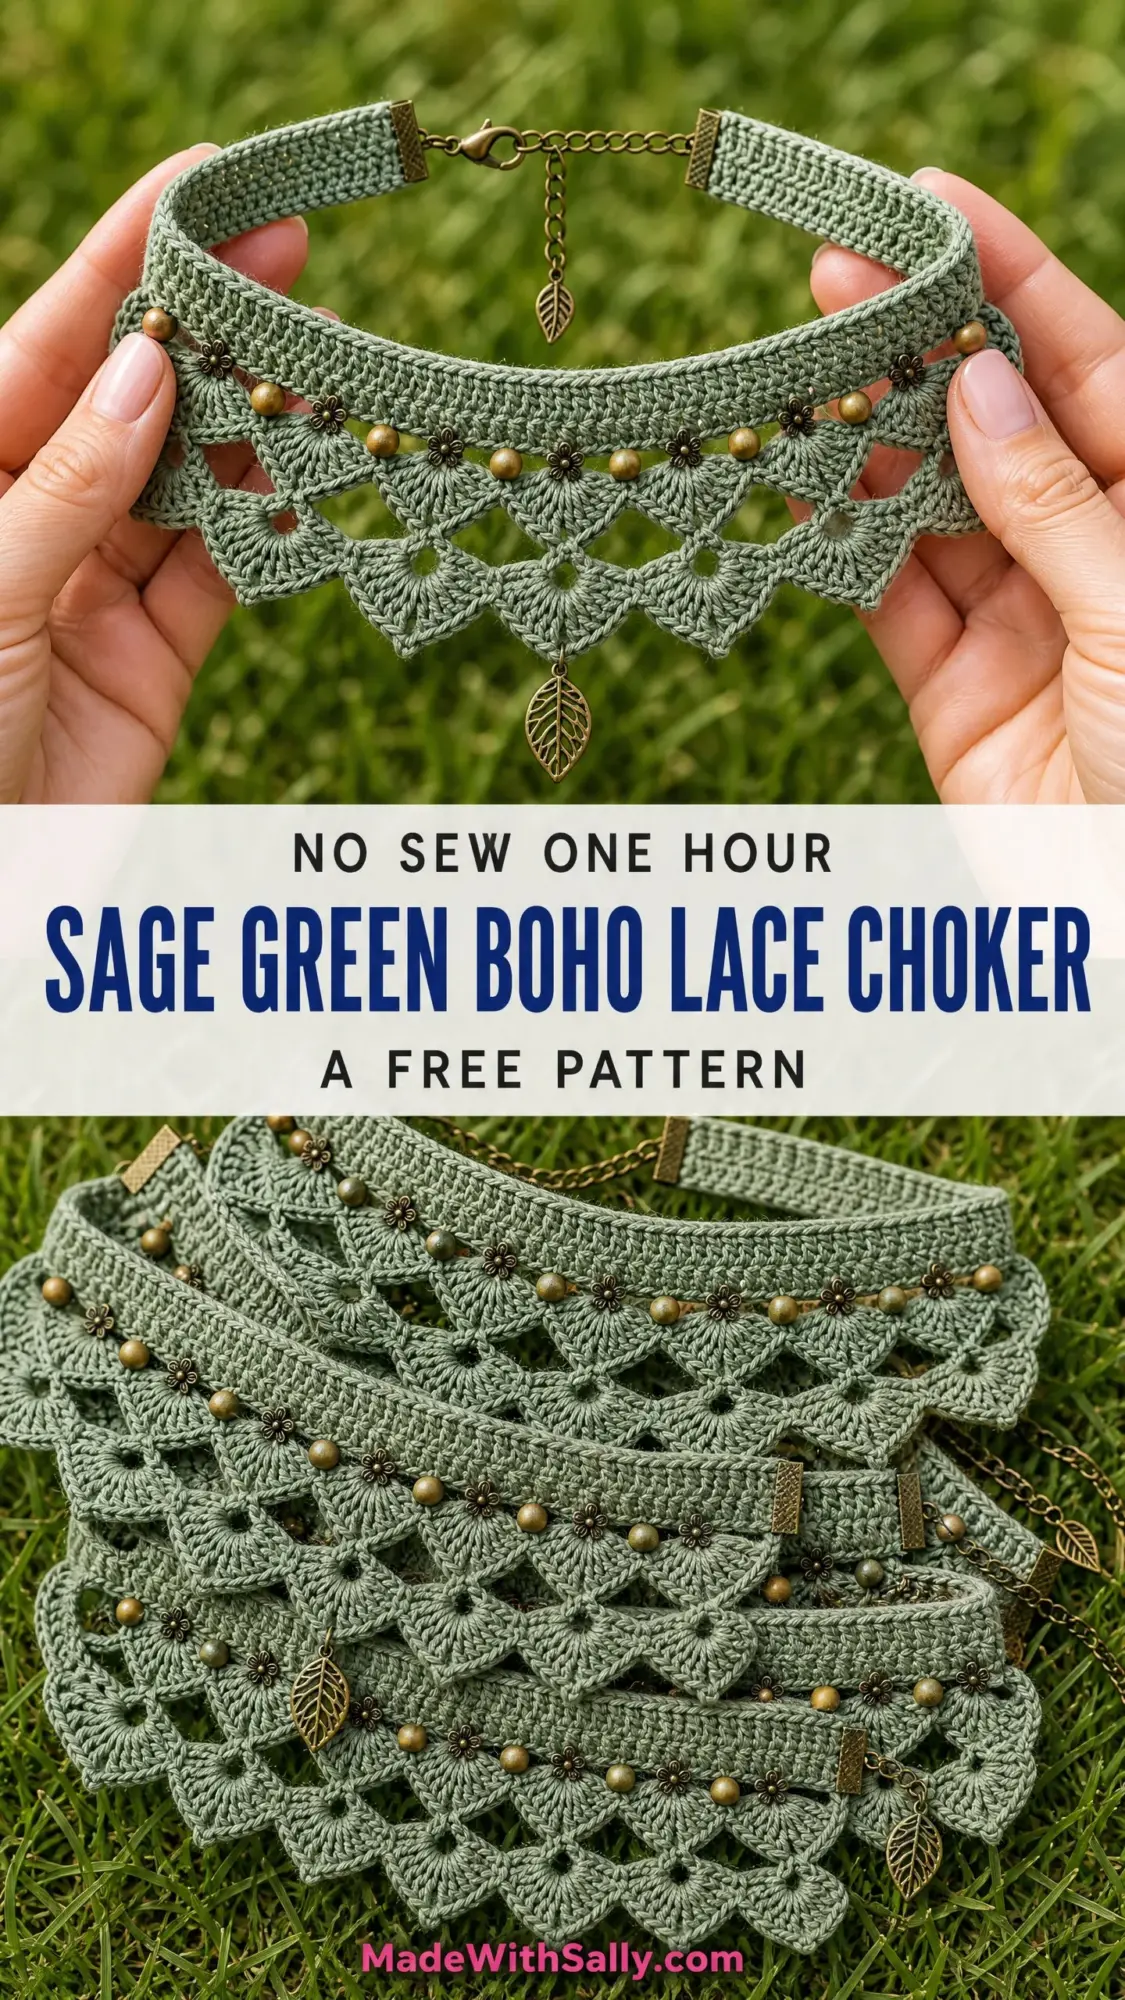
This choker sits beautifully at the base of the neck, with a dramatic fan and diamond lace bib that catches the light and draws compliments. The sage green cotton yarn gives it an earthy, natural vibe that pairs perfectly with casual summer dresses or cozy autumn layers.
Whether you’re making this for yourself or as a thoughtful gift for someone special, I think you’re going to love how it comes together. Let me walk you through everything you need to know.
What Makes This Boho Lace Choker Special
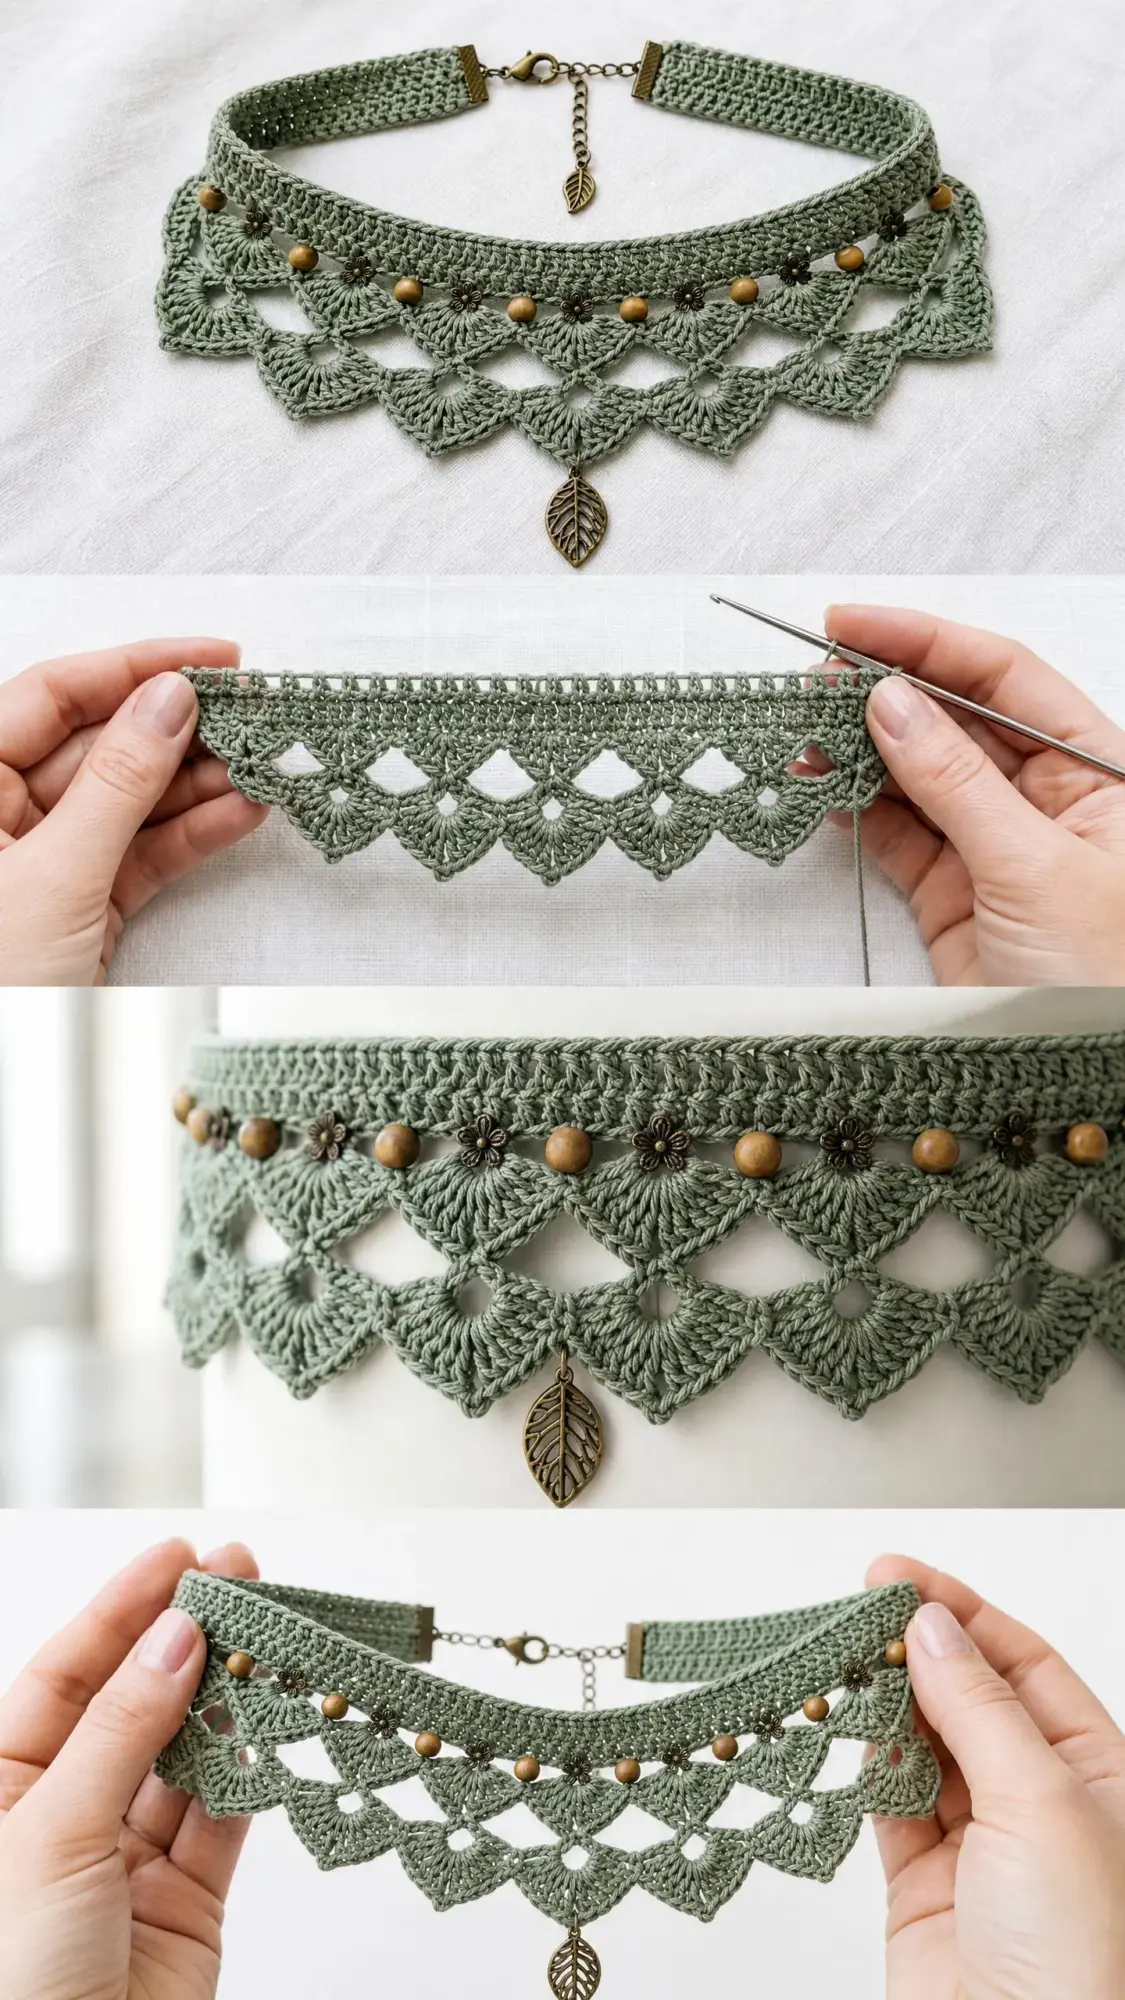
This isn’t your typical crochet necklace. The design features a structured neckband made from dense half double crochet stitches that sits flat and comfortable against your throat. From the lower edge of that band, a gorgeous lace bib fans outward and downward into pointed scallops. The effect is dramatic without being heavy.
The fan and diamond stitch pattern creates those beautiful open lacework sections you see in the finished piece. Wooden beads and small bronze flower spacer beads are worked directly into the fabric during construction, not added afterward. This means they’re secure and perfectly positioned. A bronze leaf charm dangles from the center point of the lace bib, adding movement and visual interest. A second matching charm hangs from the extender chain at the back.
The hardware is all antique bronze, including flat crimp style end bars, a lobster claw clasp, and a short extender chain. Everything coordinates beautifully with the natural materials.
Skill Level and Time Investment
I’d call this an intermediate level project. If you’re comfortable working shell stitches and reading lace repeat patterns, you’ll do great. The neckband is completely straightforward. The lace bib requires you to work chain spaces, cluster stitches, and multiple shells into a single stitch or space. That sounds fancier than it is, I promise.
The key skill here is maintaining your stitch count across the bib rows. Lace patterns can get tricky if you lose track, so I’ll give you checkpoints throughout to make sure everything is on track.
The bead placement adds one extra step, but it’s honestly not difficult at all. You’ll string all the beads onto your yarn before you even start crocheting. Then you simply push them into position at the right moments.
Time estimate: Plan for 3 to 5 hours including finishing and hardware attachment. The bead stringing takes about 15 minutes at the beginning. This makes a wonderful weekend project or a few evenings of relaxing crochet time.
Finished Measurements
Before you start, here’s what you’re making:
The neckband length can be customized if you need a different fit. I’ll cover that in the sizing tips section.
Materials You’ll Need
Yarn
Size 3 light weight (DK) 100 percent cotton yarn in sage green, approximately 60 yards / 55 meters
Yarn suggestions that work beautifully:
1. Paintbox Yarns Simply DK (100% cotton, 137 yards / 125 meters per 50 g ball) in Grass Green or Pistachio. One ball is more than sufficient.
2. Drops Safran (100% Egyptian cotton, 175 yards / 160 meters per 50 g ball) in color 11 (light olive) or color 08 (light sage). One ball is more than sufficient.
3. Lion Brand 24/7 Cotton in Aloe (DK weight, 100% mercerized cotton, 186 yards / 170 meters per 100 g ball). One ball is more than sufficient and the mercerized finish gives excellent stitch definition for lace.
Important substitution note: Use 100 percent cotton or a cotton blend yarn for structure and drape. Avoid stretchy fibers like nylon or elastane because the lace bib must hold its shape flat against your chest. A yarn with good stitch definition will show the fan and diamond motifs most clearly. Stay within the light DK to sport weight range (sizes 2 to 3). Going heavier will make the bib too stiff and bulky. Going lighter will require a hook size adjustment and will affect the finished dimensions.
Hook
US size D-3 / 3.25 mm crochet hook
Notions
Gauge
20 sc x 24 rows = 4 inches / 10 cm worked in single crochet with a US D-3 / 3.25 mm hook, blocked.
For the lace section: one full fan and diamond repeat (10 stitches wide at foundation) = approximately 1.25 inches / 3.2 cm wide.
Why gauge matters here: The neckband uses 10 repeats of the fan base, giving a working foundation of 101 stitches. At gauge this yields a neckband of approximately 12.5 inches / 32 cm before hardware, which after seaming into crimp bars sits at 12 inches / 30.5 cm. If your choker is going to fit properly, you need to hit gauge. Adjust hook size up or down one size if needed.
Abbreviations and Stitch Definitions
Let me define every stitch and term you’ll encounter. These are all US crochet terms.
Special Stitches for This Crochet Pattern
3-dc Cluster (cl)
This stitch combines three incomplete double crochets into one, creating a textured bump. Here’s exactly how to work it:
Yarn over, insert hook into indicated stitch or space, yarn over and pull up a loop, yarn over and pull through 2 loops (2 loops remain on hook). Yarn over, insert hook into same stitch or space, yarn over and pull up a loop, yarn over and pull through 2 loops (3 loops remain on hook). Yarn over, insert hook into same stitch or space, yarn over and pull up a loop, yarn over and pull through 2 loops (4 loops remain on hook). Yarn over and pull through all 4 loops on hook. Cluster complete.
5-dc Shell
Work 5 dc all into the same stitch or space. This creates a fan shape that’s central to the lace pattern.
Bead Push-Up
Before working the indicated stitch, slide one bead (the next bead on your yarn) up snugly against the hook so the bead sits on the front face of the work. Complete the stitch as normal. The bead is now locked in place on the RS of the fabric.
Don’t worry if this sounds complicated. It becomes natural very quickly once you try it.
Important Pattern Notes Before You Begin
1. Construction order: The neckband is worked first as a flat strip. The lace bib is then worked downward from the lower edge of the neckband in rows. Work is turned at the end of each row.
2. Bead stringing (do this first!): Before beginning, string all beads onto the yarn in the following alternating sequence: flower spacer, wooden bead, flower spacer, wooden bead. Continue until all 12 wooden beads and 12 flower spacer beads are strung (24 beads total). They will be pushed into place during Row 3 of the lace section.
3. Right side orientation: The RS of the neckband faces outward (away from the neck). All lace rows are worked with the RS of the neckband facing you, so the bib builds on the front (outer) face.
4. Not worked in the round: The choker is a flat strip and the hardware creates the closure. Leave 0.75 inch / 2 cm tails at each end of the neckband for insertion into the crimp bars.
5. Turning chains for the neckband: Ch 2 and turn at the end of each row. The ch-2 does not count as a stitch.
6. Turning chains for the lace bib: The turning chain is specified within each row instruction.
Step by Step Crochet Pattern Instructions
Neckband
The neckband is a narrow strip of half double crochet worked flat. It sits at the top of the choker and is the band that presses against the throat.
Foundation chain: Ch 63.
Row 1 (WS): Hdc in 3rd ch from hook and in each ch across. Turn. (61 hdc)
Row 2 (RS): Ch 2, hdc in each st across. Turn. (61 hdc)
Row 3: Ch 2, hdc in each st across. Turn. (61 hdc)
Row 4: Ch 2, hdc in each st across. Turn. (61 hdc)
Do not fasten off. The neckband strip should measure approximately 12 inches / 30.5 cm long and 0.75 inch / 2 cm wide at this point.
Checkpoint: After completing the neckband, the strip should measure 12 inches / 30.5 cm in length (relaxed, unblocked) and 0.75 inch / 2 cm in width. Count 61 hdc stitches along one long edge before proceeding.
Neckband to Bib Foundation Row
Rotate the work so the long bottom edge of the neckband faces you. You will now work along the bottom long edge of the neckband, picking up stitches to create the foundation for the lace bib. Do not cut yarn.
Foundation Bib Row (RS, picking up along bottom edge): Ch 1, work 101 sc evenly along the bottom edge of the neckband. Turn. (101 sc)
Note on stitch count: 101 sc = 10 fan repeats x 10 stitches each, plus 1 extra stitch at the end to balance the final repeat. The 61 stitch neckband edge has approximately 61 row end post edges to pick up from. Work into every available post and add occasional additional stitches into the same post to reach 101 total. Distribute evenly across the edge.
At gauge, 101 sc across the DK cotton will measure approximately 20 inches / 50 cm if laid flat, but once attached to the 12 inch neckband the stitches gather and compress naturally into the ruffle that forms the lace bib. This gathering is intentional and creates the fullness of the fan pattern.
Lace Bib
The lace bib is worked in rows downward from the Foundation Bib Row. The RS always faces you.
Row 1 (WS, establishes fan base points): Ch 3 (counts as dc here and throughout lace section), turn. Dc in same st as ch-3. (Ch 1, sk 3 sts, 5-dc shell in next st, ch 1, sk 3 sts, 2 dc in next st) rep across, ending last rep with 2 dc in last st. Turn.
Stitch count check: You should have 10 shells and 11 pairs of 2-dc posts across the row. (10 shells, 11 two-dc groups, 20 ch-1 sps)
Row 2 (RS, creates diamond chain spaces): Ch 5 (counts as dc + ch 2), turn. Sc in top of first shell, (ch 5, cl in sp between shells, ch 5, sc in top of next shell) rep across to last shell, ch 5, sc in top of last shell, ch 2, dc in top of last st. Turn. (10 sc, 9 cl, 20 ch-5 sps, 2 edge ch-2 sps)
Note: "Top of shell" means into the 3rd (center) dc of the 5-dc shell. "Sp between shells" means into the space above the 2-dc post group between two adjacent shells, working the cluster into the ch-1 space or the post itself.
Row 3 (WS, bead row and re-establishment of shells): Ch 3 (counts as dc), turn. 4 dc in first ch-2 sp at edge (completing a half-shell at edge). (Bead push-up into next ch-5 sp, ch 2, sc in top of cl, ch 2, bead push-up, 5-dc shell in next ch-5 sp) rep across, ending with bead push-up into last ch-5 sp, ch 2, sc in top of last cl, ch 2, bead push-up, 5 dc in last ch-2 sp at edge. Turn.
After Row 3: You should have 10 shells (including the two half-shells at each edge that together form the equivalent of one shell), 9 sc sitting atop clusters, and 24 beads placed (12 wooden beads and 12 flower spacers, alternating, one bead pushed up on each side of each sc). (10 shells or equivalent, 9 sc, 18 ch-2 sps, 24 beads placed)
Row 4 (RS, drop to points): Ch 1, turn. Sc in first dc. (Ch 3, sk 2 dc, sc in 3rd dc of shell, ch 5, sc in 3rd dc of next shell, ch 3, sc in sc between shells) rep across, ending last rep with ch 3, sk 2 dc, sc in last dc. Turn. (10 sc atop shells, 9 sc atop between-shell sc from Row 3, 10 ch-3 sps, 9 ch-5 sps)
Note: The ch-5 arcs fall between shells and the ch-3 sps frame the outer points of each shell. This begins the diamond shaping that creates the pointed scallop edge.
Row 5 (WS, scallop points with diamond fills): Ch 1, turn. Sc in first sc. (3 sc in ch-3 sp, sc in sc, 5 dc in ch-5 sp, sc in sc, 3 sc in ch-3 sp, sc in sc between shell groups) rep across, ending with 3 sc in last ch-3 sp, sc in last sc. Turn. (approximately 137 sts)
Checkpoint: After Row 5, the lace bib should be approximately 1.5 inches / 3.8 cm deep. You should see the beginning of the fan and diamond structure, with small raised points beginning to form along the lower edge. The beads from Row 3 should be visible along the upper portion of the bib sitting on the RS.
Row 6 (RS, defines scallop arches): Ch 3 (counts as dc), turn. Dc in same st. (Ch 1, sk 2 sts, sc in next st, ch 3, sk 3 sts (the 5-dc fan), sc in next st, ch 1, sk 2 sts, 5-dc shell in next st) rep across, ending last rep with 2 dc in last st instead of shell. Turn. (9 shells, 2 edge posts, 18 ch-1 sps, 9 ch-3 arches over fans, 18 sc)
Row 7 (WS, final scallop points): Ch 1, turn. Sc in first dc. (Ch 3, sc in ch-3 arch, ch 3, sc in center dc of next shell) rep across, ending ch 3, sc in ch-3 arch, ch 3, sc in top of t-ch. Turn. (20 ch-3 sps, 21 sc)
Row 8 (RS, final scallop edge): Ch 1, turn. Sc in first sc. (Work into ch-3 sp: hdc, 3 dc, hdc, sc in next sc) rep across, working the last sc into the final sc. Do not turn. Fasten off. Leave a 6 inch / 15 cm tail for weaving.
Row 8 stitch count: Each ch-3 sp receives 5 sts (hdc, dc, dc, dc, hdc) plus 1 sc between each group. 20 ch-3 sps x 5 sts = 100 sts, plus 21 sc = 121 sts total. (121 sts)
The lower edge of the bib should now show 20 individual scallop points with the center two points flanking the hanging position for the center leaf charm.
Final checkpoint: The completed lace bib should measure approximately 2.75 inches / 7 cm from the Foundation Bib Row to the lowest point of the center scallop. The full bib width follows the 12 inch neckband. The scallop edge should lie flat. If the bib is ruffling excessively, your gauge is too loose. If it is pulling and distorting the neckband, your gauge is too tight. Light blocking will resolve minor issues.
Finishing Your Boho Choker
Weaving in Ends
Thread the yarn needle with each tail and weave in securely, running the tail through at least 4 stitches in alternating directions so the lace does not loosen over time.
Blocking
This step is essential for the lace to open up and the diamond motifs to show clearly.
Wet block the choker by submerging in cool water for 10 minutes, pressing out excess water gently in a towel (do not wring), then pinning the lace bib to a foam blocking mat. Pin each scallop point outward to define it, and pin the upper neckband edge straight. Allow to dry completely, 12 to 24 hours.
Attaching Charms
Using a jump ring and flat nose pliers, attach one bronze leaf charm to the center lowest scallop point. Locate the center of Row 8, count to the lowest central point between scallop 10 and scallop 11, and attach the jump ring through the stitch at that point. Attach the second bronze leaf charm to the end link of the extender chain.
Attaching Hardware
Fold the left short end of the neckband (0.75 inch / 2 cm of fabric) and insert into one crimp bar end. Apply a small amount of fabric glue or clear jewelry adhesive inside the bar before inserting the yarn end, press closed with flat nose pliers. Repeat on the right short end. Allow glue to cure per manufacturer’s instructions (typically 30 minutes to 2 hours).
Attach the lobster claw clasp to one crimp bar loop using a jump ring. Attach the extender chain to the other crimp bar loop using a jump ring.
Size Customization Tips
To shorten the choker (for a tighter fit): Reduce the foundation chain by multiples of 2 stitches per row. The neckband hdc count must remain a multiple compatible with producing a Foundation Bib Row divisible by 10 plus 1. Options: 8 repeats = 81 foundation bib sts, 9 repeats = 91 foundation bib sts, 10 repeats (standard) = 101 foundation bib sts. Adjust neckband chain accordingly.
To lengthen the choker (for a looser fit or longer neck): Add repeats in multiples of 10 foundation stitches and extend the neckband chain proportionally. Each additional repeat adds approximately 1.25 inches / 3.2 cm of bib width and requires an additional 2 wooden beads and 2 flower spacer beads.
To deepen the bib: After Row 5, repeat Rows 6 through 7 one additional time before working the final scallop edge (Row 8). This adds approximately 0.75 inch / 2 cm of depth.
Care Instructions
Hand wash in cool water with a gentle soap. Do not wring. Lay flat to dry, reshaping the scallops by hand while damp. Do not machine wash or tumble dry, as the cotton may shrink and distort the lace. Do not bleach.
Remove the choker before swimming, showering, or applying perfume, hairspray, or lotions, as these can discolor the beads and tarnish the bronze hardware. Store flat or loosely coiled in a dry place away from direct sunlight to prevent color fading.
You Made It!
Thank you so much for choosing this pattern for your next project. I genuinely hope you love making this sage green boho lace choker as much as I loved designing it. If you make one, I would absolutely love to see your finished piece! Tag me on Instagram or share a photo in my Facebook group.
If this pattern caught your eye, go ahead and save it to your Pinterest boards so you can find it easily when you’re ready to start. And please drop a comment below if you make this choker. I love hearing how projects turn out and seeing the color combinations you choose!
