
Looking for a statement piece that keeps you warm while turning heads at every gathering? This dusty blue ruffle sleeve peplum cardigan delivers exactly that. The fitted bodice flatters your shape, the romantic ruffles add drama without overwhelming your frame, and the entire piece works up in a single gorgeous shade of periwinkle blue.
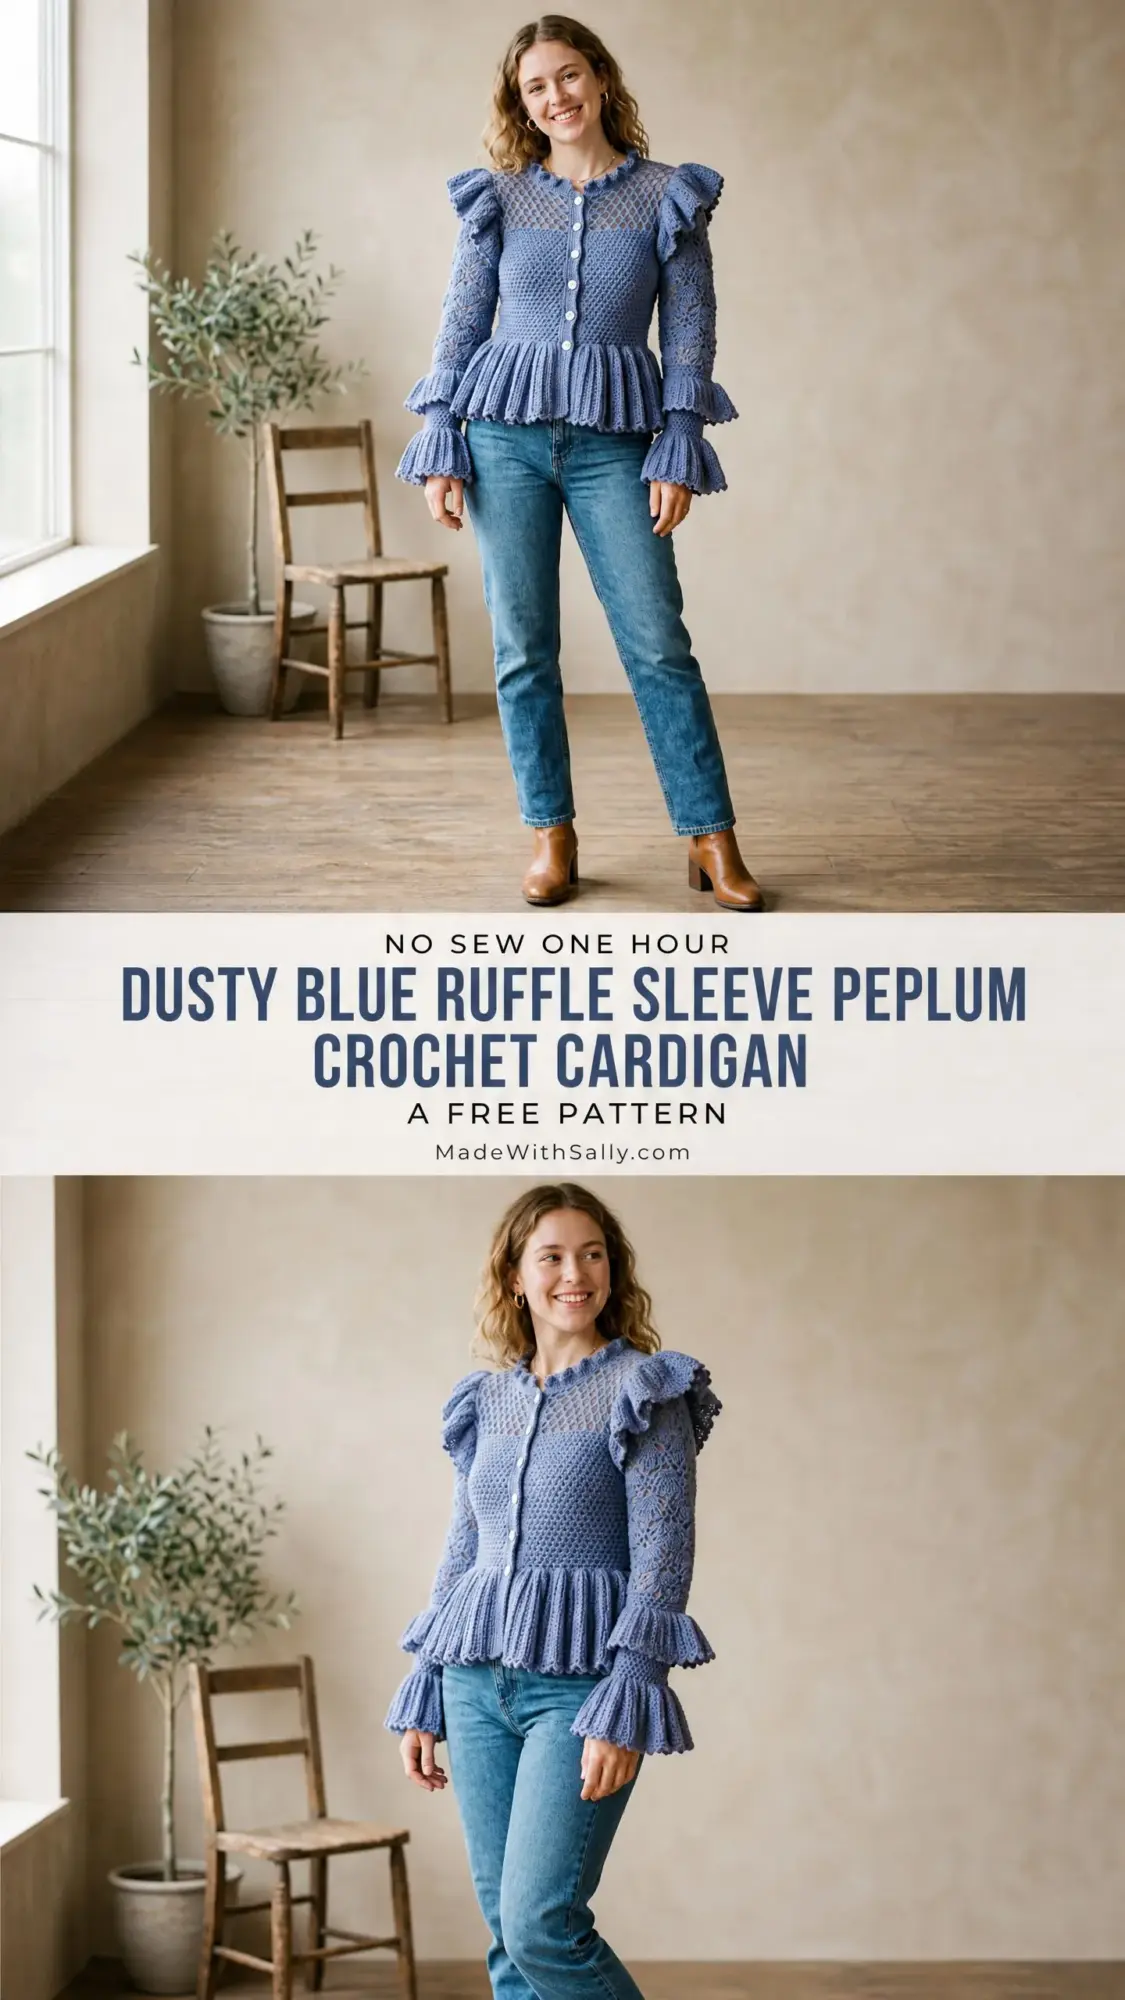
This cardigan combines three distinct stitch textures in one garment. You will work a dense modified granite stitch for the structured body, an open honeycomb mesh for the delicate yoke, and a beautiful fan lace pattern for the sleeves. If you have been crocheting for a while and want to challenge yourself with something truly special, this is the project to tackle.
Whether you are making this for yourself or as an unforgettable handmade gift, the finished cardigan looks like it came straight from a boutique. Yes, it takes time and attention to detail. But every hour you invest shows in the final result. Let me walk you through everything you need to bring this beauty to life.
Why This Cardigan Pattern Stands Out
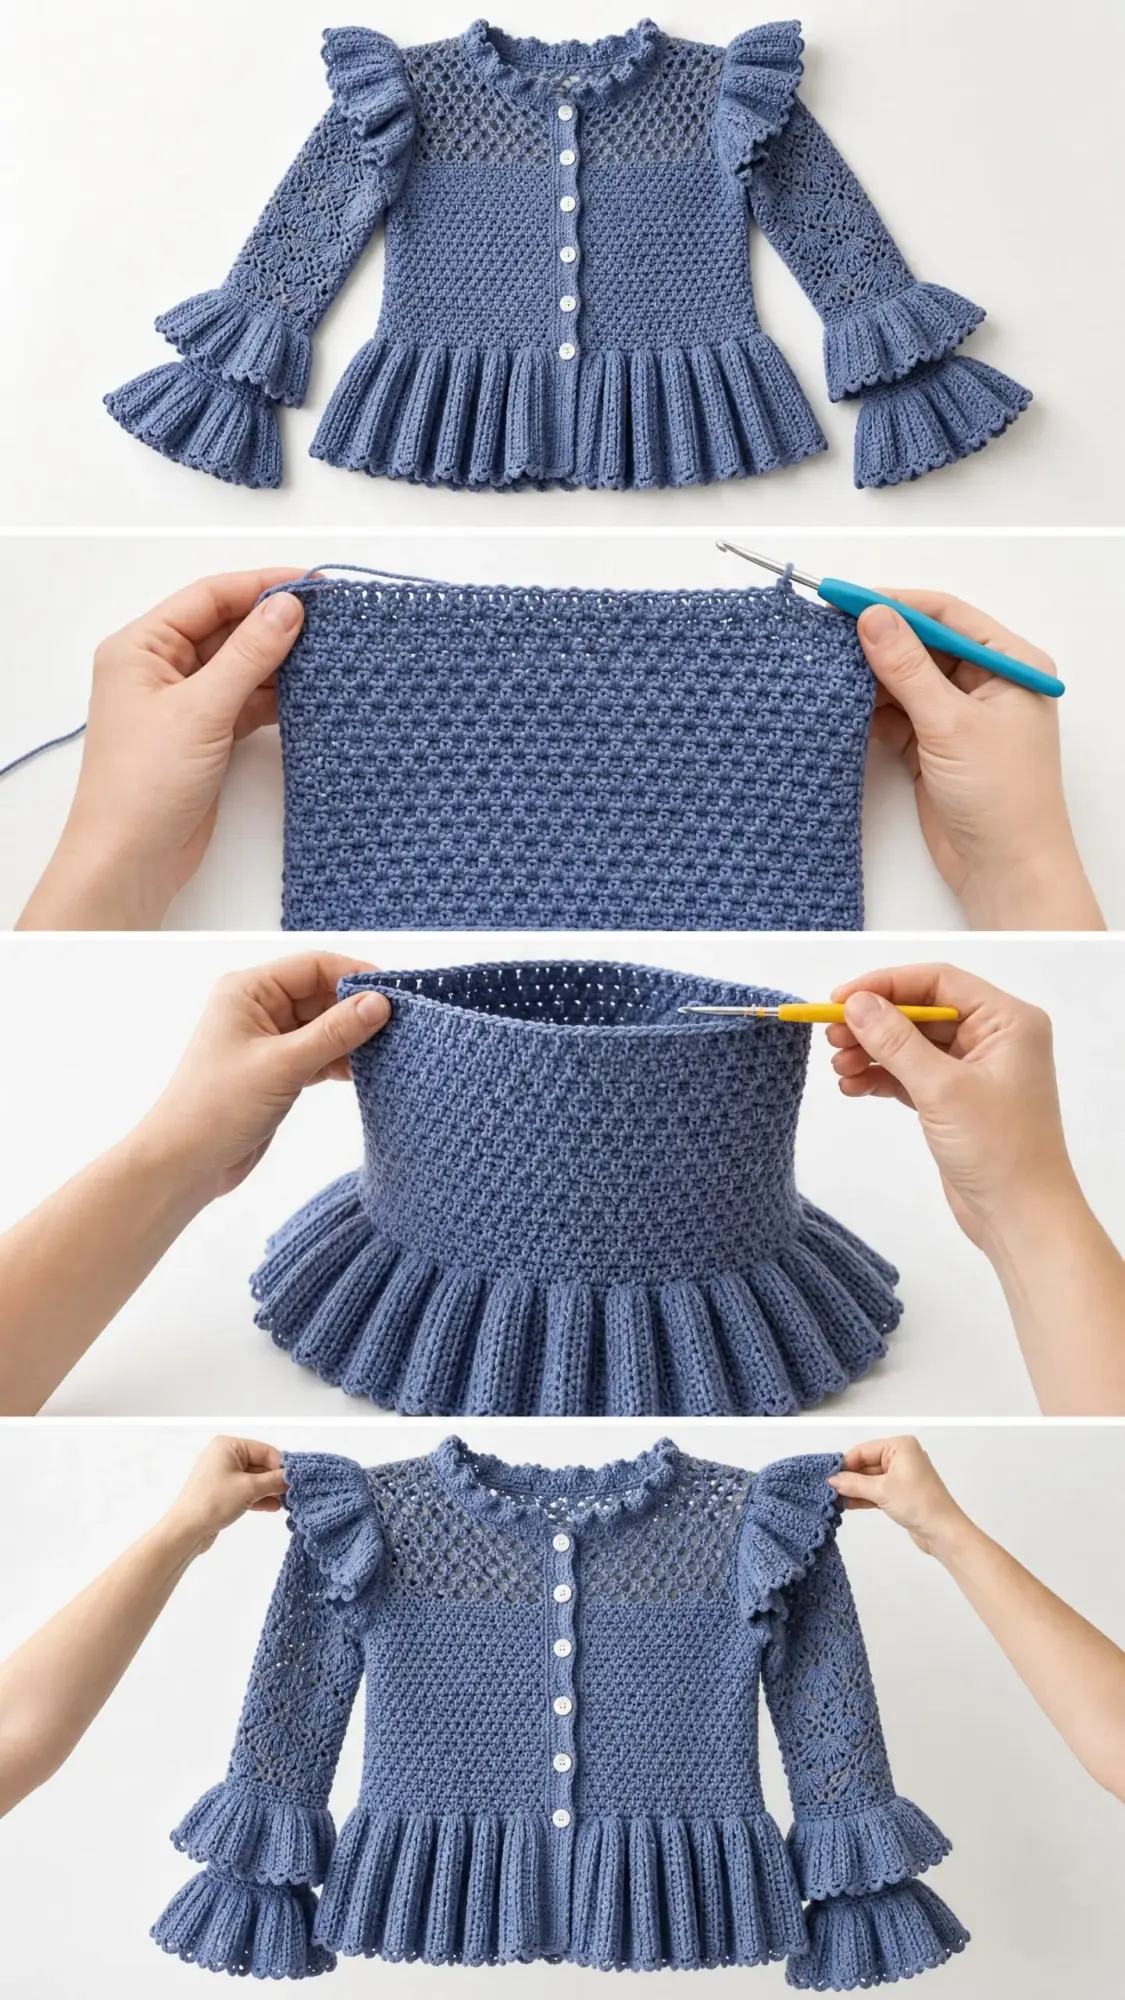
This is not your average crochet sweater. The design features multiple construction elements that give it a couture quality. You will create a structured bodice with waist shaping that actually fits, an airy mesh yoke across the upper chest and back, romantic shoulder and neckline ruffles, a sweeping pleated peplum at the hem, and show-stopping double-tiered bell cuffs with scalloped edges.
The button band accommodates six pearl or mother-of-pearl buttons for a polished finish. Everything comes together in one cohesive dusty periwinkle blue that photographs beautifully and suits most skin tones.
Skill Level and Time Investment
I rate this pattern as advanced intermediate to advanced. You should feel comfortable with multiple stitch textures, precise shaping, reading stitch counts carefully, working partial repeats, and seaming finished panels together.
Plan for approximately 60 to 80 hours of work for an experienced crocheter making size Medium. This is absolutely a labor of love, but the result is a one-of-a-kind wearable piece of art.
Finished Measurements
This pattern includes sizes Small through Extra-Large. Throughout the instructions, sizes appear as S (M, L, XL).
Bust: 34 (37, 40, 43) inches or 86.5 (94, 101.5, 109) cm
Waist: 28 (31, 34, 37) inches or 71 (78.5, 86.5, 94) cm
Hip at peplum join: 36 (39, 42, 45) inches or 91.5 (99, 106.5, 114.5) cm
Length from shoulder to hem ruffle top: 22 (22.5, 23, 23.5) inches or 56 (57, 58.5, 59.5) cm
Sleeve length from underarm to cuff ruffle top: 17 (17, 17.5, 17.5) inches or 43 (43, 44.5, 44.5) cm
Materials You Will Need
Yarn: DK weight yarn (CYCA #3) in dusty periwinkle blue. You need approximately 1,500 (1,650, 1,800, 1,950) yards or 1,372 (1,509, 1,646, 1,783) meters.
Hooks:
Notions:
Recommended Yarn Options
Option 1: Paintbox Yarns Simply DK in shade Dusty Blue. This 100% acrylic yarn offers excellent stitch definition and is machine washable. You need 6 (6, 7, 8) skeins at 276 yards per 100g skein.
Option 2: Cascade 220 Superwash Sport in a comparable dusty blue. This 100% superwash merino gives a softer drape that works beautifully for the ruffle sections. You need 11 (13, 14, 15) skeins at 136 yards per 50g skein.
Option 3: Paintbox Yarns Cotton DK in Misty Blue. Cotton creates crispness in the mesh yoke and lace sleeves. You need 6 (6, 7, 8) skeins at 273 yards per 100g skein.
Important: Avoid very fuzzy or halo yarns. They will obscure the beautiful stitch definition in the lace and mesh sections. Yarns with 4 to 10 percent stretch work best for maintaining fit over time.
Gauge Information
Getting gauge right is critical for fit. Make and block swatches in each stitch pattern before starting.
Modified Granite Stitch (using E-4 hook): 20 stitches x 22 rows = 4 inches or 10 cm, measured after wet blocking.
Honeycomb Mesh Stitch (using E-4 hook): 18 stitches x 20 rows = 4 inches or 10 cm, after wet blocking.
Fan Lace Stitch: One 12-stitch fan repeat measures approximately 2.25 inches or 5.7 cm wide and 1 inch or 2.5 cm tall after blocking.
Abbreviations and Stitch Definitions
ch = chain: yarn over, pull through loop on hook
sl st = slip stitch: insert hook, yarn over, pull through both loops at once
sc = single crochet: insert hook, yarn over, pull up a loop (2 loops on hook), yarn over, pull through both loops
hdc = half double crochet: yarn over, insert hook, yarn over, pull up a loop (3 loops on hook), yarn over, pull through all 3 loops
dc = double crochet: yarn over, insert hook, yarn over, pull up a loop, (yarn over, pull through 2 loops) twice
tr = treble crochet: yarn over twice, insert hook, yarn over, pull up a loop, (yarn over, pull through 2 loops) three times
sk = skip
st(s) = stitch(es)
sp(s) = space(s)
rep = repeat
pm = place marker
rem = remaining
RS = right side
WS = wrong side
yo = yarn over
blo = back loop only
flo = front loop only
ch-sp = chain space
t-ch = turning chain
dec = decrease
inc = increase
sc2tog = single crochet 2 together: a decrease that combines 2 stitches into 1
dc2tog = double crochet 2 together: a decrease combining 2 dc into 1
dc5tog = double crochet 5 together: a decrease combining 5 dc into 1
Special Stitches for This Crochet Cardigan Pattern
Modified Granite Stitch (MGS)
This stitch creates the dense, textured fabric for the bodice. It works on a multiple of 2 stitches plus 1.
Foundation row (RS): Work 1 sc in second ch from hook. (Skip 1 ch, work 1 sc and 1 hdc in next ch) across to last ch, work 1 sc in last ch. Turn.
Row 2 (WS): Ch 1. Work 1 sc in first st. (Skip 1 st, work 1 sc and 1 hdc in next st) across to last st, work 1 sc in last st. Turn.
Repeat Row 2 for pattern. The ch-1 turning chain does NOT count as a stitch.
Honeycomb Mesh Stitch (HMS)
This creates the open diamond mesh for the yoke. It works on a multiple of 4 stitches plus 1.
Setup Row (RS): Work 1 sc in first st, (ch 3, sk 3 sts, 1 sc in next st) across. Turn.
Row 2 (WS): Ch 5 (counts as dc + ch 2). Work 1 sc in first ch-3 sp, (ch 3, 1 sc in next ch-3 sp) across to last sp, ch 2, 1 dc in last sc. Turn.
Row 3 (RS): Ch 1. Work 1 sc in first dc, (ch 3, 1 sc in next ch-3 sp) across, ending with 1 sc in third ch of t-ch. Turn.
Repeat Rows 2 and 3 for pattern.
Fan Lace Stitch (FLS)
This decorative lace creates the beautiful sleeve pattern. It works on a multiple of 12 stitches plus 1.
Row 1 (WS): Ch 1. Work 1 sc in each st across. Turn. (This is a setup row only.)
Row 2 (RS): Ch 3 (counts as dc). Work 2 dc in first st, (sk 2 sts, 1 sc in next st, sk 2 sts, 5 dc in next st) across to last 6 sts, sk 2 sts, 1 sc in next st, sk 2 sts, 3 dc in last st. Turn.
Row 3 (WS): Ch 1. Work 1 sc in first dc, (ch 2, dc5tog over next 5 dc, ch 2, 1 sc in next sc) across, ending 1 sc in top of t-ch. Turn.
Row 4 (RS): Ch 3. Work 2 dc in first st, (sk ch-2 sp, 1 sc in dc5tog, sk ch-2 sp, 5 dc in next sc) across, ending 3 dc in last sc. Turn.
Repeat Rows 3 and 4 for pattern.
Scallop Edging
This finishing border appears on all ruffle hems and cuffs. Use the D-3 hook.
Join yarn in any st. (Sl st in next st, ch 3, 2 dc in same st, sl st in same st, sl st in next st) across. Fasten off.
Each scallop unit uses 2 stitches. Adjust your stitch count to an even number before working the scallop edging.
Pleated Ruffle (for peplum)
Step 1: Work a foundation row of sc evenly around the bottom edge of the bodice.
Step 2: Ch 3 (counts as dc). Work 2 dc in each sc across. This triples the stitch count for fullness. Turn.
Step 3: Work 6 rows of dc on these sts without increases. Turn.
Step 4: Work 1 final row of sc. Then work Scallop Edging around the bottom.
Shoulder Ruffle
Pick up 1 st for every stitch or seam post along the shoulder seam line. Ch 3, work 2 dc in each picked-up st, turn, work 2 rows dc. Finish with Scallop Edging.
Neckline Ruffle
Pick up sts evenly around the neckline. Join to work in the round.
Round 1: Ch 3, work 1 dc in each st around, join.
Round 2: Ch 3, work 2 dc in each st around, join. (This doubles your stitches.)
Work 1 more round dc. Finish with Scallop Edging worked in the round.
Construction Order
This cardigan is worked in flat panels and seamed together. Here is the order:
1. Back panel, from bottom hem to shoulder
2. Left Front panel, from bottom hem to shoulder
3. Right Front panel, from bottom hem to shoulder
4. Two Sleeves, from cuff end to sleeve cap
5. Seam shoulders, set in sleeves, seam sides
6. Peplum ruffle, worked into the bodice hem
7. Neckline ruffle pickup
8. Shoulder ruffle pickup
9. Button band on left and right fronts
10. Cuff ruffle tiers
11. Block the finished cardigan
Step by Step Pattern Instructions
Back Panel
Foundation Chain: Using E-4 hook, ch 93 (101, 109, 117).
Row 1 (RS): Work 1 sc in 2nd ch from hook. (Sk 1 ch, work 1 sc and 1 hdc in next ch) 45 (49, 53, 57) times. Work 1 sc in last ch. Turn. (92, 100, 108, 116 sts)
Rows 2 through 30: Work in MGS as established. After Row 30, the back body should measure approximately 5.5 inches from foundation. (92, 100, 108, 116 sts each row)
Waist Shaping for Back Panel, Decrease Section
Row 31 (RS): Ch 1. Work 1 sc in first st. (Sk 1 st, sc2tog over next 2 sts, sk 1 st, 1 sc in next st) 11 (12, 13, 14) times. Continue in MGS to last 46 (50, 54, 58) sts, working same decrease pattern in second half. 1 sc in last st. Turn. (80, 88, 96, 104 sts)
Rows 32 through 33: Work 2 rows plain MGS. (80, 88, 96, 104 sts)
Row 34 (second decrease row): Decrease 12 sts evenly across. (68, 76, 84, 92 sts)
Rows 35 through 44: Work 10 rows plain MGS. (68, 76, 84, 92 sts)
Waist Shaping for Back Panel, Increase Section
Row 45 (RS): Ch 1. 1 sc in first st. (Work 1 sc, 1 hdc, and 1 sc in next st, 1 sc in following st) 11 (12, 13, 14) times across first half. Repeat for second half. 1 sc in last st. Turn. (80, 88, 96, 104 sts)
Row 46: Work 1 plain MGS row. (80, 88, 96, 104 sts)
Row 47 (second increase row): Increase 12 sts evenly as in Row 45. Turn. (92, 100, 108, 116 sts)
Rows 48 through 58: Work 11 rows plain MGS. (92, 100, 108, 116 sts)
Checkpoint: Your back panel should measure approximately 11 inches tall and 18.5 (20, 21.5, 23) inches wide.
Armhole Shaping for Back Panel
Row 59 (RS): Sl st across first 6 (6, 8, 8) sts. Ch 1, work in MGS to last 6 (6, 8, 8) sts. Leave remaining sts unworked. Turn. (80, 88, 92, 100 sts)
Row 60: Ch 1. Sc2tog over first 2 sts. Work MGS to last 2 sts. Sc2tog. Turn. (78, 86, 90, 98 sts)
Row 61: Ch 1. Sc2tog. MGS to last 2 sts. Sc2tog. Turn. (76, 84, 88, 96 sts)
Row 62: Ch 1. Sc2tog. MGS to last 2 sts. Sc2tog. Turn. (74, 82, 86, 94 sts)
Row 63: Ch 1. Sc2tog. MGS to last 2 sts. Sc2tog. Turn. (72, 80, 84, 92 sts)
For sizes L and XL only:
Row 64: Ch 1. Sc2tog. MGS to last 2 sts. Sc2tog. Turn. (82, 90 sts)
All sizes now have (72, 80, 82, 90 sts).
Yoke Mesh Section for Back Panel
Work a plain sc row to set up, then adjust stitch count for HMS (multiple of 4 plus 1):
Adjustment Row: Work sc across, adding 1 sc at center. (73, 81, 85, 93 sts)
HMS Rows 1 through 14: Work HMS as written in Special Stitches.
After 14 HMS rows, back yoke mesh measures approximately 3.5 inches. Total back height is now approximately 17.5 inches. (73, 81, 85, 93 sts)
Back Shoulder and Neck Shaping
Work 4 rows plain sc across all sts. (73, 81, 85, 93 sts)
Neck Width: Center 25 (27, 29, 31) sts are the back neck. Shoulders are 24 (27, 28, 31) sts each side.
Left Shoulder: Work across first 24 (27, 28, 31) sts only. Turn. Work 2 more rows sc for shoulder depth. Fasten off.
Right Shoulder: Rejoin yarn at right shoulder edge, 24 (27, 28, 31) sts from right edge. Work 2 rows sc. Fasten off.
Left Front Panel
Foundation Chain: Using E-4 hook, ch 48 (52, 56, 60).
Row 1 (RS): 1 sc in 2nd ch from hook. (Sk 1 ch, 1 sc and 1 hdc in next ch) 22 (24, 26, 28) times. 1 sc in last ch. Turn. (47, 51, 55, 59 sts)
Rows 2 through 30: Work in MGS. (47, 51, 55, 59 sts)
Waist Shaping for Left Front
Row 31 (RS): Work MGS across, decreasing 6 sts evenly across row. Turn. (41, 45, 49, 53 sts)
Rows 32 through 33: Work 2 rows plain MGS. (41, 45, 49, 53 sts)
Row 34: Decrease 6 sts evenly. Turn. (35, 39, 43, 47 sts)
Rows 35 through 44: Work 10 rows MGS. (35, 39, 43, 47 sts)
Row 45 (RS): Work MGS, increasing 6 sts evenly. Turn. (41, 45, 49, 53 sts)
Row 46: Work 1 plain MGS row. (41, 45, 49, 53 sts)
Row 47: Increase 6 sts evenly. Turn. (47, 51, 55, 59 sts)
Rows 48 through 58: Work 11 rows MGS. (47, 51, 55, 59 sts)
Armhole Shaping for Left Front
The armhole edge is the left edge of the panel as worked.
Row 59 (RS): Sl st across 6 (6, 8, 8) sts at armhole edge. Ch 1. Work MGS to end. Turn. (41, 45, 47, 51 sts)
Row 60: Work MGS to last 2 sts of armhole edge. Sc2tog. Turn. (40, 44, 46, 50 sts)
Row 61: Sc2tog at armhole edge. MGS to end. Turn. (39, 43, 45, 49 sts)
Row 62: MGS to last 2 sts. Sc2tog. Turn. (38, 42, 44, 48 sts)
Row 63: Sc2tog. MGS to end. Turn. (37, 41, 43, 47 sts)
For L and XL only:
Row 64: MGS to last 2 sts. Sc2tog. Turn. (42, 46 sts)
Adjust stitch count for HMS multiple of 4 plus 1:
Working stitch counts: (37, 41, 41, 45 sts)
Yoke Mesh for Left Front
Work HMS Rows 1 through 14. (37, 41, 41, 45 sts)
Left Front Neck Shaping
Work 4 rows plain sc. (37, 41, 41, 45 sts)
Row 1: Work sc across to last 4 sts. Leave rem sts unworked. Turn. (33, 37, 37, 41 sts)
Row 2: Sc2tog at neck edge. Work sc to end. Turn. (32, 36, 36, 40 sts)
Row 3: Work sc to last 2 sts. Sc2tog. Turn. (31, 35, 35, 39 sts)
Row 4: Sc2tog. Sc to end. Turn. (30, 34, 34, 38 sts)
Row 5: Sc to last 2 sts. Sc2tog. Turn. (29, 33, 33, 37 sts)
Row 6: Sc2tog. Sc to end. Turn. (28, 32, 32, 36 sts)
Row 7: Sc to last 2 sts. Sc2tog. Turn. (27, 31, 31, 35 sts)
Continue decreasing at neck edge until shoulder count matches back shoulder: (24, 27, 28, 31 sts)
Work 2 rows sc on shoulder sts. Fasten off.
Right Front Panel
Work as Left Front, reversing all shaping. Armhole shaping occurs at right edge, neck shaping occurs at left edge (center front edge).
Foundation Chain: ch 48 (52, 56, 60).
Rows 1 through 58: Work same as Left Front. (47, 51, 55, 59 sts)
Armhole Shaping Row 59 (RS): Work MGS to last 6 (6, 8, 8) sts. Leave rem sts unworked. Turn. (41, 45, 47, 51 sts)
Continue symmetrically to Left Front through all armhole and neck shaping until shoulder count matches: (24, 27, 28, 31 sts)
Work 2 rows sc on shoulder sts. Fasten off.
Sleeves (Make 2)
The sleeve begins at the wrist and works toward the cap.
Foundation Chain: Using E-4 hook, ch 49 (49, 61, 61).
Row 1 (Setup row, WS): Sc in 2nd ch from hook and in each ch across. Turn. (48, 48, 60, 60 sts)
Fan Lace Section for Sleeves
Row 2 (RS, FLS Row 2): Ch 3 (counts as dc). Work 2 dc in first st, (sk 2, 1 sc in next, sk 2, 5 dc in next) across to last 6 sts, sk 2, 1 sc in next, sk 2, 3 dc in last st. Turn.
Row 3 (WS, FLS Row 3): Ch 1. 1 sc in first dc, (ch 2, dc5tog over next 5 dc, ch 2, 1 sc in next sc) across, ending 1 sc in top of t-ch. Turn.
Row 4 (RS, FLS Row 4): Ch 3. 2 dc in first st, (sk ch-2 sp, 1 sc in dc5tog, sk ch-2 sp, 5 dc in next sc) across, ending 3 dc in last sc. Turn.
Repeat Rows 3 and 4 until 24 rows total of FLS are complete. After Row 25, sleeve wrist section measures approximately 6 inches. (49, 49, 61, 61 sts)
Sleeve Taper, Switch to MGS with Increases
Work a transition sc row: Ch 1, sc across all sts. (49, 49, 61, 61 sts)
The sleeve must increase to underarm width over approximately 30 MGS rows. Target underarm stitch count: 69 (75, 81, 87) sts.
Work increase rows evenly spaced, adding stitches at both edges, until you reach the target count. Then continue to sleeve cap shaping.
Finishing Your Crochet Cardigan
Assembly
1. Seam shoulders using mattress stitch or whip stitch
2. Set in sleeves, matching sleeve cap to armhole opening
3. Seam sides from underarm to hem
Add the Peplum Ruffle
Following the Pleated Ruffle instructions, work into the bottom edge of the bodice to create the dramatic peplum.
Add the Neckline Ruffle
Pick up stitches evenly around the neckline and work the Neckline Ruffle as described.
Add the Shoulder Ruffles
Pick up stitches along each shoulder seam and work the Shoulder Ruffle.
Work the Button Band
Using the D-3 hook, pick up stitches evenly along both front edges. Work several rows of sc, creating buttonholes on the right front band (as worn) by working ch-2, sk-2 at six evenly spaced intervals.
Add the Cuff Ruffles
Work double-tiered bell cuffs at each sleeve end, finishing with Scallop Edging.
Block Your Finished Cardigan
Wet block the entire garment, pinning the ruffles to maintain their shape. Allow to dry completely before wearing.
Tips for Success with This Pattern
Take your time with swatches. Making three separate gauge swatches feels tedious, but it saves heartache later.
Use stitch markers liberally. Mark the beginning of pattern repeats, the center of each panel, and any shaping points.
Try on as you go. After completing the back panel and before starting the fronts, hold it up to yourself to check the length and width.
Block each panel before seaming. This makes assembly much easier and helps you catch any sizing issues early.
Keep notes. Write down which row you are on, especially when working the mesh and lace sections. These patterns require attention to maintain the correct sequence.
This dusty blue ruffle sleeve peplum crochet cardigan is a true showpiece. It demands patience and skill, but rewards you with a garment unlike anything you will find in stores. Every ruffle, every bit of lace, every perfectly shaped curve speaks to the hours of love you poured into creating it.
Thank you so much for choosing this pattern for your next big project. I cannot wait to see what you create. If you make this cardigan, please share your photos on Instagram or Facebook and tag me. I would be absolutely thrilled to see your beautiful finished pieces.
If you want to come back to this pattern later, go ahead and pin it to your favorite Pinterest board so it is easy to find. And please drop a comment below if you make this cardigan or have any questions along the way. I love hearing from you, and your fellow crocheters appreciate the tips and encouragement too.
