
When I sat down to design this romper, I had a very specific vision in mind. I wanted something that felt vintage and fresh at the same time. Something that would turn heads at a summer barbecue or a beach boardwalk. The one-shoulder silhouette kept calling to me, and I knew the navy and white color combination would give it that classic nautical vibe I was chasing.
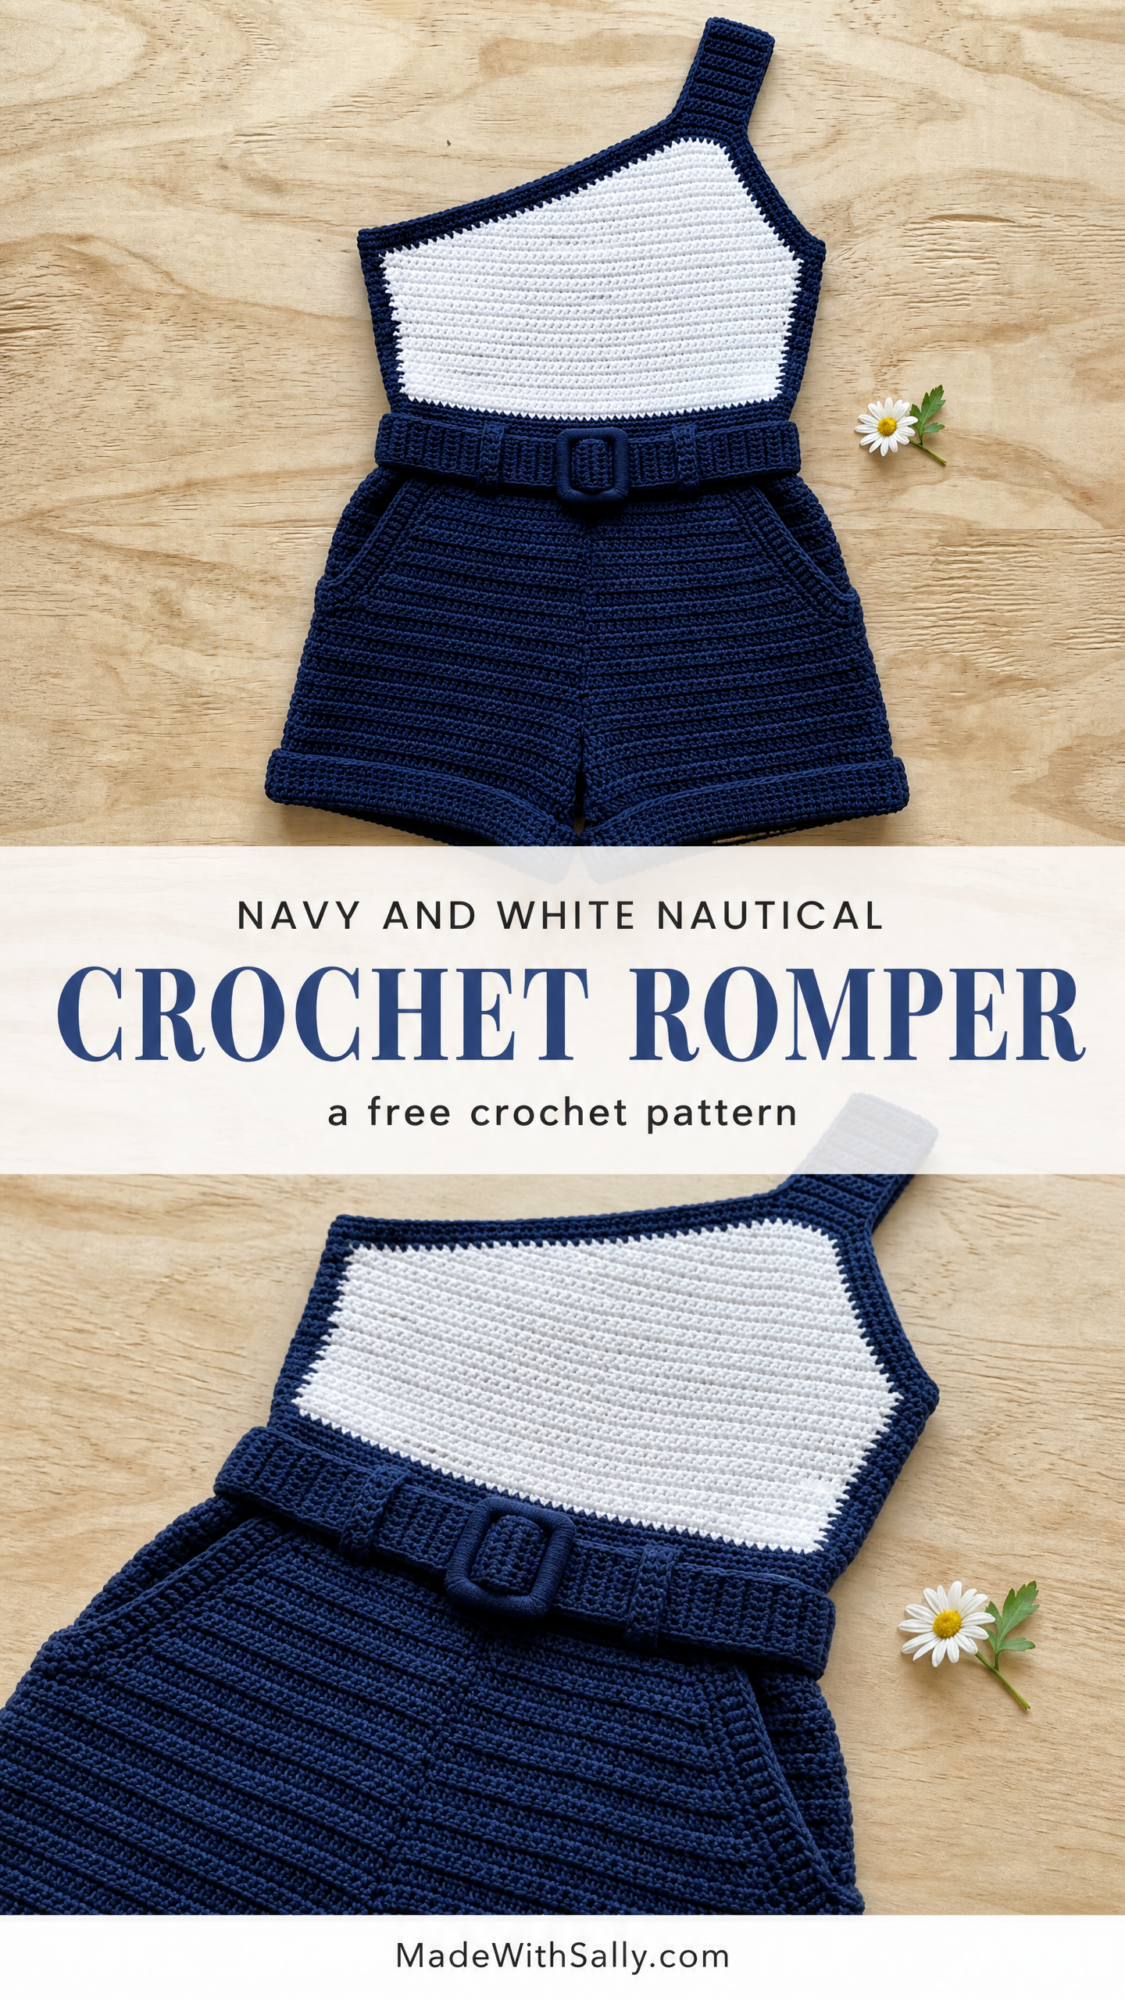
I spent weeks tweaking the proportions of the bodice, adjusting the hip shaping, and perfecting that ribbed texture on the shorts. The belt with the crocheted buckle was the finishing touch that brought everything together. I wanted clean lines, a flattering fit, and construction that made sense from start to finish.
I am SO pleased with how this turned out. The structured bodice, the high-waisted shorts with actual pockets, the way the horizontal ribbing catches the light. This is the kind of piece you make once and wear constantly all summer long.
About This Crochet Pattern
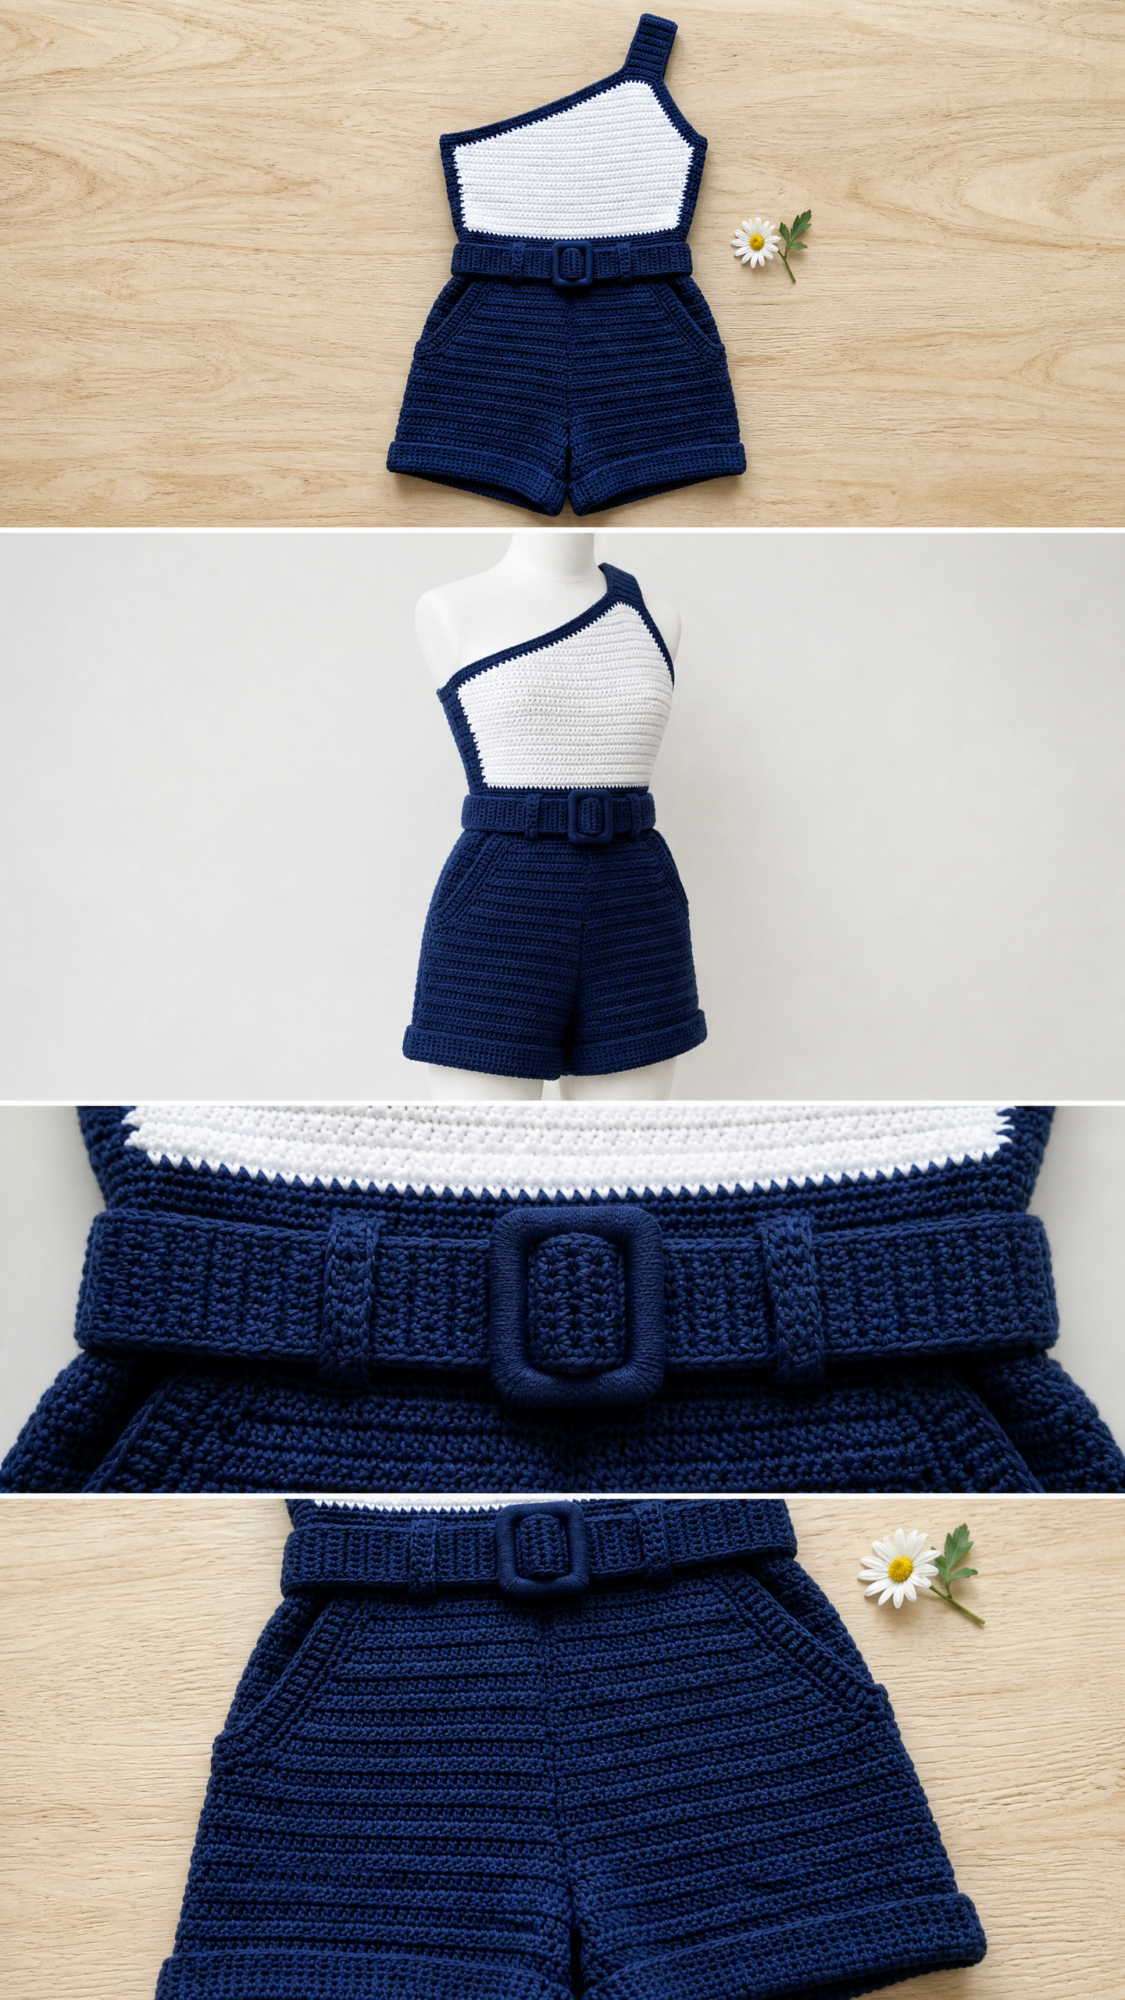
This crochet romper pattern creates a stunning one-piece garment featuring a color-blocked bodice and high-waisted shorts. The bodice showcases a white center panel bordered in navy, with an asymmetrical one-shoulder strap. The shorts section displays beautiful horizontal ribbing created by working in the back loop only.
The construction flows logically from top to bottom. You start with the shoulder strap, expand into the full bodice panel, work a matching back piece, seam them together, then continue downward into the shorts worked in the round. Pockets are added separately, and the belt with its crocheted buckle finishes the look.
This is an intermediate level crochet tutorial requiring comfort with several techniques. You will work flat and in the round, manage color changes, seam pieces together, work in back loops only, and shape with increases and decreases. The asymmetric bodice shaping needs attention to detail, but I will walk you through every step.
Finished Size
This pattern is written for size Small, fitting a 32 to 34 inch bust, 26 to 28 inch waist, and 34 to 36 inch hips.
Finished measurements:
To size up to Medium (fitting 34 to 36 inch bust, 28 to 30 inch waist), add 8 stitches to the foundation chain and work 2 additional rows in each horizontal section. For each size beyond Medium, add another 8 stitches and 2 rows. The shorts circumference adjusts automatically based on your bodice stitch count.
Materials Needed
Yarn:
Recommended yarn options:
Stick with 100% cotton or cotton blends for this garment. Wool or acrylic will stretch unpredictably at the waist and won’t block to a flat finish.
Hook: US size E-4 (3.5 mm)
Notions:
Gauge
21 stitches and 24 rows = 4 inches in single crochet worked flat
21 stitches and 24 rounds = 4 inches in single crochet through back loop only worked in the round
Gauge matters here. Even one stitch difference per 4 inches will throw off the bust and hip fit significantly. Make a swatch at least 5 inches square, wash and dry it as you plan to care for the finished romper, then measure.
Abbreviations
Special Stitches
BLO Single Crochet: This creates the horizontal ribbed texture on the shorts. Insert your hook into only the back loop of the stitch, which is the loop farthest from you when looking at the right side. Complete the single crochet as normal. Each row creates a raised ridge on the front.
Color Change Single Crochet: Work your single crochet until you have 2 loops on the hook. Drop the current color to the wrong side, pick up the new color, and pull through both loops to complete the stitch.
Pattern Notes Before You Begin
The bodice is worked flat in rows, starting at the top of the shoulder strap and working down to the waist. The one-shoulder design means the strap sits on the left side as worn.
The white center panel uses Yarn B, while the navy border and all other sections use Yarn A. You can carry Yarn A across the back when the navy border is 4 stitches or fewer on each side.
The shorts are worked in joined rounds after seaming the bodice. All rounds are worked with the right side facing. Do not turn between rounds.
Pockets are worked flat and sewn on before adding the waistband.
The turning chain of 1 does NOT count as a stitch throughout this entire pattern.
Stitch counts appear in parentheses at the end of each row or round.
Step by Step Instructions
Front Bodice Strap
Using Yarn A (Navy), ch 9.
Row 1 (RS): Sc in 2nd ch from hook and in each ch across, ch 1, turn. (8 sc)
Rows 2 through 30: Sc in each st across, ch 1, turn. (8 sc)
After Row 30, do not turn. The strap measures approximately 5 inches.
Front Bodice Expansion
With RS facing and Yarn A still attached at end of Row 30, ch 66.
Row 31 (Bodice Row 1): Beginning in 2nd ch from hook, sc 4 in Yarn A across first 4 ch, switch to Yarn B and sc 57 across next 57 ch, switch back to Yarn A and sc 4 across final 4 ch, then sc across the 8 sts of the strap. Ch 1, turn. (73 sc total)
Rows 32 through 60: Sc 4 in Yarn A, sc 57 in Yarn B, sc 12 in Yarn A, ch 1, turn. (73 sc)
After Row 60, fasten off Yarn B. Continue with Yarn A only.
Checkpoint: The bodice panel from strap expansion to Row 60 should measure approximately 8 inches in height. The full bodice including strap should measure approximately 13 inches. Width should be approximately 14 inches.
Back Bodice Panel
Work a second bodice piece entirely in Yarn A with no color blocking.
Using Yarn A, ch 9.
Rows 1 through 30 (Back Strap): Work exactly as front strap. (8 sc per row)
At end of Row 30, ch 66.
Back Bodice Row 31: Beginning in 2nd ch from hook, sc across all 65 ch, then sc across the 8 sts of the strap. Ch 1, turn. (73 sc)
Back Bodice Rows 32 through 60: Sc in each st across, ch 1, turn. (73 sc per row)
Fasten off after Row 60.
Seaming the Bodice
Lay front and back pieces with right sides together, aligning all edges. Using Yarn A and tapestry needle, seam the two side edges together using whipstitch or mattress stitch. Leave the bottom edge (waist) and top neckline and strap edges open.
Armhole and Neckline Border
With RS facing and Yarn A, join at top right corner of diagonal neckline. Work 1 sc in each row end and 1 sc in each st evenly around neckline and armhole openings. Work 3 sc into corner stitches to keep edges flat. Sl st to first sc to join. Fasten off.
If the edge ruffles, remove 1 sc per 10 sts. If it pulls in, add 1 sc per 10 sts.
Waist Edge Preparation
With RS facing and Yarn A, join at one side seam at bottom waist edge. Work 1 sc in each st around entire waist opening. Sl st to first sc to join. Do not fasten off. (146 sc total)
Checkpoint: Waist opening should measure approximately 27.5 inches in circumference.
Shorts Section
The shorts are worked in joined rounds from waist to leg openings. All rounds use BLO single crochet with RS facing.
Rnds 1 through 3: Ch 1, sc BLO in each st around, sl st to first sc. (146 sc)
Rnd 4: Ch 1, sc-inc BLO in first st, sc BLO in next 36 sts, sc-inc BLO in next st, sc BLO in next 71 sts, sc-inc BLO in next st, sc BLO in next 34 sts, sc-inc BLO in last st, sl st to first sc. (150 sc)
Rnds 5 and 6: Ch 1, sc BLO in each st around, sl st to first sc. (150 sc)
Rnd 7: Ch 1, sc-inc BLO in first st, sc BLO in next 37 sts, sc-inc BLO in next st, sc BLO in next 73 sts, sc-inc BLO in next st, sc BLO in next 36 sts, sc-inc BLO in last st, sl st to first sc. (154 sc)
Rnds 8 and 9: Ch 1, sc BLO in each st around, sl st to first sc. (154 sc)
Rnd 10: Ch 1, sc-inc BLO in first st, sc BLO in next 38 sts, sc-inc BLO in next st, sc BLO in next 75 sts, sc-inc BLO in next st, sc BLO in next 37 sts, sc-inc BLO in last st, sl st to first sc. (158 sc)
Rnds 11 through 14: Ch 1, sc BLO in each st around, sl st to first sc. (158 sc)
Checkpoint: After Round 14, shorts should measure approximately 2.5 inches from waist. Hip circumference should be approximately 30 inches.
Rnd 15: Ch 1, sc-inc BLO in first st, sc BLO in next 39 sts, sc-inc BLO in next st, sc BLO in next 77 sts, sc-inc BLO in next st, sc BLO in next 38 sts, sc-inc BLO in last st, sl st to first sc. (162 sc)
Rnds 16 and 17: Ch 1, sc BLO in each st around, sl st to first sc. (162 sc)
Rnd 18: Ch 1, sc-inc BLO in first st, sc BLO in next 40 sts, sc-inc BLO in next st, sc BLO in next 79 sts, sc-inc BLO in next st, sc BLO in next 39 sts, sc-inc BLO in last st, sl st to first sc. (166 sc)
Rnds 19 through 22: Ch 1, sc BLO in each st around, sl st to first sc. (166 sc)
Checkpoint: After Round 22, shorts measure approximately 3.75 inches from waist. Circumference is approximately 31.6 inches.
Rnd 23: Ch 1, sc-inc BLO in first st, sc BLO in next 41 sts, sc-inc BLO in next st, sc BLO in next 81 sts, sc-inc BLO in next st, sc BLO in next 40 sts, sc-inc BLO in last st, sl st to first sc. (170 sc)
Rnds 24 through 30: Ch 1, sc BLO in each st around, sl st to first sc. (170 sc)
Checkpoint: After Round 30, shorts measure approximately 5 inches from waist. Circumference is approximately 32.4 inches.
Rnd 31: Ch 1, sc-inc BLO in first st, sc BLO in next 42 sts, sc-inc BLO in next st, sc BLO in next 83 sts, sc-inc BLO in next st, sc BLO in next 41 sts, sc-inc BLO in last st, sl st to first sc. (174 sc)
Rnds 32 through 40: Ch 1, sc BLO in each st around, sl st to first sc. (174 sc)
Checkpoint: After Round 40, shorts measure approximately 6.75 inches from waist. Ready to divide for legs.
Dividing for Legs
The 174 stitches divide into two legs of 87 stitches each. Mark stitch 1 and stitch 88 as division points at the inner legs.
Crotch Gusset
Row 1 (Crotch Bridge): Join Yarn A at marked division point. Ch 9, skip 87 sts of back leg, sc in first st of front leg section. Ch 1, turn.
Row 2: Sc in each of 9 ch sts, sc in next st of front leg.
Fasten off and seam inner crotch edges together with mattress stitch for approximately 1 inch to close gusset. Each leg opening now has 96 stitches (87 original plus 9 crotch bridge).
Leg Rounds
Work separately for each leg. Join Yarn A at inner leg seam.
Rnd 1: Ch 1, sc BLO in each of 96 sts around leg opening, sl st to first sc. (96 sc)
Rnd 2: Ch 1, sc BLO in each st around, sl st to first sc. (96 sc)
Continue in pattern for remaining leg rounds as established, then work the cuff section.
Finishing Tips
Block your finished romper by soaking in cool water, gently squeezing out excess moisture, and laying flat to dry. Cotton yarn responds beautifully to wet blocking and will help even out your stitches.
For the belt, work a long narrow strip of single crochet approximately 28 inches long. The crocheted buckle is a small square frame that can be worked over a plastic or metal ring for extra stability.
Weave in all ends securely, especially at color change points and seams that will experience stress during wear.
You Did It!
This Navy and White Nautical Romper crochet pattern represents a true labor of love. Every detail, from the one-shoulder silhouette to the ribbed shorts texture to that perfectly proportioned belt, comes together to create something genuinely special. This is the kind of handmade piece people will ask you about everywhere you go.
The structured cotton fabric, the classic color combination, the thoughtful construction. It all adds up to a garment you will reach for again and again on warm summer days.
Thank you so much for choosing to make this pattern. I hope you love wearing it as much as I loved designing it. If you make one, I would absolutely love to see it! Tag me on Instagram or share in my Facebook group. Your photos make my whole day.
If this pattern is calling your name, go ahead and save it to your Pinterest boards so you can find it when you are ready to start. And please drop a comment below if you make one. I read every single one and love hearing how your projects turn out!
