
I call this one "Midnight Cascade," and it has quite a story behind it. I sketched the original concept in a worn notebook during a friend’s wedding rehearsal dinner about three years ago. The bride wore this stunning navy gown with tiered ruffles, and I kept thinking how beautiful that silhouette would look in crochet. That notebook sat in my craft room drawer until last spring when I finally pulled it out and brought the design to life. The one-shoulder neckline, the diamond mesh detail, the three flowing ruffle tiers. Every element came together even better than I had imagined all those years ago.
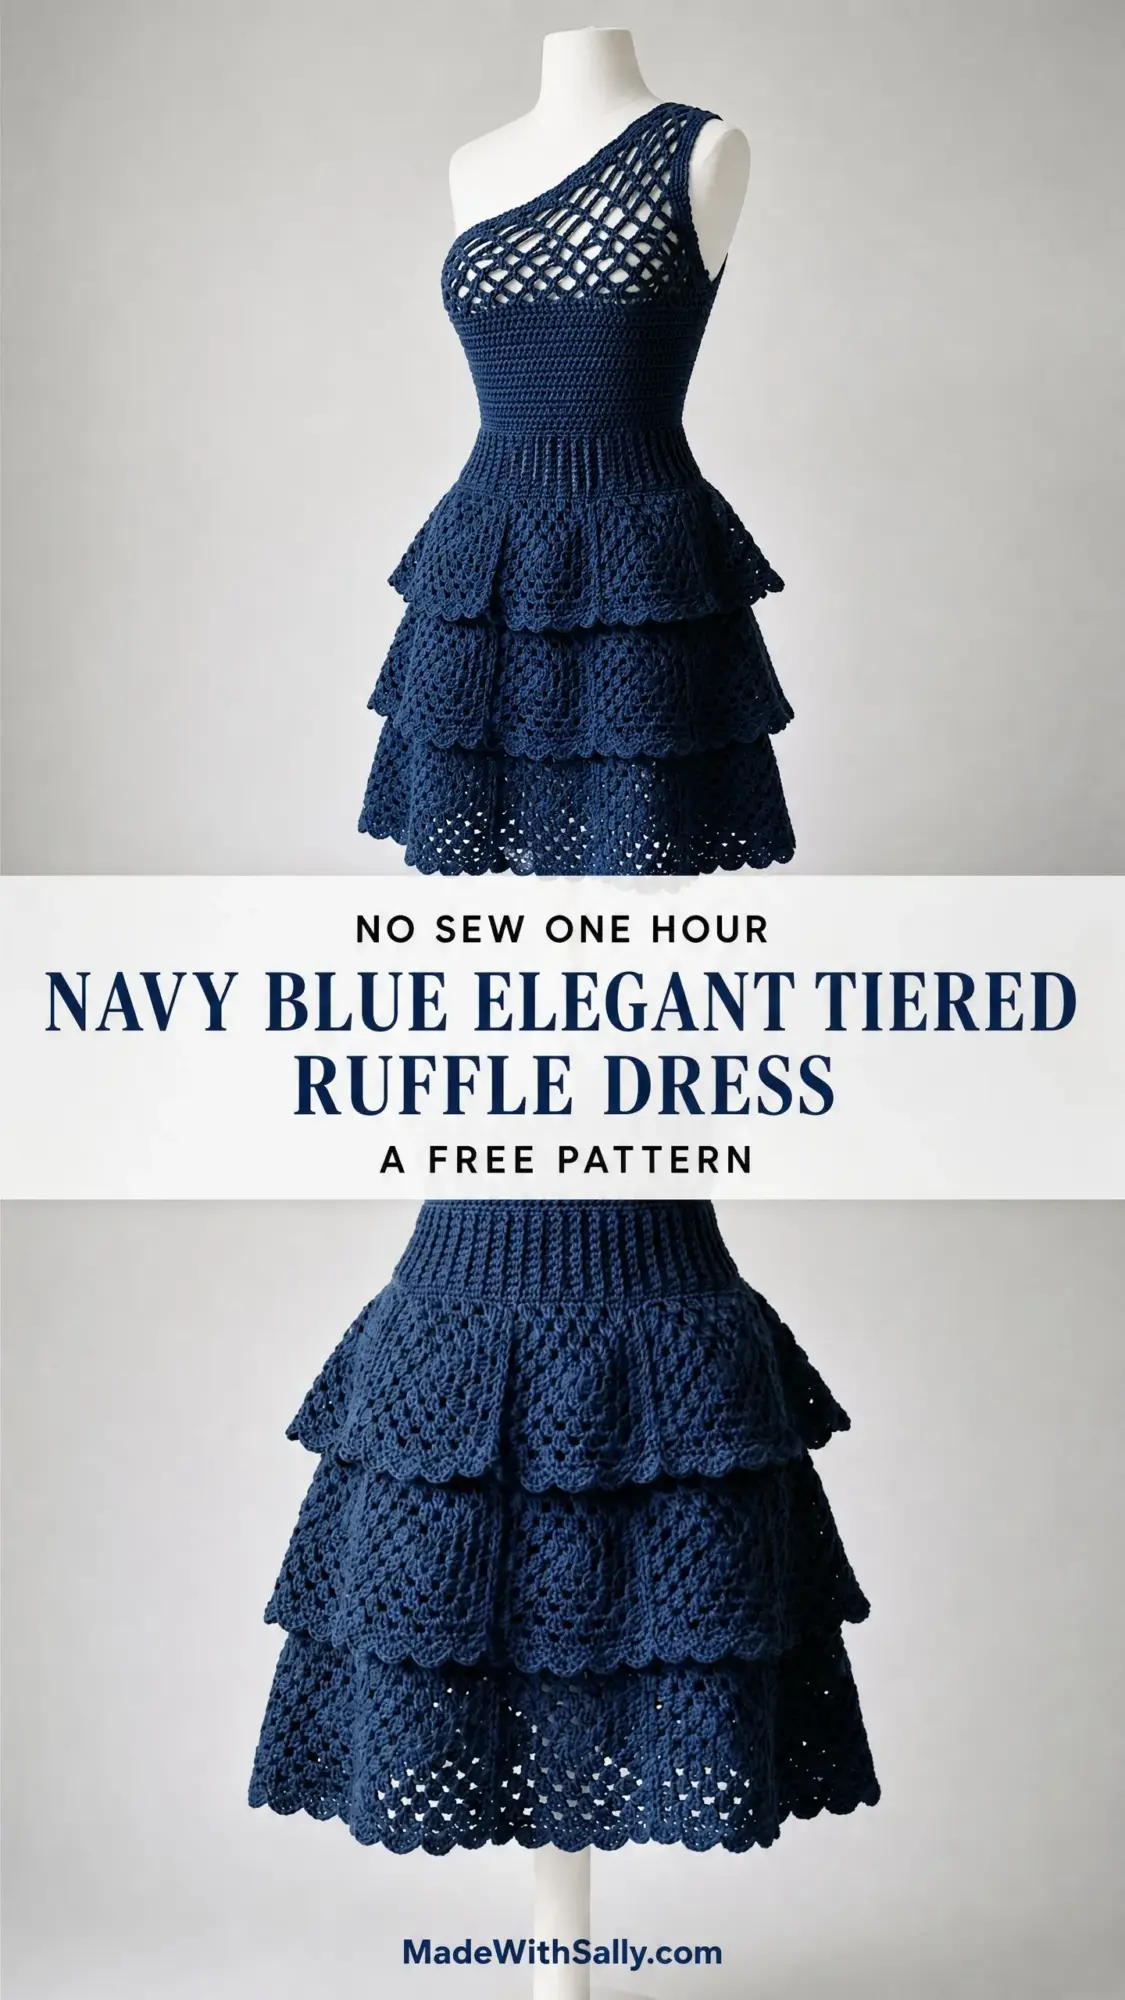
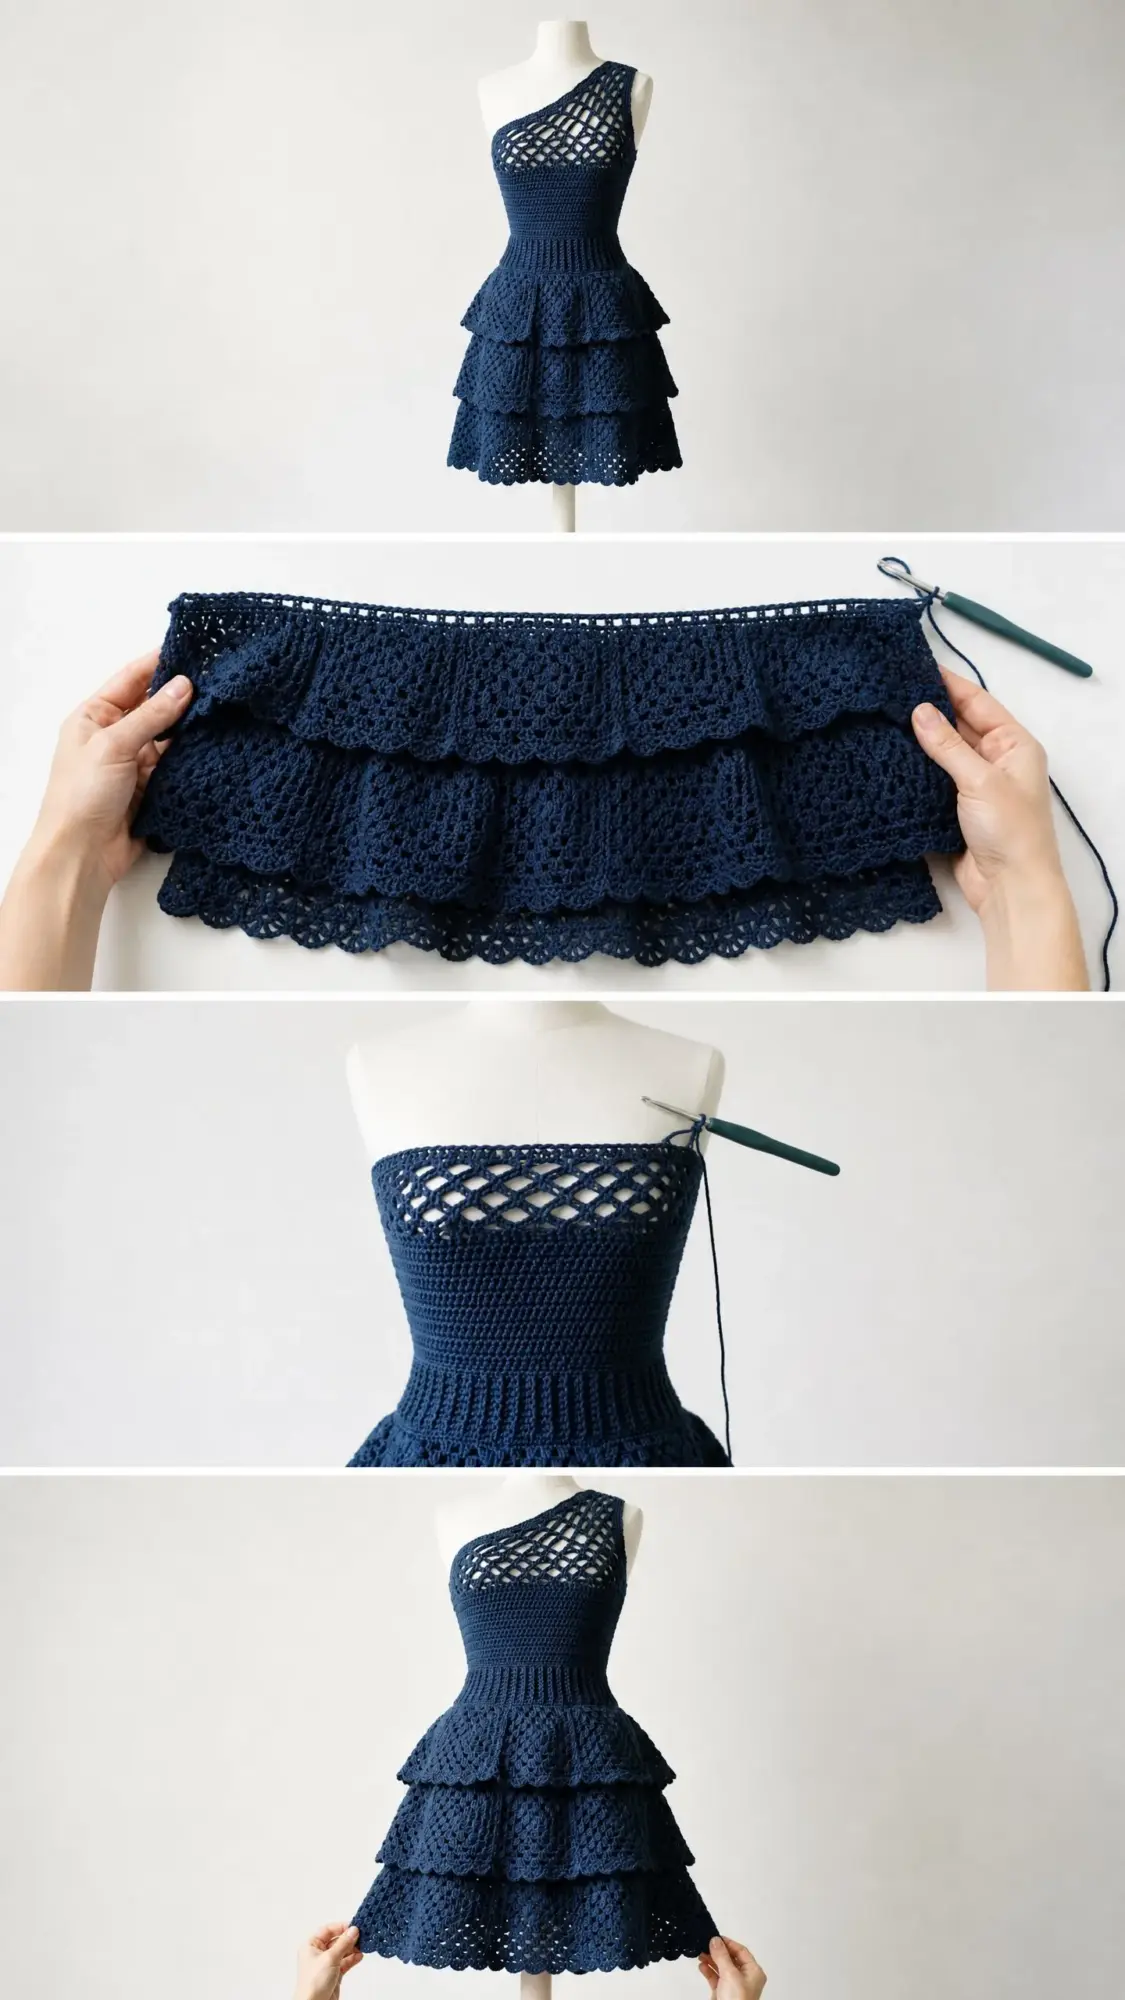
This elegant tiered ruffle dress crochet pattern combines multiple techniques into one showstopping garment. You will work a diamond net stitch yoke, a fitted single crochet bodice, a ribbed waistband, and three graduated lace fan tiers with scalloped edges. The construction flows from top to bottom, starting at the shoulder strap and ending at the longest ruffle hem.
Fair warning. This is not a weekend project. Plan for 35 to 50 hours of work depending on your pace. But the result is a truly wearable piece of crochet art that looks like it belongs on a runway. Let me walk you through every step.
Skill Level and What You Need to Know
This crochet dress pattern falls into the advanced intermediate category. You do not need to know any complicated stitches. Every technique here uses basics you probably already have in your toolkit. The challenge comes from coordinating multiple stitch textures across a fitted silhouette, managing asymmetric shaping, and maintaining consistent gauge throughout a longer garment.
If you can work single crochet, double crochet, and chains confidently, you have the foundation. If you have made at least one garment before, you understand how fit works. Those two things together will carry you through this project.
Materials You Will Need
Yarn: Approximately 1,400 to 1,600 yards of DK weight (CYCA 3) smooth cotton or cotton-blend yarn in navy blue. A slightly mercerized cotton shows the lace stitch definition beautifully.
Good yarn choices include:
Avoid fuzzy or halo yarns. They will blur the open mesh and lace details.
Hooks:
Notions:
Gauge (Do Not Skip This)
With E-4 hook and single crochet:
20 sc x 24 rows = 4 inches / 10 cm square, blocked
With F-5 hook and lace fan pattern:
One full fan repeat (10 stitches wide) = approximately 2 inches / 5 cm
4 rows of lace = approximately 2 inches / 5 cm, blocked
This is a fitted garment. Gauge matters more here than in almost any other project. Work swatches in both stitch patterns, wash and block them, then measure before starting.
Finished Measurements (Size Medium)
Abbreviations and Stitch Definitions
ch: chain. Wrap yarn over hook, pull through loop on hook.
sl st: slip stitch. Insert hook, yarn over, pull through stitch and loop on hook in one motion.
sc: single crochet. Insert hook in stitch, yarn over, pull up a loop (2 loops on hook), yarn over, pull through both loops.
dc: double crochet. Yarn over, insert hook in stitch, yarn over, pull up a loop, yarn over, pull through 2 loops, yarn over, pull through remaining 2 loops.
sk: skip. Pass over the indicated stitch without working into it.
st/sts: stitch/stitches
sp: space
ch-sp: chain space. The gap created by chains in the previous row.
blo: back loop only. Work into only the back loop of the stitch.
sc2tog: single crochet decrease. Insert hook in next stitch, pull up loop, insert hook in following stitch, pull up loop, yarn over, draw through all 3 loops. This decreases by one stitch.
picot: chain 3, slip stitch in first chain made. Creates a small decorative bump.
RS/WS: right side/wrong side
pm: place marker
Special Stitch Patterns
Diamond Net Stitch (Yoke Section)
Row 1 (RS): Ch 5 (counts as dc + ch 2), sk 2 sts, dc in next st, (ch 2, sk 2 sts, dc in next st) across. Turn.
Row 2 (WS): Ch 5 (counts as dc + ch 2), dc in first ch-2 sp, (ch 2, dc in next ch-2 sp) across, ch 2, dc in 3rd ch of turning ch. Turn.
Repeat Row 2 for pattern. Each ch-2 sp counts as 2 stitches when transitioning back to sc fabric.
Lace Fan Stitch (Skirt Tiers)
Each fan repeat uses 10 stitches as the base.
Row 1 (RS): Sc in first st, (sk 2 sts, 5 dc in next st, sk 2 sts, sc in next st, ch 3, sc in next st) across, ending last rep with sc in last st instead of ch 3 sc. Turn.
Row 2 (WS): Ch 3 (counts as dc), 2 dc in first st, (sk fan, sc in ch-3 sp, ch 3, sc in ch-3 sp, 5 dc in next sc) across, ending 3 dc in last sc. Turn.
Row 3 (RS): Ch 1, sc in first st, ch 3, sc in ch-3 sp, (5 dc in next sc, sc in ch-3 sp, ch 3, sc in ch-3 sp) across, ending sc in top of turning ch. Turn.
Row 4 (WS): Repeat Row 2.
These 4 rows create the lace fan texture visible in the skirt tiers.
Scallop Picot Edging
Work along any edge: sl st in first st, (ch 3, sl st in first ch of ch-3 just made to form picot, ch 2, sk 1 st, sl st in next st) across.
Pattern Instructions
Section 1: Shoulder Strap
Using E-4 hook, ch 11.
Row 1 (RS): Sc in 2nd ch from hook and each ch across. Turn. (10 sc)
Rows 2 through 28: Ch 1, turn, sc in each sc across. (10 sc)
The strap should measure approximately 5 inches long. This strap crosses the left shoulder.
Section 2: Yoke (Diamond Net Stitch)
The yoke expands from the strap to span the full front chest width.
Row 1 (RS, establishment row): Ch 1, do not turn strap. Working into the long edge of the strap, pick up and sc evenly along the strap edge: 28 sc along the strap length, then ch 1 and turn. (28 sc)
Row 2 (increase row): Ch 1, 2 sc in first st, sc across to last st, 2 sc in last st. Turn. (30 sc)
Row 3: Repeat Row 2. (32 sc)
Row 4: Repeat Row 2. (34 sc)
Row 5: Repeat Row 2. (36 sc)
Rows 6 through 8: Repeat Row 2 three more times. (42 sc after Row 8)
Begin Diamond Net Stitch over these 42 stitches.
Yoke Net Row 1 (RS): Ch 5, sk 2 sts, dc in next st, (ch 2, sk 2, dc in next st) 12 times, dc in last st. Turn. (14 dc, 13 ch-2 sps)
Yoke Net Rows 2 through 8: Ch 5, dc in first ch-2 sp, (ch 2, dc in next ch-2 sp) across, ch 2, dc in 3rd ch of turning ch. Turn. (14 dc, 13 ch-2 sps throughout)
Fasten off after 8 rows of diamond net.
Checkpoint: Your flat piece should measure approximately 8.5 inches wide and 9 to 10 inches tall including the strap.
Section 3: Bodice (Worked in the Round)
Join round: With RS of yoke facing, attach yarn at the lower right corner of the yoke. Work across the bottom edge of the yoke: sc in each dc and 2 sc in each ch-2 sp across (13 ch-2 sps x 2 = 26, plus 14 dc positions = 42 sc across the front lower yoke edge). Place marker. Continue around the entire bodice opening, picking up sc evenly along the right open side, across the back (ch 62 across back to create the back panel equivalent), and up the left open side back to start. Join with sl st to form a ring.
Working stitch count for bodice round 1: 180 sc total. (42 sc front, 62 sc back, approximately 38 sc distributed between the two open side edges)
Rnd 1: Ch 1, sc in each st around. Join. (180 sc)
Rnds 2 through 5: Ch 1, sc in each st around. Join. (180 sc)
Begin waist shaping:
Rnd 6: Ch 1, sc in first 43 sts, sc2tog, sc in next 88 sts, sc2tog, sc in remaining 45 sts. Join. (178 sc)
Rnd 7: Ch 1, sc in each st around. Join. (178 sc)
Rnd 8: Ch 1, sc in first 42 sts, sc2tog, sc in next 87 sts, sc2tog, sc in remaining 45 sts. Join. (176 sc)
Rnd 9: Ch 1, sc in each st around. Join. (176 sc)
Rnd 10: Ch 1, sc in first 41 sts, sc2tog, sc in next 86 sts, sc2tog, sc in remaining 45 sts. Join. (174 sc)
Rnd 11: Ch 1, sc in each st around. Join. (174 sc)
Rnd 12: Ch 1, sc in first 40 sts, sc2tog, sc in next 85 sts, sc2tog, sc in remaining 45 sts. Join. (172 sc)
Rnd 13: Ch 1, sc in each st around. Join. (172 sc)
Rnd 14: Ch 1, sc in first 39 sts, sc2tog, sc in next 84 sts, sc2tog, sc in remaining 45 sts. Join. (170 sc)
Rnd 15: Ch 1, sc in each st around. Join. (170 sc)
Rnd 16: Ch 1, sc in first 38 sts, sc2tog, sc in next 83 sts, sc2tog, sc in remaining 45 sts. Join. (168 sc)
Rnd 17: Ch 1, sc in each st around. Join. (168 sc)
Rnd 18: Ch 1, sc in first 37 sts, sc2tog, sc in next 82 sts, sc2tog, sc in remaining 45 sts. Join. (166 sc)
Rnd 19: Ch 1, sc in each st around. Join. (166 sc)
Rnd 20: Ch 1, sc in first 36 sts, sc2tog, sc in next 81 sts, sc2tog, sc in remaining 45 sts. Join. (164 sc)
Rnd 21: Ch 1, sc in each st around. Join. (164 sc)
Rnd 22: Ch 1, sc in first 35 sts, sc2tog, sc in next 80 sts, sc2tog, sc in remaining 45 sts. Join. (162 sc)
Rnd 23: Ch 1, sc in each st around. Join. (162 sc)
Rnd 24: Ch 1, sc in first 34 sts, sc2tog, sc in next 79 sts, sc2tog, sc in remaining 45 sts. Join. (160 sc)
Rnd 25: Ch 1, sc in each st around. Join. (160 sc)
Rnds 26 through 30: Ch 1, sc in each st around. Join. (160 sc)
Continue decreasing to waist:
Rnd 31: Ch 1, sc in first 38 sts, sc2tog, sc in next 78 sts, sc2tog, sc in remaining 40 sts. Join. (158 sc)
Rnd 32: Ch 1, sc in each st around. Join. (158 sc)
Rnd 33: Ch 1, sc in first 37 sts, sc2tog, sc in next 77 sts, sc2tog, sc in remaining 40 sts. Join. (156 sc)
Rnd 34: Ch 1, sc in each st around. Join. (156 sc)
Rnd 35: Ch 1, sc in first 36 sts, sc2tog, sc in next 76 sts, sc2tog, sc in remaining 40 sts. Join. (154 sc)
Rnd 36: Ch 1, sc in each st around. Join. (154 sc)
Rnd 37: Ch 1, sc in first 35 sts, sc2tog, sc in next 75 sts, sc2tog, sc in remaining 40 sts. Join. (152 sc)
Rnd 38: Ch 1, sc in each st around. Join. (152 sc)
Rnd 39: Ch 1, sc in first 34 sts, sc2tog, sc in next 74 sts, sc2tog, sc in remaining 40 sts. Join. (150 sc)
Rnd 40: Ch 1, sc in each st around. Join. (150 sc)
Do not fasten off. Place marker at this round. This is the waistband attachment row.
Checkpoint: At Rnd 40, your bodice tube should measure approximately 13 to 14 inches in total height and approximately 30 inches in circumference.
Section 4: Waistband
The waistband is worked separately as a flat sideways ribbed panel.
With E-4 hook, ch 11.
Row 1: Sc in 2nd ch from hook and each ch across. Turn. (10 sc)
Row 2: Ch 1, turn, sc blo in each sc across. (10 sc)
Repeat Row 2 until the waistband panel measures 28 inches, approximately 168 rows.
Seam the short ends together to form a ring. Whipstitch the waistband to the bodice Rnd 40 using the back loop of each sc on the bodice edge and the end-row loops of the waistband.
Section 5: Skirt Tier 1
With F-5 hook, ch 223.
Row 1 (RS, foundation): Sc in 2nd ch from hook and each ch across. Turn. (222 sc)
Row 2 (RS): Sc in first st (edge), sk 2, 5 dc in next st, sk 2, sc in next st, (ch 3, sc in next st, sk 2, 5 dc in next st, sk 2, sc in next st) 21 times, end sc in last st (edge). Turn. (22 fans)
Rows 3 through 12: Continue in lace fan pattern as described in Special Stitches.
Scallop Picot Edging Row: Work along the bottom edge: sl st in first st, (ch 3, sl st in first ch of ch-3 to form picot, ch 2, sk 1 st, sl st in next st) across. Fasten off.
Seam back short edges together. Attach Tier 1 to the lower edge of the waistband by slip stitching through both layers, distributing the 222 sts evenly around the 150 waistband sts.
Section 6: Skirt Tier 2
With F-5 hook, ch 301.
Row 1 (RS): Sc in 2nd ch from hook and each ch across. Turn. (300 sc)
Row 2 (RS, lace begin): Sc in first st (edge), sk 2, 5 dc in next st, sk 2, sc in next st, (ch 3, sc in next st, sk 2, 5 dc in next st, sk 2, sc in next st) 29 times, sc in last st (edge). Turn. (30 fans)
Rows 3 through 17: Continue in lace fan pattern.
Scallop Picot Edging Row: Work as before. Fasten off.
Seam back edges. Attach Tier 2 approximately 1 inch below the Tier 1 attachment line along the bodice exterior.
Section 7: Skirt Tier 3
With F-5 hook, ch 371.
Row 1 (RS): Sc in 2nd ch from hook and each ch across. Turn. (370 sc)
Row 2 (RS, lace begin): Sc in first st (edge), sk 2, 5 dc in next st, sk 2, sc in next st, (ch 3, sc in next st, sk 2, 5 dc in next st, sk 2, sc in next st) 36 times, sc in last st (edge). Turn. (37 fans)
Rows 3 through 21: Continue in lace fan pattern.
Scallop Picot Edging Row: Work as before. Fasten off.
Seam back edges. Attach Tier 3 approximately 1 inch below the Tier 2 attachment line.
Section 8: Back Closure
Install a 7-inch invisible zipper along the center back seam from the top of the bodice to the waistband, approximately 12 to 14 inches. Alternatively, work 4 button loops using ch-3 along one back edge with corresponding hook-and-eye closures.
Size Customization Tips
To size down (Small/XS): Begin with ch 9 for the strap (8 sc), pick up 24 sts for the yoke base, reduce bodice stitch counts by approximately 10 percent. Target waist count around 130 sc. Scale tiers: Tier 1 = 200, Tier 2 = 260, Tier 3 = 330.
To size up (Large/XL): Begin with ch 13 for the strap (12 sc), pick up 32 sts for the yoke base, increase bodice counts by approximately 10 percent. Target waist count around 170 sc. Scale tiers: Tier 1 = 250, Tier 2 = 340, Tier 3 = 420.
To adjust length: Add or remove lace rows within each tier. Each 2 rows of lace equals approximately 1 inch.
Finishing and Blocking
Weave in all ends securely, working through stitch backs in at least two directions.
Wet blocking is essential for this project. Submerge the entire dress in cool water. Gently squeeze out excess water without wringing. Lay flat on blocking mats. Pin each lace fan open to its full width along the fan arches and picot points. Shape the bodice over a dress form if available. Allow to dry completely, at least 24 hours.
After blocking, each lace tier will open considerably. The full circumference of Tier 3 should reach approximately 52 inches.
Care Instructions
Hand wash in cool water with gentle detergent. Do not machine wash or agitate. Lay flat to dry. Re-block as needed to maintain the lace definition.
I hope this tiered ruffle dress crochet tutorial brings you as much joy to make as it brought me to design. This pattern waited years to come to life, and now it gets to live in your hands too. Thank you so much for choosing to spend your creative time here with me.
If you want to find this pattern again easily, save it to your Pinterest boards so it is waiting for you when you are ready to start. And please, if you make your own Midnight Cascade dress, leave a comment below or tag me in your photos. I would absolutely love to see your version of this design out in the world.
