
I don’t know about you, but I have a serious soft spot for coordinating baby sets. There’s just something about a matching top and shorts that makes me want to drop everything and start crocheting immediately.
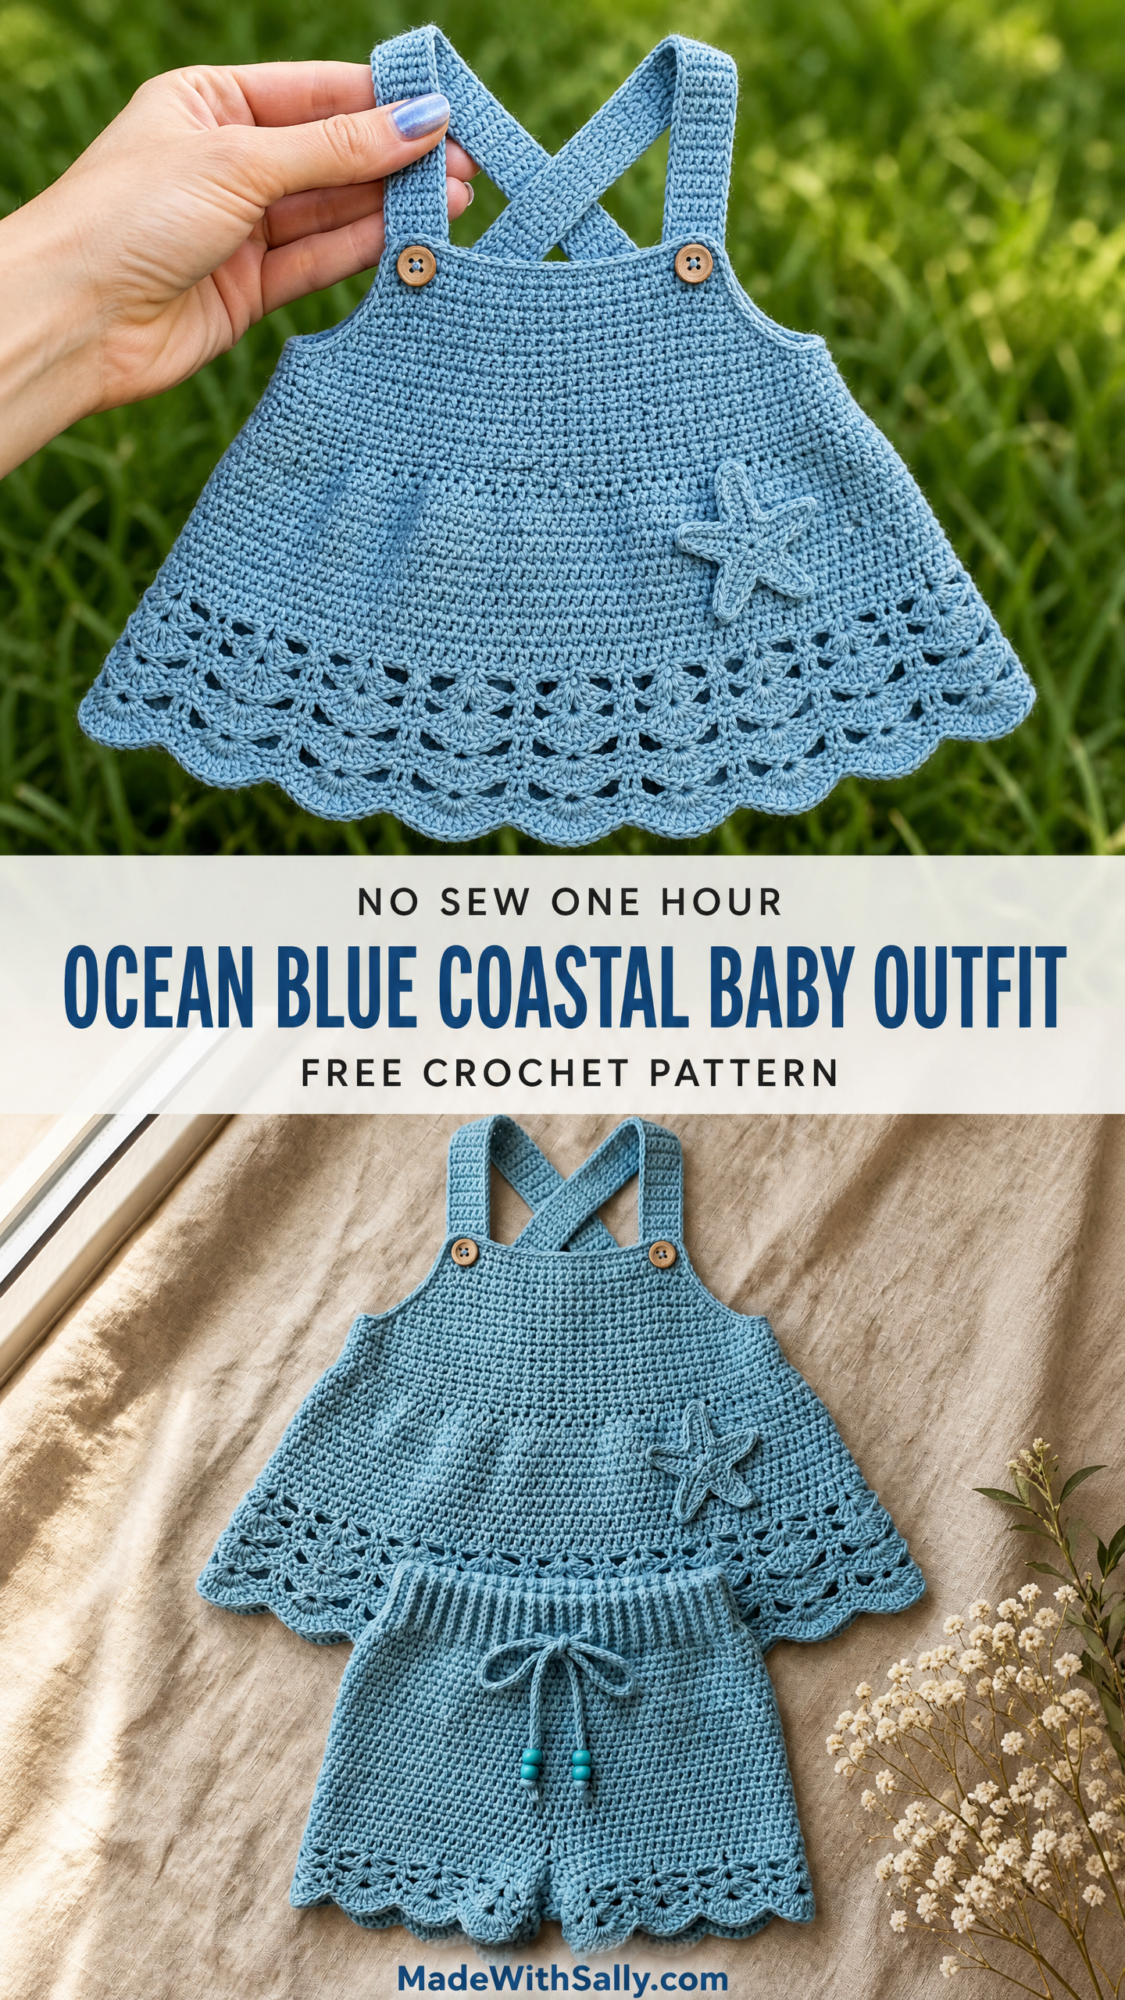
This coastal-inspired two-piece outfit checks all my boxes. The flowy top with crossback straps, the adorable drawstring shorts, that sweet little starfish applique. It’s beach-day ready without being over the top.
And here’s the best part: once you get the rhythm of the scallop lace border, the rest is smooth sailing. Let me walk you through every single stitch.
About This Ocean Blue Coastal Baby Outfit Crochet Pattern
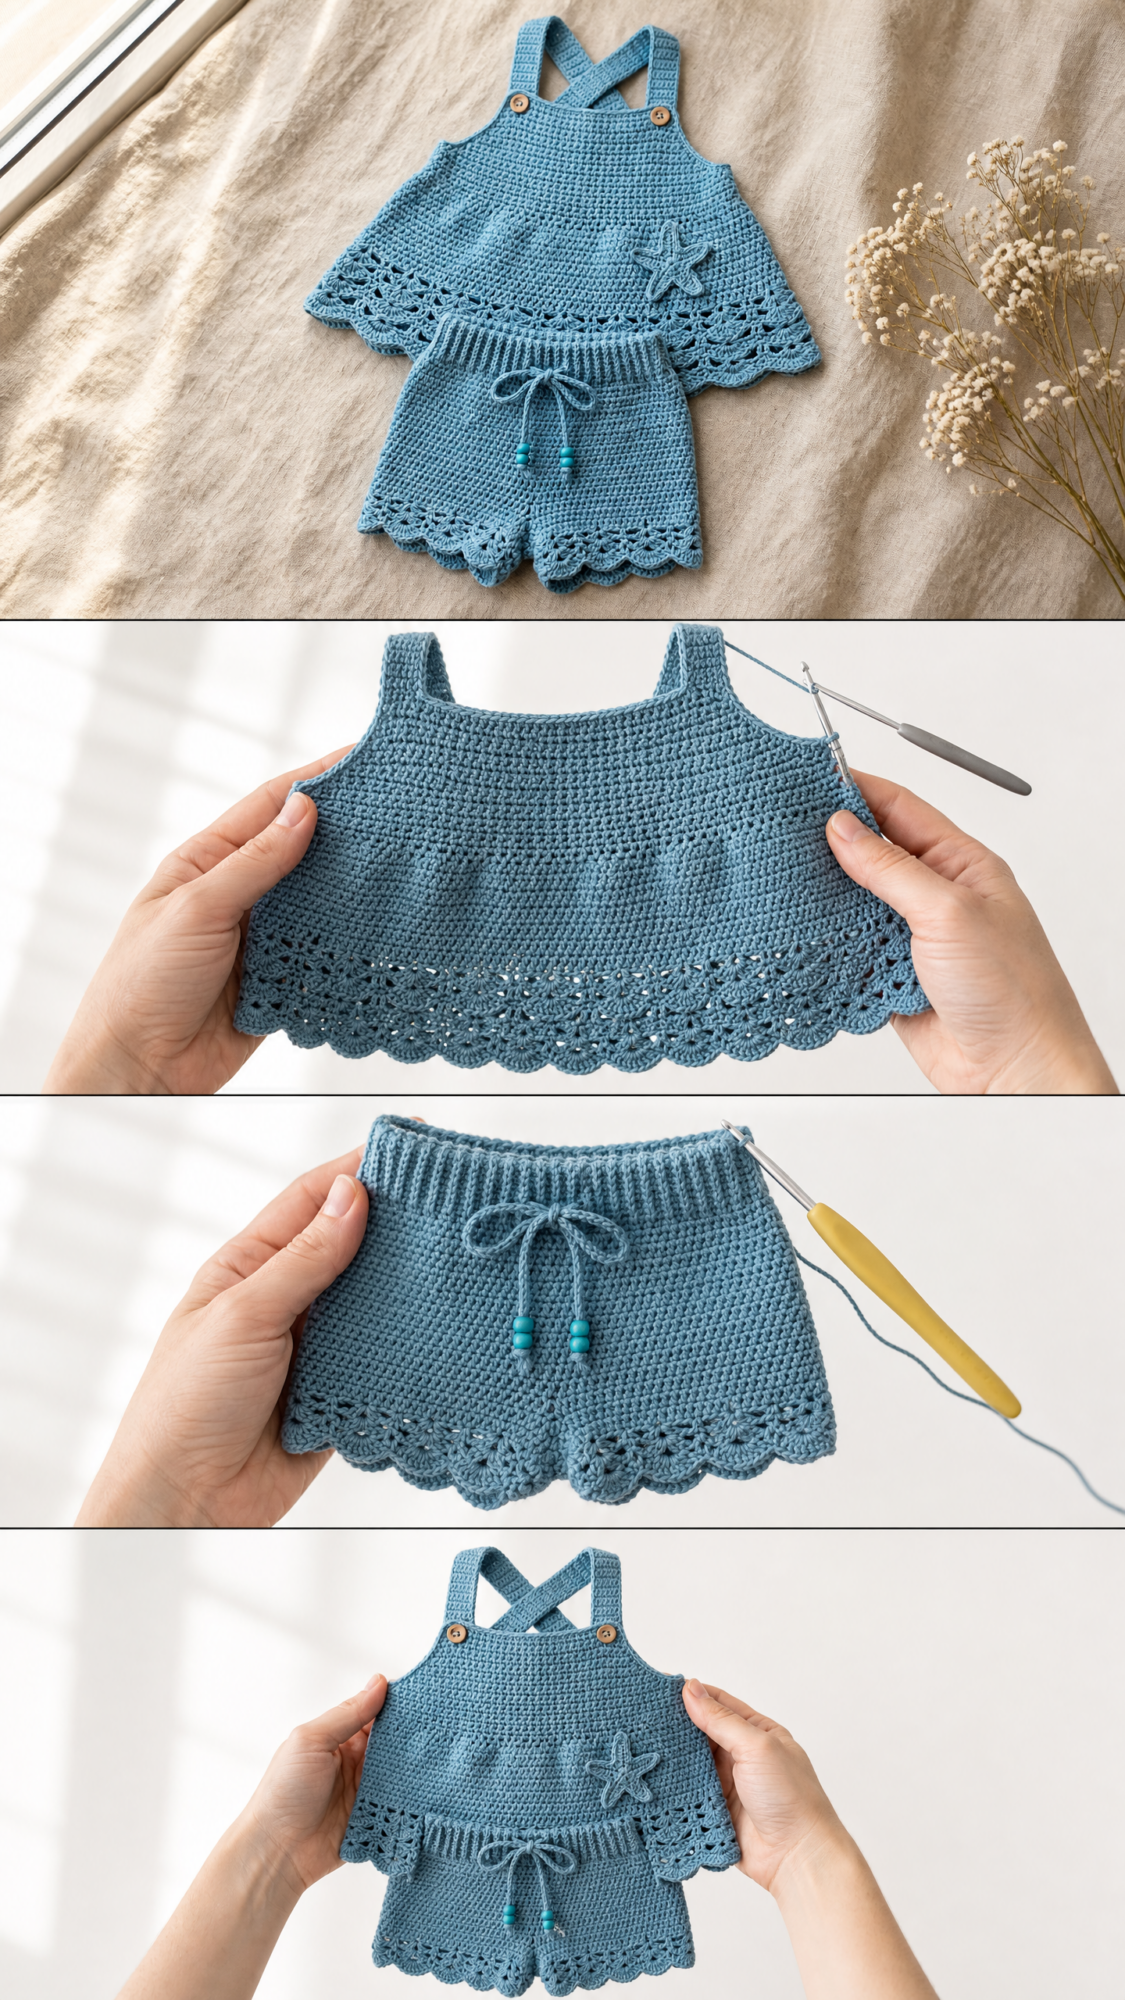
This crochet tutorial creates a two-piece coordinating set for babies aged 12 to 18 months. You’ll make a flowy A-line top with crossback straps that button at both front and back, plus matching shorts with a stretchy ribbed waistband and drawstring closure.
Both pieces feature the same beautiful scallop lace edging at the hems. The top also gets an adorable crocheted starfish applique sewn to the front. Wooden buttons finish the strap closures, and turquoise beads decorate the drawstring ends.
Skill level: Intermediate. You should be comfortable working in rows and rounds, reading lace stitch patterns, shaping garments, and completing small appliques. If you’ve finished several projects and want to level up, this is a great next challenge.
Time estimate: About 12 to 18 hours total. The top takes roughly 7 to 10 hours, the shorts take 4 to 6 hours, and finishing adds another 1 to 2 hours.
Finished Measurements
Top:
Shorts:
Materials You’ll Need
Yarn: Approximately 400 yards / 366 meters of DK weight yarn (CYCA 3 Light), 100 percent cotton or cotton blend. A smooth, lightly twisted cotton gives the best stitch definition for the lace edging.
Recommended yarns:
Avoid fuzzy or highly textured yarns. They’ll hide your pretty lace details.
Hooks:
Notions:
Gauge
With larger E-4 / 3.5 mm hook in single crochet:
18 stitches and 20 rows = 4 inches / 10 cm, blocked
One 6-stitch scallop repeat measures approximately 1.25 inches / 3.2 cm wide.
Gauge matters here! This is a fitted garment. Please swatch and block before starting.
Abbreviations
Let me define every abbreviation before we dive in. I’ll explain what each stitch actually does so you’re never guessing.
Special Stitches
Shell Stitch
Work 5 double crochet stitches all into the same stitch or space. This creates one shell unit that fans out beautifully.
Scallop Lace Border
This is the gorgeous decorative edging you see at the hem of both pieces. It’s worked over a multiple of 6 stitches plus 2. Here’s how it works:
Row 1 (RS): Ch 1, sc in first st, skip 2 sts, work 5 dc in next st (shell made), skip 2 sts, sc in next st. Repeat from the shell instruction across, ending sc in last st. Turn.
Row 2 (WS): Ch 3 (counts as dc), 2 dc in first sc (half shell at edge), skip to center of next shell (3rd dc), sc in that dc, work 5 dc in next sc between shells, sc in center of next shell. Repeat across, ending 3 dc in last sc. Turn.
Row 3 (RS): Ch 1, sc in first dc, 5 dc in next sc (shell made), sc in center of next shell (3rd dc of 5-dc group), 5 dc in next sc, sc in center of next shell. Repeat across, ending sc in top of t-ch. Turn.
Don’t panic if this looks complicated. Once you complete one repeat, the rhythm clicks into place.
Ribbed Waistband
Every row: Ch 1, sc in BLO of each stitch across. Turn.
Working in the back loop only creates that stretchy ribbed texture you see on the shorts waistband.
Pattern Notes Before You Begin
Part One: The Top
Section A: Front Bodice Panel
Foundation: With larger hook, ch 46.
Row 1 (RS): Sc in 2nd ch from hook and in each ch across. Turn. (45 sc)
Row 2 (WS): Ch 1, sc in each st across. Turn. (45 sc)
Rows 3 through 4: Repeat Row 2. (45 sc)
Now you’ll begin the A-line flare shaping. The panel gets wider at the bottom for that flowy silhouette.
Row 5 (RS, increase row): Ch 1, inc in first st, sc across to last st, inc in last st. Turn. (47 sc)
Row 6: Ch 1, sc across. Turn. (47 sc)
Row 7 (increase row): Ch 1, inc in first st, sc across to last st, inc in last st. Turn. (49 sc)
Row 8: Ch 1, sc across. Turn. (49 sc)
Row 9 (increase row): Ch 1, inc in first st, sc across to last st, inc in last st. Turn. (51 sc)
Row 10: Ch 1, sc across. Turn. (51 sc)
Row 11 (increase row): Ch 1, inc in first st, sc across to last st, inc in last st. Turn. (53 sc)
Row 12: Ch 1, sc across. Turn. (53 sc)
Row 13 (increase row): Ch 1, inc in first st, sc across to last st, inc in last st. Turn. (55 sc)
Row 14: Ch 1, sc across. Turn. (55 sc)
Row 15 (increase row): Ch 1, inc in first st, sc across to last st, inc in last st. Turn. (57 sc)
Row 16: Ch 1, sc across. Turn. (57 sc)
Row 17 (increase row): Ch 1, inc in first st, sc across to last st, inc in last st. Turn. (59 sc)
Row 18: Ch 1, sc across. Turn. (59 sc)
Row 19 (increase row): Ch 1, inc in first st, sc across to last st, inc in last st. Turn. (61 sc)
Row 20: Ch 1, sc across. Turn. (61 sc)
Checkpoint: Your panel should measure approximately 4 inches tall and 13.5 inches wide. You should have 61 stitches. This number is important for the lace border math to work out correctly.
Do not fasten off. Continue to the lace border.
Front Bodice Lace Border
Lace Row 1 (RS): Ch 1, sc in first st, skip 2 sts, 5 dc in next st (shell), skip 2 sts, sc in next st. Repeat [skip 2, 5 dc in next st, skip 2, sc in next st] 9 more times. Turn. (10 shells, 11 sc)
Lace Row 2 (WS): Ch 3 (counts as dc), 2 dc in first sc (half shell), sc in 3rd dc of first shell, [5 dc in next sc, sc in 3rd dc of next shell] 9 times, 3 dc in last sc. Turn.
Lace Row 3 (RS): Ch 1, sc in first dc, [5 dc in next sc, sc in 3rd dc of next shell] across, ending sc in top of t-ch. Turn.
Fasten off. Weave in ends.
Section B: Back Bodice Panel
Work exactly as the Front Bodice Panel, Rows 1 through 20 and Lace Rows 1 through 3.
Fasten off. Weave in ends.
Section C: Joining the Panels
Hold front and back panels with wrong sides together. Using your yarn needle, whip stitch or slip stitch the side edges together.
Important: Leave the top 12 rows (approximately 2.5 inches) open on each side for armholes. The seam starts at the lace bottom and works upward.
Section D: Straps (Make 2)
With smaller D-3 / 3.25 mm hook, ch 5.
Row 1: Sc in 2nd ch from hook and in each ch across. Turn. (4 sc)
Rows 2 through 38: Ch 1, sc across. Turn. (4 sc)
Row 39 (button loop end): Ch 1, sc in first st, ch 4 (button loop), sl st in same st, sc in each remaining st across. Turn. (4 sc plus ch-4 loop)
Row 40: Ch 1, sc across. Turn. (4 sc)
Fasten off leaving a 12-inch tail for sewing.
Strap Attachment
Sew the non-loop end of each strap to the top front corners of the front bodice panel, about 2 stitches in from each side edge.
The straps cross at the back in an X shape. The button loop ends attach at the back top corners.
Sew 2 wooden buttons to the front top corners and 2 wooden buttons to the back top corners to secure the crossed straps.
Part Two: The Shorts
Section A: Leg Pieces (Make 2)
Foundation: With larger E-4 / 3.5 mm hook, ch 50.
Row 1 (RS): Sc in 2nd ch from hook and in each ch across. Turn. (49 sc)
Row 2 (WS): Ch 1, sc across. Turn. (49 sc)
Rows 3 through 6: Ch 1, sc across. Turn. (49 sc)
Now work the scallop lace border for the leg hem.
Leg Lace Row 1 (RS): Ch 1, sc in first st, [skip 2, 5 dc in next st, skip 2, sc in next st] 8 times. Turn. (8 shells, 9 sc)
Leg Lace Row 2 (WS): Ch 3, 2 dc in first sc, [sc in 3rd dc of next shell, 5 dc in next sc] 7 times, sc in 3rd dc of last shell, 3 dc in last sc. Turn.
Leg Lace Row 3 (RS): Ch 1, sc in first dc, [5 dc in next sc, sc in 3rd dc of next shell] across, ending sc in top of t-ch. Turn.
Fasten off. Make second leg the same way.
Section B: Joining the Legs
With RS facing and larger hook, join yarn at one side edge of the top of Leg 1 (the foundation chain edge). Sc across the top edge of Leg 1. (49 sc)
Without fastening off, sc across the top edge of Leg 2. (49 sc)
Place marker. Join with sl st to first sc to work in the round. (98 sc total)
Rnds 1 through 8: Ch 1, sc in each st around. Sl st to first sc to join. (98 sc)
Section C: Crotch Seam
Flatten the shorts with front and back aligned. Using your yarn needle, whip stitch the center 8 stitches at the bottom of each leg together. This creates the approximately 2-inch inseam.
Section D: Eyelet Round for Drawstring
With RS facing and larger hook, join yarn to any stitch at the top of the shorts body.
Eyelet Rnd: Ch 1, sc in first st, [ch 1, skip 1 st, sc in next st] around. Join with sl st to first sc. (49 sc and 49 ch-1 spaces)
Section E: Ribbed Waistband
With smaller D-3 / 3.25 mm hook, ch 8.
Row 1: Sc in 2nd ch from hook and in each ch across. Turn. (7 sc)
Rows 2 through 98: Ch 1, sc in BLO of each st across. Turn. (7 sc)
Fasten off leaving a long tail. Join the short ends with slip stitch to form a ring.
Whip stitch the waistband ring to the top of the shorts along the eyelet round, matching each waistband row to each stitch.
Section F: Drawstring
Cut 2 lengths of yarn, each 30 inches long. Hold both strands together and fold in half. Thread through every other eyelet space around the waistband, entering and exiting at the same spot.
Thread 3 beads onto each pair of yarn ends. Knot below the beads to secure. Trim ends to about 0.5 inches below the knot.
Part Three: Starfish Applique
Center Ring: With larger hook, make a magic ring (or ch 4, sl st to form ring).
Rnd 1: Ch 1, work 10 sc into ring. Join with sl st to first sc. (10 sc)
Arms (Make 5)
For each arm, you’ll use 2 stitches of the center ring.
Arm: Ch 1, sc in same st, sc in next st of ring. (2 sc)
Row 1 of arm: Ch 1, turn, sc in each of 2 sts. (2 sc)
Row 2: Ch 1, turn, sc in each of 2 sts. (2 sc)
Row 3: Ch 1, turn, sc in each of 2 sts. (2 sc)
Row 4: Ch 1, turn, sc2tog. (1 sc)
Row 5: Ch 1, sc in same st. Fasten off.
Work around the center ring, attaching each arm to the next 2 stitches until all 5 arms are complete.
Stitch around the outer edges to tighten and define the shape. Weave in ends.
Sew the starfish to the lower left area of the front bodice panel using whip stitch.
Size Customization Tips
For 6 to 12 months: Reduce the top’s foundation chain to 40 (39 working sc). Work only 6 increase rows to reach 51 stitches. Shorten straps by 4 to 6 rows. Reduce leg foundation to 44 (43 sc). Reduce shorts body to 6 rounds.
For 2T to 3T: Increase the top’s foundation chain to 52 (51 working sc). Work 12 increase rows to reach 75 stitches. Add 4 to 6 rows to straps. Increase leg foundation to 56 (55 sc). Add 2 to 3 rounds to shorts body. Add 10 rows to waistband.
Always maintain a stitch count that works with the lace border math (multiple of 6 plus 1 for the top, multiple of 6 plus 1 for the legs).
Finishing and Care
Block both pieces gently before assembling. Lay flat to dry. The lace borders really bloom after blocking.
For washing, hand wash or use a gentle cycle with cold water. Lay flat to dry to maintain shape.
You Did It!
This ocean blue coastal baby outfit is such a satisfying project to complete. The coordination between the pieces, the pretty lace borders, that sweet little starfish. It all comes together into something truly special.
Thank you so much for choosing this pattern for your next project. I hope you love making it as much as I loved designing it. If you create this outfit, I would absolutely love to see your finished piece! Share your photos on Instagram or Facebook and tag me so I can celebrate your work.
If you found this crochet pattern helpful, save it to your Pinterest boards so you can find it easily when you’re ready to start. And please drop a comment below if you make this set. I love hearing which yarn colors you choose and seeing how the finished outfits turn out!
