
You know that gorgeous skein of lavender yarn you’ve been saving for something special? This is the project. Dig into your stash because the Lavender Dreams Mandala Crochet Set is calling your name.
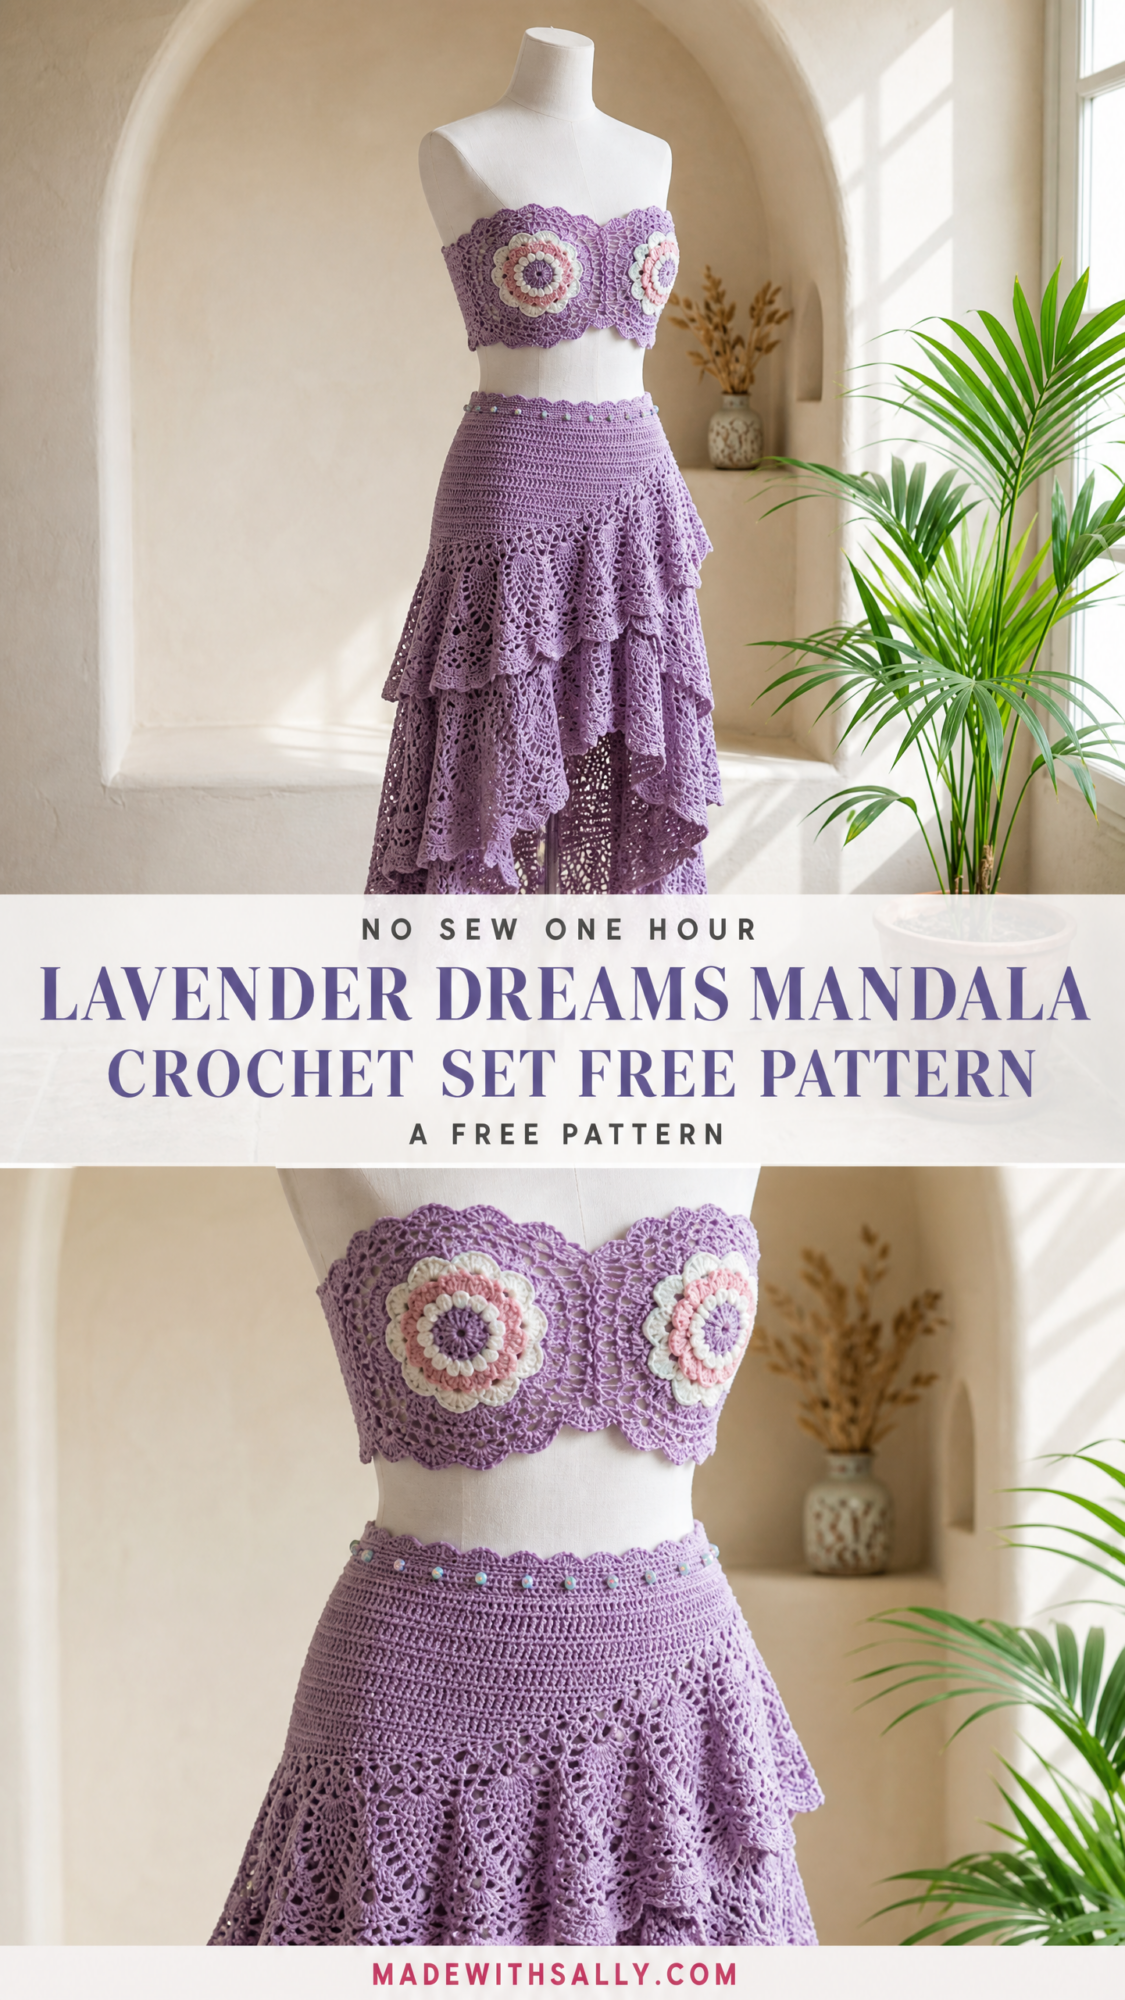
This two-piece set combines a structured strapless bandeau top with dramatic mandala motifs and a show-stopping high-low tiered skirt. The construction is genuinely interesting. You’ll work flat circles for the mandalas, build a shaped bandeau body, then create cascading pineapple lace tiers that flow from front to back. I won’t sugarcoat it. This is an advanced pattern requiring comfort with multiple techniques. But if you’ve been looking for a project that challenges you and results in something absolutely stunning, this is it.
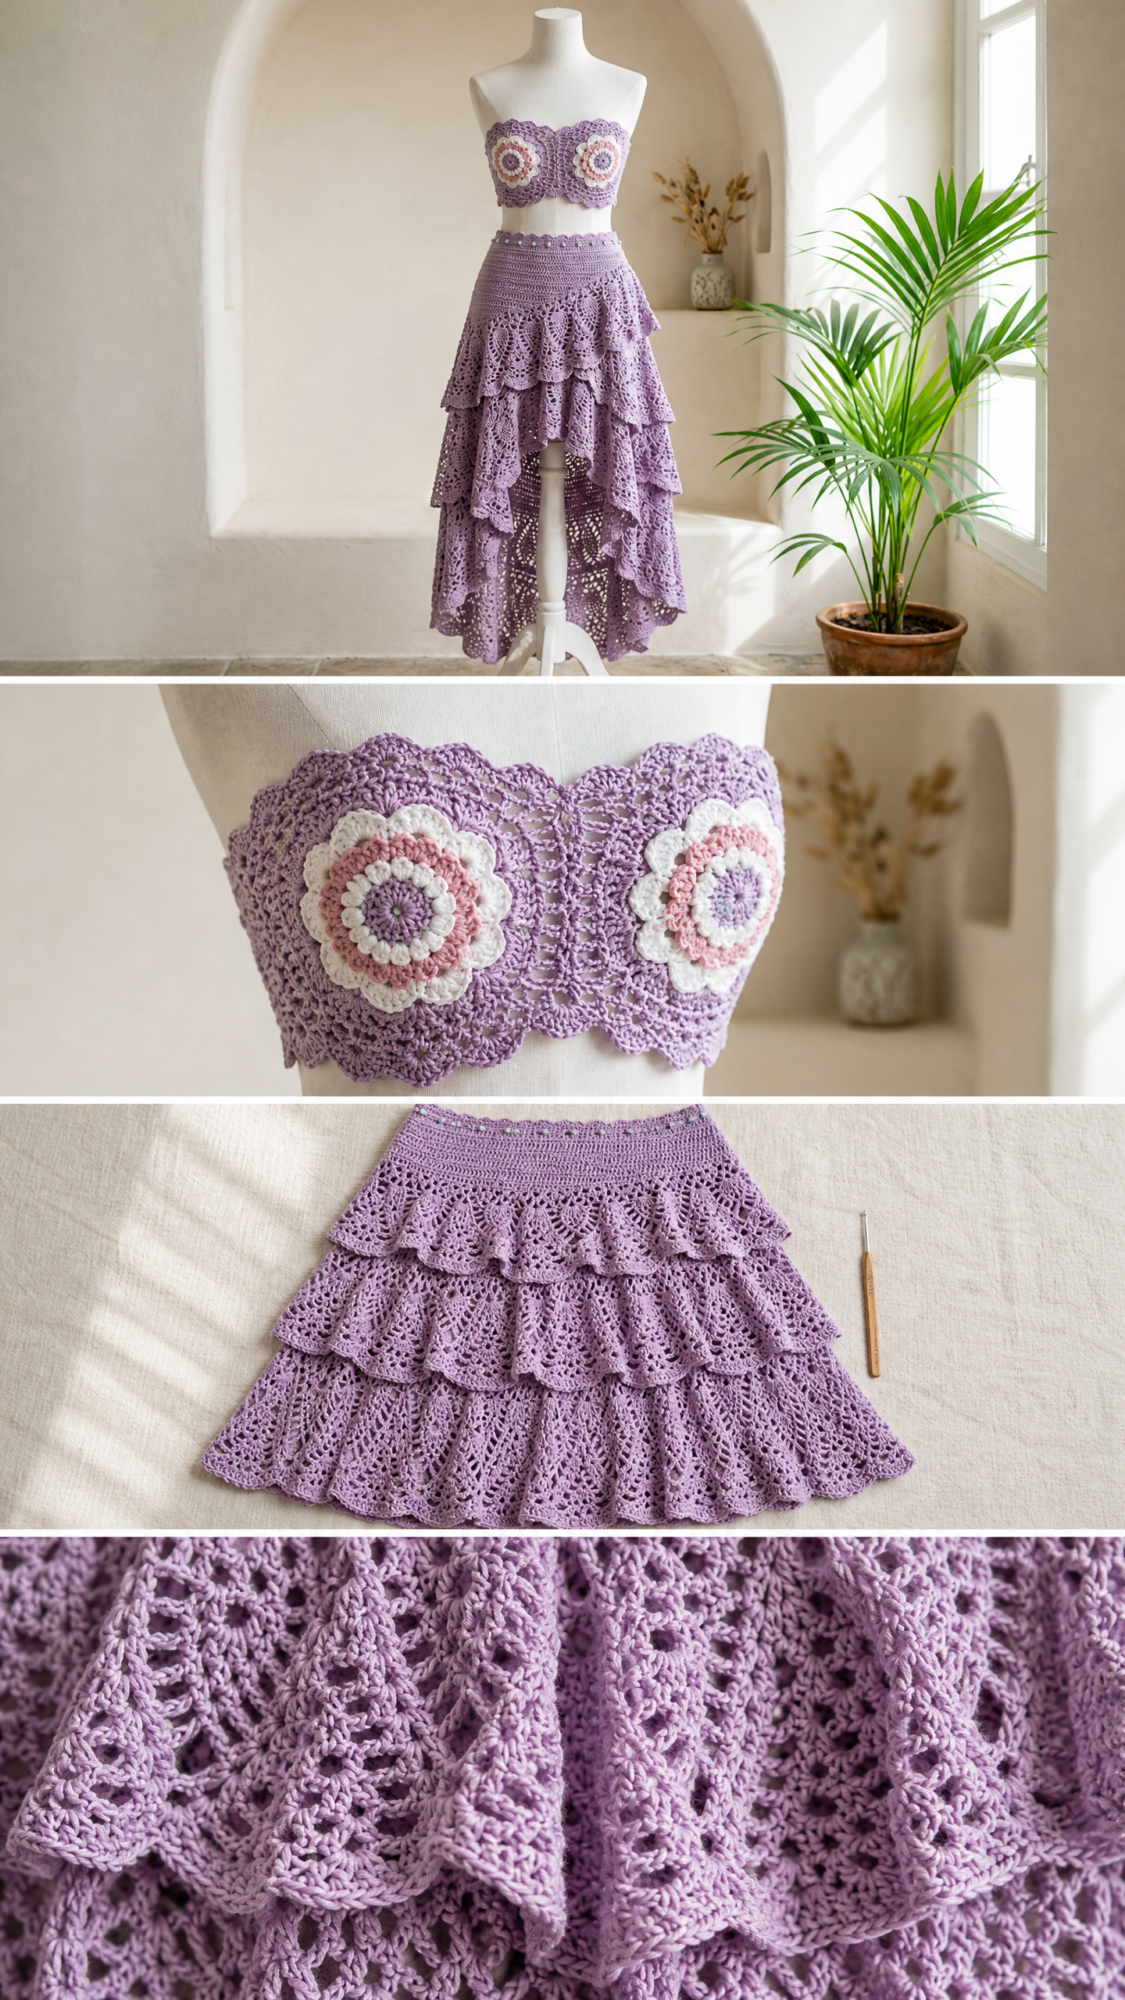
The finished set features soft lavender as the main color with concentric rings of dusty rose, blush pink, and cream creating those eye-catching mandala flowers on the bodice. Every edge showcases elegant scalloped shells. It’s festival-ready, beach-perfect, or simply a gorgeous display of your crochet skills.
About This Crochet Pattern
The Lavender Dreams Mandala Crochet Set consists of two coordinating pieces designed to be worn together. The bandeau top features a lace-up ribbon closure at the back for adjustable fit. Two large circular mandala motifs sit centered on the front cups, creating a bohemian focal point. The skirt begins with a solid double crochet (dc) waistband, then flows into four cascading tiers of pineapple lace that graduate from shorter at the front to longer at the back. This creates that dramatic mullet-style silhouette you see in the photos.
Skill level: Advanced. This pattern requires working in the round, joining motifs to a body, reading lace stitch concepts, managing multiple stitch types within a single row, executing high-low shaping, and creating a lace-up closure.
Time estimate: Plan for 12 to 18 hours for the bandeau top and 25 to 35 hours for the skirt. Total set completion runs 37 to 53 hours depending on your experience level and gauge consistency.
Finished Measurements
The pattern is written for size Small/Medium (US 4/6).
Bandeau top:
Skirt:
Size customization tips appear at the end of the pattern.
Materials Needed
Yarn:
Hooks:
Notions:
Yarn Suggestions
Option 1: Lion Brand Yarn 24/7 Cotton in "Lavender" colorway. DK weight, 100 percent mercerized cotton, 186 yards / 170 m per 3.5 oz / 100 g skein. Requires approximately 5 skeins MC. Excellent stitch definition and minimal stretch, ideal for structured bandeau and lace skirt.
Option 2: Paintbox Yarns Simply DK in "Pansy Purple." DK weight, 100 percent acrylic, 137 yards / 125 m per 1.76 oz / 50 g ball. Requires approximately 6 balls MC. Budget-friendly with a slight sheen and blocks well with steam.
Option 3: Cascade Yarns 220 Superwash Sport (used at DK tension) in "Lavender Haze." Sport weight used at relaxed gauge to achieve DK-equivalent fabric. 136 yards / 124 m per 1.76 oz / 50 g skein. Requires approximately 7 skeins MC. Beautifully soft against skin for a wearable garment.
Substitution note: Choose a yarn with minimal halo or fuzz so the lace pineapple stitch openings remain crisp and visible. Cotton and cotton blends block permanently for the lace tiers. If substituting with acrylic, steam block rather than wet block. Avoid highly elastic yarns as the bandeau requires structural integrity to stay in place.
Gauge
With E-4 / 3.5 mm hook and MC:
20 sc x 24 rows = 4 in / 10 cm square in single crochet (sc)
With F-5 / 3.75 mm hook and MC:
1 complete pineapple lace repeat (14 sts wide) = 2.75 in / 7 cm wide
Lace tier row height: 6 rows = 2 in / 5 cm
Gauge is critical for fit. Adjust hook size as needed to match gauge before beginning. I cannot stress this enough. Take the time to swatch!
Abbreviations (US Terms)
Let me walk you through all the abbreviations you’ll encounter. If you’re newer to reading patterns, bookmark this section.
Special Stitches You’ll Learn
Scallop Edging Shell
This stitch creates the signature wavy scalloped border on all finished edges. You’ll use it throughout both pieces.
Step 1: Slip stitch into the first stitch.
Step 2: Chain 1.
Step 3: Work 5 dc into the same stitch.
Step 4: Skip 2 stitches.
Step 5: Slip stitch into the next stitch.
Step 6: Skip 2 stitches.
Step 7: Work 5 dc into the next stitch.
Repeat steps 4 through 7 across or around, ending with a slip stitch into the final stitch.
Important note: When applying scallop edging to a finished edge, you need a stitch count that is a multiple of 6. Individual edging instructions include adjustments for this.
Pineapple Lace Repeat (14-stitch repeat)
This 14-stitch repeat creates the fan-and-arch lace fabric used in all skirt tiers. Here’s how one complete unit works over 14 stitches:
Step 1: Chain 3, skip 1 stitch, dc in next stitch (forms a V).
Step 2: Chain 2, skip 2 stitches, work 7 tr into the next stitch (fan of 7 trebles).
Step 3: Chain 2, skip 2 stitches, dc in next stitch.
Step 4: Chain 1, skip 2 stitches, dc in next stitch.
This forms one full pineapple base unit. On subsequent rounds, the pineapple decreases by working sc across the top of each fan on alternating rounds. You’ll narrow the fan by one treble each time until the pineapple closes at a point. Simultaneously, the arch chains grow wider on the sides to fill space. Full round-by-round pineapple construction appears in the skirt tiers section.
Lace-Up Eyelet Column
This creates the series of chain loops at the center back of the bandeau through which the ribbon is threaded. On the designated back center column, work as follows on every right-side row: sc to 2 stitches before center back, ch 2, skip 2 stitches, sc in next stitch. This creates evenly spaced eyelets. A ribbon weaves vertically through these eyelets to cinch fit.
Pattern Notes Before You Begin
1. The bandeau top is worked flat in rows from a foundation chain. The two mandala motifs are worked separately then sewn onto the front face of the completed top.
2. The skirt is worked in the round from a foundation chain joined into a ring, beginning with the waistband and then adding tiers.
3. High-low shaping in the skirt is achieved by working extra rounds at the back only during the lower two tiers. Short rows accomplish this. The front center of the skirt stops at Tier 2 while the back continues through Tiers 3 and 4.
4. All stitch counts at the end of rows/rounds appear in parentheses.
5. Chain 3 at the beginning of a double crochet row/round counts as 1 dc throughout.
6. Chain 1 at the beginning of a single crochet row does NOT count as a stitch.
7. All lace tier rounds are worked on the right side. The piece is not turned for lace rounds. Instead, slip stitch to join and chain up.
8. Weave in all ends as you complete each section to reduce finishing time at the end.
Part One: Mandala Motifs (Make 2)
Use F-5 / 3.75 mm hook. Work both motifs identically. The color sequence is: CC (dusty rose) for rounds 1 through 2, CB (blush pink) for rounds 3 through 4, CA (cream) for round 5, MC (lavender) for rounds 6 through 8.
Foundation: Make a magic ring (adjustable loop).
Round 1: With CC, ch 3 (counts as dc), work 11 dc into the magic ring, pull ring closed, sl st to top of beginning ch-3 to join. (12 dc)
Round 2: Ch 3, dc in same stitch as join (counts as dc-increase), 2 dc in each remaining stitch around, sl st to top of beginning ch-3. (24 dc)
Round 3: Change to CB. Ch 3, dc in same stitch, dc in next stitch, (2 dc in next stitch, dc in next stitch) around, sl st to top of beginning ch-3. (36 dc)
Round 4: Ch 3, dc in same stitch, dc in next 2 stitches, (2 dc in next stitch, dc in next 2 stitches) around, sl st to top of beginning ch-3. (48 dc)
Round 5: Change to CA. Ch 3, dc in same stitch, dc in next 3 stitches, (2 dc in next stitch, dc in next 3 stitches) around, sl st to top of beginning ch-3. (60 dc)
Round 6: Change to MC. Ch 3, dc in same stitch, dc in next 4 stitches, (2 dc in next stitch, dc in next 4 stitches) around, sl st to top of beginning ch-3. (72 dc)
Round 7: Ch 1 (does not count as st), sc in same stitch as join, (ch 3, skip 2 stitches, sc in next stitch) around, ending with ch 3, sl st to first sc to join. (24 ch-3 arches)
Round 8: Sl st into first ch-3 arch, ch 3, 4 dc into same arch (half shell), ch 1, (5 dc into next arch, ch 1) around, sl st to top of beginning ch-3. (24 shells of 5 dc each, 24 ch-1 sps)
Fasten off, leaving a 12 in / 30 cm tail for seaming. Finished motif diameter: approximately 5 in / 12.5 cm.
Checkpoint: Each completed motif should measure approximately 5 in / 12.5 cm in diameter after a light blocking. If smaller, switch to a larger hook. If larger, switch to a smaller hook and re-work.
Part Two: Bandeau Top
Use E-4 / 3.5 mm hook and MC throughout. The bandeau is worked flat as a rectangle with shaping. Then the top edge is shaped and the back closure eyelets are worked.
Foundation Row
Ch 151.
Row 1 (WS): Sc in 2nd ch from hook and in each ch across, turn. (150 sc)
Row 2 (RS): Ch 1, sc in each sc across, turn. (150 sc)
Row 3: Ch 1, sc in each sc across, turn. (150 sc)
Row 4: Ch 3, dc in each sc across, turn. (150 dc)
Row 5: Ch 3, dc in each dc across, turn. (150 dc)
Row 6: Ch 1, sc in each dc across, turn. (150 sc)
Row 7: Ch 1, sc in each sc across, turn. (150 sc)
Row 8: Ch 1, sc in each sc across, turn. (150 sc)
This establishes the lower body band of the bandeau. The fabric should measure approximately 2.5 in / 6.5 cm tall at this point.
Upper Cup Shaping Section
The upper portion of the bandeau is divided into three sections: Left Cup (stitches 1 through 57), Center Bridge (stitches 58 through 93), Right Cup (stitches 94 through 150). Each cup is shaped separately to create a slight curve at the upper edge.
Left Cup (stitches 1 through 57)
Row 9 (RS): Ch 1, sc in first 57 sts, turn, leaving remaining stitches unworked. (57 sc)
Row 10: Ch 1, sc2tog over first 2 sts, sc to last 2 sts, sc2tog, turn. (55 sc)
Row 11: Ch 1, sc2tog over first 2 sts, sc to last 2 sts, sc2tog, turn. (53 sc)
Row 12: Ch 1, sc2tog over first 2 sts, sc to last 2 sts, sc2tog, turn. (51 sc)
Row 13: Ch 1, sc in each sc across, turn. (51 sc)
Row 14: Ch 1, sc2tog, sc to last 2 sts, sc2tog, turn. (49 sc)
Row 15: Ch 1, sc in each sc across, turn. (49 sc)
Fasten off MC. Left cup complete.
Center Bridge (stitches 58 through 93)
Reattach MC with RS facing to stitch 58.
Row 9 (RS): Ch 1, sc in stitches 58 through 93, turn. (36 sc)
Rows 10 through 15: Ch 1, sc in each sc across, turn. (36 sc each row)
Fasten off MC. Center bridge complete.
Right Cup (stitches 94 through 150)
Reattach MC with RS facing to stitch 94.
Row 9 (RS): Ch 1, sc in stitches 94 through 150, turn. (57 sc)
Row 10: Ch 1, sc2tog, sc to last 2 sts, sc2tog, turn. (55 sc)
Row 11: Ch 1, sc2tog, sc to last 2 sts, sc2tog, turn. (53 sc)
Row 12: Ch 1, sc2tog, sc to last 2 sts, sc2tog, turn. (51 sc)
Row 13: Ch 1, sc in each sc across, turn. (51 sc)
Row 14: Ch 1, sc2tog, sc to last 2 sts, sc2tog, turn. (49 sc)
Row 15: Ch 1, sc in each sc across, turn. (49 sc)
Fasten off MC.
Checkpoint: After completing all three sections of the bandeau upper, the piece should measure approximately 6 in / 15 cm tall at the tallest point (cup outer edges) and approximately 5 in / 13 cm tall at the center bridge.
Top Edge Scallop
Reattach MC with RS facing at the top left corner of the bandeau.
Preparation round: Work sc evenly across the top edge of the left cup (approximately 49 sc to match row 15), across the top of the center bridge (approximately 36 sc), and across the top of the right cup (approximately 49 sc). Total preparation row: (134 sc)
Adjust to 132 sc if count is slightly off to achieve a multiple of 6 for scallop edging: work sc2tog at 1 inconspicuous location in each cup if needed.
Scallop top edge: With RS facing, reattach at left corner. Work Scallop Edging Shell as given in Special Stitches across all 132 sts. (22 scallop shells)
Fasten off.
Bottom Edge Scallop
With RS facing, reattach MC at the bottom left corner of the foundation row.
Work a preparation row of 144 sc along the bottom (adjusting from the original 150 stitches by working sc2tog at 6 evenly spaced points), then work Scallop Edging Shell. (24 scallop shells)
Fasten off.
Back Lace-Up Eyelet Finishing
The back center of the bandeau runs along the two short side edges.
On the left short edge (which is the back right when worn), with RS facing, reattach MC at the bottom corner.
Work 1 sc into each row end up the side edge. The piece has 15 rows of varying heights. Count approximately 22 row-end stitches. Adjust by working sc2tog at 2 points to achieve 20 sc evenly up the side. (20 sc)
Repeat on the right short edge (back left when worn). (20 sc)
Eyelet row on back right edge (RS):
Row 1: Ch 1, sc in first 2 sts, (ch 2, skip 2 sts, sc in next 2 sts) 4 times, sc in last 2 sts, turn. (4 eyelets formed)
Row 2: Ch 1, sc in each sc and 2 sc in each ch-2 space across, turn. (20 sc)
Fasten off.
Repeat eyelet row on back left edge.
Thread satin ribbon through eyelets and tie at top or bottom, lacing corset-style. Trim ribbon ends.
Attaching the Mandala Motifs
Position one motif on the left cup front, centered. The motif center should sit at approximately 3 in / 7.5 cm from the bottom edge and 1.5 in / 4 cm from the center front bridge. Pin in place.
Using the long tail and yarn needle, whipstitch around the outer edge of round 8 of the motif, catching both the motif and the bandeau fabric with each stitch. Work all the way around, keeping tension even.
Repeat for the right cup motif, mirroring the placement.
Weave in all ends.
Checkpoint: With both motifs attached, the bandeau front should show two large circular lavender and multicolor flowers centered symmetrically on each cup. The scalloped edges should lie flat along the top and bottom.
Part Three: Skirt
Use E-4 / 3.5 mm hook for the waistband. Switch to F-5 / 3.75 mm hook for all lace tiers.
Waistband
The waistband is worked in rounds for a seamless finish.
Foundation: Ch 140, join with sl st to first ch, being careful not to twist the chain. (140 ch)
Round 1: Ch 3 (counts as dc), dc in each ch around, sl st to top of beginning ch-3. (140 dc)
Rounds 2 through 6: Ch 3, dc in each dc around, sl st to top of beginning ch-3. (140 dc each round)
Round 7: Ch 1, sc in each dc around, sl st to first sc. (140 sc)
Round 8: Ch 1, sc in each sc around, sl st to first sc. (140 sc)
Round 9 (increase round): Ch 3, dc in same st, dc in next 3 sts, (2 dc in next st, dc in next 3 sts) around, sl st to top of beginning ch-3. (175 dc)
Round 10: Ch 3, dc in each dc around, sl st to top of beginning ch-3. (175 dc)
The waistband now measures approximately 3.5 in / 9 cm tall and 28 in / 71 cm in circumference.
Checkpoint: The waistband circumference should measure 28 in / 71 cm unstretched at this point. Try on or measure against your measurement before continuing.
Establishing Lace Tier Foundation
Round 11 (increase to tier base): Ch 3, dc in same st, dc in next 4 sts, (2 dc in next st, dc in next 4 sts) around, sl st to top of beginning ch-3. (210 dc)
Round 12: Ch 3, dc in each dc around, sl st to top of beginning ch-3. (210 dc)
The 210-stitch count is the foundation for Tier 1. 210 divided by 14 equals 15 complete pineapple lace repeats.
Tier 1 (Shortest tier, full circumference)
Switch to F-5 / 3.75 mm hook.
The following 6 rounds form one complete pineapple lace tier. Each tier is worked in rounds, joined, not turned.
Round 13 (Tier 1, Round 1): Sl st into first dc, ch 4 (counts as dc plus ch 1), skip 1 dc, dc in next dc, (ch 2, skip 2 dc, 7 tr in next dc, ch 2, skip 2 dc, dc in next dc, ch 1, skip 1 dc, dc in next dc) 14 times, ending last rep with ch 2, skip 2 dc, 7 tr in next dc, ch 2, skip 2 dc, sl st to 3rd ch of beginning ch-4. (14 pineapple fans of 7 tr, 14 V-stitches, 28 ch-2 sps)
Round 14 (Tier 1, Round 2): Sl st into ch-1 sp, ch 3, dc in same sp, ch 2, sc across top of 7-tr fan as follows: sc in first tr, (ch 1, sc in next tr) 6 times (7 sc with 6 ch-1 sps between them, forming the pineapple top), ch 2, (2 dc in ch-1 sp, ch 2, sc in first tr, (ch 1, sc in next tr) 6 times, ch 2) 13 times, sl st to top of beginning ch-3. (14 pineapple tops begun, each with 7 sc)
Round 15 (Tier 1, Round 3): Sl st to ch-2 sp, ch 3, dc in same sp, ch 2, sc in first ch-1 sp of pineapple, (ch 1, sc in next ch-1 sp) 4 times (5 sc with 4 ch-1 sps, pineapple narrowed by 1 on each side), ch 2, (2 dc in next ch-2 sp, ch 2, sc in first ch-1 sp, (ch 1, sc in next ch-1 sp) 4 times, ch 2) 13 times, sl st to top of beginning ch-3. (14 pineapples now 5 sc wide)
Round 16 (Tier 1, Round 4): Sl st to ch-2 sp, ch 3, dc in same sp, ch 2, sc in first ch-1 sp, (ch 1, sc in next ch-1 sp) 2 times (3 sc with 2 ch-1 sps), ch 2, (2 dc in ch-2 sp, ch 2, sc in first ch-1 sp, (ch 1, sc in next ch-1 sp) 2 times, ch 2) 13 times, sl st to top of beginning ch-3. (14 pineapples now 3 sc wide)
Round 17 (Tier 1, Round 5): Sl st to ch-2 sp, ch 3, dc in same sp, ch 2, sc in ch-1 sp (single center sc, pineapple tip), ch 2, (2 dc in ch-2 sp, ch 2, sc in ch-1 sp, ch 2) 13 times, sl st to top of beginning ch-3. (14 pineapples at tip, 1 sc each)
Continue working additional tiers following the same pineapple lace structure, adding the high-low shaping by working extra rounds at the back center for Tiers 3 and 4. The front stops at Tier 2 while the back continues, creating that beautiful cascading mullet silhouette.
Finishing Your Lavender Dreams Set
Block both pieces for best results. For cotton yarn, wet block by soaking in cool water, gently squeezing out excess moisture, and pinning to blocking mats. Open up all lace sections and scallops while pinning. Allow to dry completely before unpinning.
For acrylic yarn, steam block by hovering a steam iron over the fabric without touching it directly. Shape while warm and allow to cool completely.
Attach optional bead embellishments to the waistband if desired using a sewing needle and matching thread. Space approximately 30 small beads or pearls evenly around the waistband for extra sparkle.
Tips for Success with This Crochet Tutorial
Take your time with gauge. This pattern has precise fit requirements. A gauge swatch is not optional here.
Use stitch markers generously. Mark the beginning of rounds, the center front and back of the skirt, and the boundaries between cup sections on the bandeau.
Block as you go. Blocking each mandala motif before attaching makes placement much easier.
Try on frequently. The skirt especially benefits from trying on during construction to check fit and length before committing to the next tier.
This Lavender Dreams Mandala Crochet Set pattern is a labor of love. It’s the kind of project you work on over several weeks, enjoying the process as much as the finished piece. When you slip it on for the first time and see those cascading lace tiers catch the light, you’ll know every hour was worth it.
I hope you love making this set as much as I loved designing it. If you complete your Lavender Dreams Set, I would absolutely love to see it! Tag me on Instagram or share in my Facebook group. Save this pattern to your Pinterest boards so you can find it when you’re ready to start, and please leave a comment below if you make it. Your photos and feedback make my day!
