
Let me guess. You took one look at this stunning two-piece set and thought, "There is no way I could make that." I get it. The sculptural sunflowers, the fitted silhouette, that gorgeous asymmetric neckline. It looks like something you would find in a high-end boutique, not something you could create with your own hands.
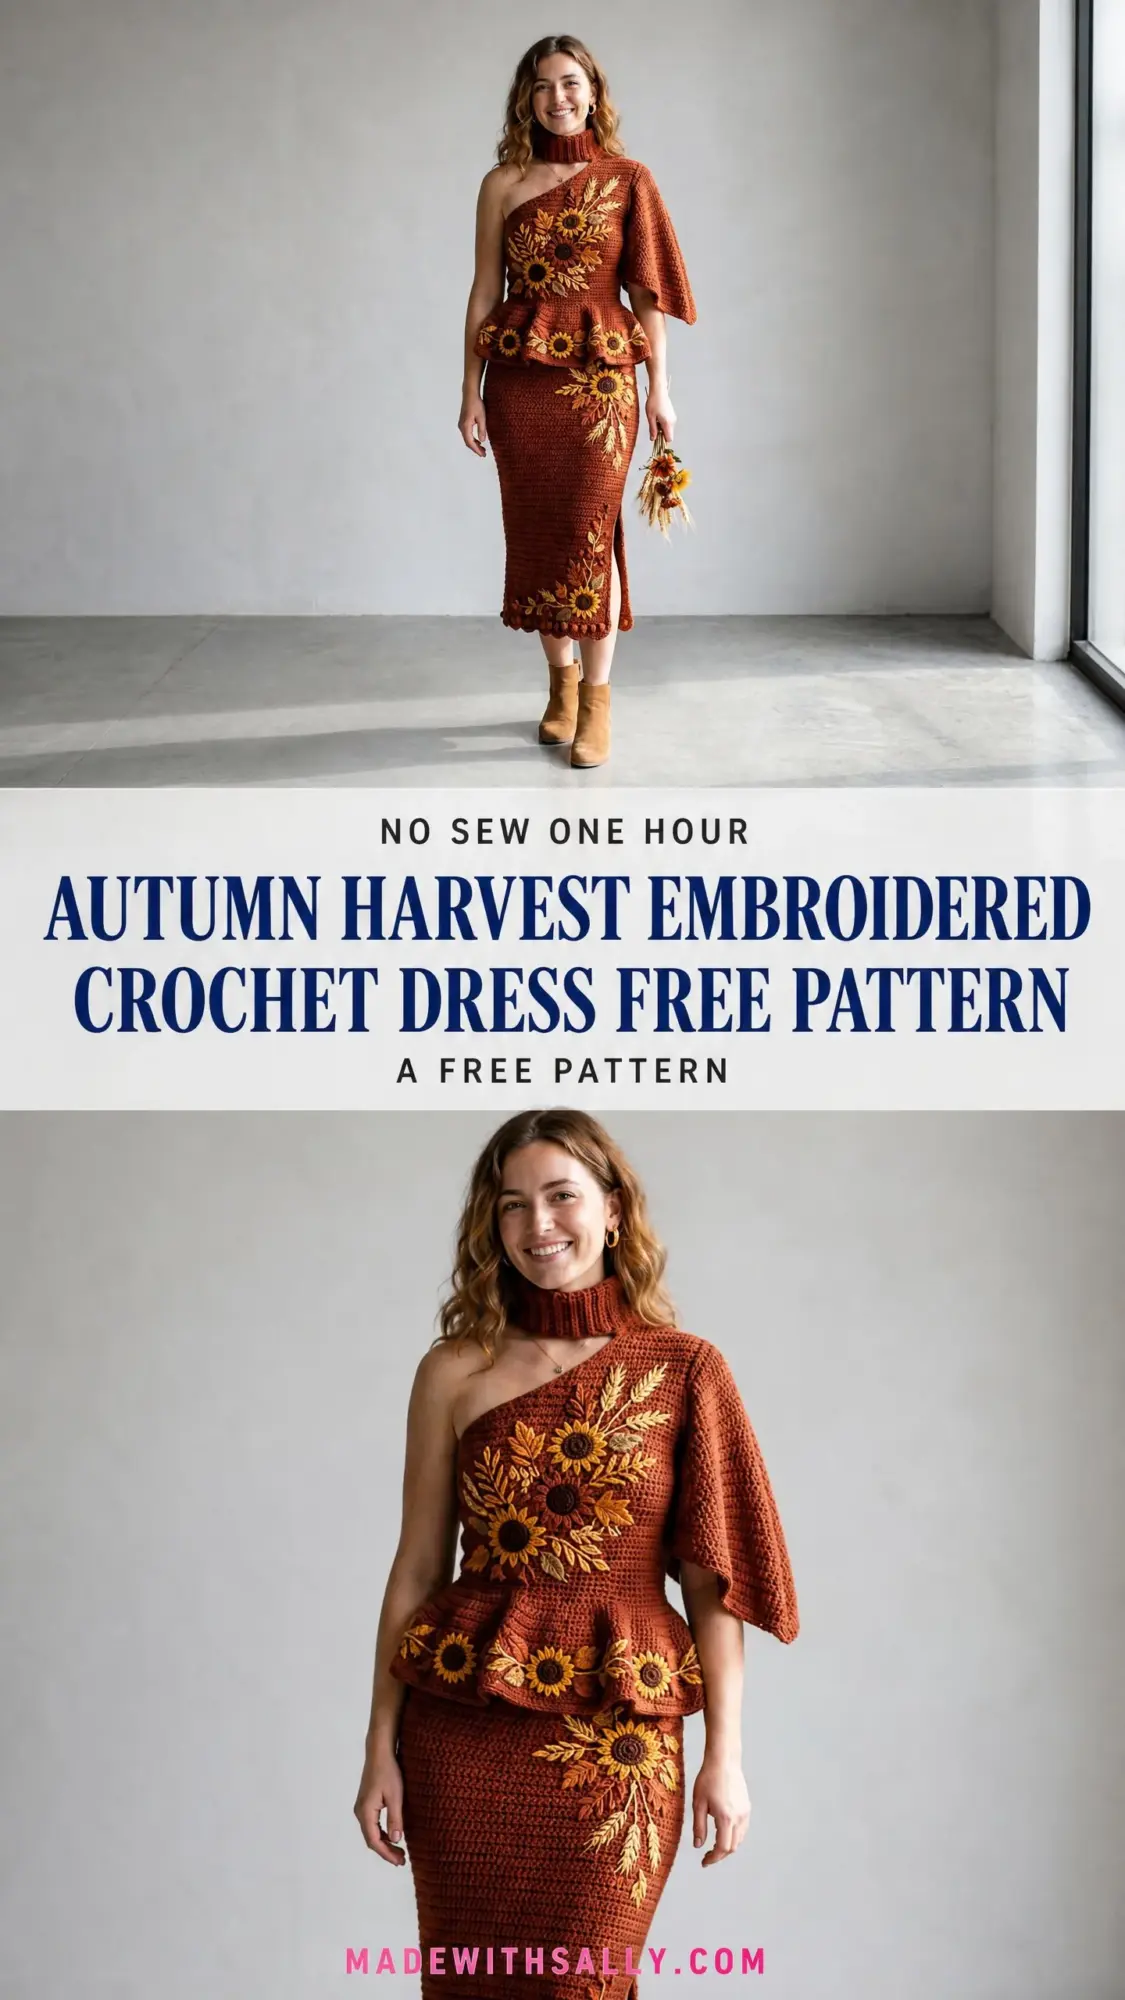
But here is the truth. This entire set is built on single crochet. That is it. The same basic stitch you probably learned in your very first week of crocheting. The drama comes from the construction, the shaping, and those beautiful appliqué motifs that you make separately and sew on at the end.
If you can single crochet, decrease, and follow a stitch count, you can make this dress. It takes time, yes. It requires patience and attention to detail. But intimidating? Not when you break it down step by step.
About This Crochet Pattern
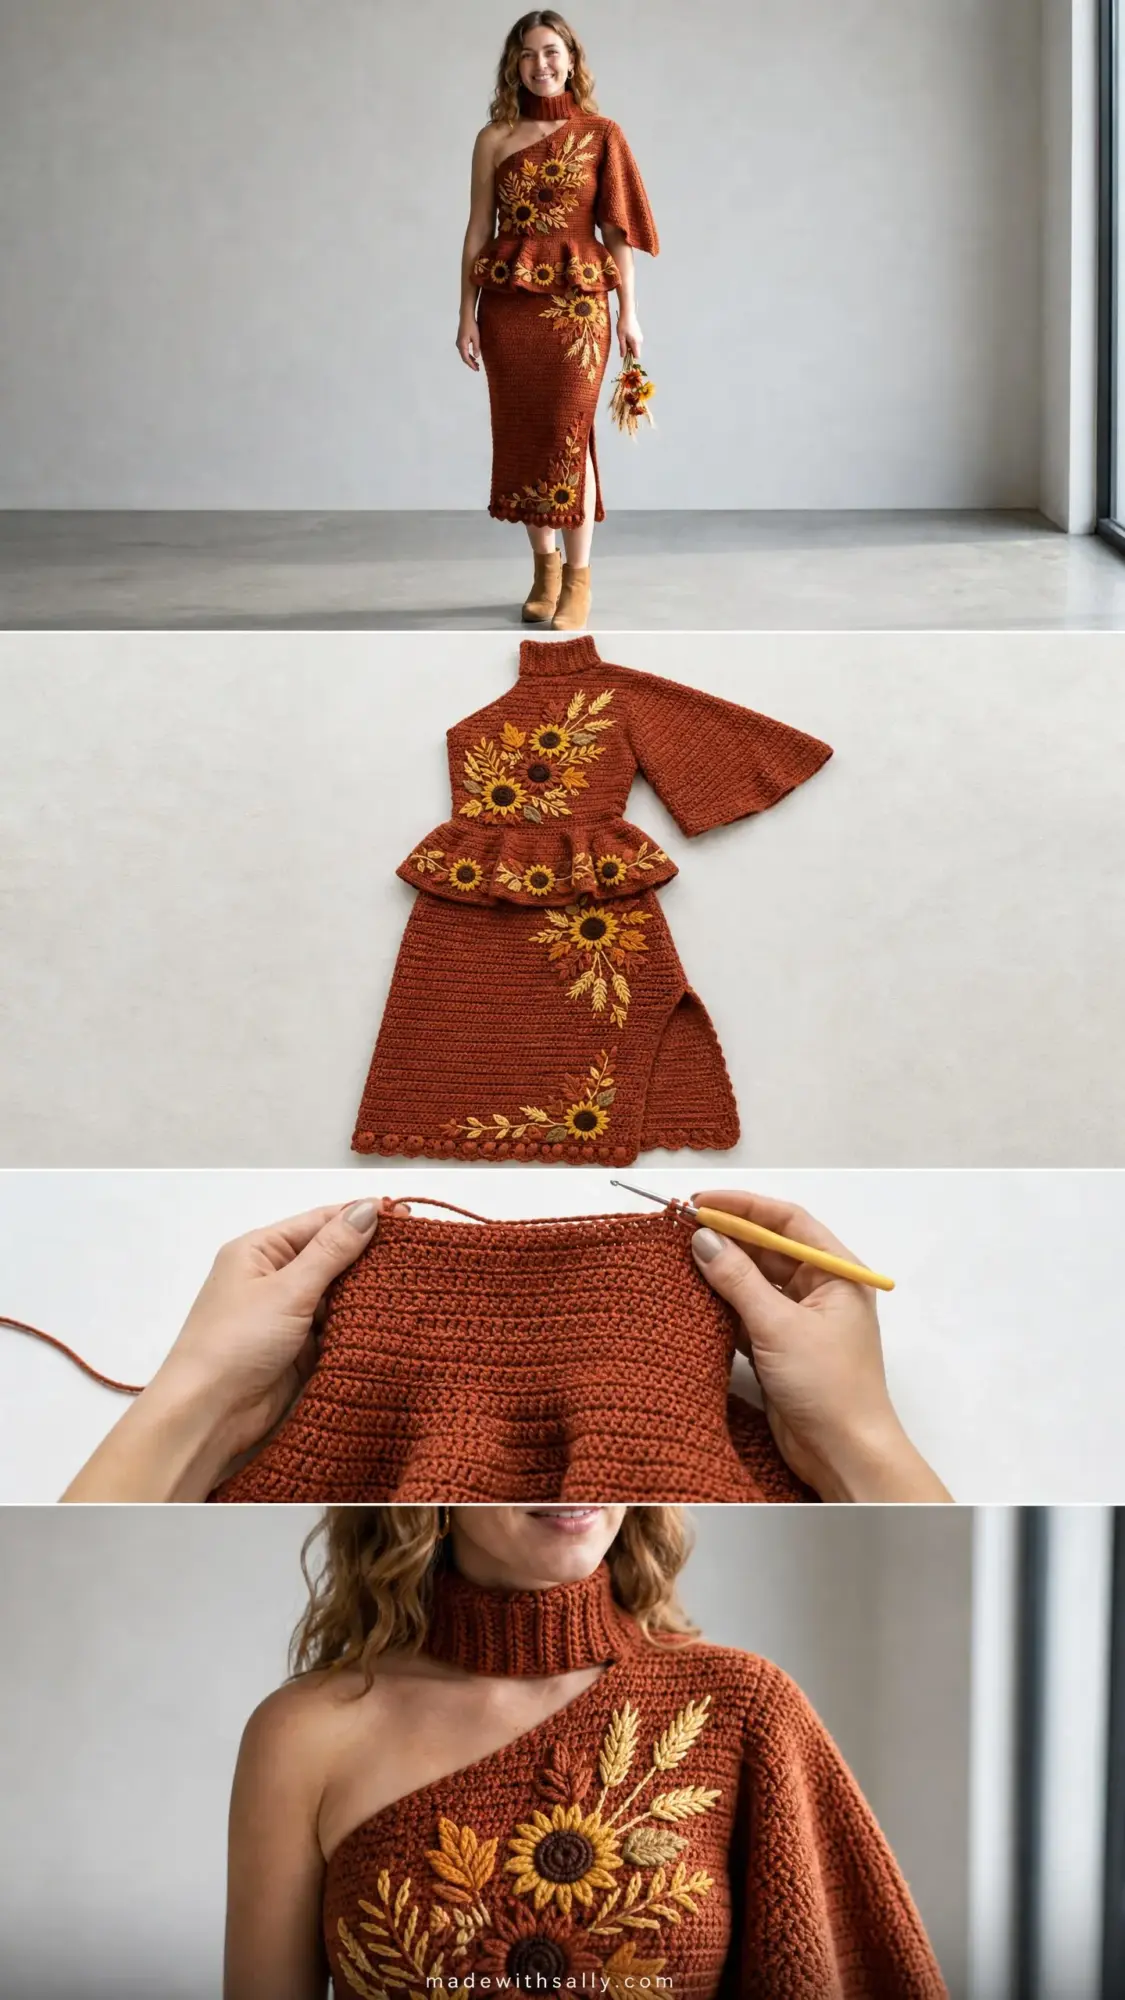
This Autumn Harvest Embroidered Crochet Dress is actually a coordinating two-piece set. You get a fitted one-shoulder peplum top with an attached turtleneck collar and a dramatic draped sleeve on one side. The skirt is a form-fitting midi-length pencil style with a front center slit and a playful bobble hem edging.
The rich rust and terracotta color palette screams fall harvest vibes. Those dimensional sunflower and wheat motifs are crocheted separately and sewn on as surface appliqué. This means you can place them exactly where you want them, adjusting the layout to flatter your specific body shape.
Skill level: Advanced. This pattern requires confident familiarity with working in the round, working flat panels, seaming, picking up stitches for an attached collar, shaping a peplum ruffle, reading stitch counts across asymmetric shaping, and executing three-dimensional appliqué motifs.
Time estimate: The complete two-piece set requires approximately 80 to 120 hours of working time. Allow an additional 10 to 15 hours for crocheting and sewing all sunflower, leaf, and wheat motifs.
This is a significant project. Think of it as a labor of love, something you work on over several weeks or months. The result is a wearable work of art.
Finished Measurements
The pattern is written for a size Medium with the following finished measurements:
Skirt:
Top:
Materials Needed
Yarn:
Hooks:
Notions:
Yarn Suggestions
Option 1: Lion Brand Wool-Ease in Pumpkin (Color A), with Lion Brand Vanna’s Choice in Gold (Color B), Taupe (Color C), Olive (Color D), and Mustard (Color E). This blend of wool and acrylic gives structure and a slight halo that reads beautifully in the dense single crochet fabric.
Option 2: Paintbox Yarns Simply DK held double throughout (treated as worsted weight) in Burnt Orange for Color A. Holding DK double gives excellent stitch definition. Use Paintbox Yarns Simply DK held single for motifs.
Option 3: Cascade 220 Superwash in Rust (Color A). This 100 percent superwash wool is machine washable and provides excellent stitch definition.
Substitution note: Choose a yarn that produces a firm, dense fabric at the stated gauge. Avoid yarns with excessive stretch or drape, as the pencil skirt silhouette relies on the fabric holding its shape.
Gauge
With Color A and G-6 / 4.0 mm hook, working in single crochet (sc) in rows:
Gauge is critical for a fitted garment. Work a swatch of at least 5 inches / 12.7 cm square, block it, and measure before beginning. Adjust hook size as needed to achieve correct gauge.
Abbreviations Used (US Terms)
Before we dive into the instructions, let me define every abbreviation you will encounter:
Special Stitches for This Crochet Tutorial
Bobble Stitch (bob)
This creates the decorative bumps along the hem edging.
Yarn over, insert hook in stitch, yarn over, pull up a loop, yarn over, pull through 2 loops. You now have 1 half-closed double crochet on your hook. Repeat this action 4 more times in the same stitch, keeping all loops on hook. Yarn over and pull through all 6 loops on hook. Chain 1 to close the bobble.
Single Crochet Decrease (sc2tog)
This is how you shape the garment by reducing stitch count.
Insert hook in next stitch, yarn over, pull up a loop. Without completing the stitch, insert hook in the following stitch, yarn over, pull up a loop. Yarn over and pull through all 3 loops on hook. This consumes 2 stitches and produces 1 stitch.
Puff Stitch for Flower Center
Yarn over, insert hook in ring or stitch, yarn over, pull up a loop to approximately 0.5 inch height. Repeat 4 more times in the same location, keeping all loops on hook. Yarn over and pull through all 11 loops on hook. Chain 1 to close.
Sunflower Petal
Chain 10. Starting in second chain from hook, work 1 sc, 1 hdc, 4 dc, 1 hdc, 1 sc, slip stitch in last chain. This forms one rounded petal. Each sunflower requires 12 petals worked around a center ring.
Leaf
Chain 14. Starting in second chain from hook: sc in next 2 ch, hdc in next 2 ch, dc in next 3 ch, hdc in next 2 ch, sc in next 2 ch, 3 sc in last ch (tip of leaf). Working back along the opposite side of the foundation chain: sc in next 2 ch, hdc in next 2 ch, dc in next 3 ch, hdc in next 2 ch, sc in next 2 ch, slip stitch in same st as first sc. Fasten off leaving a tail for sewing. This produces a full oval leaf approximately 3 inches / 7.5 cm long.
Small Leaf
Chain 10. Starting in second chain from hook: sc in next 2 ch, hdc in next 2 ch, dc in next ch, hdc in next ch, sc in next ch, 3 sc in last ch. Working back along opposite side: sc in next ch, hdc in next ch, dc in next ch, hdc in next 2 ch, sc in next 2 ch, slip stitch in base. Fasten off. Produces a leaf approximately 2 inches / 5 cm long.
Wheat Sprig
Using Color E, chain 20. Slip stitch back along chain from hook, working 1 slip stitch in each chain, creating a stiff rib. Along this main stem, at every 4th chain space on the return, attach a small side shoot: chain 6, slip stitch back along the 6 chains, then continue slip stitching along the main stem. Repeat on alternating sides to create a wheat branch effect. Fasten off.
Surface Slip Stitch Embroidery
Insert hook from front to back through the fabric at the desired starting point. Draw up a loop of yarn from behind the fabric. Insert hook into next stitch or row, draw up another loop, pull through the loop on hook. Continue to create a visible chain line on the surface of the fabric. Used to create vine stems connecting motif clusters.
Important Pattern Notes
1. The skirt is worked in continuous rounds (no joining, no turning) from the waistband down. Use a locking stitch marker to mark the beginning of each round and move it up as you work.
2. The skirt waistband channel is worked first in flat rows then seamed to form a tube for the elastic. The body of the skirt is then worked in the round from the bottom edge of the waistband.
3. The front slit of the skirt is created by working in flat rows for the final 10 inches / 25.5 cm of the skirt length instead of rounds.
4. The top is worked in flat panels: a front panel and a partial back panel. The shoulder is asymmetric.
5. The turtleneck collar is worked in the round, picked up from the neckline edge, and worked upward for 4 inches / 10 cm, then folded over.
6. The peplum ruffle is worked as an attached ruffle by picking up stitches along the bottom edge of the bodice and working outward with increases to create flare.
7. All sunflower, leaf, and wheat motifs are crocheted separately and sewn in place after both main pieces are completed and blocked.
8. Right side of the fabric is the side that faces outward when the garment is worn. All pattern notes assume RS is facing unless otherwise stated.
9. The skirt uses back loop only single crochet for the main body, which creates a subtle horizontal rib texture.
10. Stitch counts appear at the end of each row or round in parentheses.
Step by Step Instructions: The Skirt
Waistband
The waistband is worked flat to create a channel for the elastic. After seaming the short ends together, stitches are picked up along the bottom edge to begin the body of the skirt.
With Color A and G-6 hook, chain 130.
Row 1 (WS): Sc in second ch from hook and in each ch across. Turn. (129 sc)
Rows 2 through 10: Ch 1, sc in each st across. Turn. (129 sc each row)
Fold the waistband panel in half lengthwise so RS faces outward. Slip stitch the short ends together to form a ring. Do not fasten off. You now have a double-layered waistband tube. The elastic will be inserted after the skirt is complete.
Checkpoint: The waistband ring should measure approximately 28.5 inches / 72.5 cm in circumference and 1 inch / 2.5 cm in height (folded).
Skirt Body
Work will now proceed in continuous rounds from the lower edge of the folded waistband. Hold the waistband so the seam is at center back.
Round 1: Working through both layers of the lower folded edge, sc evenly around, placing 1 sc per original foundation chain stitch. Do not join rounds; use a marker. (129 sc)
Rounds 2 through 10: BLO sc in each st around. (129 sc each round)
Checkpoint: After Round 10, the skirt body should measure approximately 2 inches / 5 cm below the waistband.
Hip Shaping: Increase Section
The skirt widens from waist to hip over the next rounds to reach 171 stitches.
Round 11: BLO sc 21, inc, sc 22, inc, sc 21, inc, sc 22, inc, sc 21, inc, sc 22, inc. (135 sc)
Round 12: BLO sc in each st around. (135 sc)
Round 13: BLO sc 22, inc, sc 23, inc, sc 22, inc, sc 23, inc, sc 22, inc, sc 23, inc. (141 sc)
Round 14: BLO sc in each st around. (141 sc)
Round 15: BLO sc 23, inc, sc 24, inc, sc 23, inc, sc 24, inc, sc 23, inc, sc 24, inc. (147 sc)
Round 16: BLO sc in each st around. (147 sc)
Round 17: BLO sc 24, inc, sc 25, inc, sc 24, inc, sc 25, inc, sc 24, inc, sc 25, inc. (153 sc)
Round 18: BLO sc in each st around. (153 sc)
Round 19: BLO sc 25, inc, sc 26, inc, sc 25, inc, sc 26, inc, sc 25, inc, sc 26, inc. (159 sc)
Round 20: BLO sc in each st around. (159 sc)
Round 21: BLO sc 26, inc, sc 27, inc, sc 26, inc, sc 27, inc, sc 26, inc, sc 27, inc. (165 sc)
Round 22: BLO sc in each st around. (165 sc)
Round 23: BLO sc 27, inc, sc 28, inc, sc 27, inc, sc 28, inc, sc 27, inc, sc 28, inc. (171 sc)
Checkpoint: After Round 23, the hip circumference should measure approximately 38 inches / 96.5 cm. Place markers at center front and center back.
Skirt Body: Straight Section
Work even in BLO sc in the round without further shaping until the skirt measures 18 inches / 45.7 cm from the bottom of the waistband.
Rounds 24 through approximately 80: BLO sc in each st around. (171 sc each round)
Adjust round count based on your gauge to reach the 18-inch mark.
Front Slit Opening
At the 18-inch mark, transition from working in the round to working in flat rows to create the front slit. Identify center front.
Transition round: Work BLO sc around to 1 stitch before center front marker. Turn work.
Row 1 of slit section (WS): Ch 1, BLO sc in each st across all 171 sts. Turn. (171 sc)
Rows 2 through 50 of slit section: Ch 1, BLO sc in each st across. Turn. (171 sc each row)
Checkpoint: After completing the slit section, total skirt length should be 28 inches / 71 cm and the front slit should be 10 inches / 25.5 cm tall.
Skirt Hem Edging
Edging Row: Ch 1, (sc in next 2 sts, bob in next st) 57 times. (171 sts worked with 57 bobbles placed)
Fasten off.
Slit Edge Finishing
With RS facing and working from hem upward along the right slit edge, join Color A. Work 1 row of sc evenly up the slit edge at a rate of 1 sc per row end. At the top of the slit, work 3 sc in the corner stitch. Fasten off. Repeat on the left slit edge. This stabilizes the slit and prevents stretching.
Step by Step Instructions: The Top
Front-Right Panel
With Color A and G-6 hook, chain 83.
Row 1 (WS): Sc in second ch from hook and in each ch across. Turn. (82 sc)
Rows 2 through 30: Ch 1, sc in each st across. Turn. (82 sc each row)
Checkpoint: After Row 30, the panel should measure approximately 6 inches / 15.2 cm tall and 18.2 inches / 46.3 cm wide.
Armhole and Neckline Shaping
Row 31: Ch 1, sc2tog (left edge decrease), sc to last 2 sts, sc2tog (right edge decrease). Turn. (80 sc)
Row 32: Ch 1, sc in each st across. Turn. (80 sc)
Row 33: Ch 1, sc2tog (left edge), sc to last 2 sts, sc2tog (right edge). Turn. (78 sc)
Row 34: Ch 1, sc in each st across. Turn. (78 sc)
Row 35: Ch 1, sc2tog (left edge), sc to last 2 sts, sc2tog (right edge). Turn. (76 sc)
Row 36: Ch 1, sc in each st across. Turn. (76 sc)
Row 37: Ch 1, sc2tog (left edge), sc to last 2 sts, sc2tog (right edge). Turn. (74 sc)
Armhole shaping is complete. Continue neckline diagonal only.
Row 38: Ch 1, sc in each st across. Turn. (74 sc)
Row 39: Ch 1, sc2tog (left edge), sc to end. Turn. (73 sc)
Row 40: Ch 1, sc in each st across. Turn. (73 sc)
Rows 41 through 58: Continue this pattern, decreasing at the left edge every other row, until you reach approximately 64 stitches.
Continue with remaining top construction including the back panel, collar pickup, and peplum ruffle according to the construction overview.
Creating the Sunflower and Leaf Motifs
This is where the magic happens. Each motif is crocheted separately using the smaller F-5 / 3.75 mm hook, then sewn onto the finished and blocked garment pieces.
For each sunflower, create a center ring with Color C (dark brown) using the puff stitch technique. Then work 12 petals in Color B (golden yellow) around the center using the sunflower petal instructions.
Create leaves in Color D (olive green) following the leaf and small leaf instructions. Make a variety of sizes for visual interest.
Work wheat sprigs in Color E (gold/ochre) following the wheat sprig instructions.
Placement tip: Before sewing, lay out all your motifs on the blocked garment pieces. Take a photo so you remember your arrangement. The image shows clusters of sunflowers with leaves and wheat radiating outward, with the motifs concentrated at the bust, hip, and hem areas.
Use rust-colored sewing thread to secure each motif with small, invisible stitches.
Tips for Success with This Crochet Pattern
Block aggressively. A fitted garment like this needs proper blocking to achieve the smooth, professional finish you see in the photos. Wet block both pieces before attaching any motifs.
Check your gauge throughout. As you work, periodically measure your piece against the stated dimensions. Catching gauge drift early saves heartache later.
Take breaks. This is a marathon project, not a sprint. Working in smaller sessions helps you maintain consistent tension and prevents fatigue errors.
Weave in ends as you go. With this many color changes in the motifs, you will have a lot of tails. Weave them in while the pieces are still manageable.
Final Thoughts
This Autumn Harvest Embroidered Crochet Dress is absolutely a project for the committed crocheter. It asks for your time, your attention, and your patience. But what you get in return is a one-of-a-kind wearable art piece that showcases what our craft can really do.
The construction is solid. The techniques are classic. And those dimensional sunflowers? They are pure joy to make once you get the rhythm down.
Take your time. Trust the process. And remember that every single crochet stitch is bringing you closer to something truly spectacular.
If this pattern is calling your name, go ahead and pin it to your Pinterest boards so you can find it when you are ready to start. And please, if you make this gorgeous set, drop a comment below or tag me in your photos. I would absolutely love to see your autumn harvest creations come to life.
