
You know that gorgeous skein sitting in your stash? The one you keep moving from bin to bin because it deserves the perfect project? This is that project.

This tiered dress combines lacework, bobble texture, and scalloped edges in a way that looks incredibly complex but breaks down into manageable sections. The construction is smart. You work the bodice flat in panels, join for the waist, then build each skirt tier in rounds. Each section builds on the last.
I will be honest with you. This is not a weekend project. It takes 60 to 80 hours for an average crocheter. But if you love detailed garment work and want something truly show-stopping, keep reading. Every stitch is worth it.
About This Dusty Rose Crochet Dress Pattern
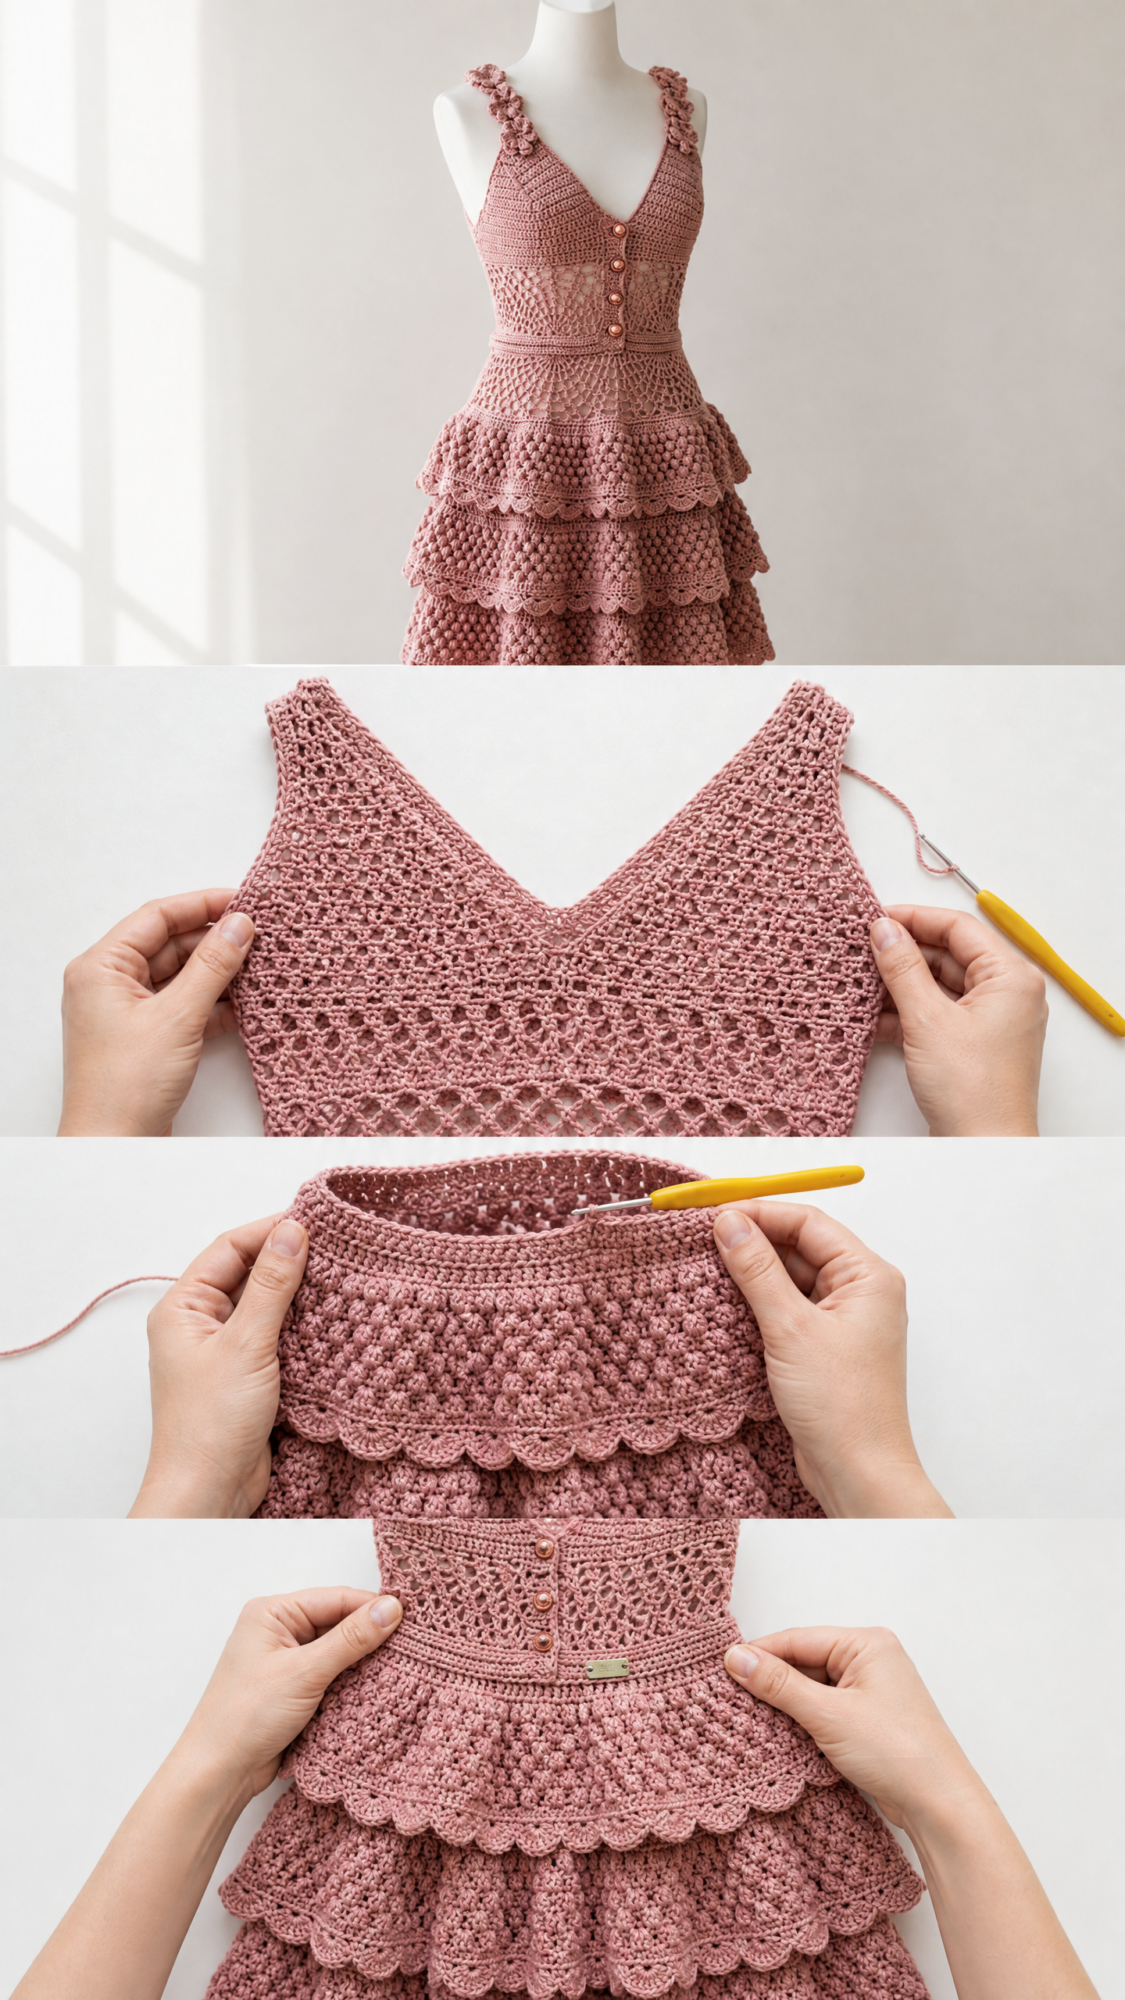
This romantic dress features a fitted V-neck bodice, a cinched waist band, and three cascading tiers of bobble-and-scallop skirt sections. The shoulder straps get adorned with tiny crocheted flower embellishments. Decorative buttons run down the center front. The back mirrors the front with a matching deep V for an elegant open-back look.
The finished dress measures approximately 32 inches from shoulder to hem. It fits a 34 to 36 inch bust and a 26 to 28 inch waist. The tiered skirt construction builds in hip allowance naturally.
Skill level: Advanced beginner to intermediate. You should be comfortable with lace patterns, bobble stitches, working flat panels, seaming, and basic garment shaping. The individual stitch patterns are not complicated. The multi-section construction and attention to gauge require careful attention.
Materials You Will Need
Yarn: DK weight (CYCA 3), smooth cotton or cotton-blend yarn in dusty rose or antique mauve. You will need approximately 1,800 to 2,000 yards total.
Recommended yarns:
Hooks:
Notions:
Substitution note: Avoid yarns with heavy texture or halo. These will obscure the lace and bobble stitch definition. Always swatch before beginning.
Gauge
Gauge is critical for fit. The bodice is close-fitting.
Using US E-4 (3.5 mm) hook:
Bobble-scallop pattern (skirt tiers):
Adjust hook size up if your swatch is too tight, down if too loose. Do not skip swatching.
Abbreviations and Special Stitches
Standard abbreviations (US terms):
Bobble Stitch (bo):
Yarn over, insert hook into indicated stitch, yarn over and pull up a loop, yarn over and pull through 2 loops. You have 1 half-closed double crochet on hook. Repeat this 4 more times in the same stitch until you have 6 loops on hook. Yarn over and pull through all 6 loops at once. Chain 1 to close and secure. This is a 5-dc bobble. The bobble pops to the right side of work.
Scallop Edging:
Work (sc, hdc, 3 dc, hdc, sc) all into the same chain space or stitch. This creates one scallop shell.
Fan Lace Stitch:
Repeat Rows 2 and 3 for pattern.
Flower Embellishment:
Fasten off, leaving tail for sewing.
Pattern Notes Before You Begin
1. The dress is constructed in sections: Front Bodice Panel, Back Bodice Panel, Waist Band, Skirt Tier 1, Skirt Tier 2, Skirt Tier 3, Left Strap, Right Strap. Flowers are made last.
2. Bodice panels are worked flat then seamed at sides.
3. Skirt tiers are worked in joined rounds after the waist band is complete.
4. Use stitch markers at side seam points and at the center front V.
5. Block each section before assembly for best results.
6. When working skirt tiers, bobbles pop to the RS. Alternate sides as you work to maintain bobble direction.
Front Bodice Panel Instructions
The front bodice is worked flat in two mirrored halves, then joined at the center V.
Right Front Bodice Half
Foundation: Ch 38.
Row 1 (RS): Sc in 2nd ch from hook and in each ch across. Turn. (37 sc)
Row 2 (WS): Ch 1, sc in each sc across. Turn. (37 sc)
Row 3 (RS): Ch 1, sc2tog over first 2 sts (neck edge decrease), sc in each remaining st to end. Turn. (36 sc)
Row 4 (WS): Ch 1, sc in each sc across. Turn. (36 sc)
Row 5 (RS): Ch 1, sc2tog, sc to end. Turn. (35 sc)
Row 6 (WS): Ch 1, sc to end. Turn. (35 sc)
Row 7 (RS): Ch 1, sc2tog, sc to end. Turn. (34 sc)
Row 8 (WS): Ch 1, sc to end. Turn. (34 sc)
Row 9 (RS): Ch 1, sc2tog, sc to end. Turn. (33 sc)
Row 10 (WS): Ch 1, sc to end. Turn. (33 sc)
Row 11 (RS): Ch 1, sc2tog, sc to end. Turn. (32 sc)
Row 12 (WS): Ch 1, sc to end. Turn. (32 sc)
Row 13 (RS): Ch 1, sc2tog, sc to end. Turn. (31 sc)
Row 14 (WS): Ch 1, sc to end. Turn. (31 sc)
Row 15 (RS): Ch 1, sc2tog, sc to end. Turn. (30 sc)
Row 16 (WS): Ch 1, sc to end. Turn. (30 sc)
You have decreased 7 sts total from the neck edge.
Rows 17 to 30: Work even in sc without shaping. (30 sc each row)
Armhole shaping begins at Row 31.
Row 31 (RS): Ch 1, sc to last 2 sts, sc2tog. Turn. (29 sc)
Row 32 (WS): Ch 1, sc2tog, sc to end. Turn. (28 sc)
Row 33 (RS): Ch 1, sc to last 2 sts, sc2tog. Turn. (27 sc)
Row 34 (WS): Ch 1, sc2tog, sc to end. Turn. (26 sc)
Row 35 (RS): Ch 1, sc to last 2 sts, sc2tog. Turn. (25 sc)
Row 36 (WS): Ch 1, sc to end. Turn. (25 sc)
Rows 37 to 44: Work even in sc. (25 sc each row)
Fasten off.
Left Front Bodice Half
Foundation: Ch 38.
Row 1 (RS): Sc in 2nd ch from hook and in each ch across. Turn. (37 sc)
Row 2 (WS): Ch 1, sc across. Turn. (37 sc)
Row 3 (RS): Ch 1, sc to last 2 sts, sc2tog. Turn. (36 sc)
Continue mirroring all shaping from the Right Front Bodice Half, reversing decrease placement. Work through Row 44. (25 sc at shoulder)
Fasten off.
Join Front Bodice Halves
With RS facing, hold both halves together. At the center V point (around Row 30), join yarn and sl st the panels together at the V base for 2 rows of overlap.
Checkpoint: Each panel should measure approximately 9 inches tall and 5 inches wide at the lower bust edge.
Back Bodice Panel
Work exactly as the Front Bodice, creating two mirrored halves with the same V-neck shaping. Join at center back V.
Bodice Lace Overlay Section
This creates the open lace texture visible in the center chest area.
With RS facing, count 18 sts inward from the right side seam edge of the front bodice lower edge. Join yarn.
Foundation row: Ch 1, sc in 18 sts across center bodice. Turn. (18 sc)
Row 1 of Lace (RS): Ch 3 (counts as dc), sk 2 sts, 5 dc in next st (fan), sk 2 sts, sc in next st. Rep across. End dc in last st. Turn. (3 fans)
Row 2 (WS): Ch 1, sc in first dc, ch 2, sc in center dc of fan, ch 2, sc in next sc. Rep across. Turn.
Row 3 (RS): Ch 3, 5 dc in first sc, sc in next sc, (5 dc in next sc, sc in next sc) across, 3 dc in last sc. Turn.
Repeat Rows 2 and 3 a total of 8 times (16 rows total).
Fasten off and sew lace panel edges to bodice with whip stitches.
Side Seams
With RS together, sew Front and Back Bodice panels at side edges from lower edge to armhole using whip stitch or mattress stitch.
Waist Band
Round 1: With RS facing and E-4 hook, join yarn at side seam. Ch 1, sc evenly around lower bodice edge. (100 sc total)
Round 2: Ch 1, sc in first st, (ch 1, sk 1 st, sc in next st) around. Join. (50 sc, 50 ch-1 sps)
Round 3: Ch 3, dc in first ch-1 sp, (ch 1, dc in next ch-1 sp) around, ch 1. Join. (50 dc, 50 ch-1 sps)
Round 4: Ch 1, sc in first ch-1 sp, (ch 1, sk dc, sc in next ch-1 sp) around. Join. (50 sc, 50 ch-1 sps)
Round 5: Ch 3, dc in first ch-1 sp, (ch 1, dc in next ch-1 sp) around, ch 1. Join. (50 dc, 50 ch-1 sps)
Round 6: Rep Round 4. (50 sc, 50 ch-1 sps)
Round 7: Ch 1, sc in each sc and each ch-1 sp around. Join. (100 sc)
Fasten off. Waist band measures approximately 1.5 inches tall.
Skirt Tier 1
Round 1 (increase round): With RS facing and F-5 hook, join yarn at back center of waist band lower edge. Ch 1, sc in same st. Work 2 sc in every other st around. (150 sc)
Round 2: Ch 1, sc in first st, (bo in next st, sc in next st) around. Join. (75 sc, 75 bo)
Round 3: Ch 1, sc in each st around. Join. (150 sc)
Rounds 4, 6, 8: Rep Round 2. (75 sc, 75 bo each)
Rounds 5, 7, 9: Sc around. Join. (150 sc each)
Round 10 (scallop edge): Ch 1, sl st in first st, (sk 2 sts, 5 dc in next st, sk 2 sts, sl st in next st) around. (25 scallops)
Fasten off. Tier 1 measures approximately 5 inches tall.
Skirt Tier 2
Attach to the sl st base of Tier 1 scallops, working from the back/underside.
Round 1 (increase round): Join yarn, increase to 180 sts by working (sc in 4 sts, 2 sc in next st) 30 times. (180 sc)
Rounds 2-9: Work bobble pattern as Tier 1 on 180-st base.
Round 10: Scallop edge. (30 scallops)
Fasten off. Tier 2 measures approximately 6 inches tall.
Skirt Tier 3
Attach similarly behind Tier 2 scallop base.
Round 1: Increase to 216 sts by working (sc in 4 sts, 2 sc in next st) 36 times. (216 sc)
Rounds 2-9: Bobble pattern on 216-st base.
Rounds 10-11: Two extra bobble rows for height.
Round 12 (scallop edge): (36 scallops)
Fasten off. Tier 3 measures approximately 7 inches tall.
Button Band
Right Button Band:
With RS facing, join yarn at lower right center front edge.
Row 1: Ch 1, sc evenly up edge. (20 sc) Turn.
Rows 2-3: Ch 1, sc in each sc. (20 sc)
Fasten off.
Left Button Band (buttonhole side):
With RS facing, join yarn at top left center front edge.
Row 1: Ch 1, sc down edge. (20 sc) Turn.
Row 2 (buttonhole row): Ch 1, sc in first 2 sts, (ch 2, sk 2 sts, sc in next 2 sts) 4 times, sc in last 2 sts. Turn. (5 buttonholes)
Row 3: Ch 1, sc in each sc and 2 sc in each ch-2 sp. (20 sc)
Fasten off.
Straps
Make 2.
Foundation: Ch 50.
Row 1: Sc in 2nd ch from hook and each ch across. Turn. (49 sc)
Rows 2-3: Ch 1, sc in each sc. Turn. (49 sc)
Row 4 (daisy chain trim): Sl st in first sc, (ch 5, sl st in 3rd ch from hook, ch 2, sl st in next sc) across.
Row 5: Work daisy chain trim along opposite edge.
Fasten off.
Sew straps to bodice approximately 2 inches inward from armhole edge on front and back.
Flower Embellishments
Make 8 to 10 flowers using the flower instructions in Special Stitches. Distribute along straps at even intervals, approximately one flower every 1 to 1.5 inches. Sew securely.
Finishing and Blocking
1. Weave in all ends thoroughly.
2. Sew buttons to Right Button Band aligned with buttonholes.
3. Reinforce any weak seams.
Wet blocking:
Submerge dress in cool water with gentle wool wash. Press gently. Roll in towel to remove excess water. Lay flat on blocking mat. Pin bodice to correct measurements. Pin each tier edge to open scallops fully. Allow to dry completely, 24 to 48 hours.
Size Customization Tips for This Crochet Dress Pattern
To increase bust by 2 inches, add 5 stitches to each bodice foundation chain (from Ch 38 to Ch 43). Adjust waist band to approximately 120 sc. Adjust Tier 1 to approximately 180 sc.
To lengthen bodice, add plain sc rows between armhole shaping and shoulder edge. Each 2 extra rows adds approximately 0.36 inches.
To lengthen tiers, add bobble rows before scallop edge. Each 2 rounds adds approximately 1 inch.
I hope you absolutely love making this tiered dress. It is a labor of love and the results are stunning. If you try this crochet pattern, save it to your Pinterest boards so you can find it easily later. And please drop a comment below when you finish yours. I would love to see your dusty rose creation come to life!
