
Looking for a statement piece that will actually get compliments? This lavender bobble stitch romper is exactly that. It features a flattering sweetheart neckline, delicate spaghetti straps, and an all-over textured bobble pattern that photographs beautifully.
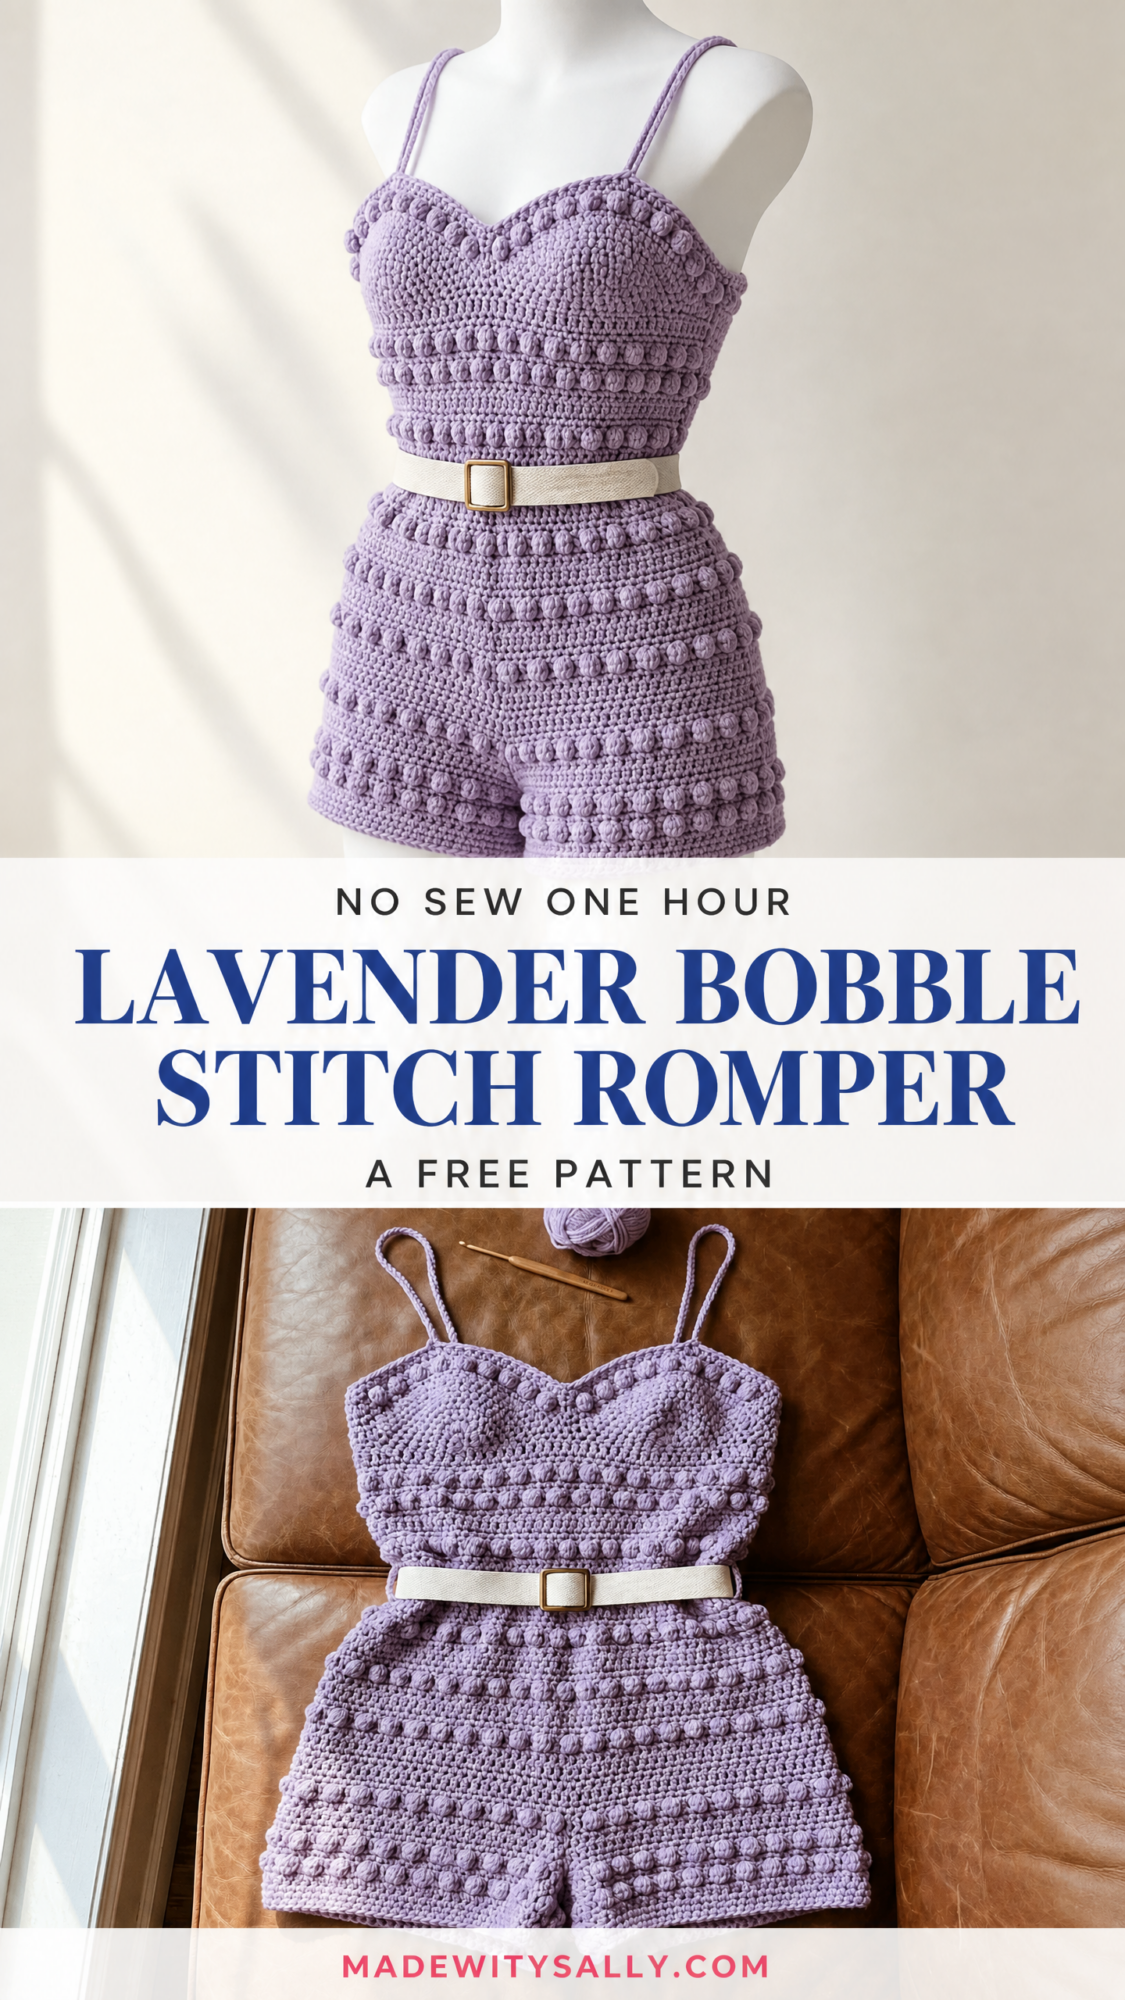
The construction uses single crochet and bobble stitches throughout, making it manageable for anyone comfortable with garment-making basics. The finished romper fits a size Small/Medium and works up in approximately 20 to 35 hours depending on your pace.
This makes an incredible piece for summer events, vacation wardrobes, or a handmade gift for someone special. The removable belt at the waist adds polish and lets you adjust the silhouette. If you have been wanting to try a garment project with real texture and visual impact, this romper delivers.
About This Crochet Pattern
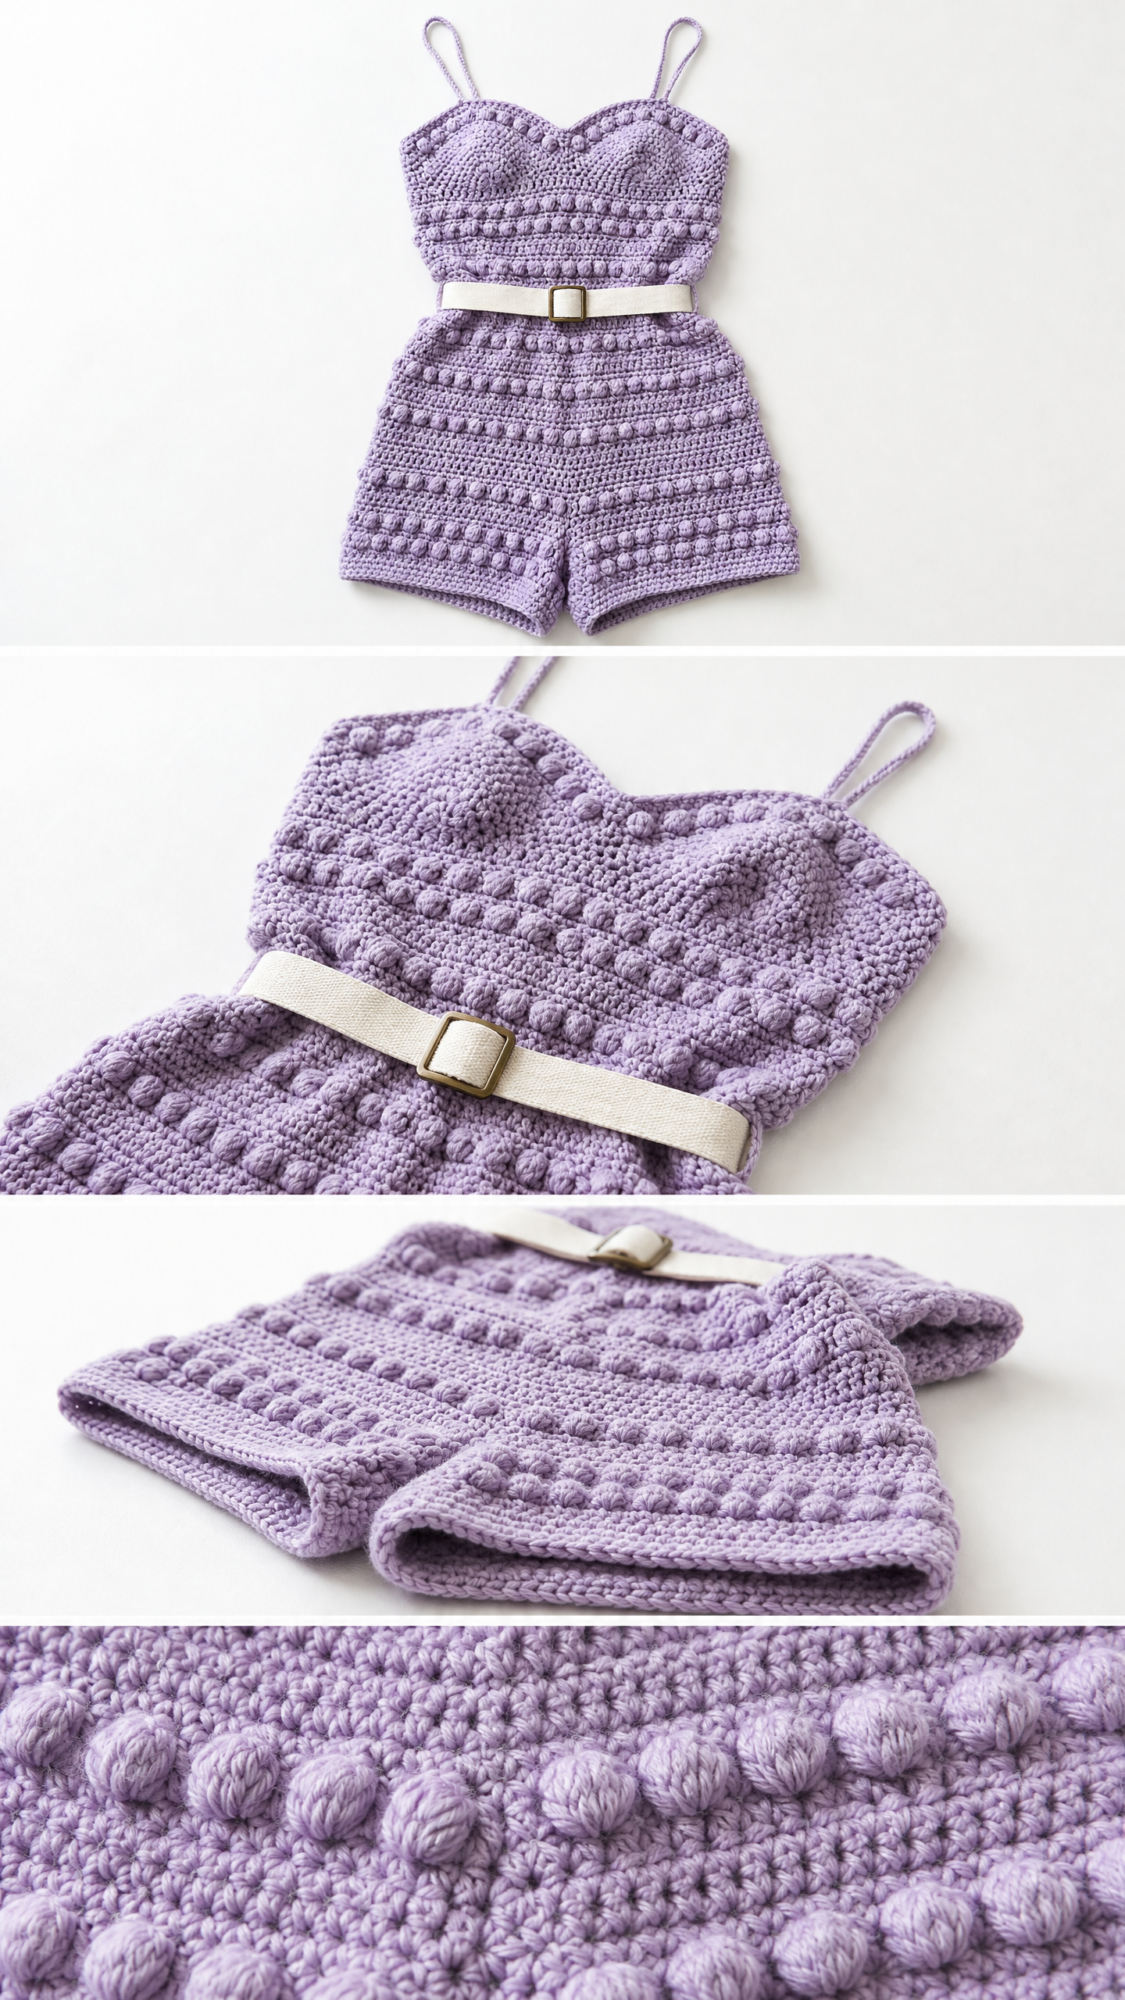
This romper combines a sweetheart-neckline bodice with high-waisted shorts, all worked in a repeating bobble stitch texture. The entire garment uses a single lavender colorway with no color changes, which keeps things simple while the bobbles create all the visual interest.
The bodice is worked flat from the bottom up. You will shape the bust with short rows to create that classic sweetheart curve, then join at the sides. The shorts are worked as two flat panels, one for the front and one for the back. You seam them at the sides and crotch, then attach the whole thing directly to the bodice waist.
Skill level: Intermediate to Advanced. You should be comfortable with working bobble stitches in consistent tension, flat construction with seaming, sweetheart neckline shaping, and assembling separate garment pieces. This is not a first project, but an intermediate crocheter who has made garments before will find it very doable.
Finished Measurements
The pattern is written for a size Small/Medium, which corresponds to US dress size 4-8.
Size customization tips are provided at the end of the pattern.
Materials Needed
Yarn: Approximately 800 to 950 yards / 730 to 870 meters of DK weight (light worsted) yarn, 100% cotton or cotton blend. Cotton is strongly recommended for structure and stitch definition. The bobbles require a yarn that does not felt or bloom excessively.
Hook: US size E-4 / 3.5 mm crochet hook (or size needed to obtain gauge)
Notions:
Recommended Yarn Options
Option 1: Lion Brand 24/7 Cotton in Lavender. 100% mercerized cotton, 186 yards per 100g skein. Purchase 5 skeins. This yarn has excellent stitch definition and consistent twist, making bobbles crisp and uniform.
Option 2: Paintbox Yarns Simply DK (100% cotton blend), approximately 137 yards per 50g skein. Purchase 7 skeins. Slightly lighter than 24/7 Cotton, ideal if you prefer a drapier fabric.
Option 3: We Are Knitters The Cotton in Lavender. 100% Pima cotton, 164 yards per 100g skein. Purchase 5 to 6 skeins. Creates a soft, structured fabric with good weight.
Substitution note: Any DK weight yarn with a smooth, plied construction will work. Avoid single-ply, fuzzy, or brushed yarns because bobbles will not be visible. Swatch carefully with substitutions as cotton yarns vary significantly in yardage and hand.
Gauge
In single crochet worked flat:
18 stitches and 20 rows = 4 in / 10 cm using a US E-4 / 3.5 mm hook
In bobble stitch pattern (alternating sc and bobble rows):
18 stitches and 10 pattern row pairs = 4 in / 10 cm
Gauge is mandatory for a garment. Take time to swatch and adjust hook size until your gauge matches exactly. A difference of even one stitch per inch will result in a garment that does not fit correctly. I know swatching feels tedious, but trust me on this one.
Abbreviations (US Terms)
Special Stitches
Bobble Stitch (B)
The bobble is a 5-double-crochet cluster worked in one stitch, creating a raised bump on the right side of the fabric. Here is exactly how to work it:
Step 1: Yarn over, insert hook into the indicated stitch.
Step 2: Yarn over, pull up a loop. You have 3 loops on hook. Yarn over, pull through 2 loops. You have 2 loops on hook. One incomplete dc made.
Step 3: Repeat Step 1 and Step 2 four more times in the SAME stitch, so you have 6 loops on hook (5 incomplete dc plus original loop).
Step 4: Yarn over, pull through all 6 loops on hook.
Step 5: Ch 1 to close and secure the bobble. This closing ch 1 does NOT count as a stitch.
Important note: The bobble pushes to the wrong side as you work it. If working with RS facing, the bobble will appear on the RS after you turn your work. When instructions say to work a bobble row, you are on the WS of the work so that bobbles appear on the outside of the finished garment.
Sweetheart Neckline Shaping
The sweetheart curve is created by working two cups separately using short rows, then joining them in the center. The V-dip at the center is formed by slip stitching across stitches. Full instructions are included in the bodice front section.
Pattern Notes Before You Begin
1. The bodice and shorts are worked as separate flat pieces, then seamed and joined at the waist. The bodice front and back are worked separately. The shorts front and back are worked separately.
2. All turning chains count as follows: ch 1 at the start of sc rows does NOT count as a stitch. The hook is turned and the first sc is worked directly into the first stitch.
3. Bobble rows are worked on wrong side rows so that bobbles push outward to the right side. Even-numbered rows in the bobble pattern are WS bobble rows. Odd-numbered rows are RS single crochet rows.
4. The bobble repeat for this garment is worked over a multiple of 2 stitches plus 1. Specifically the row reads: sc in first st, (B in next st, sc in next st) across, ending sc in last st.
5. The spaghetti straps are crocheted as chains with sc worked back along the chain, creating a double-layer strap. They are attached at the front bodice top and sewn to the back bodice top.
6. Stitch markers should be used at the beginning and end of each row when seaming to avoid confusion.
7. The belt loops are not crocheted into the garment. The belt sits at the waist join and is threaded directly through the fabric or worn over the joined seam edge.
8. When working the bobble stitch row: because each bobble uses a ch 1 close, the stitch count remains the same as the sc row before it. The ch 1 close is invisible within the cluster and does not consume an adjacent stitch.
9. Right side and wrong side: Cast on your foundation row, then turn. Row 1 is a WS row (bobble row). Row 2 is a RS row (sc row). This means bobbles appear on the outside of the finished garment from the very beginning of the work.
Step by Step Crochet Pattern Instructions
Section A: Bodice Back
The bodice back is a simple rectangle with mild waist shaping. It begins at the lower waist edge and is worked upward to the armhole/top edge.
Foundation: Ch 74.
Set-up Row (RS): Sc in 2nd ch from hook and in each ch across. Turn. (73 sc)
73 stitches gives us an odd count which allows the bobble repeat (sc, B, sc across) to begin and end with sc as specified.
Row 1 (WS, Bobble Row): Ch 1, sc in first st, (B in next st, sc in next st) rep across, ending sc in last st. Turn. (73 sts: 37 sc and 36 B)
Row 2 (RS, sc row): Ch 1, sc in each st across. Turn. (73 sc)
Rows 3 through 4: Rep Rows 1 and 2. (73 sts)
Waist Shaping Decrease
Row 5 (WS, Bobble Row with decrease): Ch 1, sc2tog over first 2 sts, (B in next st, sc in next st) rep across until 3 sts rem, B in next st, sc2tog over last 2 sts. Turn. (71 sts)
Row 6 (RS): Ch 1, sc in each st across. Turn. (71 sc)
Row 7 (WS, Bobble Row with decrease): Ch 1, sc2tog, (B in next st, sc in next st) rep across until 3 sts rem, B in next st, sc2tog. Turn. (69 sts)
Row 8 (RS): Ch 1, sc in each st across. Turn. (69 sc)
Row 9 (WS, Bobble Row): Ch 1, sc in first st, (B in next st, sc in next st) rep across, ending sc in last st. Turn. (69 sts)
Row 10 (RS): Ch 1, sc in each st across. Turn. (69 sc)
Hold your stitch count at 69 for the waist. This is the narrowest point.
Bust Expansion Increase
Row 11 (WS, Bobble Row with increase): Ch 1, 2 sc in first st, (B in next st, sc in next st) rep across until last st, 2 sc in last st. Turn. (71 sts)
Row 12 (RS): Ch 1, sc in each st across. Turn. (71 sc)
Row 13 (WS, Bobble Row with increase): Ch 1, 2 sc in first st, (B in next st, sc in next st) rep across until last st, 2 sc in last st. Turn. (73 sts)
Row 14 (RS): Ch 1, sc in each st across. Turn. (73 sc)
Row 15 (WS, Bobble Row): Ch 1, sc in first st, (B in next st, sc in next st) rep across, ending sc in last st. Turn. (73 sts)
Row 16 (RS): Ch 1, sc in each st across. Turn. (73 sc)
Row 17 (WS, Bobble Row): Ch 1, sc in first st, (B in next st, sc in next st) rep across. Turn. (73 sts)
Row 18 (RS): Ch 1, sc in each st across. Turn. (73 sc)
The back bodice is complete. Do not fasten off. Slip stitch across the top edge to neaten if desired, then fasten off and weave in ends.
Checkpoint A: After completing the back bodice, your piece should measure approximately 7 in / 18 cm tall from foundation to top edge, and 16.5 in / 42 cm wide.
Section B: Bodice Front
The bodice front is worked in two cup sections joined at the center to create the sweetheart neckline. Each cup is worked separately, then the pieces are joined.
Left Cup
Foundation: Ch 38.
Set-up Row (RS): Sc in 2nd ch from hook and in each ch across. Turn. (37 sc)
Row 1 (WS, Bobble Row): Ch 1, sc in first st, (B in next st, sc in next st) rep across, ending sc in last st. Turn. (37 sts)
Row 2 (RS): Ch 1, sc in each st across. Turn. (37 sc)
Rows 3 through 4: Rep Rows 1 and 2. (37 sts)
Row 5 (WS, Bobble Row with waist decrease at side edge only): Ch 1, sc2tog over first 2 sts, (B in next st, sc in next st) rep across, ending sc in last st. Turn. (36 sts)
When a decrease creates an even stitch count, adjust the bobble pattern on the following WS row. On all even-count WS bobble rows, work: sc in first st, (B in next st, sc in next st) rep across, ending B in last st.
Row 6 (RS): Ch 1, sc in each st across. Turn. (36 sc)
Row 7 (WS, Bobble Row): Ch 1, sc in first st, (B in next st, sc in next st) rep across, ending B in last st. Turn. (36 sts)
Row 8 (RS): Ch 1, sc in each st across. Turn. (36 sc)
Row 9 (WS, Bobble Row with bust increase at side edge): Ch 1, 2 sc in first st, (B in next st, sc in next st) rep across, ending sc in last st. Turn. (37 sts)
Row 10 (RS): Ch 1, sc in each st across. Turn. (37 sc)
Row 11 (WS, Bobble Row): Ch 1, sc in first st, (B in next st, sc in next st) rep across, ending sc in last st. Turn. (37 sts)
Row 12 (RS): Ch 1, sc in each st across. Turn. (37 sc)
Row 13 (WS, Bobble Row): Ch 1, sc in first st, (B in next st, sc in next st) rep across, ending sc in last st. Turn. (37 sts)
Sweetheart Cup Shaping (Left Cup)
The top of each cup is shaped with a gentle diagonal decrease toward the center to form the V-dip.
Row 14 (RS, decrease row): Ch 1, sc across to last 2 sts, sc2tog. Turn. (36 sc)
Row 15 (WS, Bobble Row): Ch 1, sc in first st, (B in next st, sc in next st) rep across, ending B in last st. Turn. (36 sts)
Row 16 (RS, decrease row): Ch 1, sc across to last 2 sts, sc2tog. Turn. (35 sc)
Row 17 (WS, Bobble Row): Ch 1, sc in first st, (B in next st, sc in next st) rep across, ending sc in last st. Turn. (35 sts)
Row 18 (RS, decrease row): Ch 1, sc across to last 2 sts, sc2tog. Turn. (34 sc)
Fasten off, leaving a 6 in / 15 cm tail for joining later. Place a stitch marker at the last stitch worked to mark the center top edge.
Right Cup
Work as left cup but mirror the shaping so decreases on the sweetheart rows occur at the beginning of RS rows instead of the end.
Foundation: Ch 38.
Set-up Row (RS): Sc in 2nd ch from hook and in each ch across. Turn. (37 sc)
Rows 1 through 13: Work exactly as Rows 1 through 13 of the left cup, but on Row 5 place the waist decrease at the end of the row (sc2tog over last 2 sts instead of first 2) and on Row 9 place the bust increase at the end (2 sc in last st instead of first). (37 sts at Row 13)
Row 14 (RS, decrease row): Ch 1, sc2tog, sc across to end. Turn. (36 sc)
Row 15 (WS, Bobble Row): Ch 1, B in first st, (sc in next st, B in next st) rep across, ending sc in last st. Turn. (36 sts)
Row 16 (RS, decrease row): Ch 1, sc2tog, sc across to end. Turn. (35 sc)
Row 17 (WS, Bobble Row): Ch 1, sc in first st, (B in next st, sc in next st) rep across, ending sc in last st. Turn. (35 sts)
Row 18 (RS, decrease row): Ch 1, sc2tog, sc across to end. Turn. (34 sc)
Do not fasten off.
Joining the Cups
With RS facing and right cup still on hook, ch 5 (this will form the small V-dip bridge at the sweetheart center). Pick up the left cup piece with the stitch marker edge. Insert hook into the marked last stitch of the left cup and sl st to join. The two cups are now connected.
Top Edge Finishing Row (RS, across both cups): Ch 1, sc evenly across the top of the left cup (34 sc), sc 5 times across the 5-ch bridge, sc evenly across the top of the right cup (34 sc). Turn. (73 sc)
The foundation edges of both cups are at the bottom waist. The cups are joined at the top. You now have a single-piece bodice front panel measuring approximately 16.5 in / 42 cm wide at the top and bottom.
Do not work any additional rows on the front bodice top edge. Fasten off and weave in ends.
Checkpoint B: After completing the bodice front, each cup should measure approximately 8 in / 20 cm wide and 7 in / 18 cm tall. The combined front piece laid flat should be 16.5 in wide and show a visible sweetheart dip at the center top.
Section C: Shorts Back Panel
The shorts are worked as two flat panels (front and back). The back panel is wider at the hips and slightly taller to accommodate the seat.
Foundation: Ch 80.
Set-up Row (RS): Sc in 2nd ch from hook and in each ch across. Turn. (79 sc)
Row 1 (WS, Bobble Row): Ch 1, sc in first st, (B in next st, sc in next st) rep across, ending sc in last st. Turn. (79 sts)
Row 2 (RS): Ch 1, sc in each st across. Turn. (79 sc)
Rows 3 through 8: Rep Rows 1 and 2 three more times. (79 sts)
Hip Taper Rows
Row 9 (WS, Bobble Row with decrease): Ch 1, sc2tog, (B in next st, sc in next st) rep across until 3 sts rem, B in next st, sc2tog. Turn. (77 sts)
Row 10 (RS): Ch 1, sc in each st across. Turn. (77 sc)
Row 11 (WS, Bobble Row with decrease): Ch 1, sc2tog, (B in next st, sc in next st) rep across until 3 sts rem, B in next st, sc2tog. Turn. (75 sts)
Row 12 (RS): Ch 1, sc in each st across. Turn. (75 sc)
Row 13 (WS, Bobble Row with decrease): Ch 1, sc2tog, (B in next st, sc in next st) rep across until 3 sts rem, B in next st, sc2tog. Turn. (73 sts)
Row 14 (RS): Ch 1, sc in each st across. Turn. (73 sc)
Row 15 (WS, Bobble Row): Ch 1, sc in first st, (B in next st, sc in next st) rep across, ending sc in last st. Turn. (73 sts)
Row 16 (RS): Ch 1, sc in each st across. Turn. (73 sc)
Rows 17 through 22: Rep Rows 15 and 16 three times. (73 sts)
Crotch Shaping (Back)
The crotch curve is formed by binding off stitches on both sides over several rows, then the remaining stitches form the top waist edge to attach to the bodice.
Row 23 (WS): Sl st across first 4 sts, ch 1, sc in next st, (B in next st, sc in next st) rep across until 4 sts rem, leave last 4 sts unworked. Turn. (65 sts)
Row 24 (RS): Sl st across first 3 sts, ch 1, sc in each st across to last 3 sts, leave last 3 sts unworked. Turn. (59 sc)
Row 25 (WS): Sl st across first 2 sts, ch 1, sc in next st, (B in next st, sc in next st) rep across until 2 sts rem, leave last 2 sts unworked. Turn. (55 sts)
Row 26 (RS): Ch 1, sc in each st across. Turn. (55 sc)
Row 27 (WS, Bobble Row): Ch 1, sc in first st, (B in next st, sc in next st) rep across, ending sc in last st. Turn. (55 sts)
Row 28 (RS): Ch 1, sc in each st across. Turn. (55 sc)
Rows 29 through 34: Rep Rows 27 and 28 three times. (55 sts)
The back shorts panel is complete. The top 55 sts represent the back waist edge. Fasten off and weave in ends, leaving one long tail at the top waist edge for seaming.
Checkpoint C: The back shorts panel should measure approximately 18 in / 45.5 cm wide at the hem and 11 in / 28 cm tall from hem to waist. The top waist edge should measure approximately 12.5 in / 32 cm wide.
Section D: Shorts Front Panel
The shorts front panel is similar to the back but slightly less deep at the crotch.
Foundation: Ch 78.
Set-up Row (RS): Sc in 2nd ch from hook and in each ch across. Turn. (77 sc)
Row 1 (WS, Bobble Row): Ch 1, sc in first st, (B in next st, sc in next st) rep across, ending sc in last st. Turn. (77 sts)
Row 2 (RS): Ch 1, sc in each st across. Turn. (77 sc)
Rows 3 through 8: Rep Rows 1 and 2 three times. (77 sts)
Hip Taper Rows
Row 9 (WS, Bobble Row with decrease): Ch 1, sc2tog, (B in next st, sc in next st) rep across until 3 sts rem, B in next st, sc2tog. Turn. (75 sts)
Row 10 (RS): Ch 1, sc in each st across. Turn. (75 sc)
Row 11 (WS, Bobble Row with decrease): Ch 1, sc2tog, (B in next st, sc in next st) rep across until 3 sts rem, B in next st, sc2tog. Turn. (73 sts)
Row 12 (RS): Ch 1, sc in each st across. Turn. (73 sc)
Row 13 (WS, Bobble Row): Ch 1, sc in first st, (B in next st, sc in next st) rep across, ending sc in last st. Turn. (73 sts)
Row 14 (RS): Ch 1, sc in each st across. Turn. (73 sc)
Rows 15 through 22: Rep Rows 13 and 14 four times. (73 sts)
Crotch Shaping (Front)
Row 23 (WS): Sl st across first 3 sts, ch 1, sc in next st, (B in next st, sc in next st) rep across until 3 sts rem, leave last 3 sts unworked. Turn. (67 sts)
Row 24 (RS): Sl st across first 2 sts, ch 1, sc in each st across to last 2 sts, leave last 2 sts unworked. Turn. (63 sc)
Row 25 (WS): Sl st across first 2 sts, ch 1, sc in next st, (B in next st, sc in next st) rep across until 2 sts rem, leave last 2 sts unworked. Turn. (59 sts)
Row 26 (RS): Ch 1, sc in each st across. Turn. (59 sc)
Row 27 (WS, Bobble Row): Ch 1, sc in first st, (B in next st, sc in next st) rep across, ending sc in last st. Turn. (59 sts)
Row 28 (RS): Ch 1, sc in each st across. Turn. (59 sc)
Rows 29 through 34: Rep Rows 27 and 28 three times. (59 sts)
The front shorts panel top edge has 59 sts representing the front waist. Fasten off and weave in ends, leaving one long tail at the top waist edge for seaming.
Note on waist discrepancy: The back panel has 55 sts and the front panel has 59 sts at the waist edge. When joining, distribute the extra 4 sts across the front panel with slight gathering. At gauge, the difference is under 1 in / 2.5 cm and will not be visible.
Checkpoint D: The front shorts panel should measure approximately 17 in / 43 cm wide at the hem, approximately 10 in / 25.5 cm tall, and approximately 13 in / 33 cm wide at the waist top edge.
Section E: Spaghetti Straps (Make 2)
Each strap is a simple crocheted tube built on a foundation chain.
Foundation: Ch 100 (approximately 16 in / 40.5 cm unstretched; adjust length to fit your torso).
Row 1: Sc in 2nd ch from hook and in each ch across. Do not turn. (99 sc)
Working back along the opposite side of the foundation chain, sc in each ch across. (99 sc along other side)
Sl st to beginning sc to close the strap into a flat tube. Fasten off, leaving a 10 in / 25 cm tail on each end for sewing.
Fold the strap end to form a small loop (approximately 1.5 in / 4 cm) and tack with a few stitches using the yarn tail to secure the loop in place before attaching to the bodice.
Section F: Assembly and Finishing
Step 1: Seam the Bodice Side Seams
Hold the bodice front and back with wrong sides together. Using a yarn needle and matching yarn, whipstitch or mattress stitch along both side edges, starting at the bottom waist edge and working upward to the top edge. Leave the top edge open. Leave the bottom edge open for attaching to the shorts. The seamed bodice tube should measure approximately 32 in / 81 cm in circumference at the bust and 26 in / 66 cm at the waist. Turn right side out.
Step 2: Seam the Shorts Side Seams
Hold the front and back shorts panels with wrong sides together. Whipstitch or mattress stitch both side seams, starting at the hem (foundation edge) and working upward toward the waist. Stop seaming 10 in / 25 cm up from the bottom on each side (this leaves the crotch area open). The shorts should look like a tube at this point, open at top and bottom with side seams closed.
Step 3: Seam the Crotch
Fold the shorts tube in half lengthwise so the front panel is on one side and the back panel is on the other. The crotch step edges should align at the bottom center. Whipstitch the crotch seam from the front bottom edge across to the back bottom edge, following the stepped shaping you created in the crotch rows. This forms the two leg openings. Turn right side out.
Step 4: Join Shorts to Bodice
Turn the bodice inside out. Slide the shorts (right side out) up inside the bodice so that the waist top edges align. The shorts top edge will be slightly inside the bodice bottom edge. Using a yarn needle and matching yarn, whipstitch the shorts top edge to the bodice bottom edge all the way around, matching side seams. Pin or use stitch markers before seaming to distribute evenly. Turn the entire garment right side out.
Step 5: Attach Straps
Fold each strap end into a 1.5 in / 4 cm loop as described in Section E. Using the yarn tail, sew the loop end of each strap to the inside of the front bodice top edge, positioning each strap approximately 2.5 in / 6 cm from the center sweetheart dip (one strap to the left of center, one to the right). Sew the opposite end of each strap to the inside top edge of the back bodice, positioning approximately 2.5 in / 6 cm from the center back. Adjust length to fit your torso. The straps cross over the shoulders and are not adjustable once sewn, so try the garment on before finalizing placement.
Step 6: Leg Hem Finishing
Working around each leg opening, join yarn at the inner leg seam and sc evenly around the entire leg opening. Sl st to
