
I’ve been looking for the perfect handmade bridal gown pattern for years, and this ivory pineapple lace gown is hands down my favorite. The combination of a fitted bodice with that dramatic sweeping skirt creates something truly breathtaking.
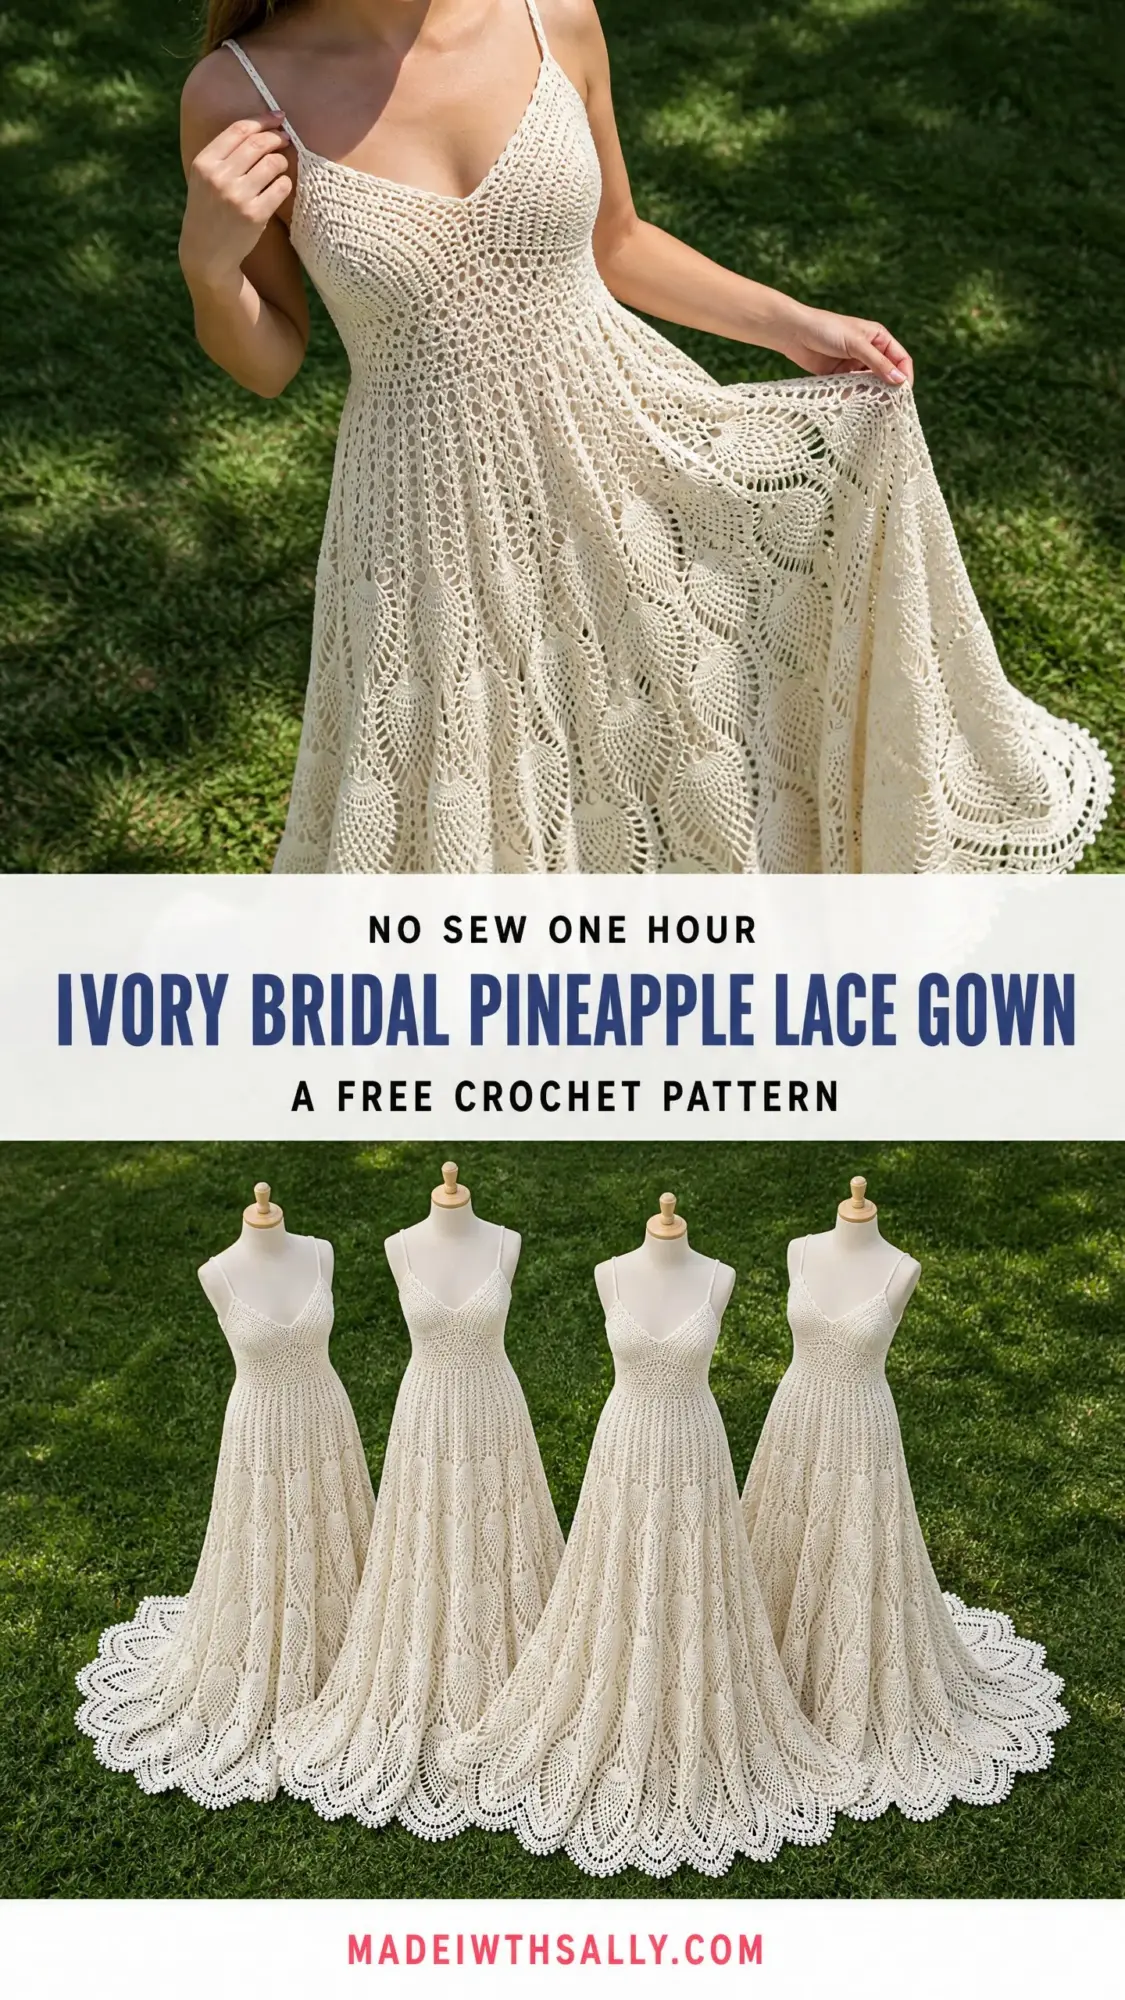
If you’ve ever dreamed of walking down the aisle in a dress you made with your own hands, this is the crochet pattern to make it happen. Every stitch tells a story, and the finished piece looks like it belongs in a high-end bridal boutique.
Fair warning though. This is an advanced project that will take serious time and dedication. We’re talking 200 to 280 hours of work. But the result? Absolutely worth every single stitch.
About This Bridal Crochet Pattern
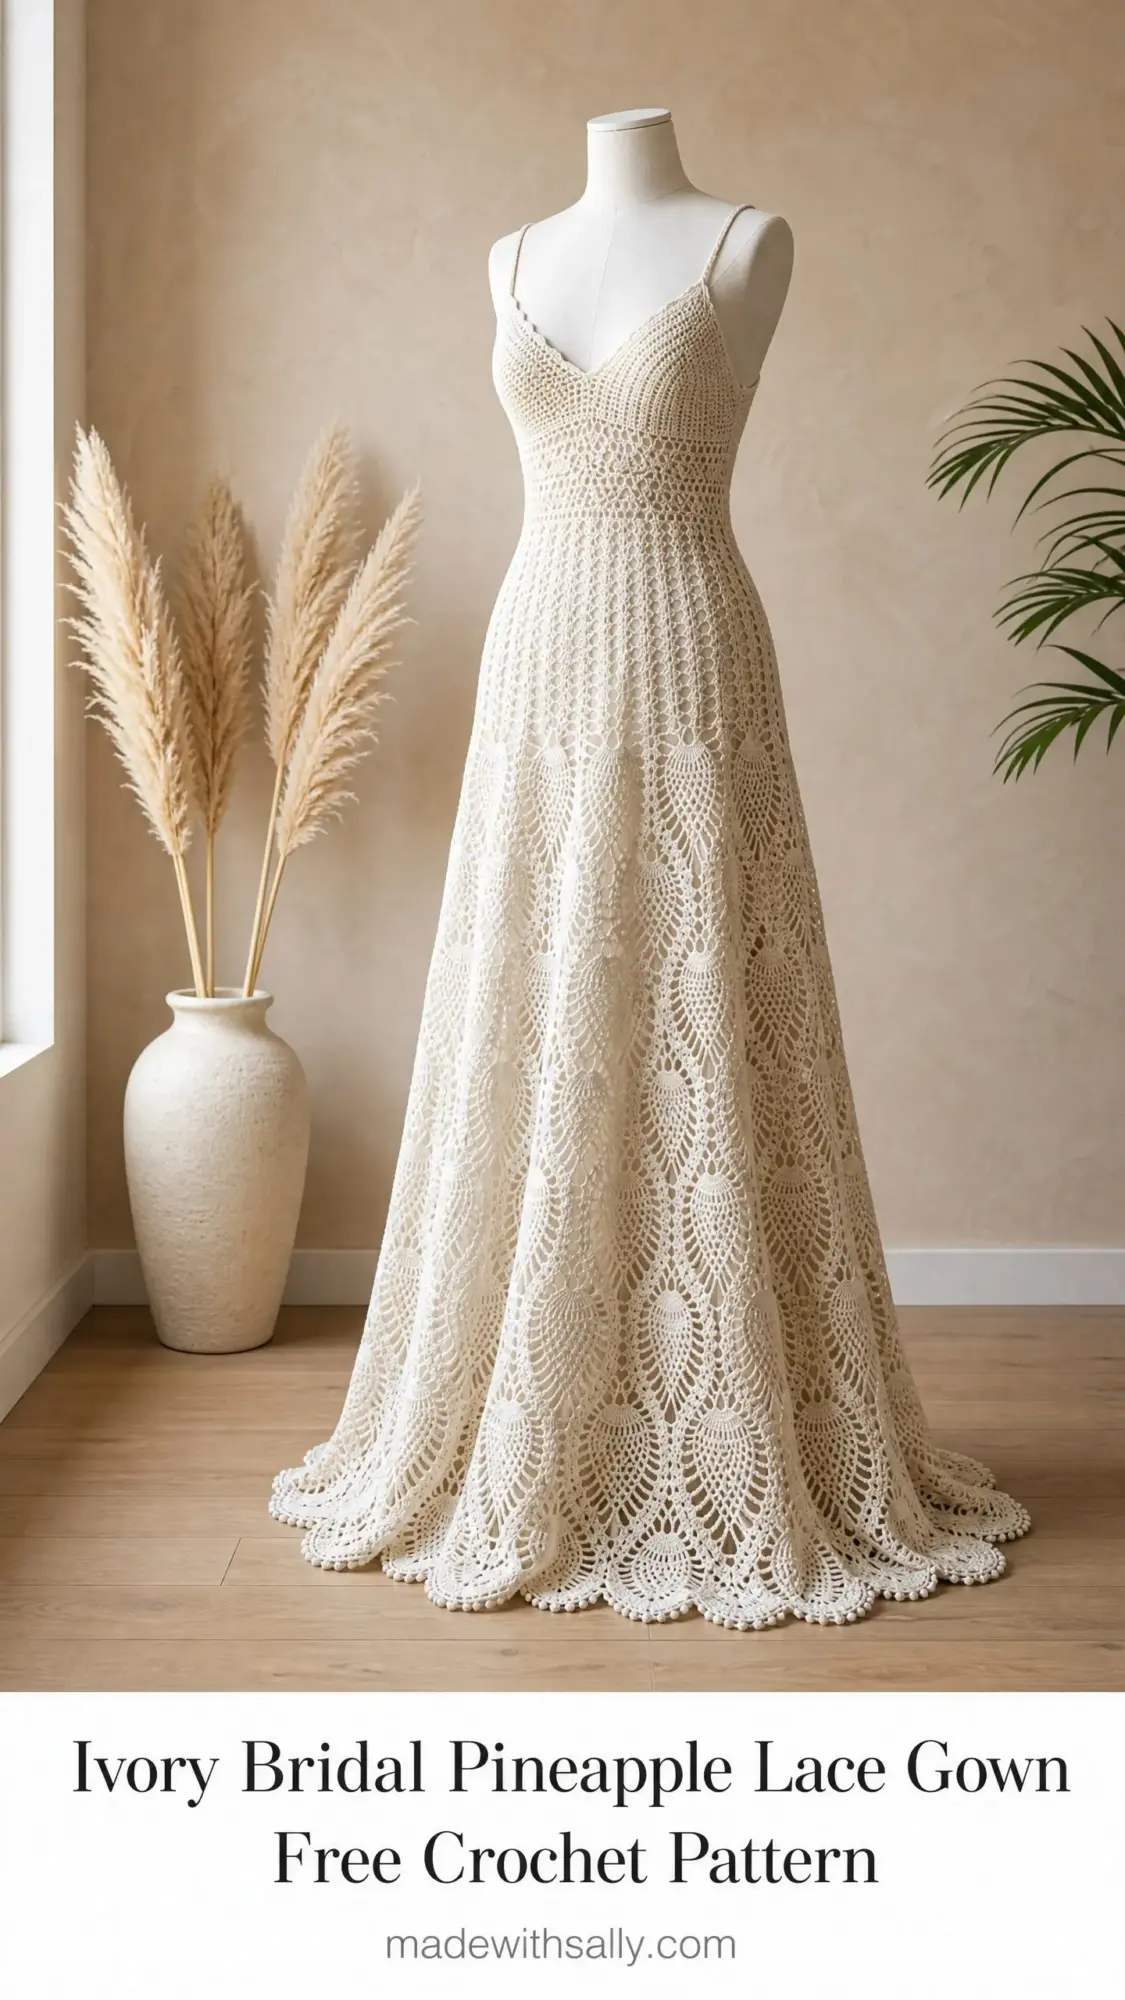
This floor-length gown features a fitted V-neck bodice worked in tight half double crochet (hdc) mesh. The bodice transitions into a sweeping A-line skirt composed of repeating pineapple lace panels. These panels grow in scale from waist to hem, creating that gorgeous dramatic flare you see in the photos.
The dress is constructed in the round from the top down. You’ll start at the bust and expand through strategic increases at the side seams and within the pineapple motif structure. Thin spaghetti straps are worked separately and attached at the end.
What makes this gown special is how the pineapple repeats naturally create the A-line silhouette. Each tier of pineapples gets wider and taller as you work toward the scalloped picot hem. No complicated shaping math required. The stitch pattern does the work for you.
Skill Level
This is an advanced crochet pattern. You’ll need confident familiarity with pineapple lace construction, reading multi-row repeat instructions, working in the round on large circumferences, seamless top-down garment shaping, and maintaining even tension over hundreds of rounds.
If you’re new to garment construction or pineapple stitch, I strongly recommend working several practice swatches before diving in. Trust me on this one. You don’t want to learn on your wedding dress.
Finished Measurements
The pattern is written for Size Small (bust 32 to 34 inches) with Size Medium (bust 35 to 37 inches) in parentheses throughout. Where only one number appears, it applies to both sizes.
Materials Needed
Yarn: Size 10 crochet thread or fingering weight mercerized cotton, approximately 3,200 (3,600) yards total in ivory or natural white.
Specific Yarn Suggestions:
1. Aunt Lydia’s Classic Crochet Thread Size 10, color Ivory (Art. 154): 350 yards per ball. You will need 10 (11) balls. This thread is widely available, consistent in twist and dye lot, and produces a crisp open lace structure ideal for pineapple motifs.
2. Lizbeth Premium Cotton Crochet Thread Size 10, color Ecru (color 601): 210 yards per ball. You will need 16 (18) balls. Lizbeth thread has a soft sheen and a slightly looser twist that gives lace a fluid, romantic drape well suited for bridal wear.
3. DMC Traditions Crochet Thread Size 10, color Ecru: 400 yards per ball. You will need 8 (9) balls. DMC thread is tightly mercerized with excellent stitch definition, producing the sharpest pineapple fan shapes.
Substitution Note: Any size 10 mercerized cotton crochet thread that achieves the stated gauge is acceptable. Avoid blends with synthetic fibers unless you want a shinier finish. Do not substitute a thicker thread weight. This will dramatically affect the drape and scale of the pineapple motifs.
Hooks:
Note that steel hook sizes run in the opposite direction from standard hooks. Size 7 steel is finer than size 6 steel.
Additional Materials:
Gauge
Bodice gauge (US 7 / 1.65 mm hook, worked in rows of hdc mesh):
22 hdc and 16 rows = 4 inches, measured over hdc mesh pattern after wet blocking.
Skirt gauge (US 6 / 1.80 mm hook, worked in pineapple lace rounds):
One full pineapple repeat at the start of the skirt (Round 1 of skirt) = approximately 3.25 inches wide and 2 inches tall for the first complete fan tier.
One full pineapple repeat at mid-skirt (Round 30 of skirt section) = approximately 5 inches wide and 3 inches tall.
Gauge is critical for fit. Both a swatch in hdc mesh AND a practice pineapple repeat swatch must be made and wet blocked before beginning. Failure to achieve gauge will result in significant size deviation in a garment of this length and circumference.
Abbreviations
Special Stitches for This Lace Gown Crochet Pattern
Pineapple Fan (pf)
The pineapple fan is the core motif of the skirt. Here’s how it’s constructed:
Round A (Fan foundation): Work (dc, ch 1) 7 times into the designated base ch-sp, then dc once more into the same sp. You will have 8 dc and 7 ch-1 spaces forming a fan. This is the widest row of the pineapple.
Round B (Pineapple row 1): Sl st across to first ch-1 sp of fan. Ch 3 (counts as dc). Work dc into same sp. (Ch 1, 2 dc) into each of the remaining 6 ch-1 sps of the fan. You have 7 pairs of 2 dc with 6 ch-1 sps between them.
Continue in this manner, working one fewer pair per round, until only 1 ch-1 sp remains between 2 pairs. On the following round, work sc into the final ch-1 sp. The pineapple is closed. The number of rounds per full pineapple repeat in this gown is 9 rounds from fan to tip.
Picot (pc)
Ch 3, sl st into the 3rd chain from hook. This creates a small decorative loop used at the hem.
V-stitch (v-st)
(Dc, ch 2, dc) all into the same stitch or space.
Shell
(2 dc, ch 2, 2 dc) all into the same stitch or space.
Pineapple Ground Mesh
Between pineapple motifs, work (ch 5, sc into the ground sp, ch 5) to create the arched network that separates the fans.
Pattern Notes Before You Begin
1. The gown is constructed top down, in the round, beginning at the bust. The bodice is worked in joined rounds of hdc mesh on the smaller hook. The skirt begins immediately after the waist shaping and switches to the larger hook.
2. The transition from bodice to skirt is a foundation chain round that establishes the base chain spaces into which the first pineapple fan round is worked.
3. The skirt increases in circumference organically through the pineapple repeat structure. Each new tier of pineapples is worked into the chain arches between the previous tier’s closed pineapple tips. Each new fan is slightly wider than the last, producing the A-line silhouette without the need for inserted increase rounds.
4. The pattern is worked with RS facing throughout in the skirt. The bodice alternates RS and WS rows.
5. There is no zipper or closure. The lace bodice has negative ease and stretches to fit over the head when on the body. If the wearer’s head circumference requires it, work 3 to 4 extra chain stitches in the foundation for ease, then decrease them back out over the first 2 bodice rounds.
6. All measurement checkpoints assume the work has been lightly wet-blocked before measuring.
Crochet Pattern Instructions
Bodice
Foundation: Using the US 7 / 1.65 mm hook, ch 176 (196). Being careful not to twist, sl st to the first ch to form a ring.
Setup Round (RS): Ch 2 (counts as hdc throughout bodice). Hdc into each ch around. Sl st to top of beg ch-2 to join. (176 (196) hdc)
Round 1: Ch 2. Hdc into each st around. Sl st to join. (176 (196) hdc)
Rounds 2 through 4: Repeat Round 1. (176 (196) hdc after each round)
Checkpoint: After Round 4, the top edge of the bodice tube should measure 32 (35.6) inches in circumference and the fabric should be approximately 1.25 inches tall.
Now work the V-neck shaping. Place markers at st 1 (right side seam), st 44 (50) (left front edge of V), st 89 (99) (left side seam), and st 133 (148) (right front edge of V).
Front V-Neck Section (worked in rows)
Front foundation row: With RS facing, join yarn at right front marker (st 133 (148)). Ch 2. Hdc across front section to left front marker, turning at end of each row. Front section stitch count: 44 (50) hdc.
V-Neck Row 1 (RS): Ch 2. Hdc to last 2 sts before center front (st 22 (25)). Turn. Do not work across the other half yet. (21 (24) hdc)
V-Neck Row 2 (WS): Ch 2. Sk first st (decrease). Hdc to end. Turn. (20 (23) hdc)
V-Neck Row 3 (RS): Ch 2. Hdc to last 2 sts. Hdc2tog over last 2 sts. Turn. (19 (22) hdc)
V-Neck Row 4 (WS): Ch 2. Sk first st. Hdc to end. Turn. (18 (21) hdc)
V-Neck Row 5 (RS): Ch 2. Hdc to last 2 sts. Hdc2tog. Turn. (17 (20) hdc)
V-Neck Rows 6 through 8: Work even in hdc without further decreasing. Turn at end of each row. (17 (20) hdc after each row)
Right front shoulder is now complete. Fasten off. Rejoin yarn at center front for left front shoulder.
Left V-Neck Section: With RS facing, join at center front. Ch 2. Hdc across remaining 22 (25) sts to left front marker. Turn. (22 (25) hdc)
Left V-Neck Row 1 (WS): Ch 2. Hdc to last 2 sts. Sk 1 st. Hdc 1. Turn. (21 (24) hdc)
Left V-Neck Row 2 (RS): Ch 2. Hdc2tog over first 2 sts. Hdc to end. Turn. (20 (23) hdc)
Left V-Neck Row 3 (WS): Ch 2. Hdc to last 2 sts. Sk 1 st. Hdc 1. Turn. (19 (22) hdc)
Left V-Neck Row 4 (RS): Ch 2. Hdc2tog. Hdc to end. Turn. (18 (21) hdc)
Left V-Neck Row 5 (WS): Ch 2. Hdc to last 2 sts. Sk 1 st. Hdc 1. Turn. (17 (20) hdc)
Left V-Neck Rows 6 through 8: Work even. Turn at end of each row. (17 (20) hdc after each row)
Fasten off.
Back Bodice (worked in rows while front V is shaped)
Join yarn at left side seam marker (st 89 (99)). Ch 2. Hdc across back section to right side seam marker. Back stitch count: 88 (98) hdc.
Back Bodice Rows 1 through 8: Ch 2. Turn. Hdc in each st across. Turn. (88 (98) hdc after each row)
Fasten off. Back bodice is complete.
Joining Round: Rejoin yarn at right side seam. Working in the round again with RS facing, hdc across right front shoulder (17 (20) hdc), hdc across back (88 (98) hdc), hdc across left front shoulder (17 (20) hdc). Sl st to join. (122 (138) hdc)
Note: The V-neck opening remains open. Do not work stitches across the neckline gap.
Waist Shaping Rounds
Decrease Round 1: Ch 2. (Hdc 8, hdc2tog) rep around. Sl st to join. (110 (124) hdc)
Decrease Round 2: Ch 2. (Hdc 9, hdc2tog) rep around for size Small. (Hdc 10, hdc2tog) rep around for size Medium. Sl st to join. (100 (113) hdc)
Note for size Medium: On Decrease Round 2, work 9 full repeats of (hdc 10, hdc2tog) for 99 sts, then hdc in last 2 sts, hdc2tog over final st and join st to complete 113 total.
Decrease Round 3: Ch 2. Hdc around, decreasing 0 (13) additional sts evenly for size Medium only. Sl st to join. (100 (100) hdc)
Both sizes now have 100 hdc.
Decrease Round 4: Ch 2. (Hdc 3, hdc2tog) rep 20 times. Sl st to join. (80 hdc)
Checkpoint: After all waist shaping, the bodice should measure approximately 7 (7.5) inches from the top edge to the current working round, and the waist circumference should be approximately 26 inches.
Waist Transition Round
This round converts the hdc mesh to a chain-space foundation for the pineapple skirt. Switch to US 6 / 1.80 mm hook.
Transition Round: Ch 1. Sc in first st. (Ch 7, sk 3 sts, sc in next st) rep around. End with ch 7, sk 3, sl st to first sc to join. (20 ch-7 arches, 20 sc)
Skirt
The skirt is worked entirely in the round with RS facing. The pineapple fans are placed one per arch into the 20 base arches of the Transition Round. This gives 20 pineapple repeats in Tier 1.
Note on Tier Structure: Each tier consists of one complete pineapple fan-to-tip cycle (9 rounds) plus the ground mesh arches above the next fan (1 to 2 rounds of ch-5 arches). This means each tier takes 10 to 11 rounds total.
Skirt Tier 1 (20 pineapple repeats)
Tier 1, Round 1 (Fan Foundation): Sl st into first ch-7 arch. Ch 3 (counts as dc). Work (dc, ch 1) 6 times, dc once more into same arch, creating 8 dc and 7 ch-1 sps per arch. (Ch 5, sc into next ch-7 arch, ch 5, work full fan into following ch-7 arch) rep 10 times, ending last rep with ch 5, sc into last arch, ch 3, dc into first arch sl st to simulate final ch-5 arch. Sl st to top of beg ch-3. (20 fans established, each with 8 dc and 7 ch-1 sps; 20 ch-5 arches and 20 sc in ground mesh)
Tier 1, Round 2 (Pineapple Row 1): Sl st to first ch-1 sp of first fan. Ch 3. Dc into same sp. (Ch 1, 2 dc in next ch-1 sp) 6 times across this fan, ending with 2 dc into final ch-1 sp of fan. Ch 5. Sc into center of ch-5 ground arch. Ch 5. Rep across all 20 fans. Sl st to top of beg ch-3. (20 fans each with 7 pairs of 2-dc and 6 ch-1 sps; 40 ground ch-5 arches)
Tier 1, Round 3 (Pineapple Row 2): Sl st to first ch-1 sp. Ch 3. Dc into same sp. (Ch 1, 2 dc in next ch-1 sp) 5 times. Ch 5. Sc into ground arch. Ch 5. Rep across all 20 fans. Sl st to join. (20 fans each with 6 pairs of 2-dc and 5 ch-1 sps)
Tier 1, Round 4 (Pineapple Row 3): Sl st to first ch-1 sp. Ch 3. Dc in same sp. (Ch 1, 2 dc) 4 times. Ch 5. Sc in ground arch. Ch 5. Rep across. Sl st to join. (20 fans each with 5 pairs of 2-dc and 4 ch-1 sps)
Tier 1, Round 5 (Pineapple Row 4): Sl st to first ch-1 sp. Ch 3. Dc. (Ch 1, 2 dc) 3 times. Ch 5. Sc in ground arch. Ch 5. Rep across. Sl st to join. (20 fans each with 4 pairs and 3 ch-1 sps)
Tier 1, Round 6 (Pineapple Row 5): Sl st to first ch-1 sp. Ch 3. Dc. (Ch 1, 2 dc) twice. Ch 5. Sc in ground arch. Ch 5. Rep across. Sl st to join. (20 fans each with 3 pairs and 2 ch-1 sps)
Tier 1, Round 7 (Pineapple Row 6): Sl st to first ch-1 sp. Ch 3. Dc. Ch 1. 2 dc in next ch-1 sp. Ch 5. Sc in ground arch. Ch 5. Rep across. Sl st to join. (20 fans each with 2 pairs and 1 ch-1 sp)
Tier 1, Round 8 (Pineapple Row 7): Sl st to sole ch-1 sp. Ch 3. Dc into same sp. Ch 5. Sc in ground arch. Ch 5. Rep across. Sl st to join. (20 closed pineapples, each with a 2-dc tip; 40 ground arches)
Tier 1, Round 9 (Pineapple Tip Close): Sc into the 2-dc tip of first pineapple. (Ch 7. Sc into 2-dc tip of next pineapple. Ch 7. Sc into center of ground arch. Ch 7.) Rep across, connecting pineapple tips and ground arches into a new network of ch-7 arches. Sl st to first sc.
Stitch count after Round 9: 40 ch-7 arches and 40 sc anchor points.
Checkpoint: After Tier 1 Round 9, the skirt should hang approximately 4 to 4.5 inches below the waist transition round. The lower edge should be approximately 40 inches in circumference.
Skirt Tier 2 (40 pineapple repeats)
Tier 2 begins with 40 ch-7 arches from Round 9 above. Each arch receives a full fan. This doubles the pineapple count.
Tier 2, Round 1: Sl st into first ch-7 arch. Fan of (dc, ch 1) 6 times, dc into same arch. Ch 4. Sc into next ch-7 arch. Ch 4. Work fan into following arch. Rep across all 40 arches, alternating fan arches with sc/ch-4 connector arches. Sl st to join. (40 fans; 40 ch-4 connector arches)
Tier 2, Rounds 2 through 8: Follow the same row-by-row pineapple narrowing sequence as Tier 1 Rounds 2 through 8, working across 40 fans. On each round, sl st to first ch-1 sp, work the appropriate reduced pair count, and work ch-4 connector arches between fans. (40 fans narrowing by 1 pair per round through Row 6; 40 closed tips at Round 8)
Tier 2, Round 9 (Tip Close): Sc into 2-dc tip of first pineapple. (Ch 8. Sc into tip of next pineapple. Ch 8. Sc into connector arch between pineapples.) Rep across, establishing 80 ch-8 arches and 80 sc. Sl st to join. (80 ch-8 arches)
Checkpoint: After Tier 2 Round 9, the skirt should measure approximately 9 to 10 inches below the waist transition. The hem circumference at this point should be approximately 80 inches.
Skirt Tier 3 (80 pineapple repeats)
Tier 3 begins with 80 ch-8 arches. This tier does NOT place a fan into every arch. Fans alternate with sc-only arches.
Tier 3, Round 1: Sl st into first ch-8 arch. Work full fan of (dc, ch 1) 7 times, dc into same arch (9 dc, 8 ch-1 sps). Ch 5. Sc into next arch (open arch). Ch 5. Work fan into following arch. Rep across. Sl st to join. (40 wider fans with 8 ch-1 sps; 40 ch-5 arches)
Tier 3, Rounds 2 through 9: Work pineapple rows reducing 1 pair per round as established. Use ch-5 connectors throughout. On Round 9, sc into 2-dc tips and work ch-9 transition arches between each tip pair. (40 closed pineapples at tip; 80 ch-9 arches established for Tier 4)
Checkpoint: After Tier 3 Round 9, the skirt measures approximately 23 to 24 inches below the waist. The hem circumference should be approximately 120 inches.
Skirt Tier 4
Tier 4 begins with 80 ch-9 arches from Tier 3 Round 9. Fan into every other arch (40 fans), sc into alternating arches.
Tier 4, Round 1: Sl st to first arch. Work an expanded fan of (dc, ch 1) 8 times, dc into same arch (10 dc, 9 ch-1 sps). Ch 6. Sc into open arch. Ch 6. Rep across. Sl st to join. (40 fans with 9 ch-1 sps; 40 ch-6 arches)
Tier 4, Rounds 2 through 9: Work pineapple rows reducing 1 pair per round. Ch-6 connectors throughout. On Round 9, work ch-10 transition arches. (40 closed pineapples; 80 ch-10 arches)
Checkpoint: After Tier 4 Round 9, the skirt measures approximately 37 to 38 inches below the waist. Hem circumference approximately 150 inches.
Skirt Tier 5 (final lace tier before hem)
Tier 5 begins with 80 ch-10 arches. Fan into every other arch (40 fans), sc into alternating arches.
Tier 5, Round 1: Work the largest fans of the gown: (dc, ch 1) 9 times, dc into same arch (11 dc, 10 ch-1 sps). Ch 7. Sc into open arch. Ch 7. Rep across. Sl st to join. (40 fans with 10 ch-1 sps; 40 ch-7 arches)
Tier 5, Rounds 2 through 9: Pineapple rows as established, reducing 1 pair per round. Ch-7 connectors. On Round 9, work sc into each tip and ch-11 arches between tips. (40 closed pineapples; 80 ch-11 arches)
Checkpoint: After Tier 5 Round 9, the skirt measures approximately 49 to 50 inches below the waist. Hem circumference approximately 180 inches.
Hem Scallop and Picot Round
Hem Round 1: Sl st into first ch-11 arch. Ch 3. Work 8 dc into same arch. (Sc into next ch-11 arch. 9 dc into following ch-11 arch) rep around, alternating sc arches and 9-dc shell arches. End with sc, sl st to top of beg ch-3. (40 shells of 9 dc; 40 sc)
Hem Round 2 (Picot Edging): Ch 1. Sc into first dc of first shell. (Pc, sc into next dc) 8 times across the 9 dc of shell. Sc into the sc between shells. Rep across all 40 shells. Sl st to first sc to join. Fasten off. (320 picots total, 8 per shell, 40 shells)
Straps
Make 2.
Using US 7 / 1.65 mm hook, ch 220 (232).
Row 1: Sc into 2nd ch from hook and each ch across. Turn. (219 (231) sc)
Row 2: Ch 1. Sl st in each st across. Fasten off.
Attach straps to the bodice at the front V-neck points and at corresponding positions on the back, adjusting placement to fit the wearer comfortably.
Size Customization Tips
To lengthen or shorten the bodice: Add or remove 2 rounds of hdc mesh per 0.5 inch of adjustment.
To widen the bodice: Add one full 10-stitch hdc mesh repeat (5 v-stitches) to the foundation chain. Ensure the new count is divisible by the pineapple repeat multiple of 20 at the waist transition.
To lengthen the skirt: Each full tier of pineapple motifs adds approximately 4.5 inches of length in the lower skirt. Insert additional tiers before the hem round to lengthen.
To add a train: After completing the final hem round, pick up stitches at the center back lower edge and work additional pineapple tiers in rows rather than rounds, increasing 1 fan repeat at each side every 2 tiers.
Finishing Your Bridal Lace Gown
Weave in all ends carefully with your tapestry needle. For a garment this large and intricate, take your time. Each end should be woven through at least 3 inches of stitches and trimmed close to the fabric.
Blocking is absolutely essential for this piece. Wet block the entire gown by soaking it in cool water with a gentle wool wash or hair conditioner. Gently squeeze out excess water without wringing. Lay flat on blocking mats, pinning out each scallop of the hem and shaping the bodice to measurements. Allow to dry completely before removing pins.
The dress has no zipper or closure. The lace bodice stretches to fit over the head when worn. If you find this too tight during fitting, you can add a small ribbon tie at the back neckline.
A Few Words of Encouragement
I won’t sugarcoat it. This bridal pineapple lace gown crochet pattern is a serious undertaking. But if you’ve made it this far in the instructions, you have the dedication to see it through.
Take breaks when you need them. Work in good lighting. Celebrate each completed tier. And remember that every bride who has ever worn a handmade wedding dress knows something precious: that someone loved them enough to spend hundreds of hours creating beauty stitch by stitch.
You’ve got this.
Thank you so much for choosing this pattern for such a meaningful project. I would absolutely love to see your finished gown, so please tag me on Instagram or share in my Facebook group when you complete it. Seeing your creations genuinely makes my day.
If this pattern is calling to you, go ahead and save it to your Pinterest boards so you can find it when you’re ready to start. And if you make this gorgeous bridal gown, I’d love to hear about your experience in the comments below.
