
THIS DRESS IS ABSOLUTELY STUNNING and I cannot wait to share it with you! Picture this: a fitted sweetheart bodice, a gorgeous two-color ripple skirt, and a show-stopping detachable butterfly belt ornament. Yes, it is an advanced project. Yes, it takes around 40 to 55 hours. But trust me when I say the finished piece is worth every single stitch.
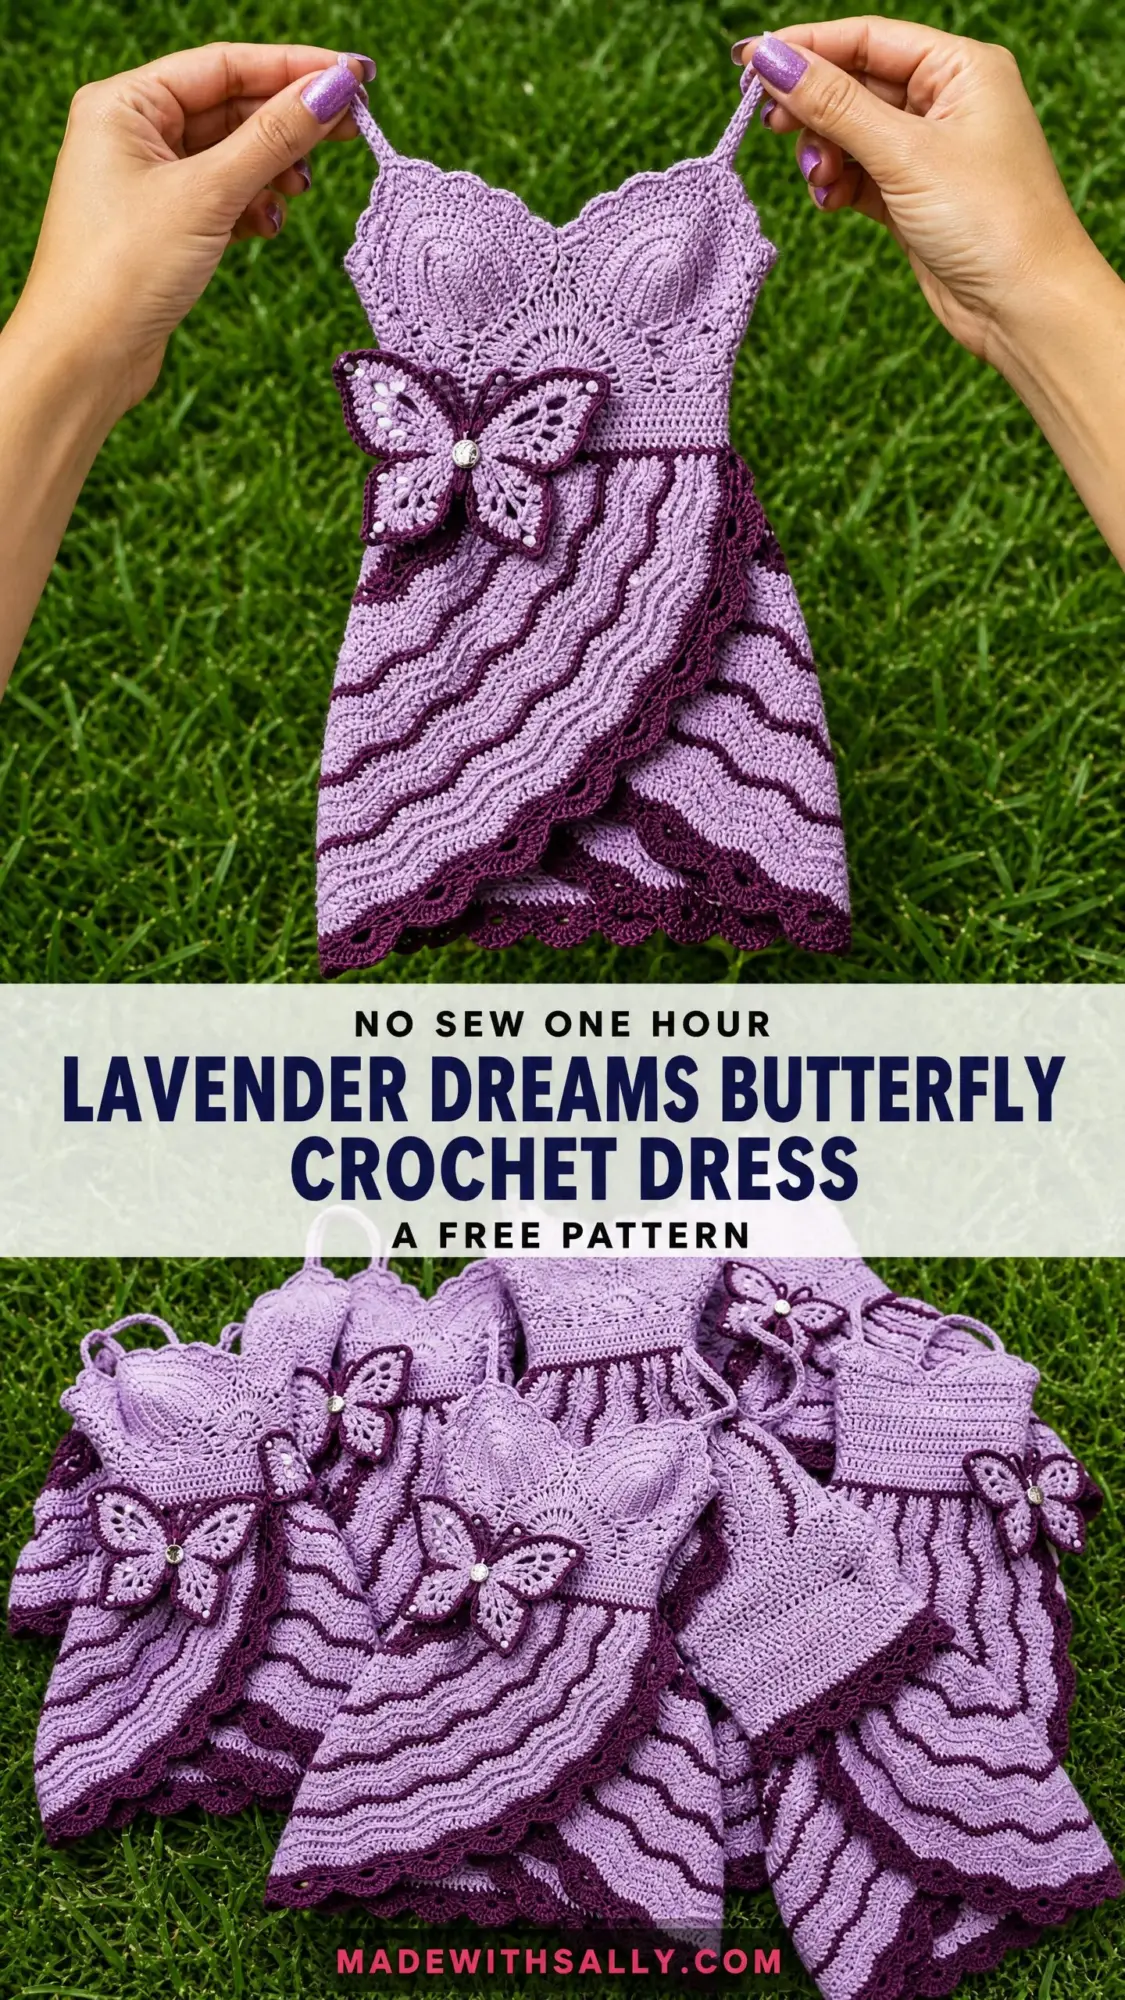
If you have been searching for that one statement crochet garment to push your skills and create something truly wearable art, you just found it. The Lavender Dreams Butterfly Crochet Dress combines classic techniques like sweetheart cup shaping and ripple wave stitch with that romantic, feminine aesthetic everyone is loving right now.
I designed this pattern with detailed checkpoint measurements throughout so you can catch any sizing issues early. The construction method breaks everything into manageable sections, and you will join them together at the end for a professional finish. Let me walk you through every single step.
About This Crochet Dress Pattern
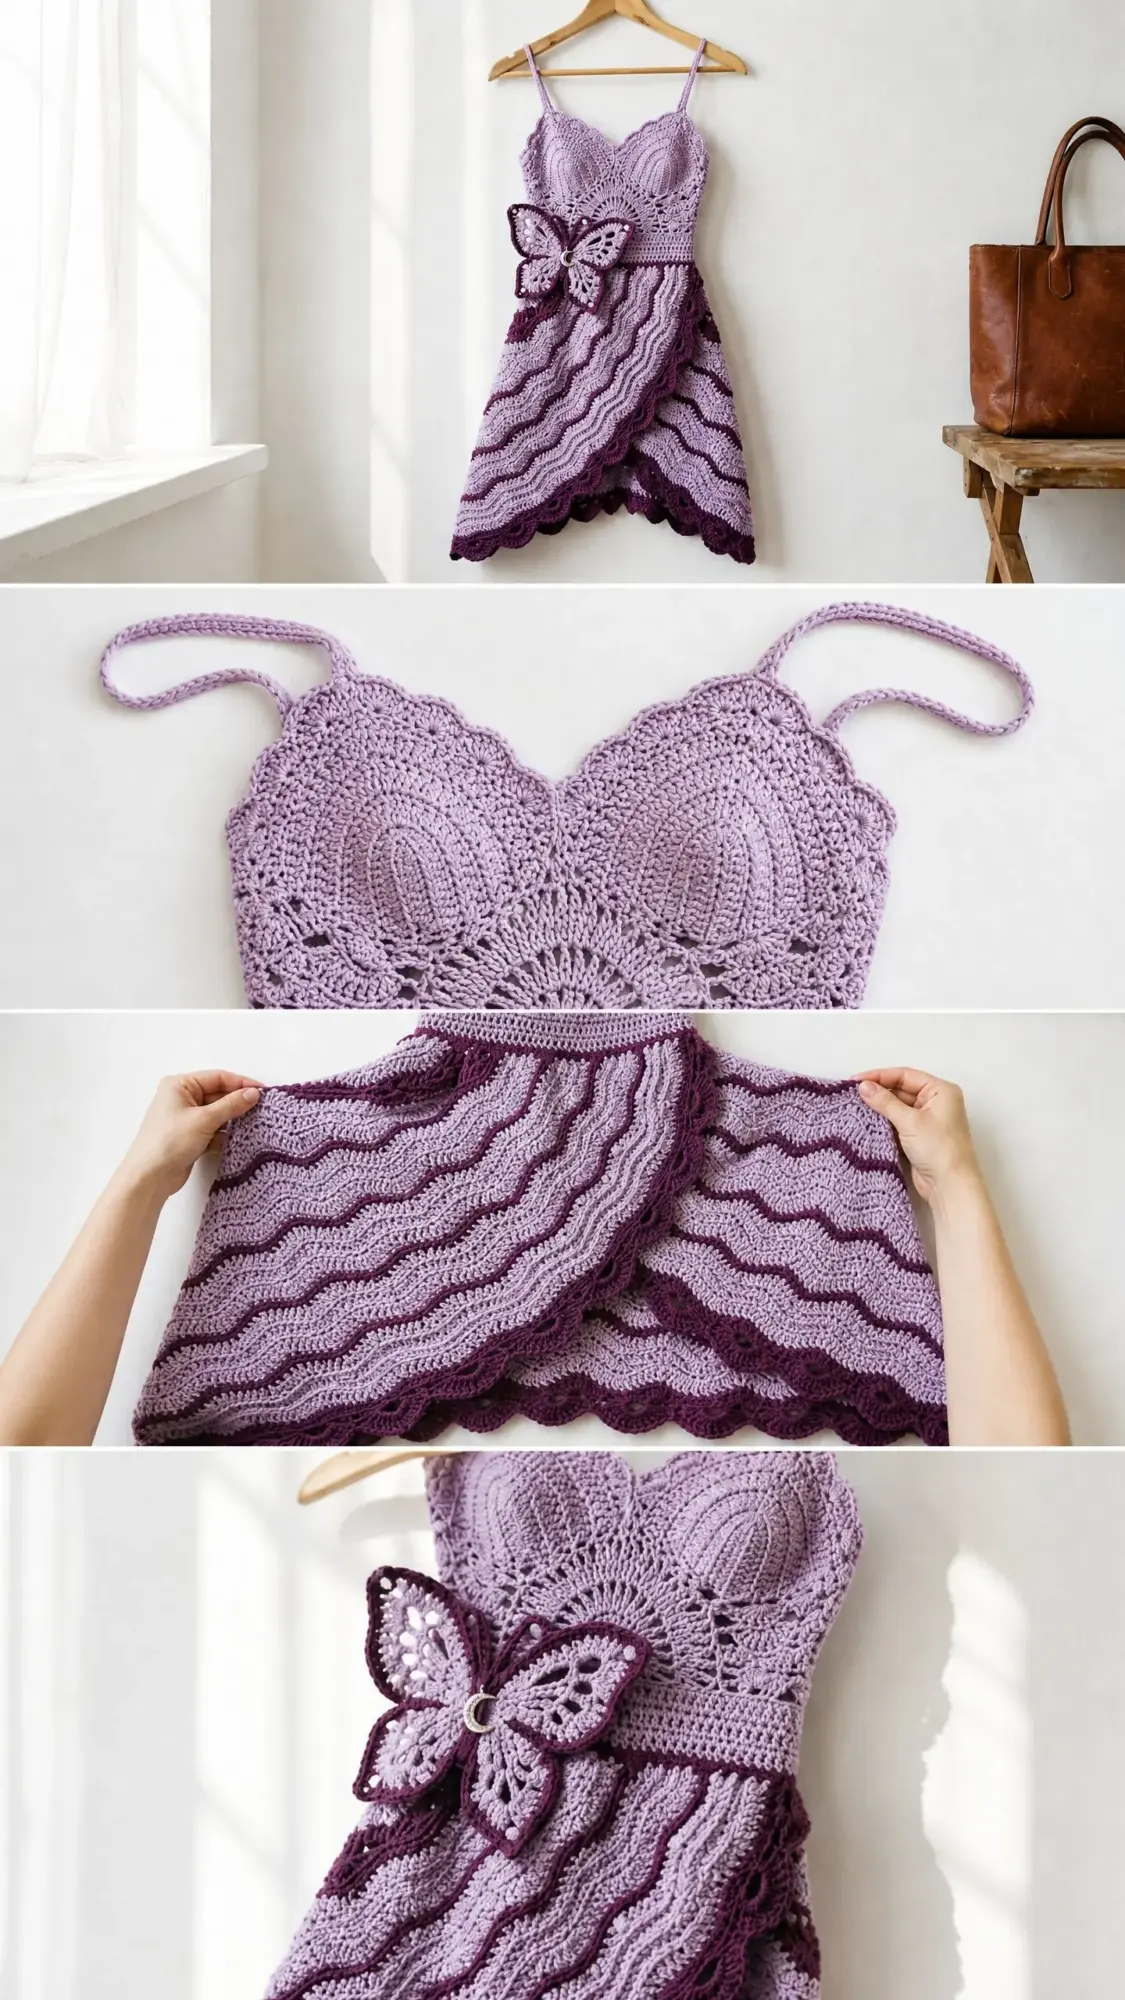
This wearable crochet dress features three main sections worked separately and joined together. You will create a fitted sweetheart bodice worked flat from bottom to top with shaping. The skirt uses a beautiful two-color ripple wave stitch in lavender and plum, worked flat and then seamed. The butterfly belt piece is worked flat and attached to a ring closure for that eye-catching centerpiece.
The finished look gives you a mini-to-midi length dress hitting above the knee. You will love the defined waistband that connects the bodice to the skirt seamlessly. The asymmetric diagonal front hem adds movement and visual interest, with the skirt wrapping slightly across the front.
Skill level: Advanced. This pattern requires comfort with working increases and decreases for cup shaping, two-color ripple stitch with clean color changes, constructing multiple panels and seaming them together, creating a three-dimensional butterfly motif, and picking up stitches along finished edges. If you have completed at least two garment projects before, you will find this manageable.
Finished Measurements
The pattern is written for size Small/Medium, fitting a bust measurement of 32 to 36 inches (81 to 91 cm).
Finished garment measurements:
Materials Needed
Yarn A (Main Color): Light worsted weight (weight 3 DK / light worsted), smooth mercerized cotton or cotton-blend in lavender or soft lilac. You will need 900 yards / 823 meters.
Yarn B (Contrast Color): Same weight and fiber in deep plum or dark purple. You will need 400 yards / 366 meters.
Hooks:
Additional materials:
Yarn Suggestions
Lion Brand 24/7 Cotton in Lavender and Plum works beautifully. This smooth mercerized cotton holds stitch definition perfectly, is machine washable, and gives excellent drape for the ripple skirt.
Paintbox Yarns Cotton DK in Misty Lilac (MC) and Pansy Purple (CC) is another great option. It is affordable with consistent tension and a wide color range.
Drops Safran in colors 19 (lavender) and 18 (violet) can be held double as an alternative. This gives a slightly softer hand with more drape.
Substitution note: Choose a smooth, plied cotton or cotton-blend with clear stitch definition. Avoid fuzzy or textured yarns as the ripple pattern and fan details will be obscured. The yarn should have minimal stretch. Always confirm gauge before beginning.
Gauge
With E-4 hook (3.5 mm) and MC:
With F-5 hook (3.75 mm) and ripple pattern (MC and CC):
Gauge is critical for a fitted garment like this crochet dress pattern. Make a 5-inch / 13 cm swatch in each stitch pattern before beginning. Adjust hook size up or down as needed to match gauge.
Abbreviations (US Terms)
Before we dive into the step by step instructions, let me define all the stitches and abbreviations you will encounter:
Special Stitches
Shell Stitch
Used in the bodice fan detail at the bust. Work 5 double crochet stitches all into the same stitch or space. This creates a fan shape. Instructions will specify whether the shell sits in a stitch or a chain space.
V-Stitch
Used in the bodice lace band. Work (1 dc, ch 1, 1 dc) all into the same stitch or space.
Ripple Wave Row
Used in the skirt with two colors. The ripple pattern uses an 18-stitch repeat. Each repeat contains 3 increase stitches over a peak, 6 regular stitches across the flat section, 3 decrease stitches into a valley, and 6 regular stitches across the next flat section. The wave effect is created by working sc2tog three times at valleys and 2 sc in each of 3 consecutive stitches at peaks within each repeat.
Scallop Edging
Used at the hem. Here is how to work it:
Step 1: Sl st into first stitch of edging row.
Step 2: Ch 3, work 4 dc into the same stitch. This is the first scallop shell.
Step 3: Sk 2 sts, sl st into next stitch.
Step 4: Ch 3, work 4 dc into same sl st stitch.
Step 5: Sk 2 sts, sl st into next stitch.
Repeat steps 4 and 5 across. End with sl st. Fasten off. The scallop repeat is 3 stitches (sk 2, sl st 1), so the hem stitch count must be divisible by 3.
Butterfly Wing Stitch
Used in the butterfly motif. The upper wing starts with a foundation chain, then you work rows of dc with ch-1 spaces creating an open lace texture. Shape by decreasing on outer edges and increasing toward the center vein. The lower wing is worked separately and smaller, using the same open dc/ch-1 lace structure. Wings are worked with plum CC and MC held separately in specified rows to create the two-tone effect.
Sweetheart Cup Shaping
Used in the bodice. Each cup is worked separately from a central point outward, with increases on outer edges and a central slight decrease at the valley between cups to create the sweetheart dip.
Pattern Notes
Construction overview: The dress is worked in separate pieces: Left Bodice Cup, Right Bodice Cup (joined at center), Bodice Back Panel, Waistband (worked in rounds joining front and back bodice), Skirt Front Panel, Skirt Back Panel (joined at side seams), Hem Edging, Left Strap, Right Strap, and Butterfly Belt.
Turning chains: In sc sections, ch 1 at turn does NOT count as a stitch. In dc sections, ch 3 DOES count as the first dc unless stated otherwise.
Color changes in the ripple skirt: Change color at the end of the last stitch of the current color row by pulling the new color through on the final yarn-over of that stitch. You can carry yarn not in use up the side edge by crocheting over it, or fasten off and rejoin for cleaner edges. The carried-yarn method is recommended for speed. The fasten-off method gives cleaner side seams if you intend to leave them unlined.
Stitch counts: Numbers in parentheses at the end of each row represent total working stitches in that row.
Skirt construction: The skirt is worked flat and seamed at center back, leaving a 10-inch / 25 cm opening at top of back seam for the zipper.
Waistband: The waistband is worked in joined rounds connecting the bodice hem to the skirt top, creating a stable waist section approximately 1.5 inches / 3.8 cm tall.
Read all instructions for a section before beginning that section.
Crochet Dress Pattern Instructions
Section 1: Bodice Front Left Cup
Use E-4 hook and MC. Work begins at the center valley of the sweetheart neckline. The left cup is worked first, then the right cup is worked separately and the two are joined at the center.
Foundation: Ch 4, sl st to join into a ring. Or, work into a magic ring.
Row 1 (RS): Ch 1, work 6 sc into ring. Turn. Do not join. (6 sc)
Row 2: Ch 1, 2 sc in first st, sc in next 4 sts, 2 sc in last st. Turn. (8 sc)
Row 3: Ch 1, 2 sc in first st, sc in next 6 sts, 2 sc in last st. Turn. (10 sc)
Row 4: Ch 1, 2 sc in first st, sc in next 8 sts, 2 sc in last st. Turn. (12 sc)
Row 5: Ch 1, sc across. Turn. (12 sc)
Row 6: Ch 1, 2 sc in first st, sc in next 10 sts, 2 sc in last st. Turn. (14 sc)
Row 7: Ch 1, sc across. Turn. (14 sc)
Row 8: Ch 1, 2 sc in first st, sc in next 12 sts, 2 sc in last st. Turn. (16 sc)
Row 9: Ch 1, sc across. Turn. (16 sc)
Row 10: Ch 1, 2 sc in first st, sc in next 14 sts, 2 sc in last st. Turn. (18 sc)
Row 11: Ch 1, sc across. Turn. (18 sc)
Row 12: Ch 1, 2 sc in first st, sc in next 16 sts, 2 sc in last st. Turn. (20 sc)
Row 13: Ch 1, sc across. Turn. (20 sc)
Row 14: Ch 1, 2 sc in first st, sc in next 18 sts, 2 sc in last st. Turn. (22 sc)
Row 15: Ch 1, sc across. Turn. (22 sc)
Row 16: Ch 1, 2 sc in first st, sc in next 20 sts, 2 sc in last st. Turn. (24 sc)
Rows 17 to 20: Ch 1, sc across. Turn. (24 sc each row)
This completes the Left Cup. Do not fasten off. Set aside on a holder or safety-pin the live stitches.
CHECKPOINT: The left cup should measure approximately 4 inches / 10 cm wide and 4 inches / 10 cm tall at this point.
Section 2: Bodice Front Right Cup
Work exactly as for Left Cup, Rows 1 to 20. Do not fasten off.
Section 3: Joining Cups and Completing Bodice Front
With RS facing, hold Right Cup in working position. With MC and E-4 hook:
Row 21 (joining row): Ch 1, sc across 24 sts of Right Cup, then sc across 24 sts of Left Cup. Turn. (48 sc)
Note: The two cups are now joined at the center. The valley between them sits at the center of the sweetheart neckline. If you wish a more defined valley, work sc2tog at the exact center junction point on this row. If so, count is 47 sc. For this pattern we work a clean join: (48 sc).
Row 22: Ch 1, sc across. Turn. (48 sc)
Row 23: Ch 1, sc2tog, sc to last 2 sts, sc2tog. Turn. (46 sc)
Row 24: Ch 1, sc across. Turn. (46 sc)
Row 25: Ch 1, sc2tog, sc to last 2 sts, sc2tog. Turn. (44 sc)
Row 26: Ch 1, sc across. Turn. (44 sc)
Row 27: Ch 1, sc2tog, sc to last 2 sts, sc2tog. Turn. (42 sc)
Rows 28 to 30: Ch 1, sc across. Turn. (42 sc each row)
This completes the bodice front panel shaping from bust to underarm. The slight taper from 48 to 42 sc creates the waist shaping on the front.
CHECKPOINT: After joining and working through Row 30, the bodice front should measure approximately 7 inches / 18 cm tall from the bottom of the cups to the last row. Width at Row 30 should be approximately 9.3 inches / 23.5 cm.
Section 4: Bodice Fan Detail Row
This row adds the radiating fan texture visible across the bust area between the cups and the waistband join. Work this as a post-Row 27 decorative round:
After completing Row 27, do NOT turn. Work fan detail row along RS:
Fan Row: Ch 1, sc in first st, (sk 2, Shell in next st, sk 2, sc in next st) 6 times, sl st to last st. (6 shells placed evenly across 42 sts)
This fan row is decorative only and does not change stitch count for subsequent construction. Continue with Row 28 picking up from the original 42 sc of Row 27.
Section 5: Bodice Lace Band
After Row 30 of bodice front (42 sc), work lace band:
Lace Row 1: Ch 4 (counts as dc + ch 1), sk 1 st, (V-stitch in next st, sk 1 st) across, dc in last st. Turn. (20 V-sts + 2 edge dc)
Lace Row 2: Ch 3 (counts as dc), work (V-stitch in each ch-1 sp of V-st below) across, dc in top of t-ch. Turn. (20 V-sts + 2 edge dc)
Lace Row 3 (Reduction Row): Ch 1, sc2tog across all dc and ch-sp pairs, treating each (dc, ch-1 sp) as one unit: sc2tog over dc and ch-sp, sc in next dc. Repeat across. Each V-st yields (sc2tog + sc) = 2 sts. 20 V-sts x 2 = 40, plus 2 edge dc worked as sc2tog at each end: 40 + 1 + 1 = 42 sc. Turn. (42 sc)
This correctly returns us to 42 sc for the waistband.
Section 6: Bodice Back Panel
The back panel is worked flat in two halves (left back and right back) to create the center back opening for the zipper. Each half is 21 sc wide.
Use E-4 hook and MC.
Left Back Panel
Foundation chain: Ch 22.
Row 1 (RS): Sc in 2nd ch from hook, sc across. Turn. (21 sc)
Rows 2 to 28: Ch 1, sc across. Turn. (21 sc each row)
Row 29 (armhole shaping): Ch 1, sc2tog, sc to end. Turn. (20 sc)
Row 30: Ch 1, sc across. Turn. (20 sc)
Row 31: Ch 1, sc2tog, sc to end. Turn. (19 sc)
Row 32: Ch 1, sc across. Turn. (19 sc)
Row 33: Ch 1, sc2tog, sc to end. Turn. (18 sc)
Row 34: Ch 1, sc across. Turn. (18 sc)
Row 35: Ch 1, sc2tog, sc to end. Turn. (17 sc)
Rows 36 to 40: Ch 1, sc across. Turn. (17 sc each row)
Fasten off. This forms the left back panel from bottom edge to top of back.
Right Back Panel
Work same as Left Back Panel, mirroring the decreases:
Foundation chain: Ch 22.
Row 1 (RS): Sc in 2nd ch from hook, sc across. Turn. (21 sc)
Rows 2 to 28: Ch 1, sc across. Turn. (21 sc each row)
Row 29 (armhole shaping): Ch 1, sc to last 2 sts, sc2tog. Turn. (20 sc)
Row 30: Ch 1, sc across. Turn. (20 sc)
Row 31: Ch 1, sc to last 2 sts, sc2tog. Turn. (19 sc)
Row 32: Ch 1, sc across. Turn. (19 sc)
Row 33: Ch 1, sc to last 2 sts, sc2tog. Turn. (18 sc)
Row 34: Ch 1, sc across. Turn. (18 sc)
Row 35: Ch 1, sc to last 2 sts, sc2tog. Turn. (17 sc)
Rows 36 to 40: Ch 1, sc across. Turn. (17 sc each row)
Fasten off.
CHECKPOINT: Each back panel should measure approximately 4.7 inches / 12 cm wide and 8 inches / 20 cm tall. The combined back width (two panels) = 34 sts at the base = approximately 7.5 inches / 19 cm. Combined with the front, this gives a full 17 inches / 43 cm half circumference, matching a 34-inch / 86 cm bust.
Section 7: Seaming Bodice
With yarn needle and MC, seam left side of bodice front to left back panel at side edge. Seam right side of bodice front to right back panel at side edge. Leave armhole edges open. Do not seam at shoulder or armhole beyond the side seam. The top edge of the bodice front (sweetheart neckline cups) and top edges of back panels remain open for neckline and back opening.
Use mattress stitch for side seams for an invisible join. This technique involves picking up the horizontal bars between stitches on each piece and pulling them together.
CHECKPOINT: After seaming, the bodice should be a tube at the bottom (waist edge) and open at the top (neckline and back opening). Waist circumference should measure approximately 28 inches / 71 cm when held gently without stretching.
Section 8: Waistband
Work waistband in joined rounds with F-5 hook and MC, picking up stitches around the lower edge of the seamed bodice.
Round 1: With RS facing, join MC at center back right edge. Ch 1, sc evenly around lower edge of bodice: 42 sc across front, 21 sc across left back, 21 sc across right back = 84 sc total. Sl st to first sc to join. (84 sc)
Round 2: Ch 1, sc in each st around. Sl st to join. (84 sc)
Round 3: Ch 3 (counts as dc), dc in next st, (ch 1, sk 1 st, dc in next 2 sts) around. Sl st to top of t-ch. (21 repeats)
Round 4: Ch 1, sc in each dc and ch-sp around. Sl st to join. (84 sc)
Round 5: Ch 1, sc in each st around. Sl st to join. (84 sc)
Round 6: Ch 1, sc in each st around. Sl st to join. (84 sc)
Rounds 7 to 8: Ch 1, sc around. Sl st to join. (84 sc each round)
Waistband is complete. Total waistband height approximately 1.5 inches / 3.8 cm. Do not fasten off. Proceed to skirt attachment or fasten off and rejoin with skirt.
Section 9: Skirt Front Panel
Use F-5 hook. The skirt is worked in two-color ripple pattern. MC = lavender. CC = plum.
The ripple repeat is 18 stitches. The skirt front panel will be 108 stitches wide (6 repeats x 18 = 108 sts) to allow for ease and the slight wrap/asymmetric overlap visible in the design.
Foundation chain (MC): Ch 110 (108 working sts + 2 for turning).
Row 1 (RS, MC): Sc in 2nd ch from hook, sc in next ch, (sc2tog 3 times, sc in next 6 ch, 2 sc in next 3 ch, sc in next 6 ch) across to last 2 ch, sc2tog. Turn.
Continue working the ripple pattern, alternating MC and CC rows according to the color sequence you prefer. The classic look shown uses 2 rows MC followed by 2 rows CC throughout the skirt.
Work until skirt measures 16 inches / 40.5 cm from foundation to longest point, shaping the asymmetric hem by adding additional rows on one side.
Finishing the Skirt
Seam the skirt panels at center back, leaving a 10-inch / 25 cm opening at the top for the zipper. Work the scallop edging around the entire hem using CC for a beautiful contrast finish.
Attach the completed skirt to the waistband by whip stitching or slip stitching evenly around, easing in any fullness.
Straps
For each strap, ch 100 with MC using E-4 hook. Sl st in each ch across. Fasten off. Attach straps at front cups and corresponding back panel positions, adjusting length as needed for your body.
Butterfly Belt
The butterfly is worked in two upper wings and two lower wings using both MC and CC. Attach to the 1-inch silver ring closure. The butterfly sits at the waist as a detachable ornament.
Blocking and Finishing
Wet block all pieces before final assembly for best results. Pin to blocking mats, spray with water, and allow to dry completely. This opens up the lace details and evens out your stitches.
Install the invisible zipper or hook-and-eye closures at center back. Weave in all ends securely.
Tips for Success
Take your time with the cup shaping. Check your measurements against the checkpoints regularly. The ripple stitch becomes rhythmic once you establish the pattern. Do not be intimidated by the color changes. They become second nature after a few rows.
This crochet tutorial breaks down an advanced project into achievable sections. Work one section at a time, and before you know it, you will have a stunning handmade dress.
I really hope you love making this Lavender Dreams Butterfly Crochet Dress as much as I loved designing it! If you found this pattern helpful, save it to your Pinterest boards so you can find it easily when you are ready to start. And please drop a comment below when you finish yours. I would absolutely love to see your color combinations and how you styled it!
