
I call this one the Harvest Moon Poncho, and it has quite the backstory. About three years ago, I sketched a rough idea for a sunflower granny square poncho in one of those little notebooks I carry everywhere. I wanted something that captured that golden hour feeling of autumn afternoons, when the light turns everything warm and the air gets that familiar crispness. The sketch sat there for ages, waiting for the right moment.
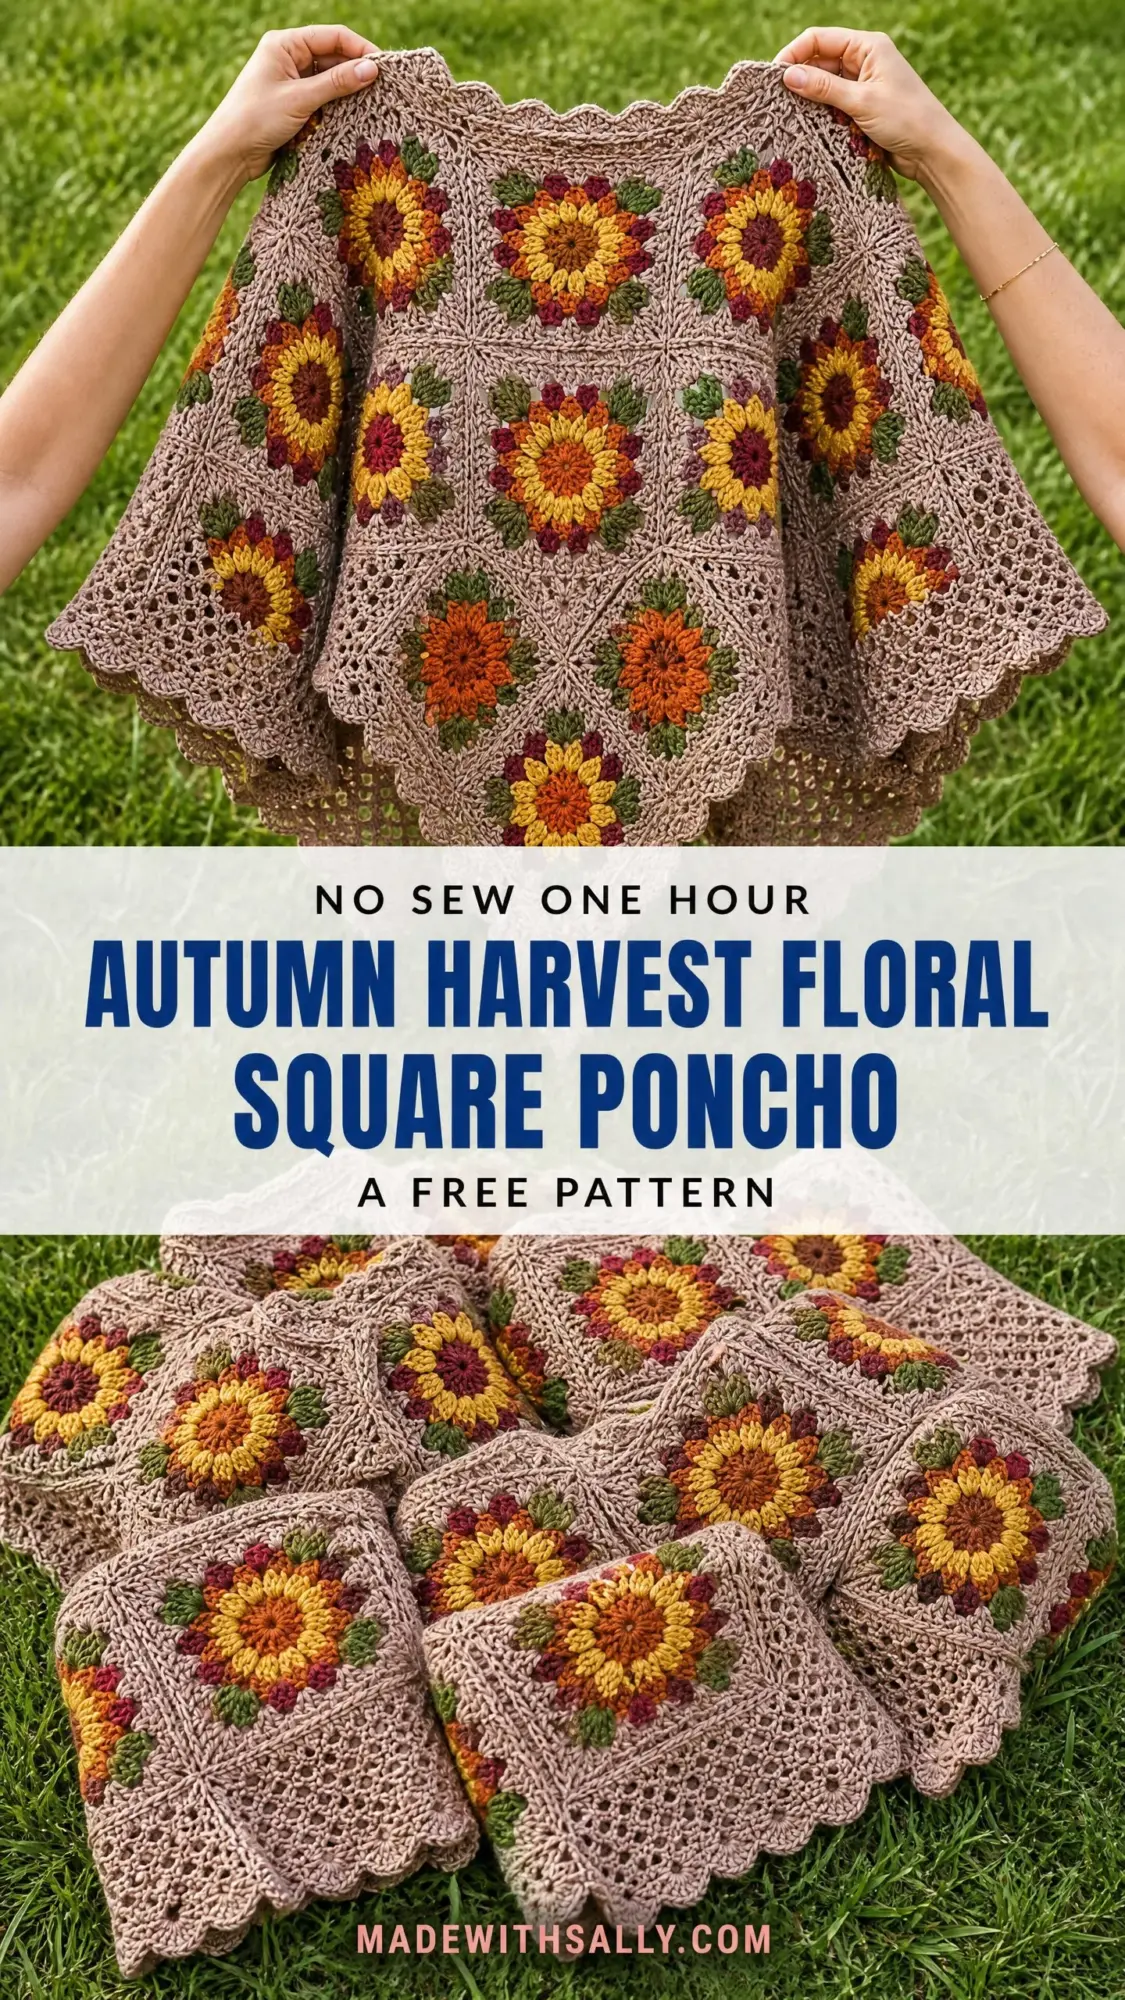
Last fall, I finally pulled it out and got to work. I made this poncho for my sister, who loves anything bohemian and lives for vintage 1970s vibes. She wore it to a pumpkin patch and got stopped four times by strangers asking where she bought it.
Now I am sharing it with you. This Autumn Harvest Floral Square Poncho combines sunflower granny squares in rich autumn colors with a relaxed, flowy silhouette that looks complicated but really comes down to making squares and joining them together.
Why You Will Love This Crochet Pattern
This poncho hits that sweet spot between impressive and achievable. Yes, you are making 32 individual squares. But each square follows the same straightforward pattern, so by the time you finish your fifth one, your hands will know the rhythm by heart.
The construction is simple at its core. You make squares. You block them. You join them. You add some pretty edging. That is genuinely the whole process.
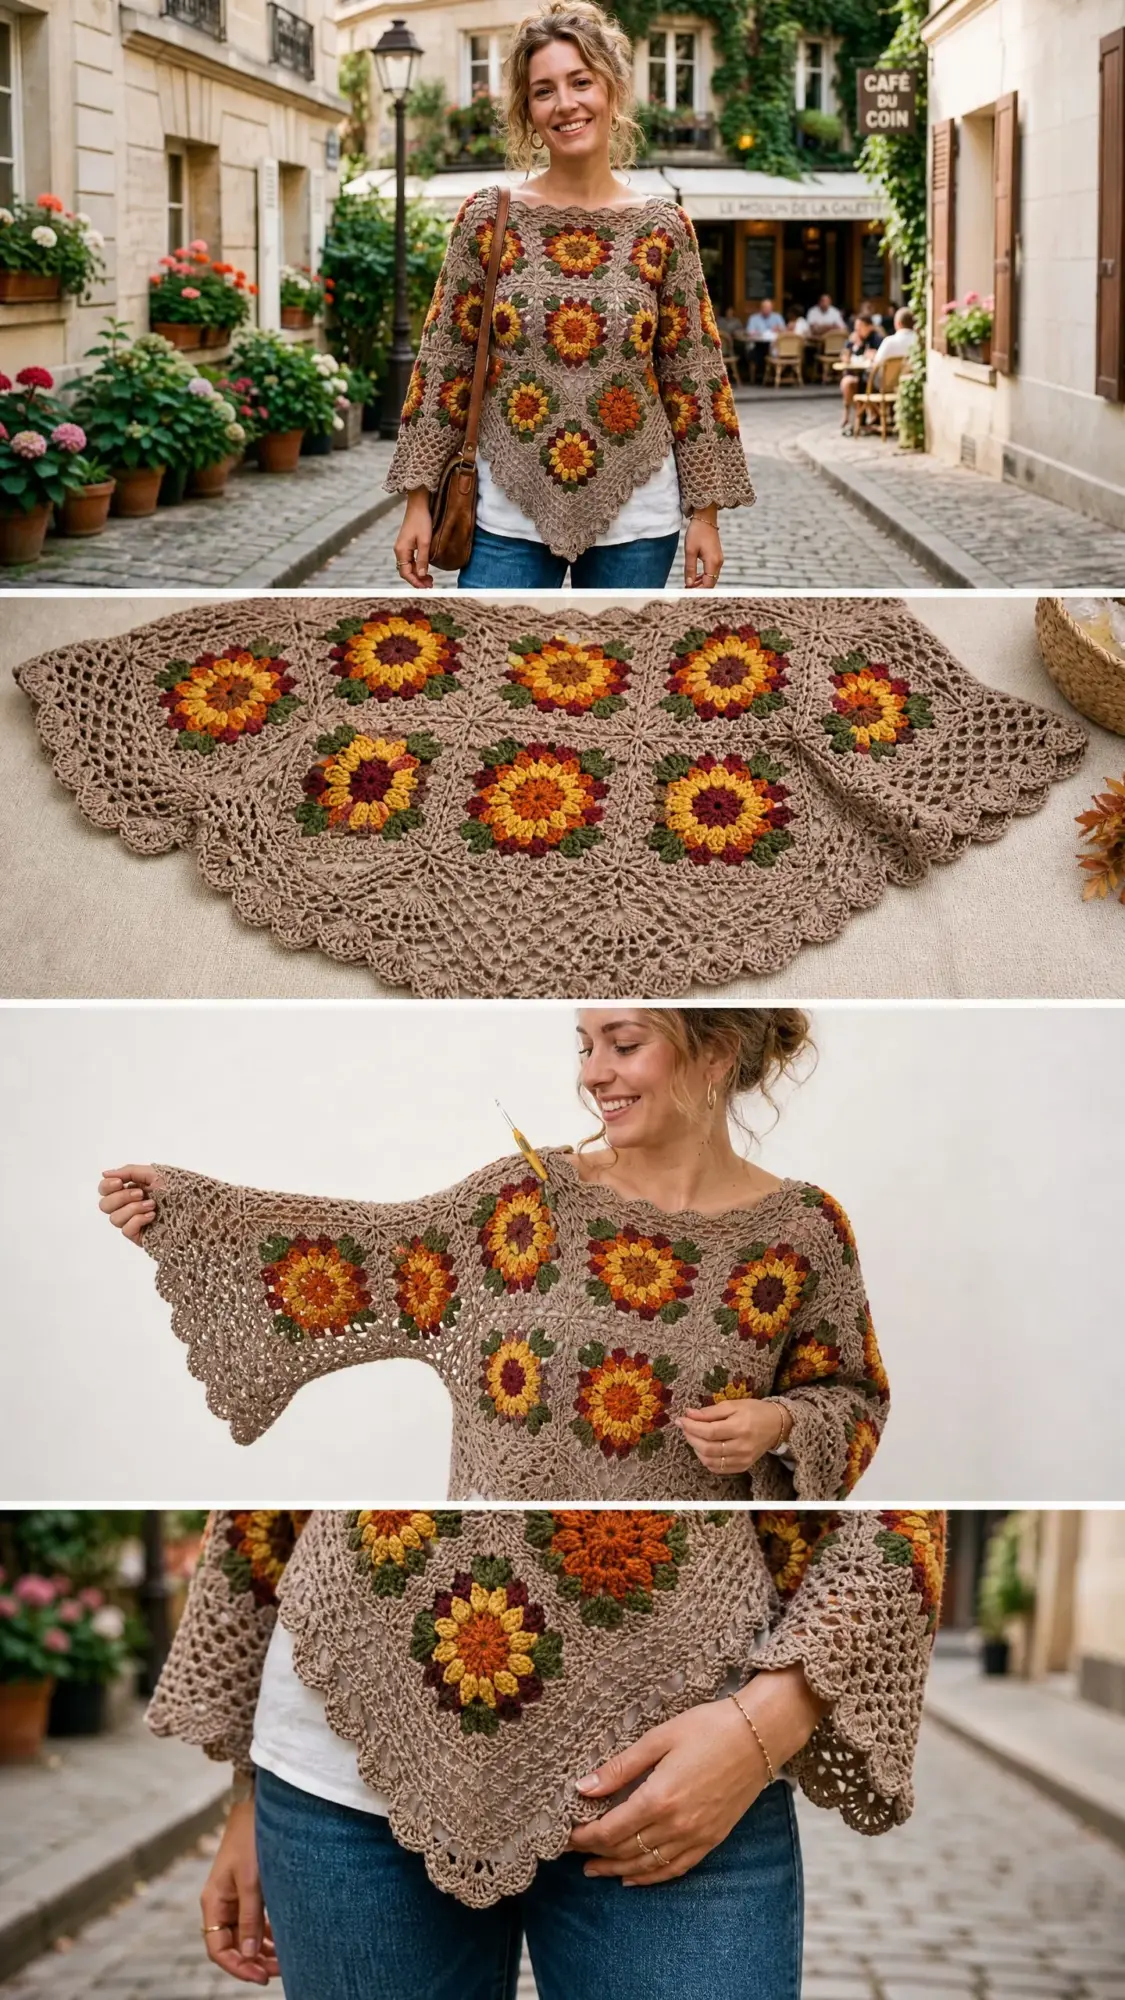
What makes this piece special is the color work. The sunflower motifs pop against the taupe background, and those autumn shades of golden yellow, burnt orange, dark burgundy, and olive green create something that looks like it belongs in a cozy European café. The photo reference shows exactly this vibe, with the poncho draping beautifully over a simple white tee and jeans.
Skill Level and Time Commitment
This is an intermediate level crochet pattern. You should be comfortable with:
No advanced shaping here. The poncho gets its shape entirely from how the squares are arranged and joined. If you can make a granny square and change colors neatly, you can absolutely make this poncho.
Time estimate: Plan for 40 to 60 hours total. That sounds like a lot, but spread it over a few weeks of evening crocheting and movie watching, and it flies by.
Finished Measurements
This pattern fits most sizes, approximately US Small through Large, which covers a bust measurement of 34 inches to 44 inches (86 cm to 112 cm). The poncho is designed with generous ease and drapes loosely, which is part of its charm.
Materials Needed
Yarn
You will need worsted weight yarn (weight category 4) in five colors:
Total yarn needed: approximately 1450 yards / 1326 m across all colors
Yarn Suggestions
Lion Brand Fishermen’s Wool works beautifully here. It is 100 percent wool, gives excellent stitch definition, and blocks like a dream. At 465 yards per 8 oz skein, you will need about 2 skeins of taupe and partial skeins of the accent colors.
Cascade 220 is another great choice. It comes in a huge color range, so matching those autumn tones is easy.
If you prefer something lighter, try Paintbox Yarns Simply DK held double. This gives you similar weight with even more color options.
Important: Choose a smooth, plied yarn with good stitch definition. Avoid fuzzy or bouclé textures because they will hide your pretty floral details.
Hook and Notions
Gauge
One completed granny square, blocked = 5 inches x 5 inches / 12.5 cm x 12.5 cm
In double crochet fabric: 14 dc x 8 rows = 4 inches x 4 inches / 10 cm x 10 cm using US J-10 / 6.0 mm hook
Gauge matters here. All 32 squares need to be the same size, or your poncho will not lie flat. Make a test square, block it, and measure. Go up a hook size if your square is too small. Go down if it is too big.
Abbreviations (US Terms)
Special Stitches
Popcorn Stitch
This creates the textured sunflower petals in Round 2. Here is how to do it:
1. Work 5 double crochet stitches into the same stitch or space.
2. Remove your hook from the working loop.
3. Insert the hook from front to back through the top of the first of those 5 dc stitches.
4. Pick up the dropped loop and pull it through the top of that first dc.
5. Chain 1 to close the popcorn.
That chain 1 at the end is important. It locks everything in place.
Shell Stitch
Work (2 dc, ch 2, 2 dc) all into the same stitch or space. This makes one shell.
Scallop Edging
1. Slip stitch into the first stitch.
2. Chain 3.
3. Work 4 dc into the same stitch.
4. Skip 2 stitches.
5. Slip stitch into the next stitch.
6. Repeat across, ending with a slip stitch into the final stitch.
Join As You Go (JAYG)
When working the final round of each new square, join to adjacent completed squares like this: when you reach a corner ch-2 space or side chain space that aligns with an edge of a completed square, work ch 1, slip stitch into the corresponding space of the completed square, ch 1 (instead of the normal ch 2 for corners or ch 1 for sides), then continue your round. This creates flat, nearly invisible seams.
Sunflower Granny Square Instructions
Make 32 squares total.
Round 1 (CC, Dark Burgundy)
Make a magic ring.
Chain 3 (this counts as your first dc throughout the pattern). Work 11 dc into the magic ring. Pull the ring closed tightly.
Join with sl st to the top of your beginning ch-3.
Fasten off CC.
Stitch count: 12 dc (including the beginning ch-3 as one dc)
Round 2 (CA, Golden Yellow)
Join CA to any st with sl st.
Chain 3 (counts as the first dc of your first popcorn).
Work 4 more dc into same st (5 dc total in this st). Remove hook, insert from front to back through top of ch-3, pick up dropped loop, pull through. Ch 1 to close. First popcorn complete.
Chain 2.
Skip 1 st.
Work popcorn stitch into next st.
Chain 2.
Rep (skip 1 st, popcorn into next st, ch 2) around until 6 popcorns are complete.
Join with sl st to top of first popcorn.
Fasten off CA.
Stitch count: 6 popcorns, 6 ch-2 spaces
Round 3 (CB, Burnt Orange)
Join CB to any ch-2 sp.
Chain 3 (counts as first dc).
Work 2 more dc into same ch-2 sp (3 dc total in first sp).
Chain 1.
Work 3 dc into next ch-2 sp.
Rep (ch 1, 3 dc into next ch-2 sp) around for all 6 sp, working the last ch 1.
Join with sl st to top of beginning ch-3.
Fasten off CB.
Stitch count: 18 dc total (6 groups of 3 dc), 6 ch-1 spaces
Round 4 (CD, Olive Green)
Join CD to any ch-1 sp.
Chain 3 (counts as first dc).
Work 2 more dc into same ch-1 sp.
Chain 1.
Work 3 dc into same ch-1 sp again (this creates 3 dc, ch 1, 3 dc into one sp).
Ch 1 between each group pair.
Rep around all ch-1 spaces.
Join with sl st to top of beginning ch-3.
Fasten off CD.
Stitch count: 36 dc total (12 groups of 3 dc), 12 ch-1 spaces
Round 5 (MC, Taupe)
This round transforms your circular flower into a square. The 12 ch-1 spaces become the framework. Corners go at every 3rd space (positions 1, 4, 7, 10).
Join MC to the first corner position ch-1 sp.
Ch 3 (counts as dc).
Work (dc, ch 2, 2 dc) into same sp. Corner made.
Ch 1. Dc into next ch-1 sp. Ch 1. Dc into next ch-1 sp. Ch 1.
Work (2 dc, ch 2, 2 dc) into next ch-1 sp. Corner made.
Ch 1. Dc into next ch-1 sp. Ch 1. Dc into next ch-1 sp. Ch 1.
Rep (corner, ch 1, dc, ch 1, dc, ch 1) twice more around.
Join with sl st to top of beginning ch-3.
Fasten off MC.
Stitch count per side: 2 dc plus 2 ch-1 spaces. Four corners of (2 dc, ch 2, 2 dc). Total dc: 16. Total ch spaces: 12
Round 6 (MC, Taupe)
Join MC to any corner ch-2 sp.
Ch 3 (counts as dc).
Work (dc, ch 2, 2 dc) into same corner sp.
Ch 1. Work 2 dc into each ch-1 sp along side (2 sets of 2 dc). Ch 1 between each set.
Work (2 dc, ch 2, 2 dc) into next corner sp.
Rep around all four sides.
Join with sl st to top of beginning ch-3.
Fasten off MC.
Stitch count per side: 4 dc plus 3 ch-1 spaces. Four corners of (2 dc, ch 2, 2 dc). Total dc: 24. Total ch spaces: 16
Round 7 (MC, Taupe, Final Round)
This is your joining round. For the first square, work standard corners. For all subsequent squares, use JAYG where edges meet completed squares.
Join MC to any corner ch-2 sp.
Ch 3 (counts as dc).
Work (dc, ch 2, 2 dc) into same corner sp.
Ch 1.
Work (2 dc, ch 1) into each ch-1 sp across the side.
Work (2 dc, ch 2, 2 dc) into next corner sp.
Rep across all four sides.
Join with sl st to top of beginning ch-3. Fasten off.
Stitch count per side: 6 dc and 3 ch-1 spaces plus corner. Total dc per square: 40. Total ch spaces: 16
Checkpoint
Each blocked square should measure exactly 5 inches x 5 inches / 12.5 cm x 12.5 cm. Make adjustments to your hook size if needed before continuing.
Assembly Layout
The poncho body forms a cross shape when laid flat.
Front Panel: 3 squares wide by 3 squares tall = 9 squares
Back Panel: Same arrangement = 9 squares
Front Point: 1 additional square joined below the bottom center of the front panel
Back Point: 1 additional square joined below the bottom center of the back panel
Left Sleeve: 3 squares wide by 2 squares tall = 6 squares
Right Sleeve: 3 squares wide by 2 squares tall = 6 squares
Total: 32 squares
Join the front and back panels along their top edges for shoulder seams. Leave the center 3 squares unjoined on each panel to create the neckline opening.
Join the side edges of front and back panels, leaving the top two rows open on each side for arm openings.
Attach sleeve panels to the arm openings by joining the 3-square-wide edge of the sleeve to the body. Seam the underarm edges to form tubes.
Neckline Edging
Join MC to any st along the inner neckline opening edge with sl st.
Round 1: Ch 1. Work 1 sc into each dc and 1 sc into each ch-1 sp around the entire neckline opening. Work 3 sc into each outer corner and sc2tog at each inner corner. Join with sl st to first sc. (84 sc)
Round 2: Ch 1. Work 1 sc into each sc around. Join. (84 sc)
Round 3: Work Scallop Edging around entire neckline. Skip 2 sts, work 5 dc into next st, skip 2 sts, sl st into next st. Rep around. (14 scallops) Join and fasten off.
Hem and Sleeve Cuff Edging
Hem Edging:
Join MC to any corner or edge st at the hem perimeter.
Round 1: Ch 1. Work 1 sc into each dc and each ch-sp along entire hem perimeter. At each outward corner (including front and back points), work 3 sc into the corner ch-2 sp. At each inward corner, sc2tog. Adjust count to a multiple of 6. Join. (Multiple of 6 sc)
Round 2: Ch 1. Work 1 sc into each sc around. Join.
Round 3: Work Scallop Edging around full hem perimeter. Join and fasten off.
Sleeve Cuff Edging (work on each sleeve):
Join MC to any st at the cuff opening edge.
Round 1: Ch 1. Work 1 sc into each dc and ch-sp around cuff opening. Join. (42 sc)
Round 2: Ch 1. Sc in each st around. Join. (42 sc)
Round 3: Work Scallop Edging. (7 scallops) Join and fasten off.
Repeat for second sleeve.
Size Customization
To make larger: Add one more MC round (Round 8) before the joining round. This adds approximately 1 inch per side to each square.
To make smaller: Eliminate Round 6 and make Round 7 your second MC round. This shrinks each square to approximately 4 inches.
To lengthen the body: Add an extra row of squares at the bottom of front and back panels before the point square.
To lengthen sleeves: Add 3 more squares per sleeve for approximately 5 extra inches of length.
Finishing and Blocking
Weave in all ends securely. Weave through at least 3 to 4 different direction paths to prevent unraveling.
For wet blocking: Submerge the poncho in cool water. Gently press out excess water without wringing. Lay flat on blocking mats and pin to finished measurements. Allow to dry completely, which takes 24 to 48 hours.
For steam blocking: Pin the poncho to blocking mats while dry. Hold a steam iron 1 to 2 inches above the surface without touching the fabric. Apply steam and smooth with hands while warm. Allow to cool completely.
Care Instructions
For 100 percent wool: Hand wash in cool water with wool-safe detergent. Do not agitate. Press out water gently. Lay flat to dry. Never tumble dry or hang.
For wool blends or superwash: Machine wash on gentle cycle in a mesh laundry bag with cool water. Lay flat to dry.
Store folded to prevent stretching.
Final Thoughts on This Crochet Tutorial
Making this Autumn Harvest Floral Square Poncho is a journey, not a sprint. Take your time with each square. Put on a good audiobook or your favorite show. Before you know it, you will have a pile of cheerful sunflowers waiting to become something beautiful.
The step by step process might feel repetitive, but that repetition is actually a gift. It means you can crochet without thinking too hard, and by the end, you will have mastered the sunflower granny square pattern so thoroughly that you could make it in your sleep.
Thank you so much for choosing this pattern. I genuinely hope you love making it as much as I loved designing it. If you finish your poncho, I would absolutely love to see it. Tag me on Instagram or share it in my Facebook group. Nothing makes my day quite like seeing your versions come to life.
If this pattern is calling your name, go ahead and pin it to your Pinterest boards so you can find it when you are ready to start. And once you make it, please come back and leave a comment below. I read every single one, and I love hearing how your projects turn out.
