
This is ONE of those projects that will absolutely stop people in their tracks. I’m talking genuine "where did you get that?!" reactions every single time you wear it. Yes, it takes some time. Yes, it requires focus. But the payoff? A stunning handcrafted lace collar that looks like it belongs in a museum or a high-end boutique.
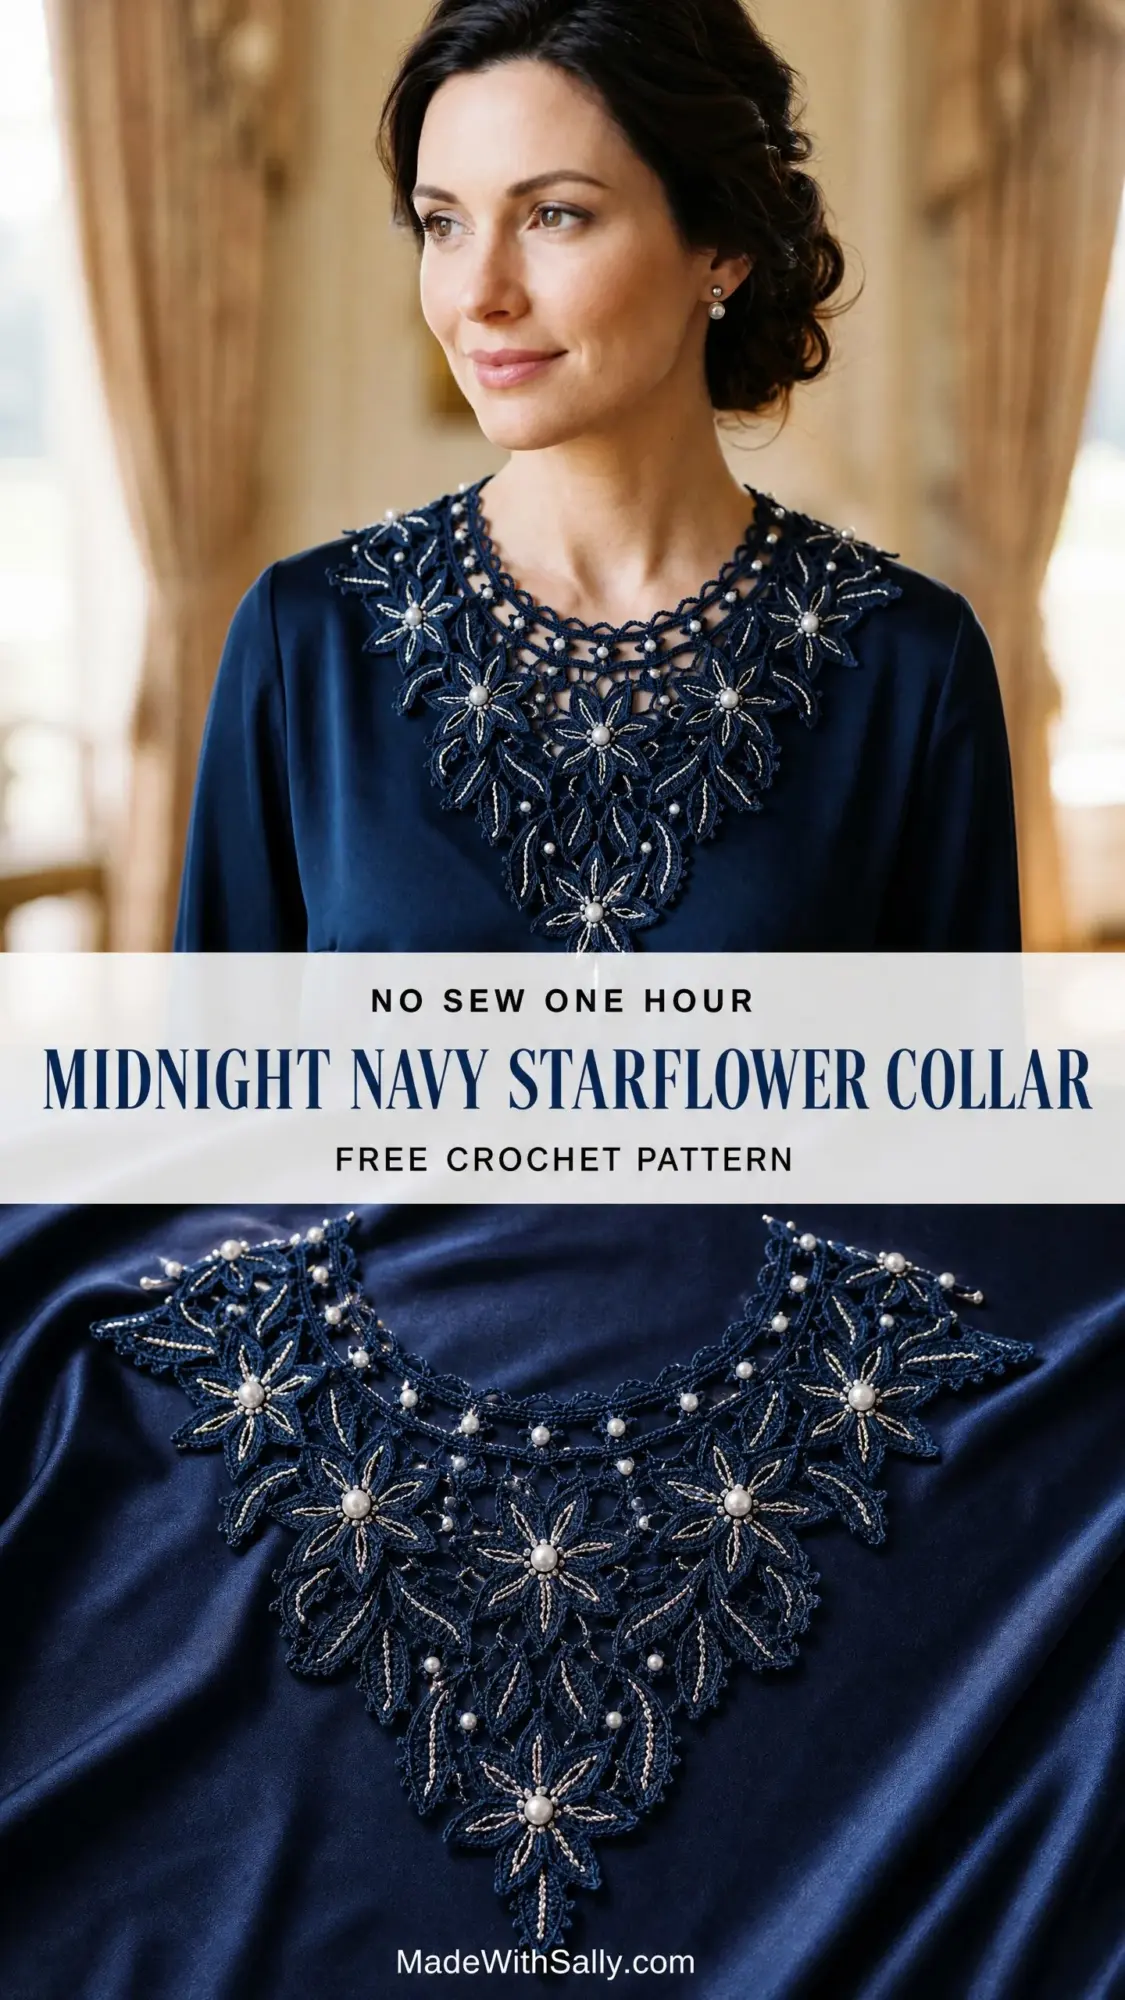
I won’t sugarcoat it. This is an advanced pattern that demands patience and attention to detail. But if you’ve been craving a project that truly challenges you and results in something breathtakingly beautiful, this is your moment. The starflower motifs, the pearl bead accents, the metallic silver threading through each petal. Every element comes together to create wearable art.
So grab your finest crochet thread, clear your schedule for a few dedicated crafting sessions, and let’s make something extraordinary together.
About This Midnight Navy Starflower Collar Crochet Pattern
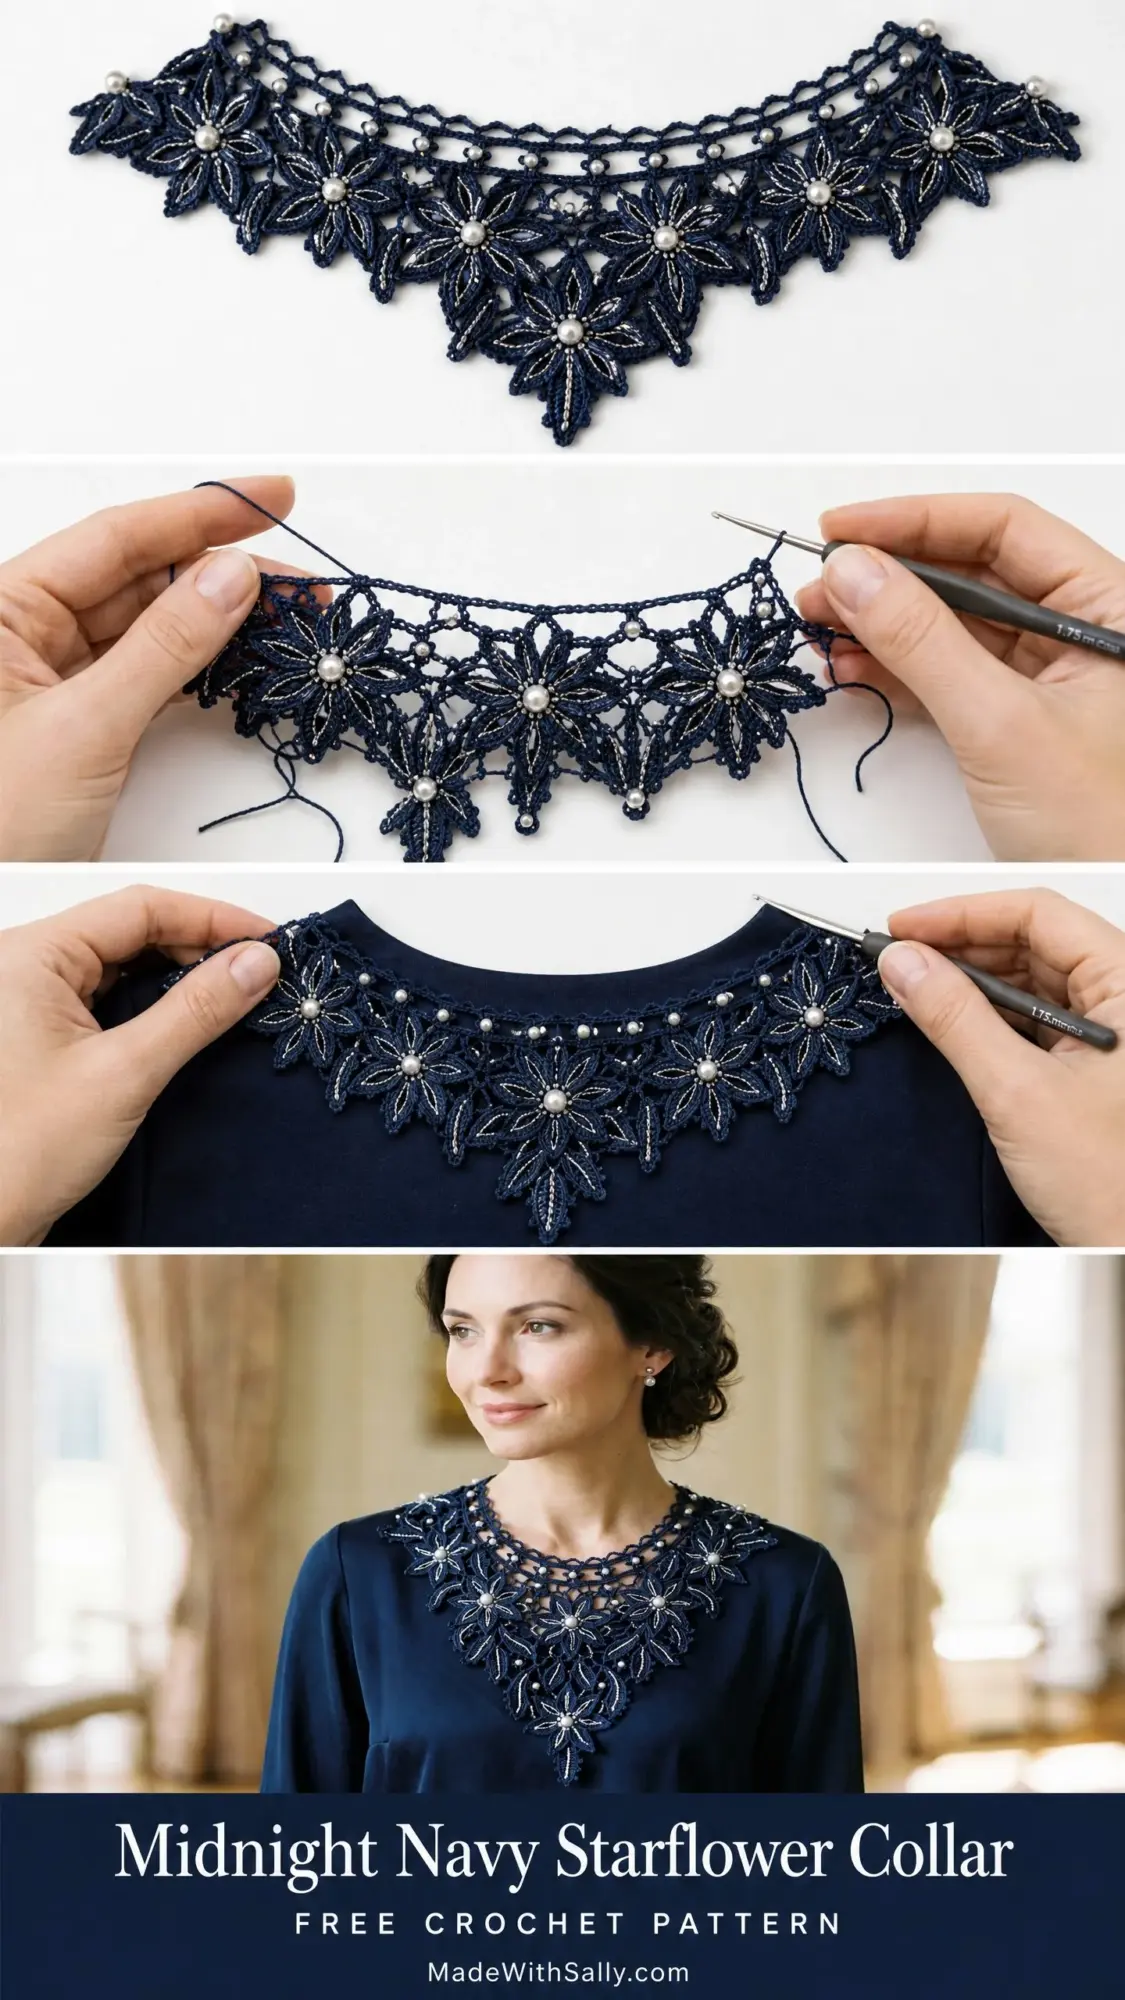
This decorative collar sits beautifully at the neckline and cascades down toward a central V-shaped point at the chest. Think elegant bib-style lace overlay. The design features repeating eight-petal starflower motifs arranged in a fan formation, with each flower center anchored by a gorgeous pearl bead accent.
The two-tone effect you see comes from silver metallic thread woven through the petals alongside the navy cotton. It catches the light and adds that subtle shimmer that elevates the entire piece.
Construction starts at the neckband, which serves as your foundation. From there, motifs are built downward in joined rows, expanding outward to create that cascading bib shape. The collar fastens invisibly at the back of the neck with a simple button-and-loop closure tucked within the neckband.
Skill Level
Advanced. This pattern requires comfort with working in fine thread, joining motifs as you go, placing beads mid-stitch, and managing delicate gauge. The motif join-as-you-go technique requires precise counting, and the shaped motif arrangement demands careful attention to placement order.
Don’t let that intimidate you though. If you’ve tackled doilies, worked with thread before, or completed other lace projects, you have the skills to do this.
Time Estimate
Plan for 20 to 28 hours of work if you’re an experienced lace crocheter working at a comfortable pace. Allow additional time for bead placement and blocking. This isn’t a weekend project, but it’s absolutely worth every minute invested.
Finished Measurements
After wet blocking, your completed collar will measure:
Materials Needed
Thread A (Main Color):
Size 10 crochet cotton thread in navy or midnight blue, approximately 350 yards (320 m)
Thread B (Accent):
Size 10 crochet cotton or cotton-blend thread with a fine metallic silver ply, approximately 80 yards (73 m)
Hooks:
Notions:
Yarn Suggestions
For Thread A, I recommend DMC Cebelia Size 10 Crochet Cotton in color 823 (Dark Navy Blue). This mercerized cotton has excellent stitch definition, minimal stretch, and holds a block beautifully. It’s widely available and consistent between dye lots. Alternatively, try Lizbeth Size 10 Crochet Cotton by Handy Hands in shade 672 (Navy Blue) for a slightly softer hand.
For Thread B, Anchor Artiste Metallic Fine Thread in Silver (col. 303) works perfectly. This fine metallic is thin enough to carry alongside size 10 cotton without distorting gauge. Madeira Glamour No. 8 in Silver is another excellent option.
Important substitution note: Thread A must be size 10 (bedspread weight) mercerized cotton or linen-cotton blend. Do not substitute with heavier thread, as the motifs will lose their delicate open structure. Thread B must be fine enough that when held together with Thread A, it doesn’t exceed the gauge listed below. Always test a swatch before committing to a substitute.
Gauge
With size 7 (1.65 mm) hook and Thread A:
Gauge is critical for this collar. A motif even 0.25 inch larger or smaller will alter the finished dimensions noticeably because motifs are joined in a precise geometric arrangement. Work a test motif, block it, and measure it dry before proceeding with the full collar.
Abbreviations and Stitch Definitions
Let me walk you through every stitch and abbreviation you’ll encounter. Even if you’re experienced, take a moment to review these since lace crochet sometimes uses terms differently than regular patterns.
Special Stitches
Starflower Petal (8-petal version):
Each petal is made as follows: ch 6, tr in 4th ch from hook, tr in next ch, sl st in last ch. This creates one elongated petal lobe. The collar uses a ring of 8 such petals with a pearl bead at center.
Picot (3-chain picot):
Ch 3, sl st in first ch of those 3 chains. This creates a small loop bump used throughout the edging and connecting chain arches.
Place Bead (pb):
Before beginning the collar, pre-string all 42 pearl beads onto Thread A using a beading needle. Push all beads down the thread and slide one bead up to the hook when a pb instruction is given. Work the stitch as normal, but before drawing the final loop through, slide the bead snug against the work so it sits on the RS of the piece.
Join-As-You-Go Motif Join (JAYG):
When instructed to join a new motif to a completed motif, at the joining picot or chain-space of the new motif, work to the midpoint of the joining chain, then sl st into the corresponding ch-sp or picot of the adjacent completed motif, then complete the remaining chains of that joining chain and continue the new motif.
Shell:
(2 dc, ch 2, 2 dc) all in same stitch or space.
V-stitch:
(dc, ch 2, dc) all in same stitch or space.
Arch:
A chain bridge of specified length joining two points, used in the connecting network between motifs.
Important Pattern Notes
1. Pre-string all 42 beads onto Thread A before beginning. This is mandatory because beads cannot be added after the thread is cut.
2. The collar is constructed in three phases. Phase One is the neckband. Phase Two is the upper motif row (Row 1 of motifs), attached directly to the lower edge of the neckband. Phase Three is the cascading lower motif section, worked downward in three additional motif rows.
3. Right side is the public-facing side. Work with RS facing for all motif rounds after the initial foundation chain.
4. Thread B creates the metallic accent lines visible along the center rib of each petal. It’s held together with Thread A during specific accent rounds of each motif.
5. The neckband is a short rectangle of single crochet worked with the size 6 (1.80 mm) hook to create a slightly firmer edge.
6. Motif placement: The collar contains 21 starflower motifs total, arranged in four horizontal rows. Row 4 (top, nearest neck) has 5 motifs. Row 3 has 6 motifs. Row 2 has 7 motifs. Row 1 (bottom center) has 3 motifs forming the V-point.
7. Block aggressively with rustproof pins to open the lace and define the petal shapes. The collar will look stiff before blocking but will lie flat and drape correctly afterward.
Step-by-Step Instructions
Section 1: Neckband
The neckband is the structural backbone of the collar. Work it with Thread A and the size 6 (1.80 mm) hook in flat rows of single crochet.
Foundation Chain:
With Thread A and size 6 hook, ch 151.
Row 1 (WS): Sc in 2nd ch from hook and in each ch across. Turn. (150 sc)
Row 2 (RS): Ch 1, sc in each sc across. Turn. (150 sc)
Row 3 (WS): Ch 1, sc in each sc across. Turn. (150 sc)
Row 4 (RS): Ch 1, sc in each sc across. Turn. (150 sc)
Row 5 (WS): Ch 1, sc in each sc across. Turn. (150 sc)
The neckband is now 5 rows tall. Do not fasten off.
Button Loop:
With RS facing, at the right end of the neckband (left side of neck as worn), sl st to the corner of row 5. Ch 7, sl st back into the same corner st to form a loop. Fasten off and weave in end.
Button Placement:
Using sewing thread, sew the small shank button to the WS of the left end of the neckband (right side of neck as worn) at center height, approximately 0.25 inch (6 mm) from the end edge.
Checkpoint: Your neckband should measure approximately 15 inches (38 cm) long and 0.5 inch (1.3 cm) tall. It should be flat and slightly firm.
Section 2: Individual Starflower Motif
Each of the 21 starflower motifs follows the same construction. Work the first motif without any joins to learn the technique.
Round 1 (Center Ring):
With Thread A and size 7 hook, make a MR.
Ch 3 (counts as first dc), work 15 dc into the ring. Pull ring tight to close center. Join with sl st to top of beg ch-3. (16 dc total)
Before joining Round 1, slide 1 pearl bead up to the hook. Insert the bead into the center of the ring by pulling the tail snug so the bead sits on the RS at center. Secure by tightening the magic ring tail around the bead base.
Round 2 (Petal Base Ring):
Ch 1 (does not count as st), sc in same st as join.
(Ch 5, skip 1 dc, sc in next dc) 7 times.
Ch 5, skip 1 dc, join with sl st to first sc. (8 ch-5 loops, 8 sc)
Round 3 (Petal Body):
Hold Thread A and Thread B together for this round only.
Working into each ch-5 loop:
Sl st into first ch-5 loop.
(Ch 1, 5 dc, 5 dc, ch 1, sl st into same ch-5 loop, sl st to next sc, sl st into next ch-5 loop) 8 times.
Join with sl st to first sl st of the round. Drop and cut Thread B leaving a 4-inch (10 cm) tail. Continue with Thread A only. (8 petals completed)
Round 4 (Outer Picot Edge):
Join to the tip of petal 1.
(Ch 3, picot, ch 3, sl st to tip of same petal, ch 4, sl st to base of next petal between petals, ch 4, sl st to tip of next petal) repeat 8 times total, joining final repeat to first ch-3. (8 picots)
For subsequent motifs: Replace the picot of any joining petal tip with a JAYG join: ch 3, sl st into the corresponding picot of the adjacent completed motif, ch 0 (return), sl st to current petal tip, and continue.
Checkpoint: One completed motif, unblocked, should measure approximately 1.5 inches (3.8 cm) across. After blocking it will measure 1.75 inches (4.5 cm).
Section 3: Collar Assembly
Motif Row 4 (5 motifs, attached to neckband)
First, create a foundation attachment row along the neckband bottom edge:
Join Thread A to the bottom-left corner st of the neckband.
Ch 1, sc in same st. Sc in each sc across the bottom edge of Row 1 of the neckband. (150 sc)
Fasten off.
Spacing: Place stitch markers at sc positions 15, 45, 75, 105, and 135 (counting from left edge). These are your 5 motif attachment points.
Work each motif through Round 3, then on Round 4, join the top petals to the neckband at the marked positions. Join adjacent motifs at their side-facing petals using JAYG.
Motif Row 3 (6 motifs)
These motifs stagger between the Row 4 motifs in a brick-offset arrangement. Each Row 3 motif nestles between two Row 4 motifs above it, connecting to their bottom picot points.
R3-M1 and R3-M6 are the outer edge motifs with one free outer petal each.
Motif Row 2 (7 motifs)
Row 2 sits below Row 3 in the same staggered pattern. R2-M1 and R2-M7 are the outer edge motifs.
Checkpoint: After Row 2 is complete, your piece should measure approximately 5.5 inches (14 cm) from neckband top to Row 2 bottom tips.
Motif Row 1 (3 motifs forming the V-point)
Three motifs form the lowest point. R1-M1 and R1-M3 are upper side motifs. R1-M2 is the center point motif.
For R1-M2, the bottom-facing petal gets a special extended picot: ch 5, picot, ch 5, sl st to petal tip. This creates the elongated tip at the very bottom of the collar.
Section 4: Outer Edging
Join Thread A to any free outer picot on the left outer edge.
Work around the full perimeter:
(Sl st into picot, ch 3, picot, ch 3) repeat around all outer free picots.
At outer corner petals, work: sl st into picot, ch 4, picot, ch 4.
Continue until you return to the starting picot. Join with sl st. Fasten off and weave in end.
Size Customization Tips
For a larger neck (16 to 18 inches): Add 2 stitches to the foundation chain for every 0.2 inch of additional length needed. Add one more motif to Row 4 (making 6), adjust Row 3 to 7 motifs, Row 2 to 8 motifs. Row 1 stays at 3 motifs. Add 2 more beads.
For a shallower collar (about 5 inches depth): Omit Row 1 entirely and stop after Row 2.
For a child size (approximately 12 inch neck): Begin with a foundation chain of 121. Work 4 motif rows with counts of 4, 5, 6, and 2. Requires approximately 240 yards Thread A and 28 beads.
Finishing and Blocking
Weave in all Thread B tails securely, passing through at least 4 stitches in opposite directions before trimming. Do the same for all Thread A tails.
Check that all 42 beads are secure. For any loose bead, thread the tail through the bead hole a second time and tie a small overhand knot behind it.
Wet Blocking:
Fill a basin with cool water and a small amount of wool wash. Submerge the collar and gently squeeze to saturate. Let soak 10 minutes. Lift out and roll in a clean towel to remove excess water.
Lay the collar RS up on a blocking board. Pin the neckband straight using T-pins every 0.75 inch. Work downward, gently pulling each petal tip open and pinning each outer picot. The motif diameter will open from approximately 1.5 inches to the target 1.75 inches.
Allow to dry completely (12 to 24 hours) before unpinning.
Care Instructions
Hand wash in cool water with gentle detergent. Do not machine wash or wring. Roll in a towel to remove water. Re-block flat to dry if the collar has lost its shape. Store flat or loosely rolled. Avoid prolonged direct sunlight to preserve the deep navy color.
I hope you absolutely love making this collar as much as I loved designing it. It’s one of those projects that reminds you why you fell in love with crochet in the first place. Thank you so much for choosing this pattern for your next adventure!
If you make this stunning collar, I would love to see it! Tag me on Instagram or share your finished piece in our Facebook group. Nothing makes my day quite like seeing your beautiful work.
This is definitely one of those patterns you’ll want to keep handy for future reference. Go ahead and save it to your Pinterest boards so you can find it easily when you’re ready to start. And please drop a comment below if you give this one a try. I’d love to hear how it turns out for you!
