
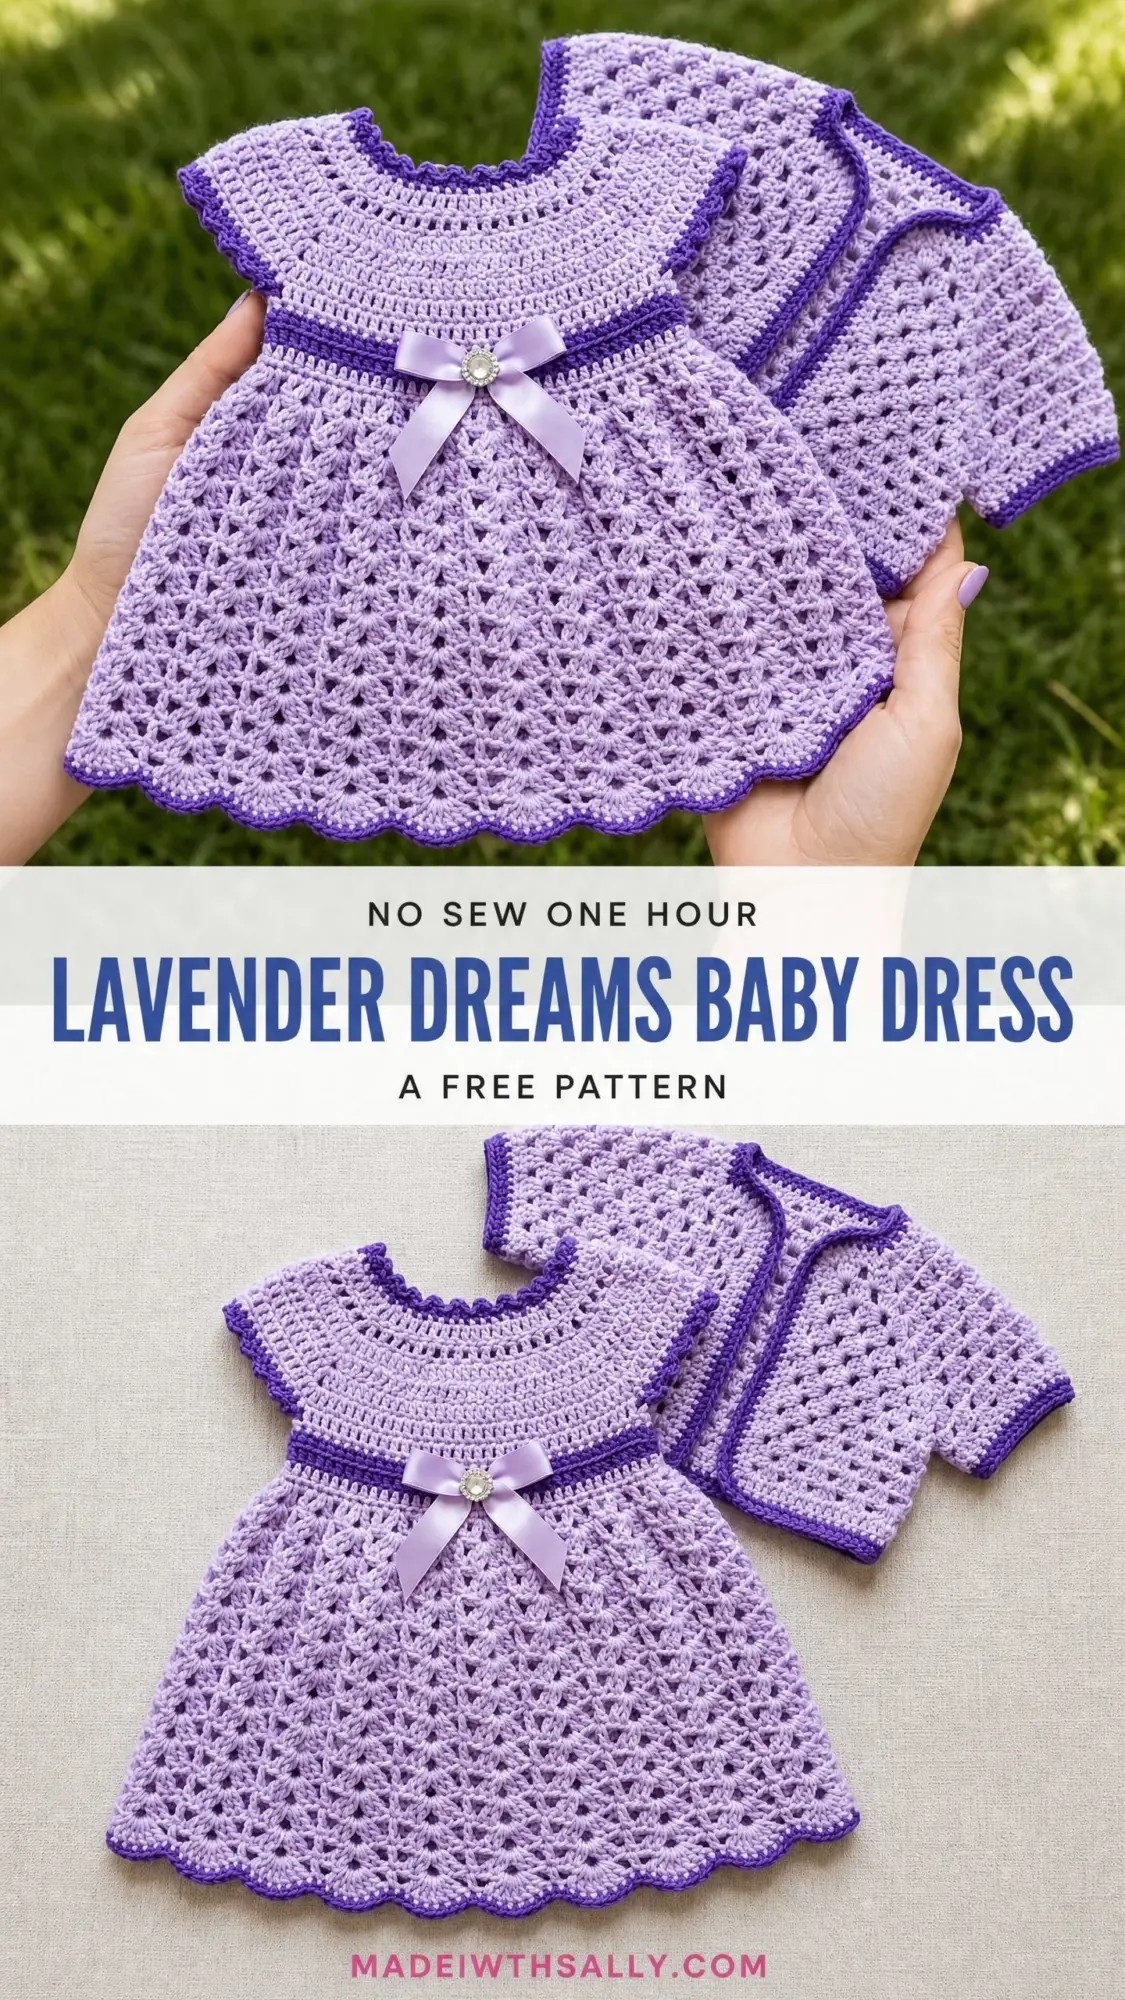
This pattern is EVERYTHING. I’m talking about a showstopper baby dress and matching bolero set that looks like it took weeks to make but actually works up in a weekend. The shell and V-stitch lace pattern creates the most gorgeous texture, and that sweet little satin bow at the waist? Absolute perfection for baby showers, christenings, or any special occasion.
If you’ve been wanting to try your hand at a baby garment that goes beyond basic, this is your moment. The construction is clever but totally manageable. You start at the neckline and work your way down, which means you can try it on a teddy bear as you go to check the fit.
Trust me when I say this set will have everyone asking "did you really MAKE that?" The answer is yes, you did, and you’re going to feel so proud when you see it come together.
About This Baby Dress Crochet Pattern
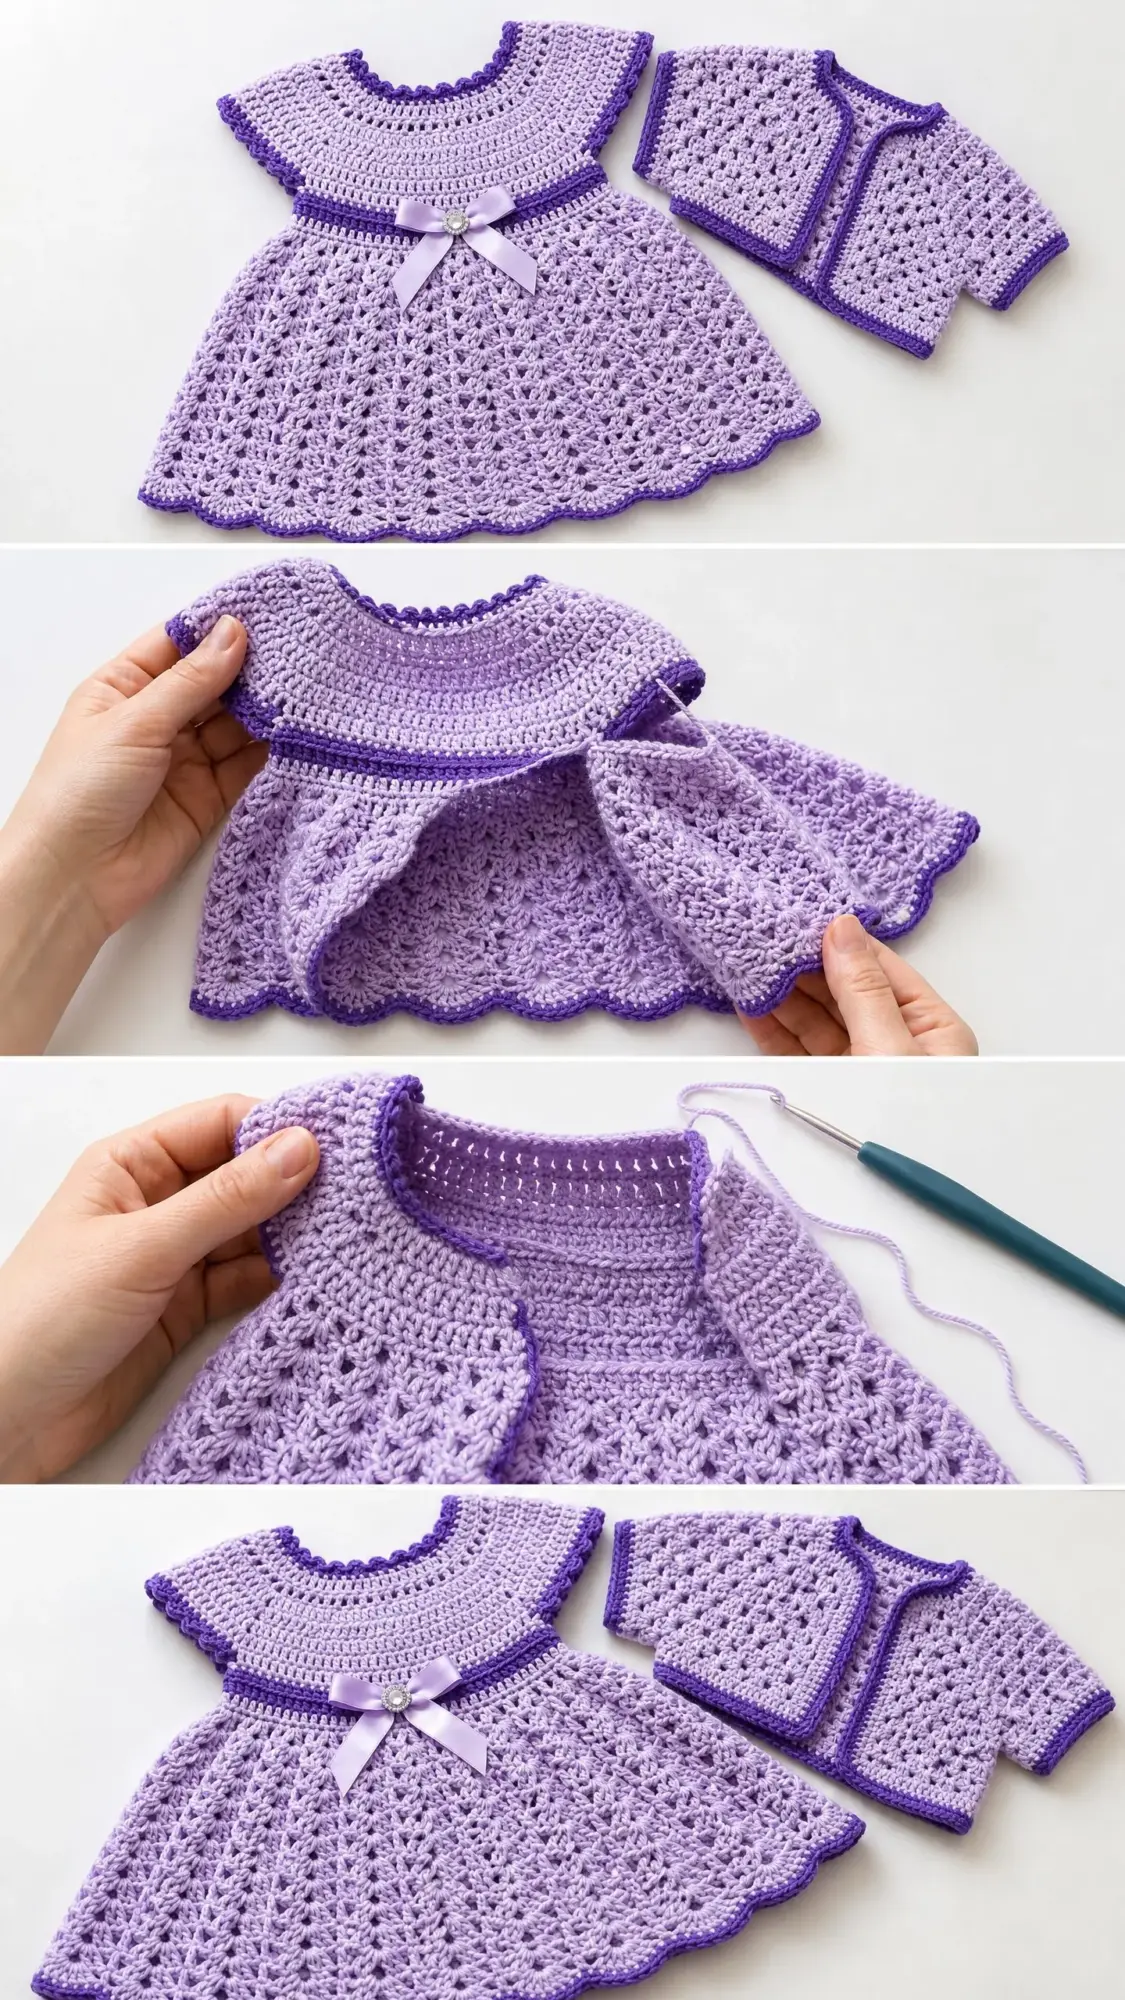
This heirloom-quality baby dress and matching bolero set features two coordinating shades of purple: a soft lavender as the main color and a deeper violet for the contrast trim. The dress is constructed top-down in the round, beginning at the neckline and expanding through the yoke with evenly spaced increases. Then it transitions into a beautiful repeating shell and V-stitch lace pattern for the skirt.
The hem and all contrast trim edges get finished with a delicate scallop border. A satin ribbon threaded through a waistline channel and tied in a bow with a pearl button center provides that gorgeous decorative accent at the empire waist. The bolero is worked separately using a granny-style shell panel construction, then seamed at the shoulders with contrast slip stitch edging framing the front opening, neck, and sleeve edges.
Together these two pieces form a complete special occasion set sized for infants 6 to 12 months.
Skill Level
This pattern is rated Intermediate. It uses basic stitches throughout but requires comfort with top-down yoke construction, working in the round, maintaining stitch counts across lace repeats, reading shell stitch patterns, and assembling a separate bolero with seaming and edging.
If you’re a beginner who has completed at least two garment projects, you should be able to follow this crochet tutorial successfully. Take your time with the lace sections and count your stitches carefully.
Time Estimate
Dress: approximately 8 to 12 hours
Bolero: approximately 4 to 6 hours
Total project: approximately 12 to 18 hours depending on your experience level
Finished Measurements
This pattern is written for size 6 to 12 months.
Materials Needed
Yarn: Light worsted weight (CYCA weight 3 or a slightly heavy DK)
Hook: US size G-6 / 4.0 mm
Notions:
Yarn Suggestions
Option 1: Lion Brand Pound of Love (100% acrylic, worsted weight, 1020 yards per skein). This yarn is soft, machine washable, and widely available. You will need approximately half a skein in lavender and a small amount in violet.
Option 2: Paintbox Yarns Simply DK (100% acrylic, DK weight, 137 yards per 50 g skein). Use a G-6 hook and check gauge carefully as this is a lighter DK. You will need 3 skeins in MC and 1 skein in CC.
Option 3: Cascade 220 Superwash (100% superwash merino wool, worsted weight, 220 yards per 100 g skein). Produces a beautiful drape and softness ideal for baby garments. Machine washable. You will need 2 skeins in MC and 1 skein in CC.
Substitution Note: Any smooth yarn in the CYCA 3 or light worsted category that achieves the stated gauge may be substituted. Avoid bulky or hairy yarns as they will obscure the lace pattern in the skirt. Always check that the yarn is baby-safe, hypoallergenic, and machine washable or easy to hand wash.
Gauge
With MC and G-6 hook, in shell and V-stitch pattern (one repeat = 6 stitches):
In single crochet fabric:
Gauge is critical for fit. Adjust hook size as needed to match gauge before beginning. I always recommend making a small swatch in the shell pattern to make sure your fabric has the right drape.
Abbreviations (US Terms)
Before we dive into the step by step instructions, let’s go over all the abbreviations you’ll encounter:
Special Stitches
These special stitch combinations create the beautiful texture in this baby dress crochet pattern:
Shell Stitch
Work 5 dc (double crochet) all into the same stitch or chain space. This creates a fan-shaped cluster that forms the primary texture of the skirt lace pattern. Think of it like a little scallop shell, which is where the name comes from!
V-Stitch (V-st)
Work 1 dc, ch 1, 1 dc all into the same stitch or chain space. The chain 1 forms the center of the V and serves as the anchor point for the next shell in the following round.
Scallop Edging
Step 1: Sl st into the indicated stitch.
Step 2: Ch 3 (counts as 1 dc).
Step 3: Work 2 more dc into the same stitch (3 dc total in this stitch).
Step 4: Skip 2 stitches.
Step 5: Sl st into the next stitch.
Step 6: Skip 2 stitches.
Step 7: Work 3 dc into the next stitch.
Repeat steps 4 through 7 across or around, adjusting final skipped stitches to complete the round evenly. The result is a gentle shell-scallop wave edging used at the hem and all contrast trim borders.
Picot Edge (used on neckline)
Step 1: Sc into indicated stitch.
Step 2: Ch 3.
Step 3: Sl st into the first ch made (back at the base of the ch-3).
Step 4: Sc into the next stitch.
Repeat steps 2 through 4 across or around. This creates tiny looped points along the neckline and all CC trim edges.
dc2tog (double crochet 2 together, used in bolero shaping)
Step 1: Yo, insert hook into indicated stitch, yo, pull up a loop, yo, pull through 2 loops (2 loops on hook).
Step 2: Yo, insert hook into next stitch, yo, pull up a loop, yo, pull through 2 loops (3 loops on hook).
Step 3: Yo, pull through all 3 loops on hook.
This completes one decrease.
Important Pattern Notes
Before you begin, please read through these notes carefully:
1. The dress yoke is worked in the round from the top down, beginning with a foundation chain joined into a ring.
2. The yoke uses single crochet with evenly spaced increases to create a flat circular panel that flares into the chest circumference.
3. At the underarm, stitches are placed on hold and new chains bridge the underarm gaps, allowing the skirt to be worked in the round continuously.
4. The skirt uses the shell and V-stitch lace repeat. Each full repeat requires 6 stitches: 1 V-st position + skip 2 + shell position + skip 2. The pattern is established in the first skirt round and maintained by working shells into the ch-1 sp of V-sts and V-sts into the center dc of shells from the previous round.
5. The bolero is worked in panels using a granny-style shell construction. A back panel and two front panels are worked flat, then joined at the shoulders and side-seamed, with sleeve openings left at the sides. All edges receive a CC slip stitch edging and then a picot finish.
6. All turning chains are noted in the instructions. The t-ch-3 at the start of a dc round counts as 1 dc unless otherwise noted.
7. Change to CC by completing the last yarn over of the last stitch in the previous round with CC, then continuing with CC.
8. When counting stitches in the lace skirt, count each V-st as 2 stitches plus the ch-1 between them. Shell counts as 5 stitches. For simplicity, this pattern tracks repeats rather than individual stitch counts in the lace skirt sections.
9. The ribbon is threaded through a chain-1 eyelet row worked at the waist transition between the yoke and the skirt.
Dress Instructions
Neckline Foundation
With CC and G-6 hook, ch 60. Being careful not to twist, sl st to first ch to form a ring.
Rnd 1 (RS, with CC): Ch 1 (does not count as a st), sc in each ch around. Sl st to first sc to join. (60 sc)
Rnd 2 (CC picot edging on neckline): Ch 1, [sc in next st, ch 3, sl st in first ch of ch-3 just made, sc in next st] repeat around, working the last sc, ch-3 picot, and sc to close the round neatly. Sl st to first sc. (30 sc and 30 picots, total stitch base remains 60)
This round creates the decorative picot edge that trims the neckline. After completing Rnd 2, fasten off CC.
Join MC to any st of Rnd 1 (not Rnd 2) by inserting hook into the back loop of the Rnd 1 stitches that sit behind Rnd 2. The main yoke body is worked by joining MC into the stitches of Rnd 1, working into the back loop of those stitches so the picot trim rolls to the front.
Join MC to any st of Rnd 1 (back loops), sl st to join.
Yoke (Worked in Joined Rounds, Right Side Facing)
Rnd 3 (MC, foundation yoke row): Ch 1, sc in BLO of each st of Rnd 1 around. Sl st to first sc. (60 sc)
This round anchors the yoke to the neckline while the picot trim sits neatly on the outside front.
Rnd 4: Ch 1, [sc in next 2 sts, 2 sc in next st] 20 times around. Sl st to first sc. (80 sc)
Rnd 5: Ch 1, sc in each st around. Sl st to first sc. (80 sc)
Rnd 6: Ch 1, [sc in next 3 sts, 2 sc in next st] 20 times around. Sl st to first sc. (100 sc)
Rnd 7: Ch 1, sc in each st around. Sl st to first sc. (100 sc)
Rnd 8: Ch 1, [sc in next 4 sts, 2 sc in next st] 20 times around. Sl st to first sc. (120 sc)
Rnd 9: Ch 1, sc in each st around. Sl st to first sc. (120 sc)
Rnd 10: Ch 1, [sc in next 5 sts, 2 sc in next st] 20 times around. Sl st to first sc. (140 sc)
Rnd 11: Ch 1, sc in each st around. Sl st to first sc. (140 sc)
Rnd 12 (CC stripe, marks visual division between upper and lower yoke): Join CC, ch 1, sc in each st around. Sl st to first sc. Do not fasten off CC yet. (140 sc)
Rnd 13 (CC): Ch 3 (counts as dc), dc in each st around. Sl st to top of t-ch-3. Fasten off CC. (140 dc)
Rnd 14 (MC): Join MC, ch 1, sc in each st around. Sl st to first sc. (140 sc)
Rnd 15 (MC): Ch 1, [sc in next 6 sts, 2 sc in next st] 20 times around. Sl st to first sc. (160 sc)
Rnd 16: Ch 1, sc in each st around. Sl st to first sc. (160 sc)
Checkpoint 1: Your yoke should now measure approximately 4.5 inches / 11.5 cm from the neckline edge. The piece lies flat as a circle. You have 160 sc on your hook.
Underarm Division
In this step you separate the front and back body from the sleeve openings. The dress sleeves are created from the yoke flare, so no separate sleeve shaping is needed. The small cap sleeve is formed by the portion of the yoke that extends beyond the underarm point.
With 160 total stitches, divide as follows:
Rnd 17 (Underarm Division Round):
Sl st into the first st (this is the beginning of the front body section). Mark this st.
Sc across next 48 sts for Front.
Place the next 16 sts on a holder or length of scrap yarn for Right Sleeve Cap.
Ch 8 (forms underarm bridge).
Sc across next 48 sts for Back.
Place the next 16 sts on a holder or length of scrap yarn for Left Sleeve Cap.
Ch 8 (forms underarm bridge).
Sl st to first sc of front to join. (48 + 8 + 48 + 8 = 112 working sts/ch in round)
Rnd 18: Ch 1, sc across 48 front sts, sc in each of 8 bridge ch, sc across 48 back sts, sc in each of 8 bridge ch, sl st to first sc. (112 sc)
Rnd 19 (Increase to lace base count): Ch 1, [sc in next 13 sts, 2 sc in next st] 8 times. Sl st to first sc. (120 sc)
8 increases x 14-st interval = 112 + 8 = 120 sc. This number divides evenly into 20 repeats of 6 for the lace pattern.
Waistband and Ribbon Eyelet Channel
Rnd 20 (CC): Join CC, ch 3 (counts as dc), dc in each st around. Sl st to top of t-ch-3. (120 dc)
Rnd 21 (CC, eyelet row for ribbon): Ch 4 (counts as dc + ch 1), sk 1 st, [dc in next st, ch 1, sk 1 st] 59 times. Sl st to 3rd ch of t-ch-4 to join. (60 dc + 60 ch-1 sps = 120 working positions)
Rnd 22 (CC): Ch 3 (counts as dc), dc in each ch-1 sp and each dc around. Sl st to top of t-ch-3. (120 dc)
Rnd 23 (CC): Ch 1, sc in each st around. Sl st to first sc. Fasten off CC. (120 sc)
Checkpoint 2: The waistband should measure approximately 1 inch / 2.5 cm deep and sit just below the underarm. The eyelet row in Rnd 21 will receive the satin ribbon after finishing.
Skirt: Shell and V-Stitch Lace Pattern
The skirt is worked from the waist downward in joined rounds with MC. The repeat is: [shell in V-st sp, sk 2 sts, V-st in center dc of shell, sk 2 sts]. Each full repeat spans 6 stitches. Starting count: 120 sts = 20 repeats.
Establishing the Lace Pattern
Rnd 24 (MC, setup round): Join MC to any st of Rnd 23. Ch 3 (counts as first dc of t-ch), 2 dc in same st (half shell to begin), [sk 2 sts, V-st in next st, sk 2 sts, shell in next st] 19 times, sk 2 sts, V-st in next st, sk 2 sts, 2 dc in same st as beg (completing the beg half shell with the first 3 dc). Sl st to top of t-ch-3 to join. (20 shells + 20 V-sts)
The beginning and ending half shells combine to form one full shell across the join. For clarity in subsequent rounds, treat the first 3-dc cluster as one half of the beginning shell and always work the full round starting into the ch-1 sp of the first V-st.
Rnd 25 (main lace round): Sl st into the ch-1 sp of the first V-st from previous round. Ch 3 (counts as dc), 4 dc in same ch-1 sp (shell made), [sk 2 dc of shell, V-st in center (3rd) dc of shell, sk 2 dc of shell, shell in ch-1 sp of V-st] 19 times, sk 2 dc of shell, V-st in center dc of last shell, sk 2 dc. Sl st to top of t-ch-3. (20 shells + 20 V-sts)
Rnd 26: Rep Rnd 25. (20 shells + 20 V-sts)
Rnd 27 (increase round to add width to skirt): Work as Rnd 25 but work [shell in ch-1 sp, ch 1, shell in same ch-1 sp] in every 5th V-st sp (4 times evenly spaced), and work regular shell in remaining 16 V-st sps. Work V-sts as normal into center dc of all shells except that the doubled shell positions become 2 shells with a ch-1 between them, creating a new V-st position in the ch-1 sp between the paired shells. (24 shells + 24 V-sts = 24 repeats)
Rnd 28: Work lace pattern as established with 24 repeats. (24 shells + 24 V-sts)
Rnd 29: Rep Rnd 28. (24 shells + 24 V-sts)
Rnd 30: Rep Rnd 28. (24 shells + 24 V-sts)
Rnd 31 (second increase round): Work as Rnd 27 structure, adding 4 more doubled-shell positions evenly spaced. (28 shells + 28 V-sts = 28 repeats)
Rnd 32: Work lace as established with 28 repeats. (28 shells + 28 V-sts)
Rnd 33: Rep Rnd 32. (28 shells + 28 V-sts)
Rnd 34: Rep Rnd 32. (28 shells + 28 V-sts)
Rnd 35: Rep Rnd 32. (28 shells + 28 V-sts)
Checkpoint 3: After Rnd 35, the skirt should measure approximately 7.5 inches / 19 cm from the waistband, and the full dress from neckline to hem should measure approximately 14 inches / 35.5 cm. The skirt should show a generous A-line flare.
Hem Scallop Edging
Rnd 36 (CC, transition sc round): Join CC. Ch 1. Working into the tops of stitches across the last lace round, [sc in each of the 5 dc of the shell, sc in each of the 2 dc and 1 ch of the V-st] around. Sl st to first sc. (224 sc)
Each repeat in the final lace round spans approximately 8 working positions (5 shell dc + 2 V-st dc + 1 ch). 28 repeats x 8 = 224.
Rnd 37 (CC, scallop hem): Ch 1. [Sl st in next st, sk 1 st, 5 dc in next st (shell scallop), sk 1 st] 56 times. Sl st to first sl st. Fasten off CC.
Sleeve Cap Edging
Return to the held sleeve cap stitches. You have 16 sts on hold plus 8 ch on the underarm bridge.
With RS facing, join MC to first held sleeve cap st.
Rnd 1 (sleeve cap): Ch 1, sc in each of the 16 held sts, sc in each of the 8 underarm bridge ch. Sl st to first sc. (24 sc)
Rnd 2: Ch 1, sc in each sc around. Sl st to first sc. (24 sc)
Rnd 3 (CC edging): Join CC. Ch 1, sc in each sc around. Sl st to first sc. (24 sc)
Rnd 4 (CC scallop): [Sl st in next st, sk 1 st, 3 dc in next st, sk 1 st] 6 times. Sl st to first sl st. Fasten off CC.
Repeat sleeve cap edging for second sleeve.
Bolero Instructions
The bolero is worked in a granny-style shell panel: one back panel and two mirror-image front panels, all worked flat in rows, then joined at the shoulders with mattress stitch or slip stitch seams. Side seams are left partially open to create armhole openings. All edges are finished with CC edging.
Back Panel
The back panel measures approximately 9 inches / 23 cm wide and 5 inches / 12.5 cm tall.
With MC, ch 37.
Row 1 (RS): 5 dc in 4th ch from hook (first shell; t-ch-3 + 4 dc = 5-dc shell with t-ch-3 counting as first dc), sk 2 ch, V-st in next ch, [sk 2 ch, shell in next ch, sk 2 ch, V-st in next ch] 4 times, sk 2 ch, shell in last ch. Turn. (6 shells, 5 V-sts)
Row 2 (WS): Ch 3 (counts as dc), 2 dc in same st at base of t-ch (half shell to start flat row), [V-st in center dc of next shell, shell in ch-1 sp of next V-st] 5 times, V-st in center dc of last shell, 3 dc in top of t-ch from previous row. Turn.
On even rows, the edges are half shells (3 dc in same st at each edge). This is standard flat lace construction. The two half-shell edges on each side of every even row will combine at seams.
Row 3 (RS): Ch 3, 2 dc in same base st, [V-st in center dc of next shell, shell in ch-1 sp of V-st] 5 times, V-st in center dc of last shell, 3 dc in top of t-ch. Turn.
Row 4: Rep Row 3. Turn.
Row 5: Rep Row 3. Turn.
Row 6: Rep Row 3. Turn.
Row 7: Rep Row 3. Turn.
Row 8: Rep Row 3. Turn.
The back panel is now approximately 5 inches / 12.5 cm tall. Do not fasten off.
Finishing Your Baby Dress Set
Once all pieces are complete, weave in all ends using your yarn needle. Block the dress and bolero gently by laying flat on a towel, spritzing with water, and pinning to shape. Allow to dry completely.
Thread the satin ribbon through the eyelet row at the waist. Center the ribbon at the front of the dress and tie in a bow. Sew the pearl or rhinestone button to the center of the bow using needle and thread.
For the bolero, seam the shoulder and side seams, leaving openings for the armholes. Add the CC edging around all raw edges.
Tips for Success
Count your stitches regularly. The lace pattern relies on having the correct number of stitches to maintain the shell and V-stitch alignment. If something looks off, count back and find where you may have missed a stitch.
Use stitch markers generously. Place them at the beginning of each round and at each quadrant of the yoke to help track your increases.
Try it on as you go. If you have a baby doll or teddy bear approximately the right size, slip the dress over it periodically to check the fit.
Don’t stress about perfection. Handmade items have character. Small variations in the lace pattern will not be noticeable in the finished garment.
This Lavender Dreams Baby Dress makes an incredible gift for baby showers, christenings, first birthdays, or any special occasion. The matching bolero adds a layer of charm and keeps little shoulders warm in air-conditioned venues.
I hope you love making this sweet little set as much as I loved designing it! If you create your own Lavender Dreams Baby Dress, I would absolutely love to see it. Tag me on Instagram or share a photo in our Facebook group.
Don’t forget to save this pattern to your Pinterest boards so you can find it when you’re ready to start stitching. And if you make this set, please drop a comment below. I read every single one and they truly make my day!
