
I call this one the "Seaside Sweetheart" dress, and it has quite the story behind it. I sketched the original concept in a beat-up notebook during a family beach vacation about three years ago. My niece was toddling around in the sand, picking up shells and presenting them to me like tiny treasures, and I thought, "I need to capture this moment in yarn."
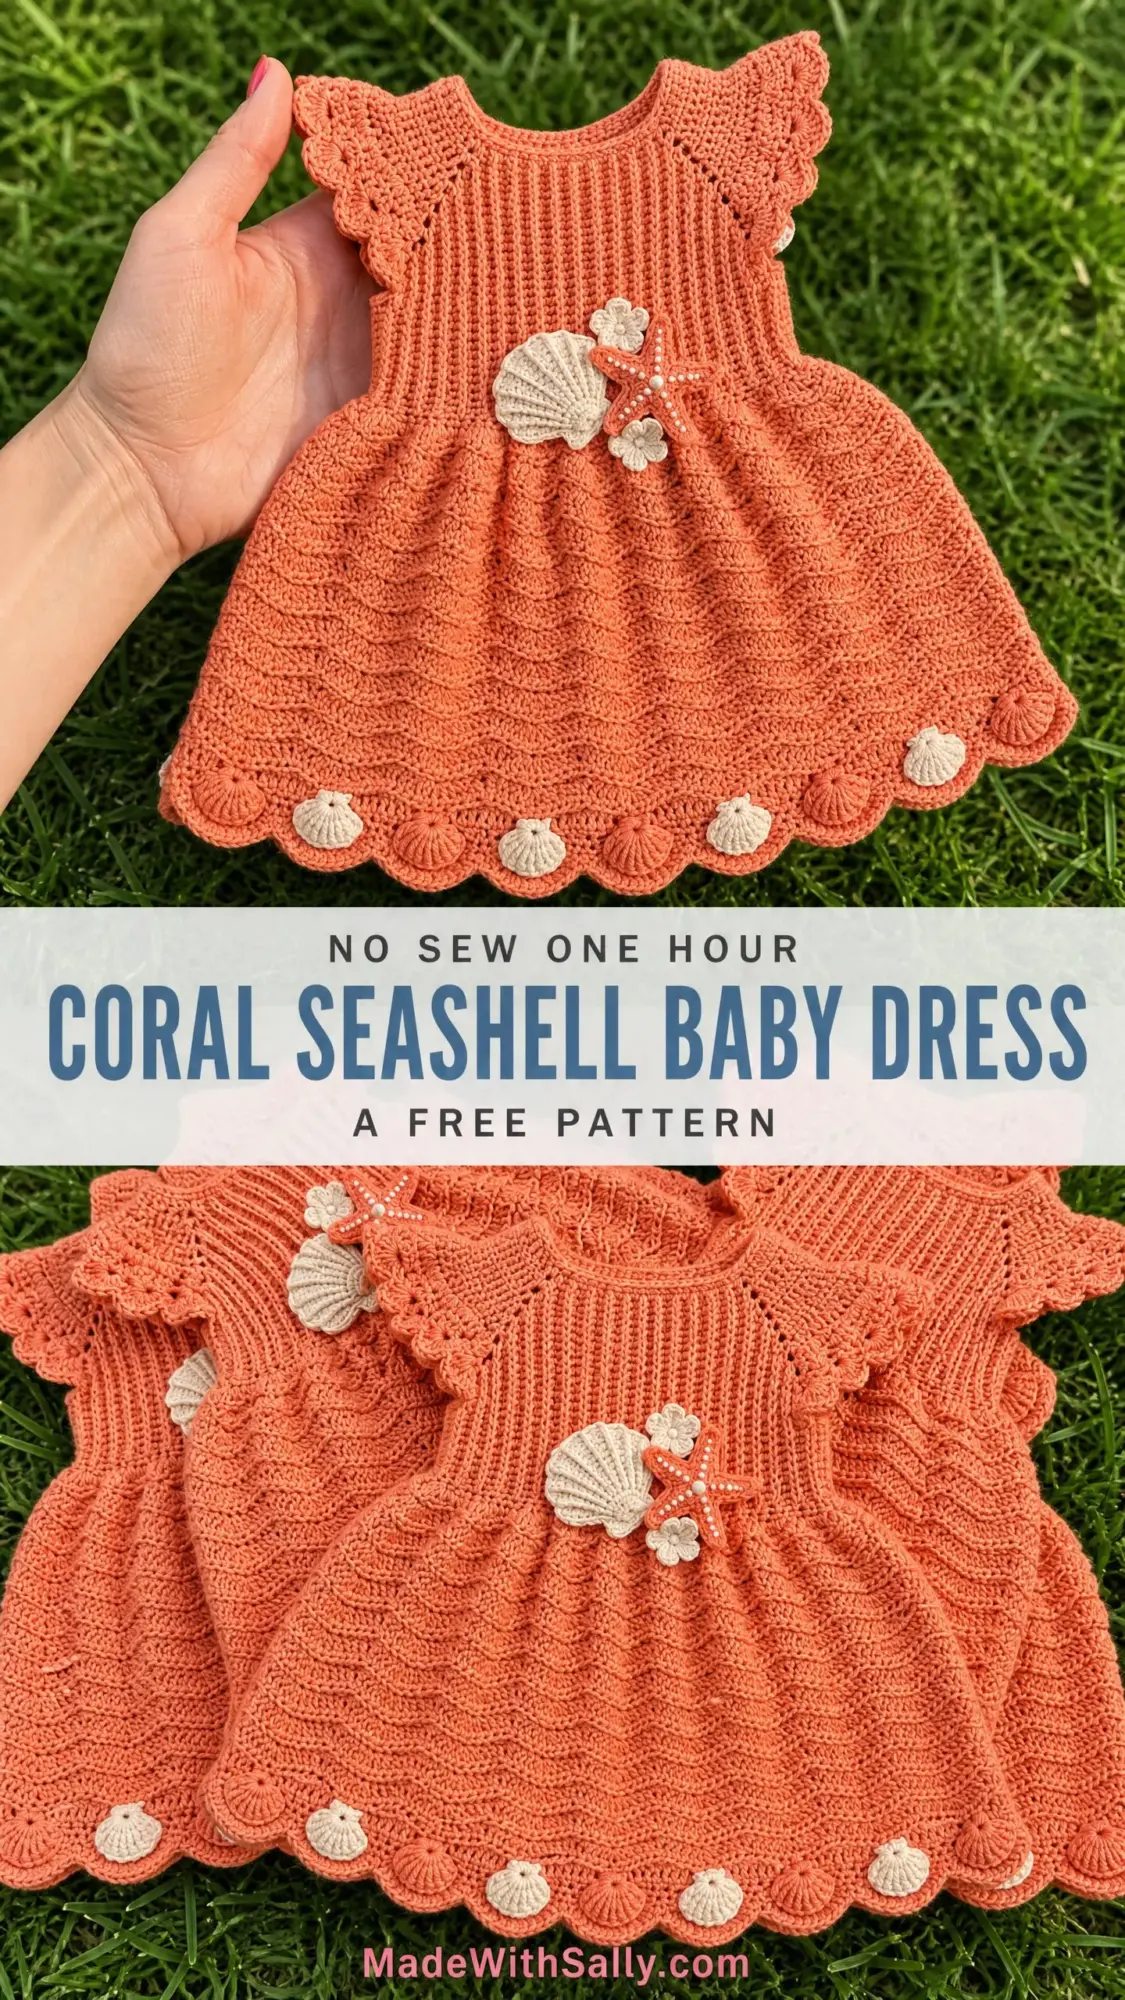
That notebook sat in my craft room drawer for ages. Then last spring, I finally pulled it out, dusted off those scribbly drawings, and got to work bringing this coral beauty to life. The wave stitch skirt, the flutter sleeves, those sweet little shell appliques along the hem. Every detail is meant to evoke lazy summer days by the water.
If you have been looking for a special heirloom piece to make for a little one, this crochet pattern delivers. The construction is clever, the finished look is absolutely stunning, and the coastal theme works beautifully for beach photos, summer parties, or just everyday adventures.
Why You Will Love This Crochet Pattern
This baby dress combines fitted structure with whimsical details in all the right ways. The ribbed bodice hugs gently without being restrictive, while the wave stitch skirt flares out in that perfect A-line silhouette. Add in those adorable flutter sleeves with scalloped edges and a cluster of handmade embellishments at the waist, and you have a showstopper.
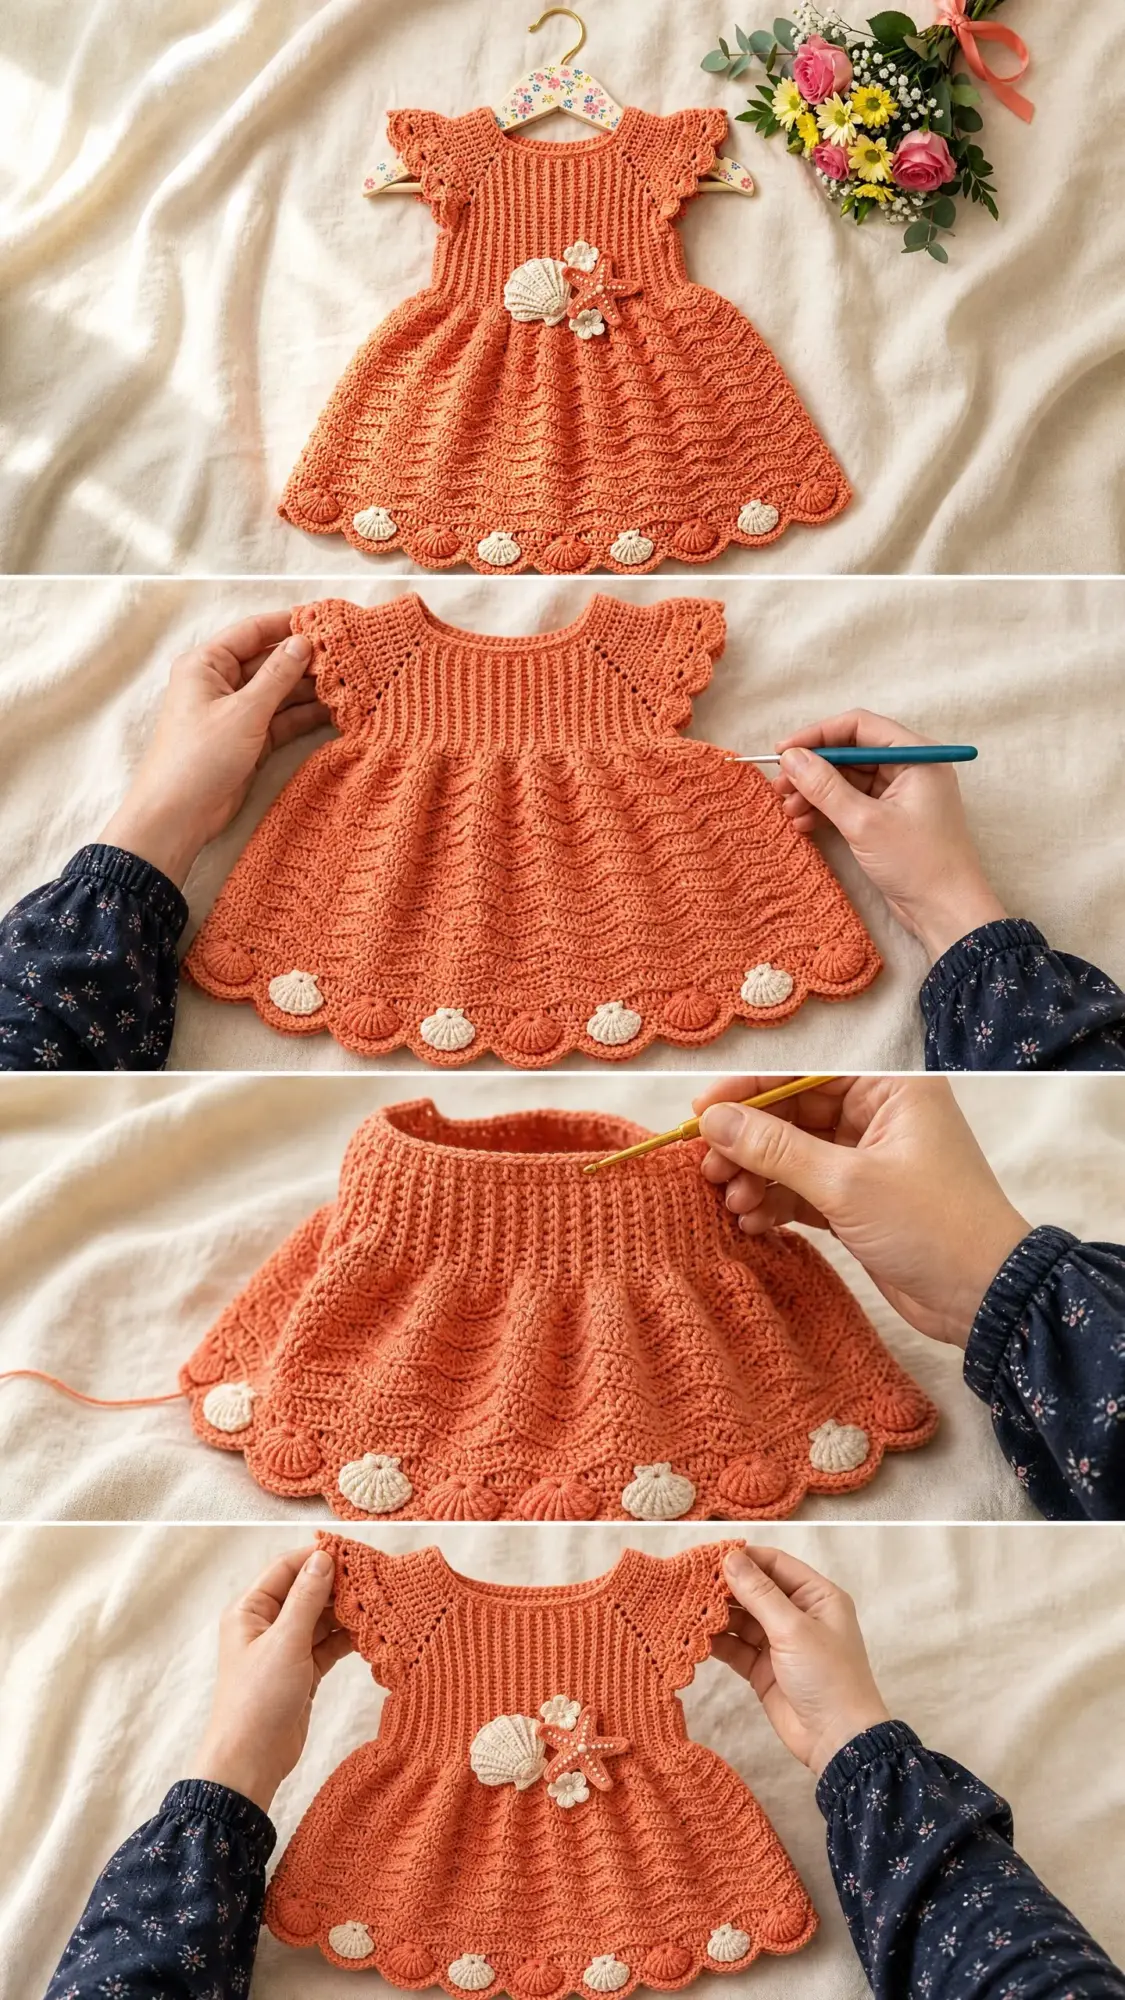
The dress works up seamlessly from the top down, which means minimal finishing work. You will only have a tiny bit of seaming at the underarm joins. Everything else flows naturally as you crochet. This construction method also makes size adjustments straightforward if you need to go bigger or smaller.
Fair warning though. This is an intermediate to advanced level project. You should feel comfortable working in the round, managing raglan increases, and tackling a multi-step stitch pattern. If you have completed at least two or three garments before, you will handle this beautifully. True beginners might want to practice the wave stitch on a swatch first.
Materials Needed
Yarn:
Hooks:
Notions:
Yarn Suggestions
Paintbox Yarns Simply DK works wonderfully here. It is 100 percent acrylic with excellent stitch definition and comes in a shade called Coral that matches perfectly. You will need about 2 balls for the main color and 1 partial ball for the contrast.
We Are Knitters The Petite Wool gives a more luxurious feel with beautiful drape. Look for Terracotta and Natural shades. Just remember this one requires hand washing.
Lion Brand Pound of Love is the budget-friendly option. Machine washable and available in Coral Reef and Antique White.
Any DK weight yarn that achieves gauge will work. Avoid slippery or novelty yarns since stitch definition matters for the wave pattern.
Finished Measurements
This pattern is written for size 12 months (approximately 18 to 20 pounds).
These measurements reflect the blocked finished garment.
Gauge
Getting gauge right matters a lot for a fitted garment like this. Please swatch before starting.
Bodice gauge (smaller hook, back loop only single crochet):
20 stitches x 22 rows = 4 inches
Skirt gauge (larger hook, wave stitch pattern):
18 stitches x 10 rows = 4 inches after blocking
Even a half-stitch difference per inch will change your chest measurement by more than an inch over the full circumference. Take the time to check.
Abbreviations
Let me walk you through all the abbreviations you will encounter in this crochet tutorial.
Special Stitches
Shell Stitch
Work 5 double crochet all into the same stitch or space. This creates a pretty fan shape. When the pattern says "shell," you are working all 5 dc into one spot.
Picot
Chain 3, then slip stitch into the first chain you made. This creates a tiny decorative loop.
Wave Stitch Pattern
This is the heart of the skirt. The wave stitch creates horizontal ripples that look like ocean waves. It works over a multiple of 12 stitches across 4 rounds.
Wave Round 1: Ch 1, sc in each st around, join with sl st to first sc.
Wave Round 2: Ch 3 (counts as first dc), dc in next 2 sts, [tr in next 3 sts, dc in next 3 sts, sc in next 3 sts, dc in next 3 sts] rep around, omitting the last 3 dc because the ch-3 stands as the first 3 sts, join with sl st to top of ch-3.
Wave Round 3: Ch 1, sc in each st around, join with sl st to first sc.
Wave Round 4: Ch 1, [sc in next 3 sts, dc in next 3 sts, tr in next 3 sts, dc in next 3 sts] rep around, join with sl st to first sc.
These 4 rounds form one complete wave repeat. The alternating tall stitches (treble crochet) and short stitches (single crochet) create that beautiful ripple texture.
Step by Step Instructions
Section 1: Neckline and Yoke Setup
With MC and smaller hook (E-4), ch 61. Join with sl st to first ch to form a ring, being careful not to twist.
Foundation Round: Ch 1, sc in each ch around, join with sl st to first sc. (60 sc)
Place markers at the following positions to mark the four raglan seam points:
These markers divide your neckline into four sections of 15 stitches each: front panel, right sleeve, back panel, left sleeve.
Section 2: Raglan Yoke Increases
All rounds are worked in back loop only to create the ribbed texture. Increases happen at the marked raglan stitches.
Raglan Increase Round: Ch 1, [work blo sc to 1 st before marker, 2 sc in next st (inc, both loops), move marker to the inc stitch, 2 sc in next st (inc, both loops), move marker] 4 times, blo sc to end of round, join with sl st to first sc.
Each increase round adds 8 stitches total (2 increases at each of 4 raglan points).
Repeat the Raglan Increase Round for Rounds 1 through 12.
After Round 12, you should have 39 stitches in each section: front panel, each sleeve, and back panel.
Section 3: Separate Sleeves and Join Body
Time to set aside those sleeve stitches and create the body tube.
Separation Round: Ch 1, blo sc across 39 front sts, ch 6 (underarm bridge), skip 39 sleeve sts (place these on a stitch holder or waste yarn), blo sc across 39 back sts, ch 6 (underarm bridge), skip 39 sleeve sts, join with sl st to first sc.
Next Round: Ch 1, sc in each st and each ch around, join with sl st. (90 sc)
Your bodice tube should measure approximately 4 to 4.5 inches from the cast-on neckline edge at this point.
Section 4: Bodice Lower Half
Continue working in blo sc in the round with no increases for 8 more rounds.
Rounds 1 through 8: Ch 1, blo sc in each st around, join with sl st to first sc. (90 sc each round)
After this section, your total bodice from neckline to empire waist should measure approximately 6 inches.
Section 5: Empire Waist Increase Round
Switch to the larger hook (F-5) for this round.
Increase Round: Ch 1, [sc in next 4 sts, 2 sc in next st] 18 times, join with sl st to first sc. (108 sc)
This brings your stitch count to a multiple of 12, which is required for the wave stitch pattern.
Section 6: Skirt in Wave Stitch Pattern
All skirt rounds use the larger hook. You will work 5 complete sets of the wave stitch pattern with increase rounds between them.
Wave Repeat Set 1 (Rounds 1-4): Work all 4 wave rounds over 108 stitches.
Increase Round A: Ch 1, [sc in next 8 sts, 2 sc in next st] 12 times, join with sl st to first sc. (120 sc)
Wave Repeat Set 2 (Rounds 5-8): Work all 4 wave rounds over 120 stitches.
Increase Round B: Ch 1, [sc in next 9 sts, 2 sc in next st] 12 times, join with sl st to first sc. (132 sc)
Wave Repeat Set 3 (Rounds 9-12): Work all 4 wave rounds over 132 stitches.
Increase Round C: Ch 1, [sc in next 10 sts, 2 sc in next st] 12 times, join with sl st to first sc. (144 sc)
Wave Repeat Set 4 (Rounds 13-16): Work all 4 wave rounds over 144 stitches.
Increase Round D: Ch 1, [sc in next 11 sts, 2 sc in next st] 12 times, join with sl st to first sc. (156 sc)
Wave Repeat Set 5 (Rounds 17-20): Work all 4 wave rounds over 156 stitches.
Do not add another increase round. You should have 156 stitches before beginning the border.
Section 7: Hem Shell Border
Border Round 1: Ch 1, sc in each st around, join with sl st to first sc. (156 sc)
Border Round 2: Ch 3 (counts as first dc), 2 dc in same st (half-shell start), [sk next st, sc in next st, sk next st, 5 dc shell in next st] 38 times, sk next st, sc in next st, sk next st, 2 dc in same st as ch-3 beginning (completing first half-shell), join with sl st to top of ch-3. (39 shells)
Border Round 3 (Picot edging): Sl st to center dc of first shell, ch 1, sc in same st, [picot, ch 2, sc in center dc of next shell] 38 times, picot, ch 2, join with sl st to first sc. Fasten off MC.
Section 8: Sleeve Flutter Edging
Return to the held sleeve stitches. Place 39 sleeve stitches back on smaller hook (E-4). Join MC at the center underarm point.
Setup Round: Ch 1, sc in each of 39 held sleeve sts, then pick up and sc 6 sts evenly across the 6 ch underarm bridge, join with sl st to first sc. (45 sc)
Adjustment Round: Ch 1, sc2tog once at underarm, sc in each remaining st, join with sl st to first sc. (44 sc)
Flutter Round 1: Ch 3 (counts as first dc), 2 dc in same st, [sk next st, sc in next st, sk next st, 5 dc shell in next st] 10 times, sk next st, sc in next st, sk next st, 2 dc in same beg st (completing split shell), join with sl st to top of ch-3. (11 shells)
Flutter Round 2: Sl st to center of first shell, ch 1, sc in same st, [picot, ch 1, sc in center dc of next shell] 10 times, picot, ch 1, join with sl st. Fasten off.
Repeat for the second sleeve.
Section 9: Embellishments
All embellishments are worked separately and sewn on after blocking.
Large Shell Applique (make 1 in CC):
Foundation: Ch 16.
Row 1: Sc in 2nd ch from hook, sc in next 2 ch, hdc in next 3 ch, dc in next 3 ch, tr in next 3 ch, [2 tr in next ch] 3 times. (18 sts)
Row 2: Ch 3, turn, 2 dc in same st, 2 dc in each of next 2 sts, dc in each of next 3 sts, hdc in each of next 3 sts, sc in each of next 3 sts, sl st in each of last 3 sts. Fasten off leaving a long tail.
Starfish Applique (make 1 in MC):
MR, ch 1, 5 sc in ring, join with sl st. (5 sc)
[Ch 7, sl st in 2nd ch from hook, sc in next ch, hdc in next ch, dc in next ch, hdc in next ch, sc in next ch, sl st in next sc of center ring] 5 times to form 5 arms. Fasten off leaving a tail.
Small Flower Appliques (make 2 in CC):
MR, ch 1, [sc, ch 2, sc] 5 times in ring, join with sl st to first sc. (5 petals)
Fasten off leaving a tail.
Small Shell Appliques for Hem (make 7 in CC):
Foundation: Ch 8.
Row 1: Sc in 2nd ch from hook, sc in next 1 ch, hdc in next 2 ch, dc in next 1 ch, [2 dc in next ch] 2 times. (9 sts)
Row 2: Ch 2, turn, 2 dc in same st, 2 dc in next st, dc in next 3 sts, hdc in next 2 sts, sc in last st. Fasten off leaving a tail.
Sew the large shell to center-right of the empire waist. Sew the starfish just above and overlapping the shell. Nestle one flower between them and place the other just above the starfish tip. Space the 7 small shells evenly along the hem border.
Finishing and Blocking
Weave in all yarn ends securely, darning each end through at least 1.5 inches of stitches in two directions.
For natural fiber yarns: Soak the dress gently in cool water for 20 minutes. Press out excess water by rolling in a clean towel without wringing. Pin out on a blocking mat to finished measurements. Open the scallop border outward and pin each arch to shape. Allow to dry completely before removing pins.
For acrylic yarns: Pin the dress dry to the blocking mat, spray until damp, and steam lightly with a steam iron held 1 inch above the surface without touching the fabric. Allow to cool and dry before removing pins.
After blocking and drying, sew on all applique pieces. Attach any beads last.
Optional back closure: Sew a 10 mm button 0.5 inches below the neck edge at center back. Work a chain of 8 stitches with MC, join ends with a sl st to form a loop, and sew opposite the button as a closure.
Size Customization Tips
Newborn (0-3 months): Cast on ch 49 (joining to 48 sts). Work 10 raglan increase rounds. Increase to 84 sts at empire waist. Work only 3 wave sets.
6 months: Cast on ch 55 (joining to 54 sts). Work 11 raglan increase rounds.
18 months: Cast on ch 67 (joining to 66 sts). Work 13 raglan increase rounds.
One raglan increase round adds approximately 0.9 inches to chest circumference. Add or subtract rounds in pairs to keep sections even. Always adjust the empire waist increase to reach the nearest multiple of 12.
Care Instructions
Acrylic yarns: Machine wash gentle cycle in cold water. Lay flat to dry. Do not wring or tumble dry on high heat.
Wool yarns: Hand wash in cool water with gentle wool wash. Press water out gently. Lay flat to dry. Do not hang.
Cotton yarns: Machine wash warm on gentle cycle. Lay flat or tumble dry on low.
Thank you so much for choosing this pattern for your next project. I truly hope you love making the Seaside Sweetheart dress as much as I loved designing it. There is something incredibly satisfying about watching all those wave stitches build up into such a stunning little garment.
If you make this crochet baby dress, I would absolutely love to see it. Tag me on Instagram or share a photo in my Facebook group. Seeing your finished pieces brings me so much joy.
Go ahead and save this coral seashell baby dress crochet pattern to your Pinterest boards so you can find it whenever you are ready to start. And please drop a comment below if you make one. I read every single comment and love hearing which color combinations you choose.
