
Looking for a show-stopping piece that combines classic crochet techniques with modern bodycon style? This black lace mini dress delivers exactly that. The fitted V-neck bodice provides structure and support at the bust, while the skirt made entirely from joined granny flower motifs creates that gorgeous lace effect perfect for evenings out.
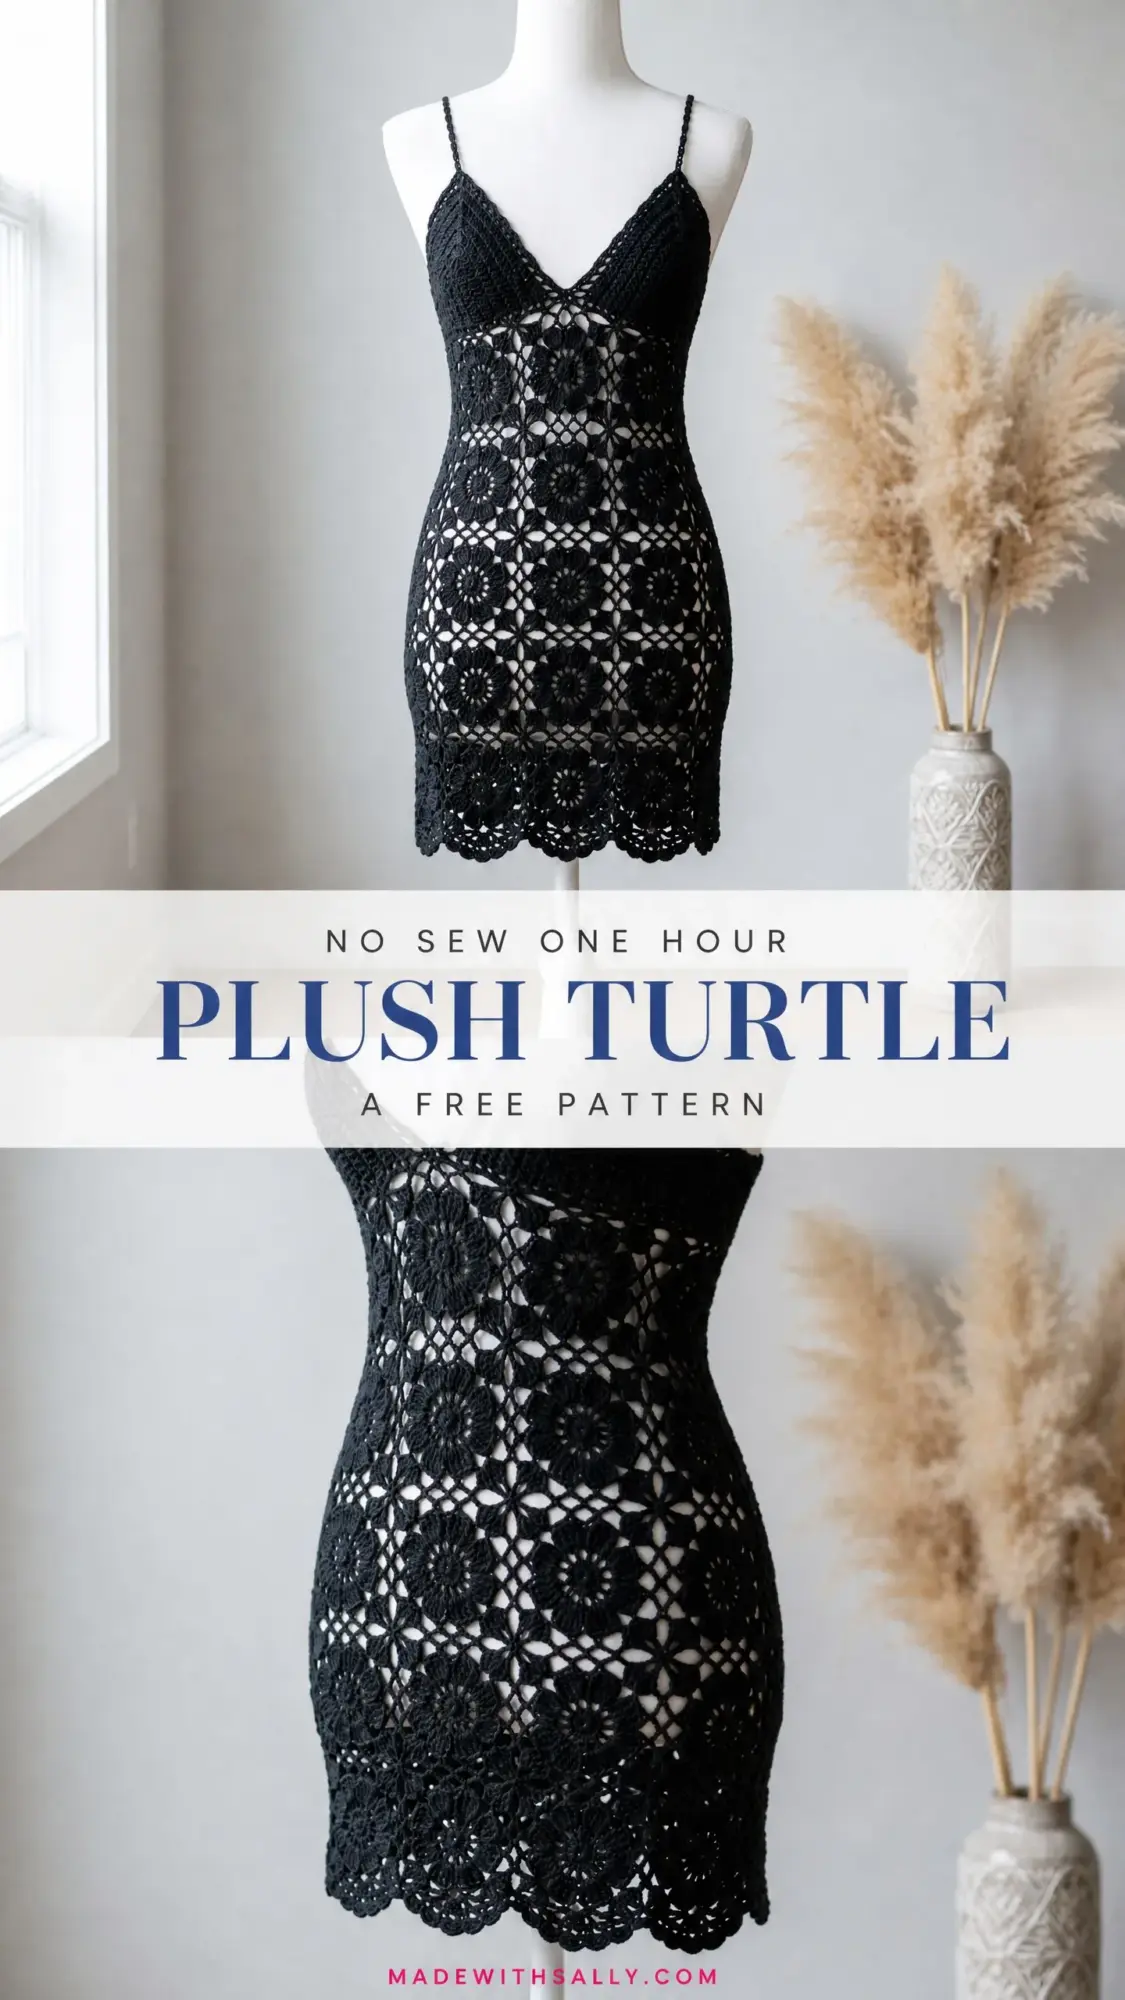
The construction uses stitches you probably already know. Half double crochet for the bodice, double crochet clusters for the motifs, and simple chain spaces throughout. If you can work a magic ring and join motifs as you go, you have everything you need. The dress works up in pieces that come together beautifully, and the open back design adds drama without extra complexity.
This pattern fits a size Small/Medium with a 34 to 36 inch bust and 26 to 28 inch waist. The total length runs about 28 inches from bodice top to finished hem. Plan for 40 to 60 hours of work depending on your speed. Half that time goes into making and joining the 48 motifs for the skirt. Yes, it is a commitment, but the finished dress is absolutely worth every stitch.
Why This Dress Pattern Works
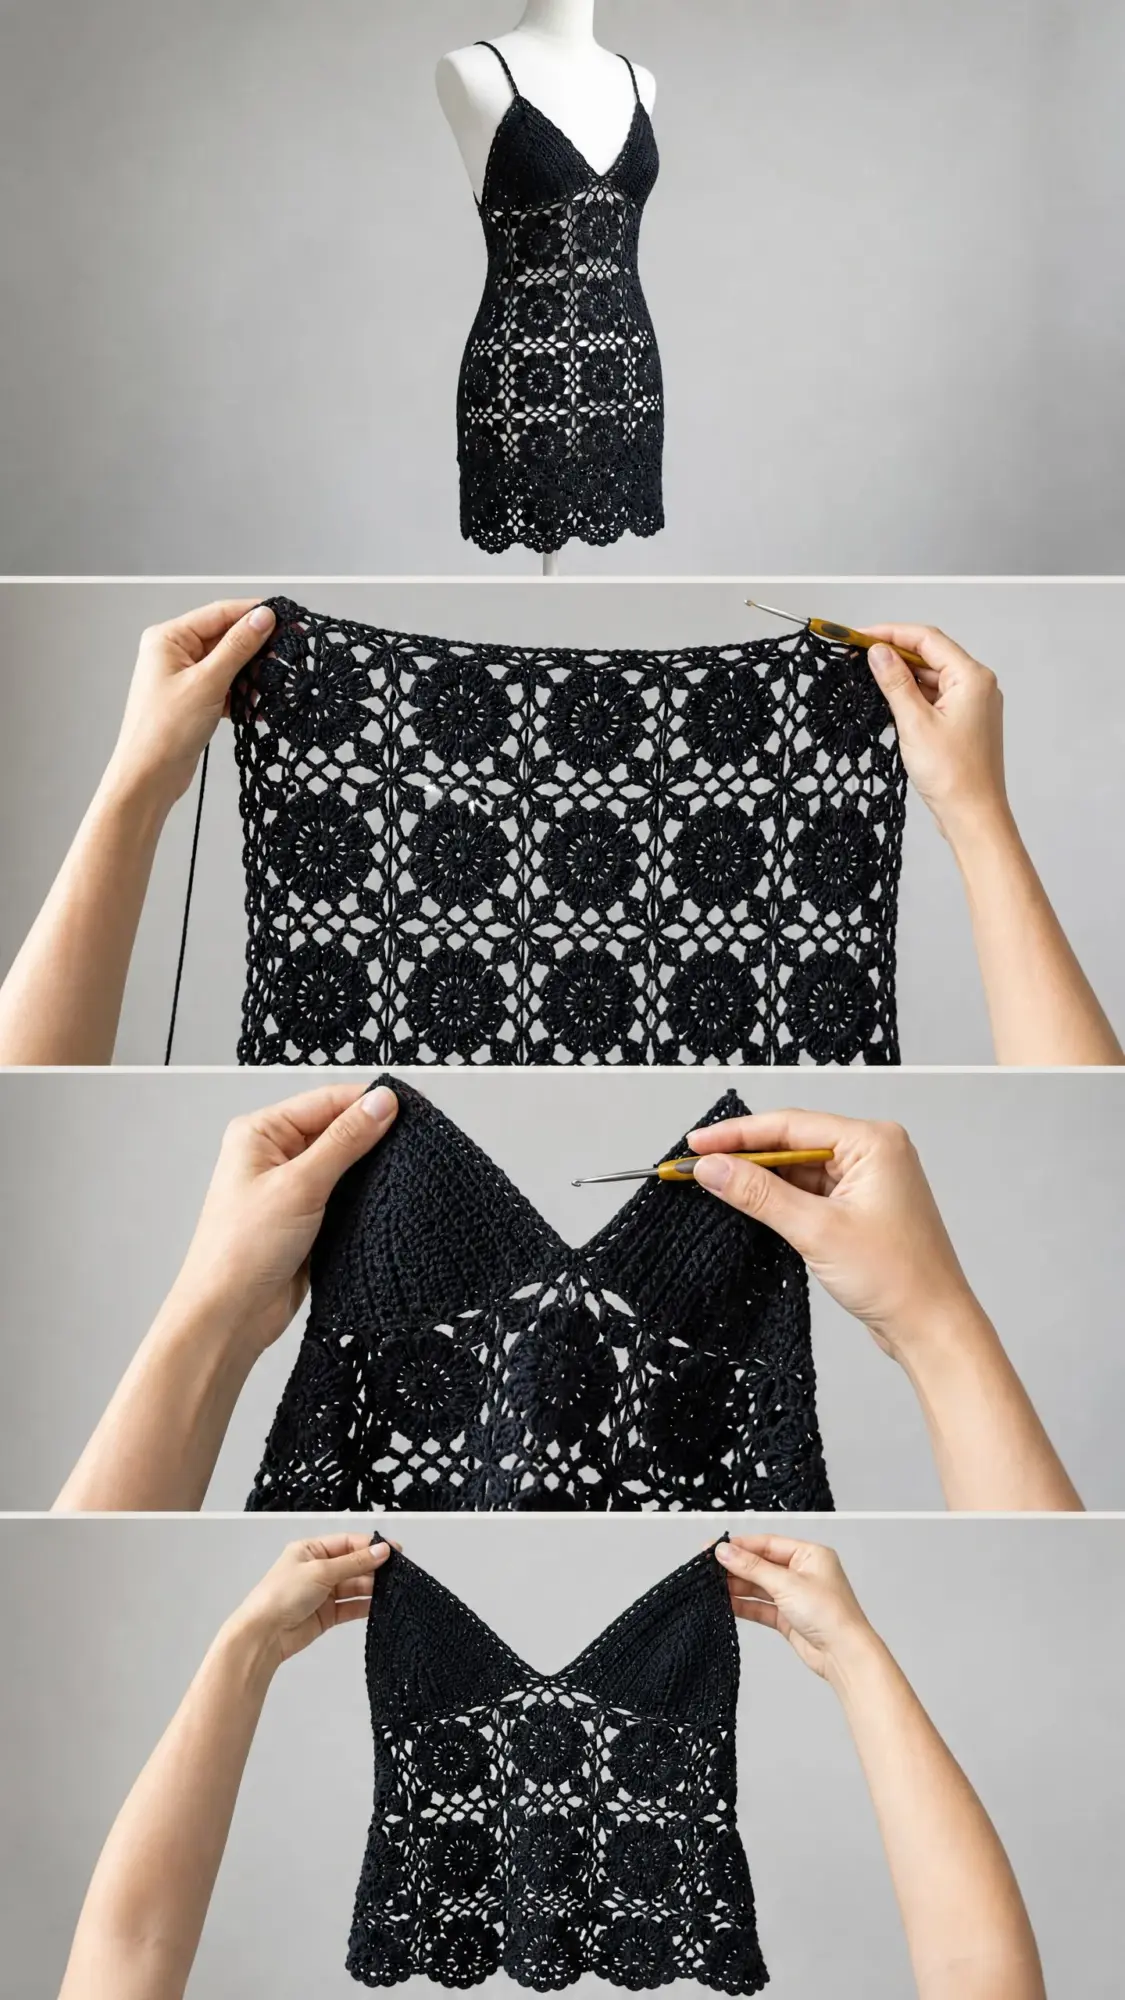
The genius of this design lies in its construction order. You build the skirt first from individual granny flower motifs, seam it into a tube, then work the bodice upward from the waistline. This means you can try on the skirt portion as you go and adjust the bodice fit in real time.
The granny flower motifs create that distinctive circle-in-a-square look with six-petal centers and open lattice corners. When joined together, they form a stretchy lace fabric that hugs curves beautifully. Cotton thread blocks crisp and holds its shape, so the finished dress maintains that sleek silhouette through multiple wears.
The bodice uses half double crochet (hdc) worked in rows with strategic decreases to shape the bust cups and V-neckline. Twisted chain straps cross at the back for a low open-back look. The whole effect is dramatic, elegant, and surprisingly wearable.
Materials You Will Need
Yarn: 900 to 1000 yards (820 to 915 meters) of size 10 crochet thread or fingering weight yarn in black. A high-twist mercerized cotton gives the crisp lace definition you see in the finished piece.
Recommended Yarn Options:
Hooks:
Additional Materials:
Substitution Note: Any yarn or thread that achieves the stated gauge and is 100 percent cotton or high-cotton-blend works well. Avoid acrylic or nylon-heavy blends as they will not block flat and the motifs will curl.
Gauge Information
Getting gauge right matters enormously for a fitted garment like this. Please swatch before starting.
Motif Gauge (US Steel 7 hook): One finished granny flower motif measures 3.25 inches x 3.25 inches (8.3 cm x 8.3 cm) after blocking.
Bodice Gauge (US B-1 hook): 22 hdc x 16 rows equals 4 inches x 4 inches (10 cm x 10 cm) in half double crochet, blocked.
If your motifs come out larger, try going down a hook size. If they come out smaller, go up a hook size. The same applies to your bodice swatch.
Finished Measurements
This pattern fits a size Small/Medium:
The lace motifs stretch approximately 10 to 12 percent when worn, which is expected and achievable in cotton thread.
Abbreviations and Stitch Definitions
Before diving into the pattern, let me walk you through every stitch abbreviation you will encounter. I have included plain-English definitions so nothing catches you off guard.
Special Stitches Explained
Granny Flower Motif
This motif is the core unit of the skirt. Each finished motif is a circle-in-a-square with a six-petal floral center and open lattice corners. You will make 48 of these total.
Round 1 (center ring): MR, ch 3 (counts as first dc), 2 dc in MR, ch 2, (3 dc in MR, ch 2) 5 times, sl st to top of beg ch-3 to join. Pull MR closed. (6 clusters of 3 dc, 6 ch-2 sps)
Round 2 (petal round): Sl st into ch-2 sp, ch 3, (2 dc, ch 2, 3 dc) in same ch-2 sp, ch 1, (3 dc, ch 2, 3 dc, ch 1) in each rem ch-2 sp around, sl st to top of beg ch-3. (12 clusters of 3 dc, 6 ch-2 petal tops, 6 ch-1 sps)
Round 3 (inner lattice round): Sl st into ch-2 sp, ch 4 (counts as dc plus ch 1), dc in same sp, ch 3, sk all sts to next ch-1 sp, sc in ch-1 sp, ch 3, (dc, ch 1, dc) in next ch-2 sp, ch 3, sk all sts to next ch-1 sp, sc in ch-1 sp, ch 3, rep from beginning around, sl st to 3rd ch of beg ch-4. (6 (dc, ch-1, dc) groups alternating with 6 sc, connected by ch-3 arcs)
Round 4 (square-forming round): Sl st into ch-1 sp, ch 3, 2 dc in same sp (corner cluster begun), ch 2, 3 dc in same sp (corner cluster complete), ch 1, 3 dc in next sc, ch 1, (3 dc, ch 2, 3 dc) in next ch-1 sp (second corner), ch 1, 3 dc in next sc, ch 1, rep from beginning for remaining 2 corners, sl st to top of beg ch-3. (4 corner clusters, 8 side clusters of 3 dc, 8 ch-1 sps between side clusters, 4 ch-2 corner sps)
Round 5 (outer finishing round): Sl st to corner ch-2 sp, ch 3, (2 dc, ch 2, 3 dc) in corner sp, (ch 1, 3 dc in next ch-1 sp) twice, ch 1, (3 dc, ch 2, 3 dc) in corner ch-2 sp, rep for all 4 corners, sl st to top of beg ch-3. Fasten off and weave in ends. (4 corner groups, 3 groups of 3 dc on each side separated by ch-1 sps, total 16 clusters of 3 dc)
Join As You Go (JAYG) Method
When working Round 5 of any motif that shares a side with a completed motif, replace each ch-2 at a shared corner with ch 1, sl st into the corresponding corner ch-2 sp of the neighboring motif, ch 1. Replace each ch-1 between side clusters on the shared side with sl st into the corresponding ch-1 sp of the neighboring motif. This creates a flat, seamless join.
V-Stitch
Work (dc, ch 1, dc) all in the same stitch or space.
Scallop Edging
Work (sc, hdc, 3 dc, hdc, sc) all in same ch-2 sp or designated space. Skip 2 sts or the ch-1 sp on each side between scallops.
Twisted Chain Strap
Ch a length of 60 chains (or to length required). Do not turn. Working back along the foundation chain from left to right (the reverse side), sl st in each ch across. This creates a rounded, rope-like strap. Fasten off leaving a 12-inch tail for sewing.
Pattern Instructions
Part 1: Granny Flower Motifs for Skirt
Make 48 individual motifs total following the Granny Flower Motif instructions above.
Motif Layout: Arrange motifs in a flat rectangle of 8 columns (horizontal) x 6 rows (vertical). Column 1 is the left edge (which becomes the center back left edge after seaming). Column 8 is the right edge (center back right edge).
Row 1 of motifs: Make Motif 1 following all 5 rounds. Fasten off. Make Motif 2 and on Round 5, join the left side of Motif 2 to the right side of Motif 1 using the JAYG method. Continue making Motifs 3 through 8, each joined to the previous one. (8 motifs in a horizontal strip)
Row 2 of motifs: Make Motif 9 and on Round 5 join its top edge to the bottom edge of Motif 1. Make Motif 10 joining its top edge to the bottom of Motif 2 and its left edge to the right edge of Motif 9. Continue joining each motif to both its left neighbor and the motif above it. (8 motifs)
Rows 3 through 6 of motifs: Continue working each row of 8 motifs and joining to the row above and to the left neighbor as you go. (8 motifs per row, 6 rows total = 48 motifs)
Checkpoint: Your completed flat skirt rectangle should measure approximately 26 inches (66 cm) wide and 19.5 inches (49.5 cm) tall.
Part 2: Seam Skirt Panel into Tube
Fold the skirt panel in half widthwise, right sides together, aligning Column 1 with Column 8 (the two center back edges). Thread a tapestry needle with a length of yarn and use a whip stitch or mattress stitch to join these two edges from bottom hem upward.
Important: Do not seam the top 3 motif rows of the back panel (top 9.75 inches) because the back is open above the waistline. Instead seam only the bottom 3 rows (approximately 9.75 inches). Secure ends. Turn right side out.
The skirt is now a tube with a closed lower back seam and an open upper back.
Part 3: Hem Scallop Edging
With US Steel 7 hook, join yarn at the bottom of the center back seam at the hem edge.
Round 1 (edging): Working along the bottom edge of the motif rectangle, work (sc, hdc, 3 dc, hdc, sc) in each ch-2 corner sp of the hem motifs. Sl st into each ch-1 sp between motif side clusters to travel between scallops.
Work 1 large scallop at far left corner, 1 scallop at each motif join (7 joins = 7 scallops), 1 scallop at far right corner = 9 large scallops total. Work 1 small scallop of (sc, 3 dc, sc) into the side cluster ch-sps on the bottom of each motif between the corner scallops = 8 small scallops. Sl st to first sc to join. Fasten off.
Total hem scallops: 17 scallops (9 large, 8 small). The hem now adds approximately 1 inch (2.5 cm) of depth.
Part 4: Bodice Foundation
Switch to US B-1 hook. Join yarn at center front of skirt top edge.
Round 1 (foundation sc from skirt top edge): Sc around entire top edge of the skirt tube, working 4 sc into each ch-2 corner sp of the top motif row and 2 sc into each ch-1 sp between clusters. With 9 corner sp x 4 = 36 sc and 8 inter-corner spans x 2 ch-1 sps x 2 sc = 32 sc, total = 68 sc. Sl st to first sc to join. (68 sc)
Round 2 (first increase round): Ch 2 (counts as hdc here and throughout), hdc in same st, (hdc in next st, 2 hdc in next st) 33 times, hdc in last st. Sl st to top of ch-2. (102 hdc)
Round 3 (second increase round): Ch 2, hdc in next 2 sts, (2 hdc in next st, hdc in next 2 sts) 33 times, 2 hdc in last st. Sl st to top of ch-2. (136 hdc)
Round 4 (third increase round): Ch 2, hdc in next 15 sts, (2 hdc in next st, hdc in next 16 sts) 7 times, 2 hdc in last st. Sl st to top of ch-2. (144 hdc)
Checkpoint: After Round 4 the bodice waistband circumference should measure approximately 26 inches (66 cm).
Part 5: Bodice Shaping
The bodice divides into front (72 sts) and back (72 sts) sections. The back remains open, and the front gets all the bust shaping.
Place markers at st 1 (center front) and st 73 (center back) to divide the 144 sts into two groups of 72.
Front Bodice (worked flat in rows, RS facing):
Turn work so RS faces you. The front section is 72 sts wide.
Row 1 (RS): Join yarn at right side of front section. Ch 2, hdc in each of next 71 sts. Turn. (72 hdc)
Row 2: Ch 2, hdc2tog over first 2 sts, hdc in each st to last 3 sts, hdc2tog, hdc in last st. Turn. (70 hdc)
Row 3: Ch 2, hdc2tog, hdc to last 3 sts, hdc2tog, hdc in last st. Turn. (68 hdc)
Row 4: Ch 2, hdc2tog, hdc to last 3 sts, hdc2tog, hdc in last st. Turn. (66 hdc)
Row 5: Ch 2, hdc2tog, hdc to last 3 sts, hdc2tog, hdc in last st. Turn. (64 hdc)
Row 6: Ch 2, hdc to end. Turn. (64 hdc)
Row 7: Ch 2, hdc2tog, hdc to last 3 sts, hdc2tog, hdc in last st. Turn. (62 hdc)
Row 8: Ch 2, hdc to end. Turn. (62 hdc)
Rows 9 and 10: Ch 2, hdc to end. Turn. (62 hdc each row)
Checkpoint: After Row 10 the front bodice panel should measure approximately 3 inches (7.6 cm) above the divide row.
V-Neck Shaping
At Row 11, split the front bodice into two equal halves for the left and right bust cups.
Row 11 (split row): Ch 2, hdc in next 29 sts, hdc2tog (this dec uses sts 30 and 31, the center 2 sts of the row). Turn leaving rem 31 sts unworked. (31 hdc, right cup)
Right Bust Cup:
Row 12: Ch 2, hdc2tog (V-neck edge decrease), hdc to end. Turn. (30 hdc)
Row 13: Ch 2, hdc to last 3 sts, hdc2tog, hdc in last st (side edge shaping). Turn. (29 hdc)
Row 14: Ch 2, hdc2tog, hdc to end. Turn. (28 hdc)
Row 15: Ch 2, hdc to end. Turn. (28 hdc)
Row 16: Ch 2, hdc2tog, hdc to end. Turn. (27 hdc)
Row 17: Ch 2, hdc to end. Turn. (27 hdc)
Row 18: Ch 2, hdc2tog, hdc to end. Turn. (26 hdc)
Row 19: Ch 2, hdc to end. Turn. (26 hdc)
Row 20: Ch 2, hdc2tog, hdc to last 3 sts, hdc2tog, hdc in last st. Turn. (24 hdc)
Row 21: Ch 2, hdc to end. Turn. (24 hdc)
Row 22: Ch 2, hdc2tog, hdc to end. Turn. (23 hdc)
Row 23: Ch 2, hdc to end. Turn. (23 hdc)
Continue decreasing at the V-neck edge every other row until the strap attachment point is reached, approximately 18 to 20 stitches remaining. Fasten off.
Left Bust Cup: Join yarn at center split and work in mirror image to the right cup, reversing all shaping.
Part 6: Straps
Make 2 twisted chain straps.
Ch 60 (or adjust length as needed to fit from front bodice point, over shoulder, crossing at upper back, and attaching to opposite side of bodice back edge).
Do not turn. Working back along the foundation chain from left to right, sl st in each ch across. Fasten off leaving a 12-inch tail for sewing.
Attach straps securely to the bodice points using black sewing thread and a hand-sewing needle. The straps cross at the open upper back for the signature low-back silhouette.
Finishing
Block all pieces before final assembly. Pin the skirt flat and steam or wet block according to your yarn’s care instructions. The motifs will open up beautifully and the scallop hem will lay flat.
Weave in all remaining ends with a tapestry needle. For the most invisible finish, weave ends along the same color path and split the yarn plies if possible.
The dress is designed to be worn with an undergarment or bodycon slip beneath it, as the lace skirt is open-work.
Size Customization Tips
For larger sizes, add additional columns of motifs to increase the skirt circumference. Each additional motif adds 3.25 inches. You will also need to increase the bodice stitch counts proportionally and adjust the shaping rows.
For a longer dress, add additional rows of motifs to the skirt height.
Helpful Tips for Success
Blocking matters. Cotton thread relaxes significantly when blocked. Your motifs may look a bit rumpled before blocking, but they will transform into crisp, flat squares with proper wet or steam blocking.
Count your stitches. Especially in the bodice shaping rows. One missed decrease can throw off the symmetry of your V-neck.
Try it on as you go. Once the skirt is seamed into a tube, you can step into it and check the fit before committing to the bodice.
Use stitch markers generously. Mark your center front, center back, and division points. Mark the V-neck center. Mark anything that helps you stay oriented.
Skill Level Notes
This pattern is rated Advanced Intermediate. You should be comfortable with:
If you have made granny squares and a fitted top before, you have the skills for this dress.
Thank you so much for choosing this pattern for your next project. I truly hope you love making it as much as I loved designing it. This dress turns heads every single time, and there is nothing quite like wearing something you made with your own hands.
If you make this lace mini dress, I would absolutely love to see it. Tag me on Instagram or share a photo in my Facebook group. Seeing your versions brings me so much joy.
Save this pattern to your Pinterest boards so you can find it when you are ready to start. And please drop a comment below if you have any questions or just want to share your progress. I read every single one.
