
I called this one the Midnight Garden because it reminded me of those old botanical illustrations you find in antique shops. The ones with dark backgrounds and flowers that seem to glow against the ink. I actually sketched the first version of this top in a worn notebook about three years ago, sitting in my grandmother’s sunroom surrounded by her African violets.
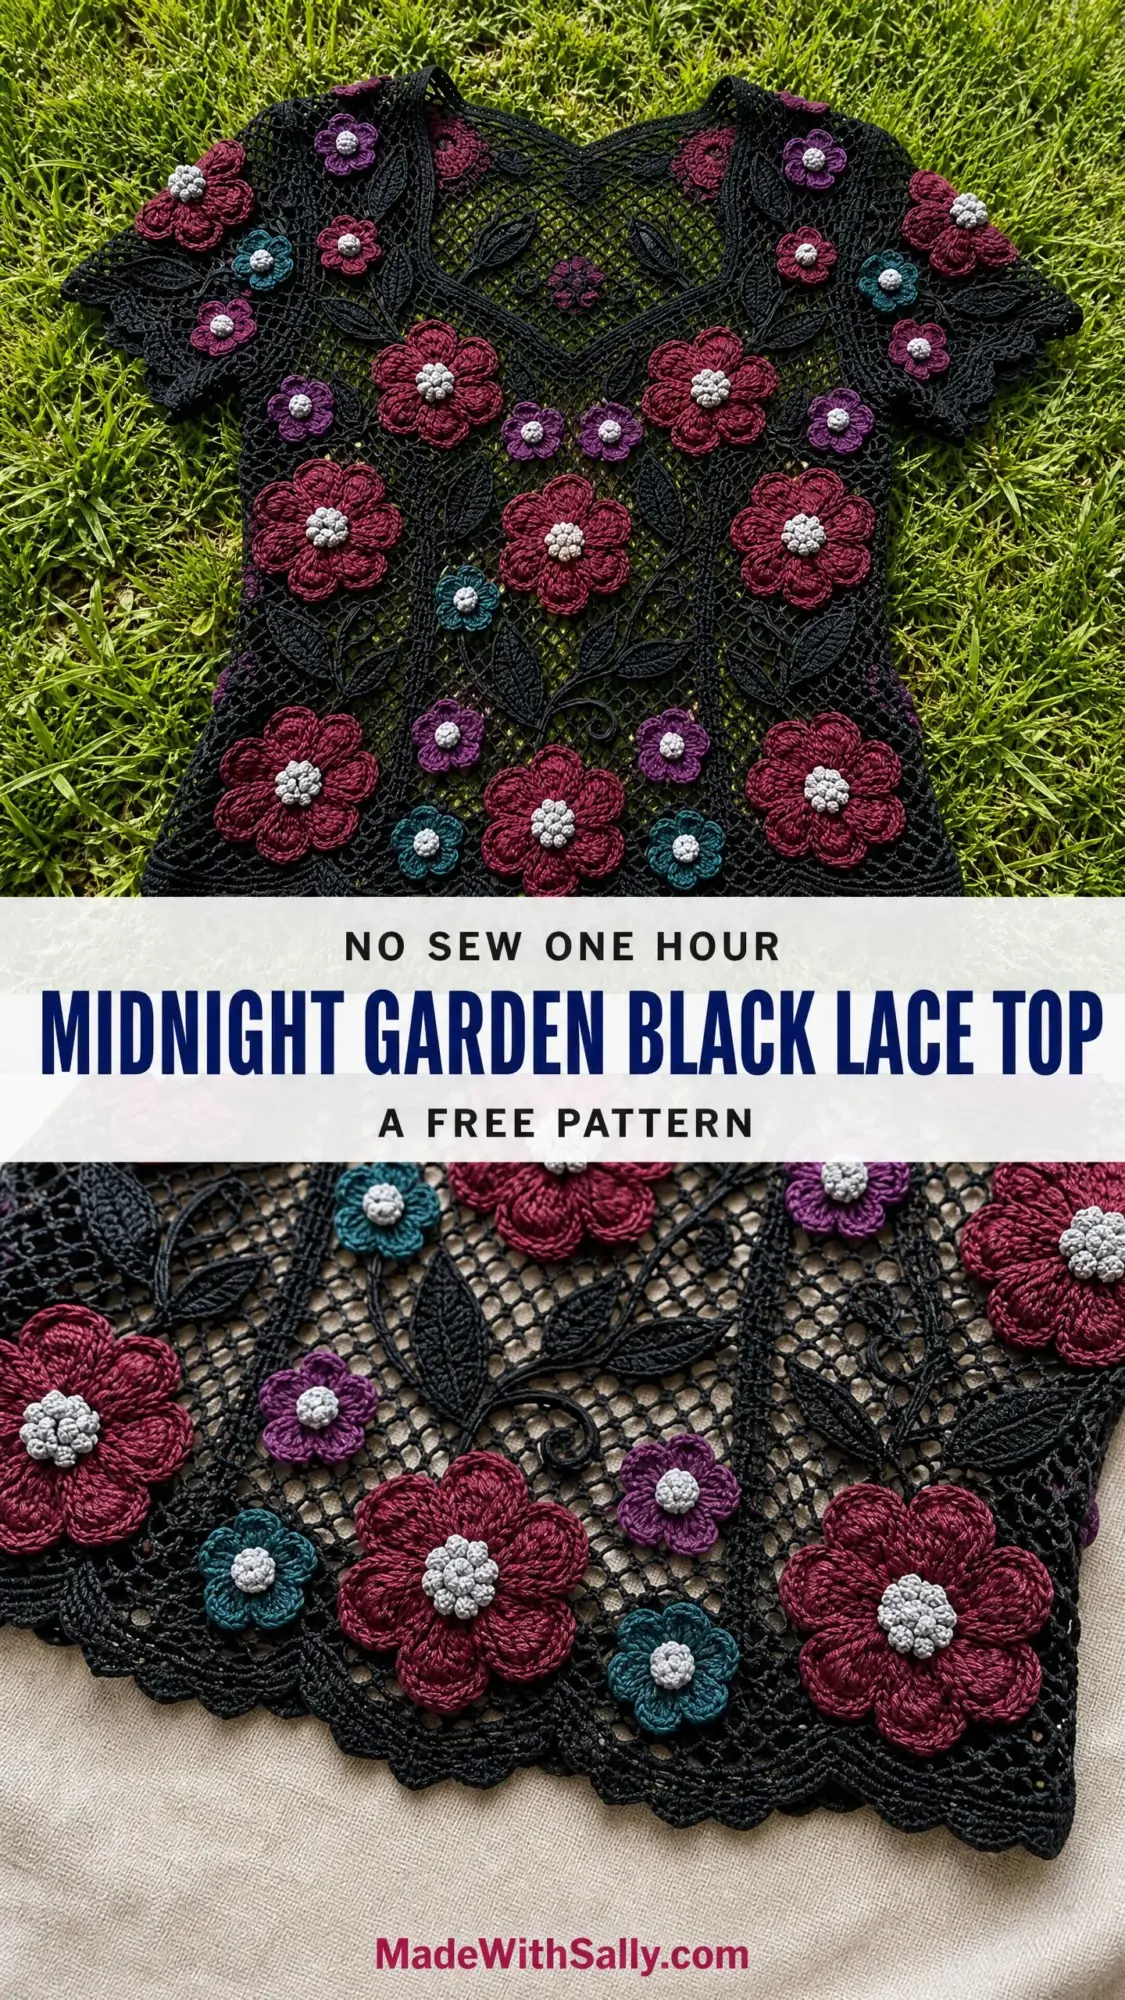
She had this vintage lace blouse from the 1970s that I always admired. Black mesh with colorful flowers scattered across it like someone had tossed a handful of petals into the night sky. When I finally sat down to create my own interpretation, I wanted that same romantic drama. That feeling of wearing a garden after dark.
This pattern has been through countless revisions since that first sketch. Every flower placement, every leaf trail, every stitch count has been tested and retested. What you are getting here is the version I am genuinely proud of. The one that fits beautifully, works up with clear logic, and turns heads every single time.
About This Crochet Pattern
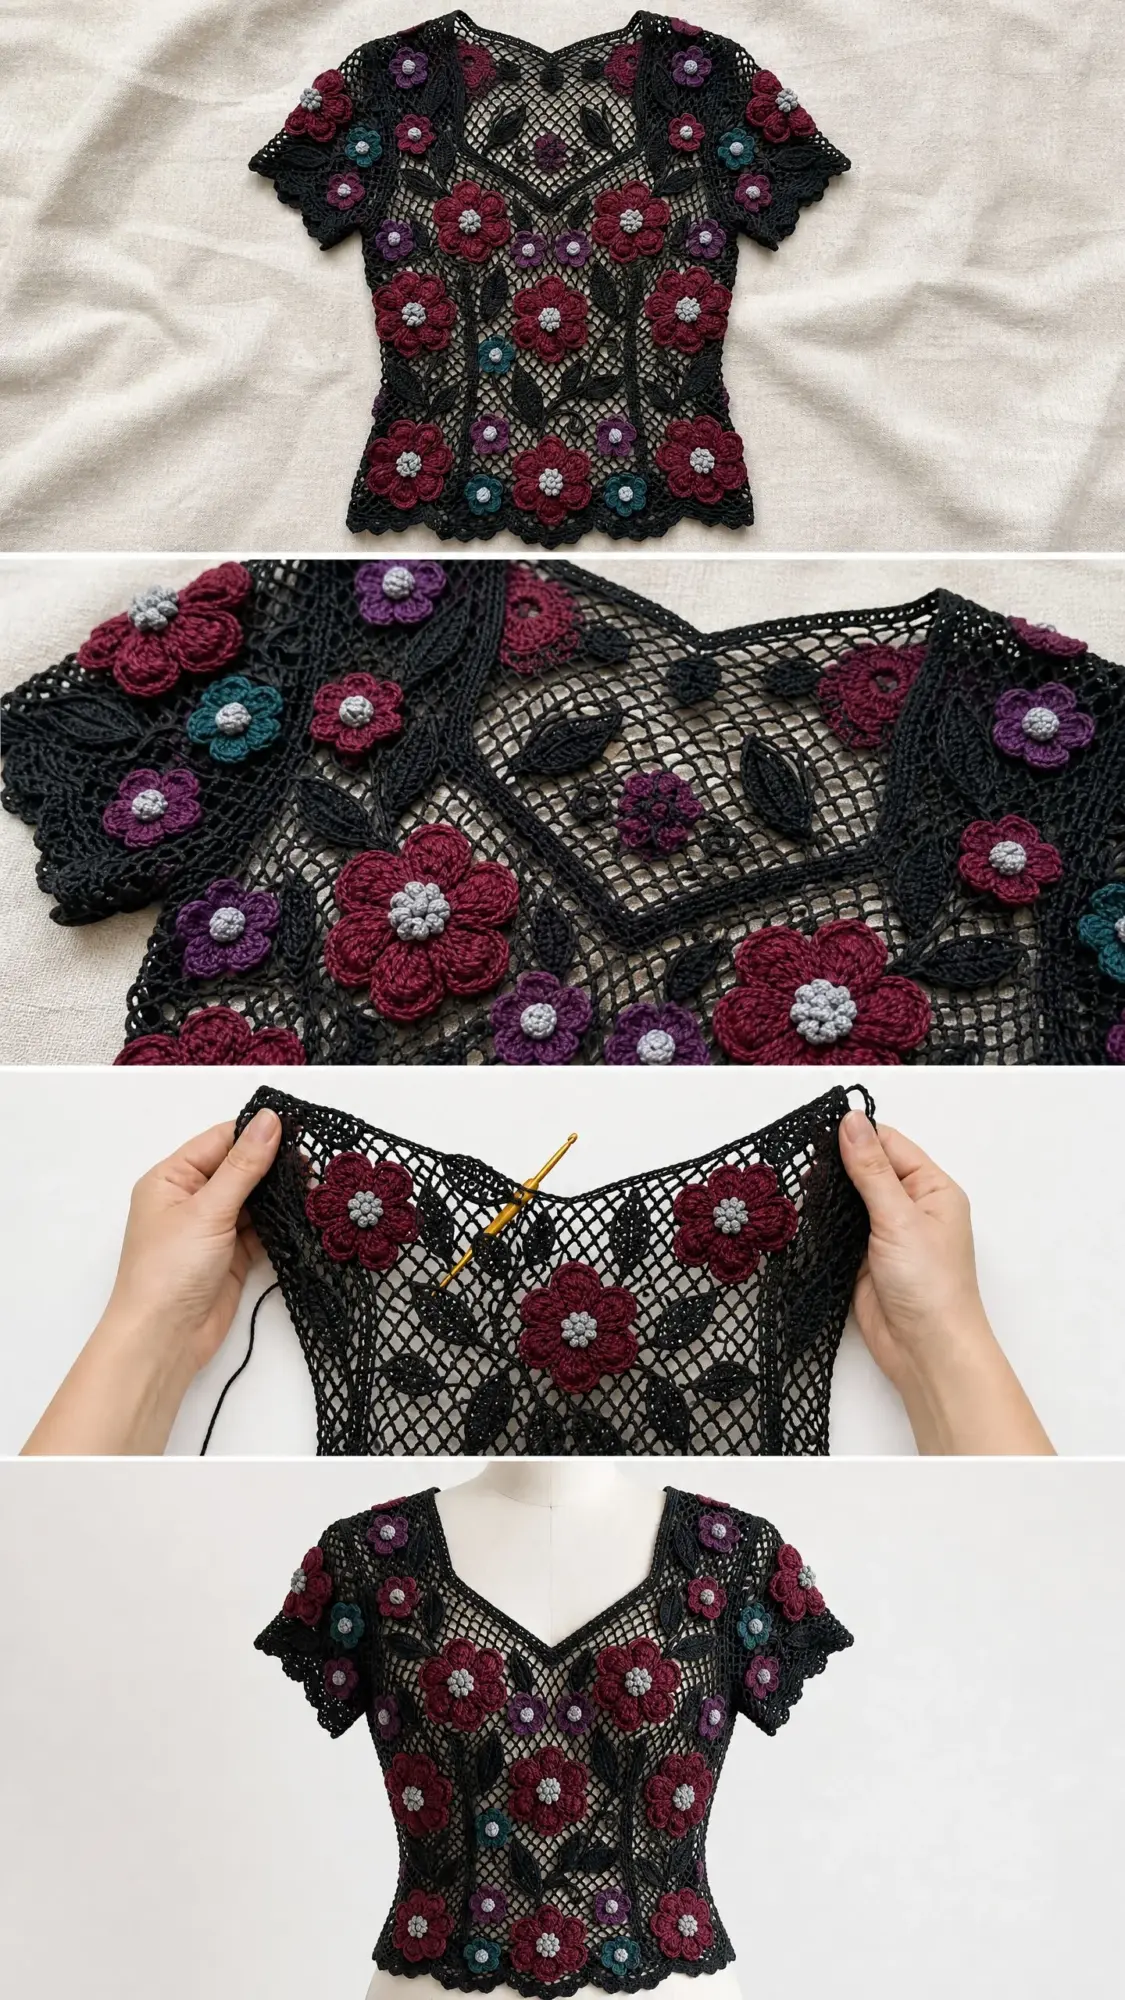
This is an Irish crochet inspired lace top with dimensional floral motifs appliqued onto a filet mesh background. The construction method is traditional but approachable. You will work two flat panels for the front and back, seam them together, then pick up stitches to work the sleeves in the round.
The flowers and leaves are all made separately and sewn on after blocking. This might sound like a lot of work, and honestly it is. But breaking the project into smaller pieces makes it much more manageable. You can crochet flowers while watching television, then tackle the mesh panels when you have focused time.
Skill level: Advanced intermediate. You should be comfortable with filet mesh, working in the round, joining motifs, seaming, and shaping. If you have never tried filet crochet before, I recommend practicing a small swatch first. The rhythm of double crochet (dc), chain one, skip one becomes second nature quickly.
Time estimate: Approximately 40 to 60 hours total, including all motif construction and finishing work.
Finished Measurements
This pattern is written for size Medium with the following finished dimensions:
Size customization tips are included at the end of the instructions.
Materials Needed
Yarn:
Yarn Recommendations:
I have tested this pattern with several yarn brands and these work beautifully:
Cascade Yarns Heritage Sock in Jet for the main color gives excellent stitch definition and holds its shape well after blocking. Drops Fabel Solid in Black is a budget friendly option with good drape for lace. Malabrigo Sock in Black adds a slight halo that creates lovely dimension without obscuring the mesh pattern.
Any smooth, plied fingering weight yarn at approximately 400 yards per 100 grams will work. Avoid single ply or loosely spun yarns as they will split during the dense mesh and motif construction.
Hook: US Size B/1 (2.25 mm) for body and all motifs
Notions: Tapestry needle, stitch markers, rust proof pins for blocking, blocking mats, spray bottle
Gauge
22 stitches and 22 rows = 4 inches (10 cm) in filet mesh stitch (one dc, one chain 1 space counted as 2 stitches) using Yarn A and US B/1 hook, after blocking.
Gauge is mandatory for this fitted garment. Please swatch at least a 6 inch square, block it, and measure before beginning the body panels. A difference of even half a stitch per inch will affect fit significantly when working with 180 or more stitches.
Motif gauge: Large flower measures approximately 2.5 inches (6.35 cm) across after blocking. Small flower measures approximately 1.5 inches (3.8 cm) across after blocking.
Abbreviations and Stitch Definitions
Understanding these terms before you begin will make the pattern much easier to follow:
Special Stitches for This Crochet Tutorial
Filet Mesh Unit (FMU)
This is the background stitch of the entire body. Each FMU consists of one dc, chain 1, skip 1 stitch or chain space. When counting stitches for rows, each FMU counts as 2 stitches. At row ends, chain 4 to turn (this counts as dc plus ch 1).
Bobble (bo)
Yarn over, insert hook into designated stitch, pull up a loop, yarn over, draw through 2 loops (2 loops remain on hook). Repeat this entire sequence 4 more times in the same stitch, making 5 incomplete double crochets in the same stitch. Yarn over and draw through all 6 loops on hook. One bobble made.
Bobble Center Cluster (bcc)
Work 7 bobbles individually into a magic ring, join with sl st to first bobble. This forms the pearl center of each flower and is worked in Yarn E (light gray). Pull the magic ring tight before joining.
Large Flower
Worked in Yarn B, C, or D as specified.
Round 1: Using magic ring, ch 3 (counts as first dc), work 11 dc into ring, join with sl st to top of ch-3. (12 dc)
Round 2: Ch 1, (sc in next st, hdc in next st, 3 dc in next st, hdc in next st, sc in next st) repeat 3 times, join with sl st to first sc. (18 sts, 3 petals of 6 sts each)
Round 3: Working behind Round 2 petals, sl st into the skipped sts of Round 1 between petals. Ch 4, (sl st into next Round 1 dc, ch 4) repeat 5 times, join. (6 ch-4 loops)
Round 4: Into each ch-4 loop work (sl st, ch 1, sc, hdc, 3 dc, hdc, sc, ch 1, sl st). (6 petals)
Fasten off leaving a 12 inch tail for sewing. The large flower measures approximately 2.5 inches (6.35 cm) across.
Make 18 total: 12 in Yarn B, 4 in Yarn C, 2 in Yarn D.
Small Flower
Worked in Yarn B, C, or D as specified.
Round 1: Using magic ring, ch 3 (counts as first dc), work 9 dc into ring, join with sl st to top of ch-3. (10 dc)
Round 2: Ch 1, (sc, 3 dc, sc) into each of 5 sets of 2 stitches, join. (25 sts in 5 petals)
Fasten off leaving a 12 inch tail. Small flower measures approximately 1.5 inches (3.8 cm) across.
Make 10 total: 4 in Yarn C, 4 in Yarn D, 2 in Yarn B.
Leaf
Worked in Yarn A.
Ch 12.
Row 1: Sc in 2nd ch from hook, hdc in next, dc in next 2, hdc in next, sc in next, hdc in next, dc in next 2, hdc in next, sl st into last ch. Do not turn. Working along the opposite side of the foundation chain: sl st, hdc, dc 2, hdc, sc, hdc, dc 2, hdc, sc, join with sl st to starting sc. Fasten off.
Leaf is approximately 1.25 inches (3.2 cm) long.
Make 36 leaves total.
Scallop Border
Worked as a finishing round along any edge. Join yarn at any corner or designated stitch. Ch 1, sc in same st, (skip 2 sts, 5 dc in next st, skip 2 sts, sc in next st) rep across, join. One scallop repeat = 6 sts.
Pattern Notes Before You Begin
1. The body is worked in two flat panels (front and back) from the hem upward. The panels are identical except that the front panel has a V-neck shaping at the top and the back panel has a shallow round neck.
2. All stitch counts for the body mesh are given as total stitch positions. Each FMU is counted as 2 stitches (1 dc plus 1 ch-1 sp). The turning chain of ch 4 at the beginning of each row counts as 1 dc plus ch 1 (one FMU).
3. Flowers, leaves, and bobble centers are all made separately and sewn on after both panels are seamed and blocked. Do not sew motifs on before blocking.
4. The garment is slightly see through due to the mesh construction. A camisole or slip worn underneath is recommended.
5. The scallop border is added last, after all motifs are in place.
Step by Step Instructions
Front Panel
Foundation Chain: Using Yarn A and US B/1 hook, ch 202. This yields 100 FMU working positions plus 2 stitches for the final dc at the row end.
Row 1 (WS): Dc in 6th ch from hook (first FMU made), (ch 1, skip 1 ch, dc in next ch) repeat across to end. Turn. (100 FMU = 200 sts)
Check: You should have 101 dc total (including the t-ch dc) and 100 ch-1 spaces. Total working positions = 200.
Row 2 (RS): Ch 4 (t-ch = first dc + ch 1), skip first ch-sp, dc in next dc, (ch 1, skip ch-sp, dc in next dc) rep across, ending dc in 3rd ch of starting ch-5 from previous row. Turn. (100 FMU = 200 sts)
Rows 3 through 6: Rep Row 2. No shaping. (100 FMU = 200 sts each row)
Checkpoint: After Row 6, the hem section should measure approximately 1.1 inches (2.8 cm) tall before blocking and approximately 36 inches (91.5 cm) wide.
Waist Shaping: Decrease Section
Row 7 (RS): Ch 4, skip ch-sp, dc2tog over next dc and the dc after skipping its ch-sp (this removes one FMU on the right edge), (ch 1, skip ch-sp, dc in next dc) across to last 3 dc positions, dc2tog over next dc and following dc skipping its ch-sp, ch 1, dc in top of t-ch. Turn. (98 FMU = 196 sts)
Row 8: Ch 4, dc in next dc, (ch 1, sk ch-sp, dc in next dc) across, dc in top of t-ch. Turn. (98 FMU = 196 sts)
Row 9: Work decrease row as Row 7. (96 FMU = 192 sts)
Row 10: Even row. (96 FMU = 192 sts)
Row 11: Decrease row. (94 FMU = 188 sts)
Row 12: Even row. (94 FMU = 188 sts)
Row 13: Decrease row. (92 FMU = 184 sts)
Row 14: Even row. (92 FMU = 184 sts)
Row 15: Decrease row. (90 FMU = 180 sts)
Rows 16 through 20: Even rows. (90 FMU = 180 sts each row)
Checkpoint: After Row 20, the front panel should measure approximately 3.6 inches (9.1 cm) from the hem. This is your waist suppression point.
Waist Shaping: Increase Section
Row 21 (RS): Ch 4, (2 dc, ch 1) in first ch-sp (increase made at right edge), (ch 1, sk ch-sp, dc in next dc) across to last ch-sp, (2 dc) in last ch-sp, ch 1, dc in t-ch top. Turn. (92 FMU = 184 sts)
Row 22: Even row. (92 FMU = 184 sts)
Row 23: Increase row. (94 FMU = 188 sts)
Row 24: Even row. (94 FMU = 188 sts)
Row 25: Increase row. (96 FMU = 192 sts)
Row 26: Even row. (96 FMU = 192 sts)
Row 27: Increase row. (98 FMU = 196 sts)
Row 28: Even row. (98 FMU = 196 sts)
Row 29: Increase row. (100 FMU = 200 sts)
Rows 30 through 34: Even rows. (100 FMU = 200 sts each row)
Checkpoint: After Row 34, the front panel should measure approximately 6.2 inches (15.7 cm) tall. The width is back to 36 inches (91.5 cm) at the full bust.
Armhole Shaping
Row 35 (RS): Sl st across first 12 sts (6 FMU), ch 4, (ch 1, sk ch-sp, dc in next dc) across to last 12 sts, leave last 12 sts unworked. Turn. (88 FMU = 176 sts)
Row 36: Ch 4, dc2tog at beg edge (armhole decrease), work even to last 3 positions, dc2tog at end edge, ch 1, dc in t-ch. Turn. (86 FMU = 172 sts)
Row 37: Armhole decrease row. (84 FMU = 168 sts)
Row 38: Armhole decrease row. (82 FMU = 164 sts)
Row 39: Armhole decrease row. (80 FMU = 160 sts)
Rows 40 through 44: Even rows. (80 FMU = 160 sts each row)
Checkpoint: After Row 44, the front panel should measure approximately 8 inches (20.3 cm) tall.
V-Neck Shaping
At Row 45, the panel divides at the center for the V-neck. The center point is at FMU position 40 counting from the right edge.
Row 45 Right Side (RS): Ch 4, work across 40 FMU to center, dc in the dc at center, leave remaining sts unworked. Turn. (40 FMU = 80 sts for right side)
Row 46 Right Side: Ch 4, work to last 4 positions, dc2tog twice (2 FMU decreased at neck edge). Turn. (38 FMU = 76 sts)
Row 47: Even row. (38 FMU = 76 sts)
Row 48: Neck decrease row: decrease 2 FMU at neck edge. (36 FMU = 72 sts)
Row 49: Even row. (36 FMU = 72 sts)
Row 50: Neck decrease row. (34 FMU = 68 sts)
Row 51: Even row. (34 FMU = 68 sts)
Row 52: Neck decrease row. (32 FMU = 64 sts)
Row 53: Even row. (32 FMU = 64 sts)
Row 54: Neck decrease row. (30 FMU = 60 sts)
Rows 55 through 60: Even rows. (30 FMU = 60 sts)
Fasten off right shoulder section.
Row 45 Left Side: Rejoin Yarn A at center dc of Row 44 on WS, work left side mirroring right side with neck decreases at neck edge each RS row. Stitch counts mirror right side exactly.
Fasten off left shoulder section.
Checkpoint: After Row 60, the front panel is complete. It should measure approximately 10.9 inches (27.7 cm) tall.
Back Panel
Foundation Chain: Using Yarn A and US B/1 hook, ch 202.
Work Rows 1 through 34 exactly as Front Panel. (100 FMU = 200 sts after Row 34)
Armhole Shaping: Work Rows 35 through 44 exactly as Front Panel Armhole Shaping. (80 FMU = 160 sts after Row 44)
Back Neck Shaping
The back neck is a shallow rounded opening with no V-shaping.
Rows 45 through 54: Work even. (80 FMU = 160 sts each row)
Row 55 (RS): Work 25 FMU, fasten off. Skip center 30 FMU (this creates the back neck opening of approximately 10.9 inches/27.7 cm), rejoin yarn, work remaining 25 FMU. Turn. (25 FMU = 50 sts each shoulder)
Rows 56 through 60: Work each shoulder section even separately. (25 FMU = 50 sts each shoulder section)
Fasten off both shoulder sections.
Seaming
Join front and back panels at shoulders using sl st seam on WS, working through both loops of corresponding stitches. Each shoulder seam joins 25 FMU of the back shoulder to the innermost 25 FMU of the front shoulder. The outer 5 FMU of front shoulders remain free and form the slight sleeve cap overlap.
Join side seams from hem to armhole using sl st seam on WS.
Checkpoint: After seaming, the joined garment should form a fitted top shell with open armhole ovals approximately 5.5 inches (14 cm) deep and 6.5 inches (16.5 cm) wide.
Sleeves (Make 2)
Sleeves are worked in the round from picked up stitches at the armhole.
Setup Round: With RS facing, join Yarn A at underarm side seam. Pm to mark beg of round. Pick up and work sc evenly around armhole opening.
Target stitch count for sleeve opening: 84 sc. Adjust pickup as needed by adding or skipping sts at even intervals to reach exactly 84. Join with sl st to first sc. (84 sc)
Rnd 1: Ch 4 (t-ch), (ch 1, sk 1, dc in next sc) around, join with sl st to 3rd ch of t-ch. (42 FMU = 84 sts)
Rnds 2 through 5: Ch 4, (ch 1, sk ch-sp, dc in next dc) around, join. (42 FMU = 84 sts each round)
Rnd 6 (Decrease Round): Ch 4, (ch 1, sk ch-sp, dc in next dc) 3 times, dc2tog, (ch 1, sk ch-sp, dc in next dc) 15 times, dc2tog, (ch 1, sk ch-sp, dc in next dc) to end, join. (40 FMU = 80 sts)
Rnds 7 through 10: Even rounds. (40 FMU = 80 sts each round)
Fasten off.
Checkpoint: After Round 10, the sleeve should measure approximately 3.5 inches (9 cm) in length from the pickup round.
Borders
Hem Border:
Join Yarn A at right side seam at the hem with RS facing. Target: 396 sc around entire hem perimeter.
Round 1: Sc evenly around hem, placing 396 sc total. Join. (396 sc)
Round 2 (Scallop): Ch 1, sc in first sc, (skip 2 sc, 5 dc in next sc, skip 2 sc, sc in next sc) 66 times, join with sl st to first sc. Fasten off. (66 scallop repeats)
Sleeve Border (each sleeve):
Round 1: Sc 78 evenly around sleeve lower edge. Join. (78 sc)
Round 2 (Scallop): (Skip 2, 5 dc in next sc, skip 2, sc in next) 13 times, join. (13 scallop repeats)
Fasten off.
Neckline Border:
Pick up along front right neck slope: approximately 30 sc. Pick up at V-center point: 1 sc. Pick up along front left neck slope: approximately 30 sc. Pick up along back neck: 60 sc. Total neckline pickup: 121 sc.
Round 1: Sc around neckline as described. Pm at center V-point sc. (121 sc)
Round 2 (Scallop): Work scallop rep (skip 2, 5 dc in next, skip 2, sc in next) around, working sc at the V-point marker without scallop to maintain point geometry. (20 scallop repeats with 1 plain sc at V-center)
Fasten off.
Motif Placement and Attachment
Block all motifs before attaching. Block the assembled garment before attaching motifs.
Flower count summary:
Placement guide:
The diagonal lines of crocheted leaves form two mirrored V-trails on the front panel, meeting at a center spine from the hem to the chest. Leaves are placed at approximately 1.5 inch intervals along these trails. Pin leaves in place first and sew with a tapestry needle and Yarn A through the WS of the mesh, catching 2 to 3 stitches of each leaf.
Flowers are placed in clusters along and around the leaf trails. The largest concentration of large Yarn B flowers falls on the center front body between Rows 20 and 50. Smaller and darker flowers (Yarn C and D) appear toward the shoulders and sleeves.
Sew one bobble center cluster into the center of each flower after the flower is sewn to the garment. Use Yarn E and catch the bobble cluster to the center round of the flower, pulling gently to dome it forward.
The back panel has a similar but sparser arrangement with 8 large flowers and 5 small flowers placed symmetrically.
Blocking Instructions
Wet block all pieces. Soak the assembled garment in cool water for 15 minutes. Gently squeeze out excess water without wringing. Lay flat on blocking mats and pin to finished measurements: 36 inches (91.5 cm) at bust, 32.5 inches (82.6 cm) at waist, 22 inches (56 cm) total length. Pin the scallop border points outward to define each scallop. Allow to dry completely (24 to 48 hours) before removing pins.
Size Customization Tips
To go up one full size (bust 38 to 40 inches): Add 10 FMU to the foundation chain (ch 222 instead of ch 202). Shoulder sections will each be 35 FMU instead of 30 FMU. Adjust armhole pickup to 92 sc for sleeves.
To go down one full size (bust 32 to 34 inches): Subtract 10 FMU from the foundation (ch 182). Shoulder sections will each be 25 FMU. Armhole pickup: 76 sc.
For length adjustment: Add or subtract even rows between the waist shaping section (Rows 16 to 20) and the armhole shaping (Row 35). Each 2 rows added or subtracted equals approximately 0.36 inches (0.9 cm) of length.
Care Instructions
Hand wash in cool water with a gentle wool or delicate fiber wash. Do not wring. Lay flat to dry. Do not tumble dry. Do not iron directly. Steam block with a steamer held 2 inches (5 cm) above the surface if reshaping is needed after washing. Store folded flat or rolled, never hung, as hanging will distort the mesh.
Final Thoughts on This Lace Top Crochet Pattern
Thank you so much for choosing to make this Midnight Garden Black Lace Top. This project is truly a labor of love, and I hope you enjoy every stitch of it. The finished piece is stunning worn over a simple camisole for evening events or layered casually with a tank top for everyday elegance.
I would absolutely love to see your finished tops. Tag me on Instagram or share in our Facebook group so I can admire your beautiful work. Seeing your versions of my patterns is honestly one of the best parts of designing.
If this pattern is calling to you, go ahead and save it to your Pinterest boards so you can find it when you are ready to start. And please drop a comment below if you make one. I read every single comment and love hearing about your projects.
