
Go dig through your stash right now. I know you have that gorgeous cotton yarn you’ve been saving for something special. This is the project.
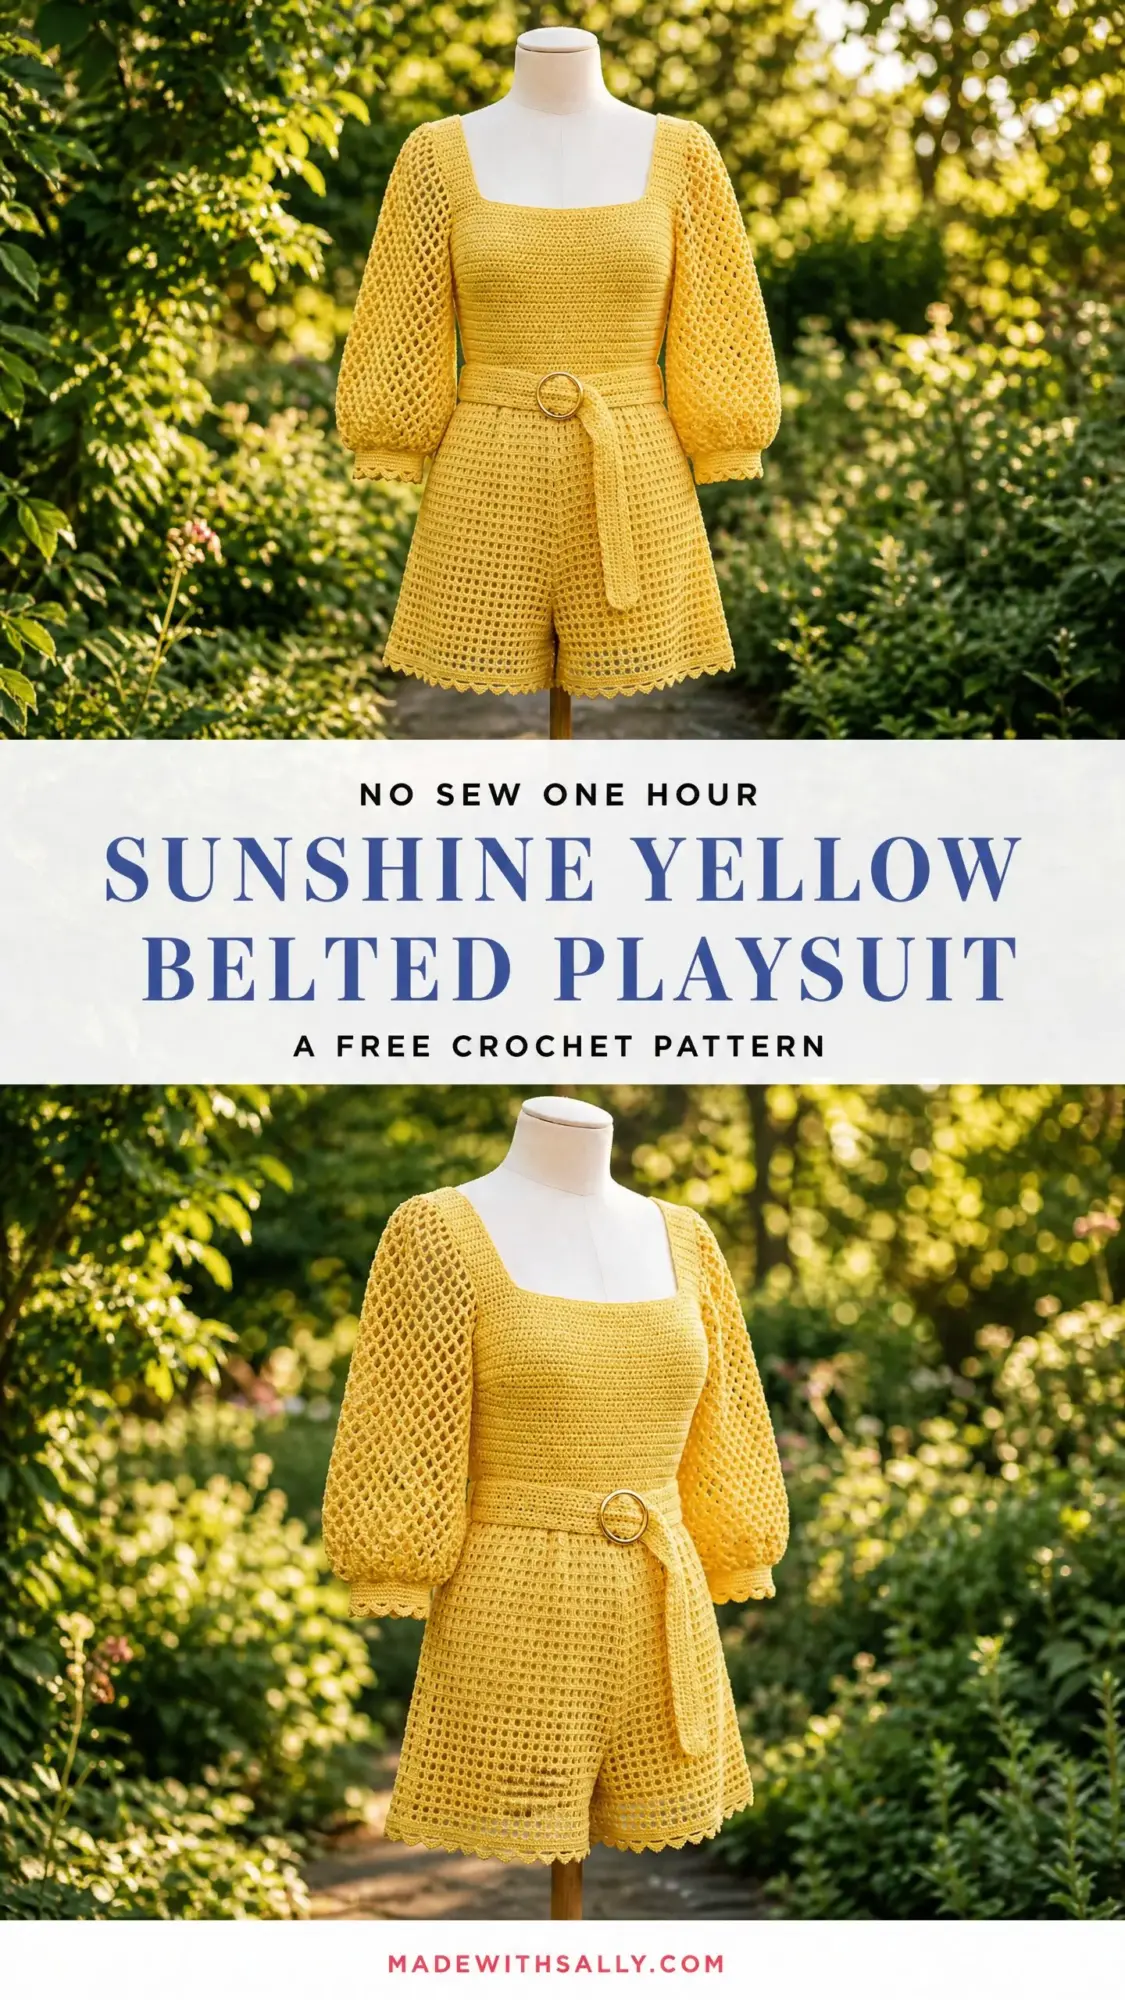
This belted playsuit combines structured bodice construction with open mesh detailing, and the result is a garment that looks far more complicated than it actually is. You get a square neckline, dreamy blouson sleeves, and shorts with the prettiest scallop hem. The whole thing is worked top down in the round, so there is minimal seaming at the end.
I will be honest with you. This is an intermediate to advanced pattern. If you have never worked a top down garment before, I would suggest tackling a simpler sweater first. But if you have made a fitted top or a raglan cardigan, you absolutely have the skills to pull this off. The construction is logical, and I will walk you through every single step.
Why This Playsuit Pattern Works
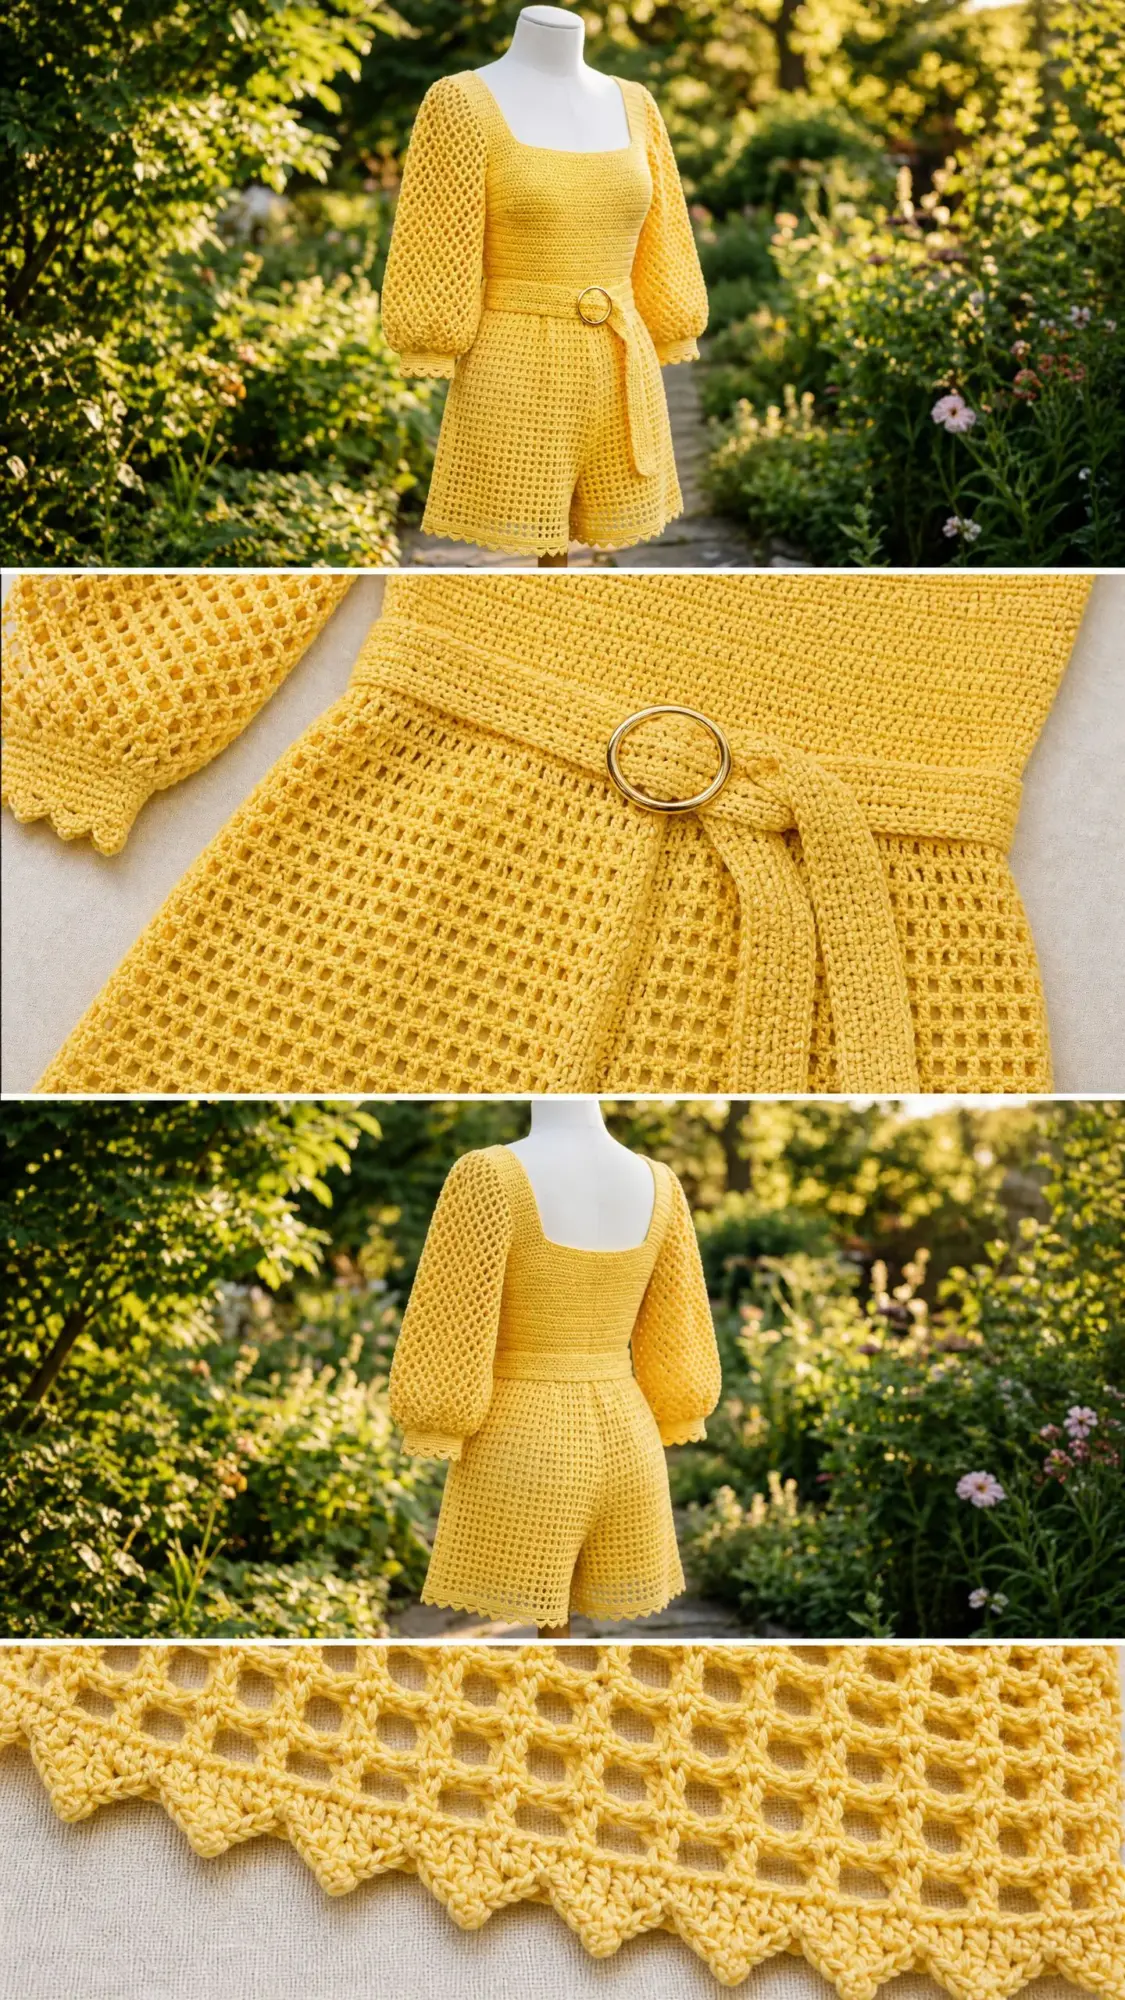
The genius of this design is how it uses different stitch textures to create visual interest and functional shaping. The bodice is worked in half double crochet for a dense, supportive structure. The waistband switches to single crochet with a smaller hook to create a natural cinch. Then the shorts open up into a breezy filet mesh that gives the legs movement and airflow.
The sleeves use a diamond mesh pattern that creates those gorgeous blouson puffs. They are gathered at the cuff with a decrease round, then finished with scallop edging. The effect is romantic and summery without being fussy.
A crocheted belt threads through built in eyelets at the waist and loops through a gold metal ring. This means you control the fit, and the hardware adds a polished finishing touch.
Materials You Will Need
Yarn: 800 yards (732 meters) of DK weight yarn. Cotton or a cotton linen blend works best for this pattern. The structure of cotton holds the bodice shape beautifully, and it blocks like a dream. Look for a sunshine yellow or golden yellow colorway.
Recommended yarn options:
Hooks:
Notions:
Finished Measurements
This pattern is written for size Small. Here are the finished dimensions:
Gauge
Getting gauge right matters a lot for a fitted garment like this playsuit. Please make a swatch.
With your G-6 / 4.0 mm hook in half double crochet worked in the round: 18 stitches and 14 rows equals 4 inches by 4 inches (10 cm by 10 cm).
With your H-8 / 5.0 mm hook in filet mesh: one 4 stitch mesh repeat equals approximately 1 inch (2.5 cm) wide.
Block your swatch before measuring. If you are getting more stitches per inch, go up a hook size. Fewer stitches, go down.
Abbreviations and Stitch Definitions
Let me walk you through every stitch you will use. Even if you know these, a quick refresher never hurts.
ch = chain. Wrap yarn over hook, pull through loop on hook. This is your foundation stitch.
sl st = slip stitch. Insert hook, yarn over, pull through both loops at once. Used for joining rounds.
sc = single crochet. Insert hook, yarn over, pull up a loop (2 loops on hook), yarn over, pull through both loops.
hdc = half double crochet. Yarn over, insert hook, yarn over, pull up a loop (3 loops on hook), yarn over, pull through all 3 loops. This creates a slightly taller stitch than single crochet with nice density.
dc = double crochet. Yarn over, insert hook, yarn over, pull up a loop (3 loops on hook), yarn over, pull through 2 loops, yarn over, pull through remaining 2 loops.
sc2tog = single crochet 2 together, a decrease. Insert hook in first stitch, pull up loop, insert hook in next stitch, pull up loop (3 loops on hook), yarn over, pull through all 3.
hdc2tog = half double crochet 2 together, a decrease. Yarn over, insert hook in first stitch, pull up loop, yarn over, insert hook in next stitch, pull up loop (5 loops on hook), yarn over, pull through all 5.
inc = increase. Work 2 stitches into 1 stitch.
sk = skip.
ch-sp = chain space. The gap created by a chain in the previous row.
RS = right side. The public facing side of your work.
WS = wrong side. The inside of your garment.
Special Stitches
Diamond Mesh Stitch
This creates the beautiful open lattice on the sleeves. It is worked over a multiple of 4 stitches plus 2.
Row 1 (RS): Ch 1, sc in first st, [ch 3, sk 3 sts, sc in next st] across. Turn.
Row 2: Ch 5 (counts as dc plus ch 2), [sc in ch-3 sp, ch 3] across, ending sc in last ch-3 sp, ch 2, dc in last sc. Turn.
Row 3: Ch 1, sc in first dc, ch 1, [sc in next ch-3 sp, ch 3] across, ending sc in t-ch sp, ch 1, sc in 3rd ch of t-ch. Turn.
Row 4: Ch 4 (counts as dc plus ch 1), sc in first ch-3 sp, [ch 3, sc in next ch-3 sp] across, ending ch 1, dc in last sc. Turn.
Repeat rows 1 through 4 for the pattern.
Filet Mesh Stitch
This creates the open grid on the shorts section.
Round 1: [Sc in next st, ch 1, sk 1 st] around, sl st to join.
Round 2: [Sc in ch-1 sp, ch 1] around, sl st to join.
Repeat round 2 for the pattern.
Scallop Edging
This finishes the sleeve cuffs and shorts hem with a decorative border.
Join yarn with sl st. Ch 1, sc in same st. [Sk 1 st, 5 dc in next st, sk 1 st, sc in next st] around. Sl st to first sc. Fasten off.
This repeat requires a multiple of 4 stitches.
Pattern Instructions
Section 1: Neckline Foundation
The square neckline is created by working flat pieces for the front and back, then joining them into a round.
Front Neckline Setup:
Ch 56.
Row 1 (WS): Hdc in 3rd ch from hook and in each ch across. Turn. (54 hdc)
Row 2 (RS): Ch 2, hdc in each st across. Turn. (54 hdc)
Row 3: Ch 2, hdc in each st across. Turn. (54 hdc)
Row 4: Ch 2, hdc in each st across. Do not turn. (54 hdc)
Place a marker and set aside.
Back Neckline Setup:
Work exactly the same as the front. Ch 56, then work Rows 1 through 4.
Joining the Neckline:
Hold front and back with right sides facing out.
Rnd 1 (joining round): With G-6 hook and RS facing, sl st to first st of front panel. Ch 1. Hdc across 54 front sts, ch 6 for right shoulder strap, hdc across 54 back sts, ch 6 for left shoulder strap. Sl st to first hdc. (108 hdc plus 12 ch)
Rnd 2: Ch 1, hdc in each hdc and in each ch around. Sl st to join. (120 hdc)
Place markers at the four corners to define your armhole positions.
Section 2: Bodice
The bodice builds shape through increase rounds at the armhole markers.
Rnd 3: Ch 1, [hdc to 1 st before marker, inc in next st, hdc to marker, inc in next st] 4 times, sl st to join. (128 hdc)
Rnd 4: Ch 1, hdc in each st around, sl st to join. (128 hdc)
Rnd 5: Ch 1, [hdc to 1 st before marker, inc in next st, hdc to marker, inc in next st] 4 times, sl st to join. (136 hdc)
Rnd 6: Ch 1, hdc in each st around, sl st to join. (136 hdc)
Rnd 7: Ch 1, [hdc to 1 st before marker, inc in next st, hdc to marker, inc in next st] 4 times, sl st to join. (144 hdc)
Rnd 8: Ch 1, hdc in each st around, sl st to join. (144 hdc)
Rnd 9: Ch 1, [hdc to 1 st before marker, inc in next st, hdc to marker, inc in next st] 4 times, sl st to join. (152 hdc)
Rnds 10-12: Ch 1, hdc in each st around, sl st to join. (152 hdc)
Rnd 13 (Armhole Separation): Ch 1, hdc across 60 front sts, ch 8 for left armhole bridge, sk 16 sts, hdc across 60 back sts, ch 8 for right armhole bridge, sk 16 sts, sl st to join. (120 hdc plus 16 ch)
Rnd 14: Ch 1, hdc in each st and each ch around. Sl st to join. (136 hdc)
Rnds 15-20: Ch 1, hdc in each st around, sl st to join. (136 hdc)
Checkpoint: The bodice should measure approximately 7 inches (18 cm) from neckline.
Section 3: Waistband
Switch to F-5 hook.
Rnd 21: Ch 1, sc in each hdc around, sl st to join. (136 sc)
Rnd 22: Ch 1, [sc across 16 sts, sc2tog] 8 times, sl st to join. (128 sc)
Rnd 23: Ch 1, [sc across 14 sts, sc2tog] 8 times, sl st to join. (120 sc)
Rnd 24: Ch 1, [sc across 13 sts, sc2tog] 8 times, sl st to join. (112 sc)
Rnds 25-26: Ch 1, sc in each st around, sl st to join. (112 sc)
Rnd 27 (Belt Channel): Place markers at stitch 28 and stitch 84. Ch 1, [sc to 1 st before marker, ch 2, sk 2 sts] twice, sc to end, sl st to join. (108 sc plus 4 ch)
Rnd 28: Ch 1, sc in each st and 2 sc in each ch-2 sp around, sl st to join. (112 sc)
Rnd 29: Ch 1, sc in each st around, sl st to join. (112 sc)
Rnd 30: Ch 1, [sc across 12 sts, inc in next st] 8 times, sl st to join. (120 sc)
Rnd 31: Ch 1, [sc across 13 sts, inc in next st] 8 times, sl st to join. (128 sc)
Switch to G-6 hook.
Rnd 32: Ch 1, hdc in each st around, sl st to join. (128 hdc)
Section 4: Shorts Hip Section
Rnd 33: Ch 1, [hdc across 15 sts, inc in next st] 8 times, sl st to join. (136 hdc)
Rnd 34: Ch 1, hdc in each st around, sl st to join. (136 hdc)
Rnd 35: Ch 1, [hdc across 16 sts, inc in next st] 8 times, sl st to join. (144 hdc)
Rnd 36: Ch 1, hdc in each st around, sl st to join. (144 hdc)
Rnd 37: Ch 1, [hdc across 17 sts, inc in next st] 8 times, sl st to join. (152 hdc)
Rnds 38-39: Ch 1, hdc in each st around, sl st to join. (152 hdc)
Section 5: Shorts Mesh Section
Switch to H-8 hook.
Rnd 40: Ch 1, [sc in next st, ch 1, sk 1 st] around, sl st to join. (76 sc plus 76 ch-1 sps)
Rnds 41-46: Ch 1, [sc in ch-1 sp, ch 1] around, sl st to join. (76 sc plus 76 ch-1 sps)
Section 6: Crotch Division
Fasten off. Join yarn at center front stitch. Work 4 sc across the crotch point, joining to center back stitch to create the inseam bridge.
Section 7: Shorts Legs
Work each leg separately.
Rnd 47: Join at crotch bridge. Ch 1, sc in each mesh sp and around bridge sts. (80 sc)
Rnd 48: Ch 1, [sc in next st, ch 1, sk 1 st] around, sl st to join. (40 sc plus 40 ch-1 sps)
Rnds 49-51: Ch 1, [sc in ch-1 sp, ch 1] around, sl st to join.
Switch to G-6 hook.
Rnd 52: Ch 1, sc in each sc and each ch-1 sp around, sl st to join. (80 sc)
Scallop Edging: [Sk 1 st, 5 dc in next st, sk 1 st, sc in next st] 20 times. Sl st to first sc. Fasten off.
Repeat for second leg.
Section 8: Sleeves
Rnd 1: With H-8 hook, join at underarm. Sc evenly around armhole, picking up 56 sts. Sl st to join. (56 sc)
Rnd 2: Ch 1, sc in each st around, sl st to join. (56 sc)
Work diamond mesh pattern for 24 rounds (6 full pattern repeats).
Switch to F-5 hook.
Gather Rnd: Ch 1, sc in each sc and ch-sp around. Sl st to join. (56 sc)
Blouson Gather Rnd 2: Ch 1, [sc2tog] across. Sl st to join. (28 sc)
Blouson Gather Rnd 3: Ch 1, sc in each st around. Sl st to join. (28 sc)
Cuff Scallop: [Sk 1 st, 5 dc in next st, sk 1 st, sc in next st] 7 times. Sl st to first sc. Fasten off.
Repeat for second sleeve.
Section 9: Belt
With F-5 hook, ch 151.
Row 1: Sc in 2nd ch from hook and in each ch across. Turn. (150 sc)
Rows 2-4: Ch 1, sc in each st across. Turn. (150 sc)
Fasten off after Row 4.
Thread one end through the gold ring, fold over 1.5 inches, and whipstitch to secure. Thread the belt through the waistband eyelets.
Section 10: Finishing
Neckline Edge: With F-5 hook, join yarn at neckline. Sc evenly around the full opening. (120 sc) Work 1 additional round of sc. Fasten off.
Weave in all ends.
Blocking Instructions
Wet blocking is required. Soak the playsuit in cool water for 20 minutes. Press out excess water gently. Lay flat on blocking mats. Pin the neckline, open the sleeve mesh, and shape the scallop edging. Allow to dry completely.
Care Instructions
Machine wash cold on gentle or hand wash. Lay flat to dry. Do not tumble dry or iron directly on mesh sections.
Time to Make This Playsuit Your Own
This sunshine yellow belted playsuit pattern is a true labor of love, and every hour you put into it will show in the finished piece. The combination of structured bodice, gathered blouson sleeves, and open mesh shorts creates something genuinely special. Take your time with the armhole separation and the crotch division. Those are the trickiest parts, and a little patience goes a long way.
I hope you love making this as much as I loved designing it. Thank you for trusting me with your yarn and your time.
If this playsuit is calling your name, go ahead and pin it to your Pinterest boards so you can find it when you are ready to cast on. And please, please leave a comment below if you make one. I would absolutely love to see your version in any color you choose.
