
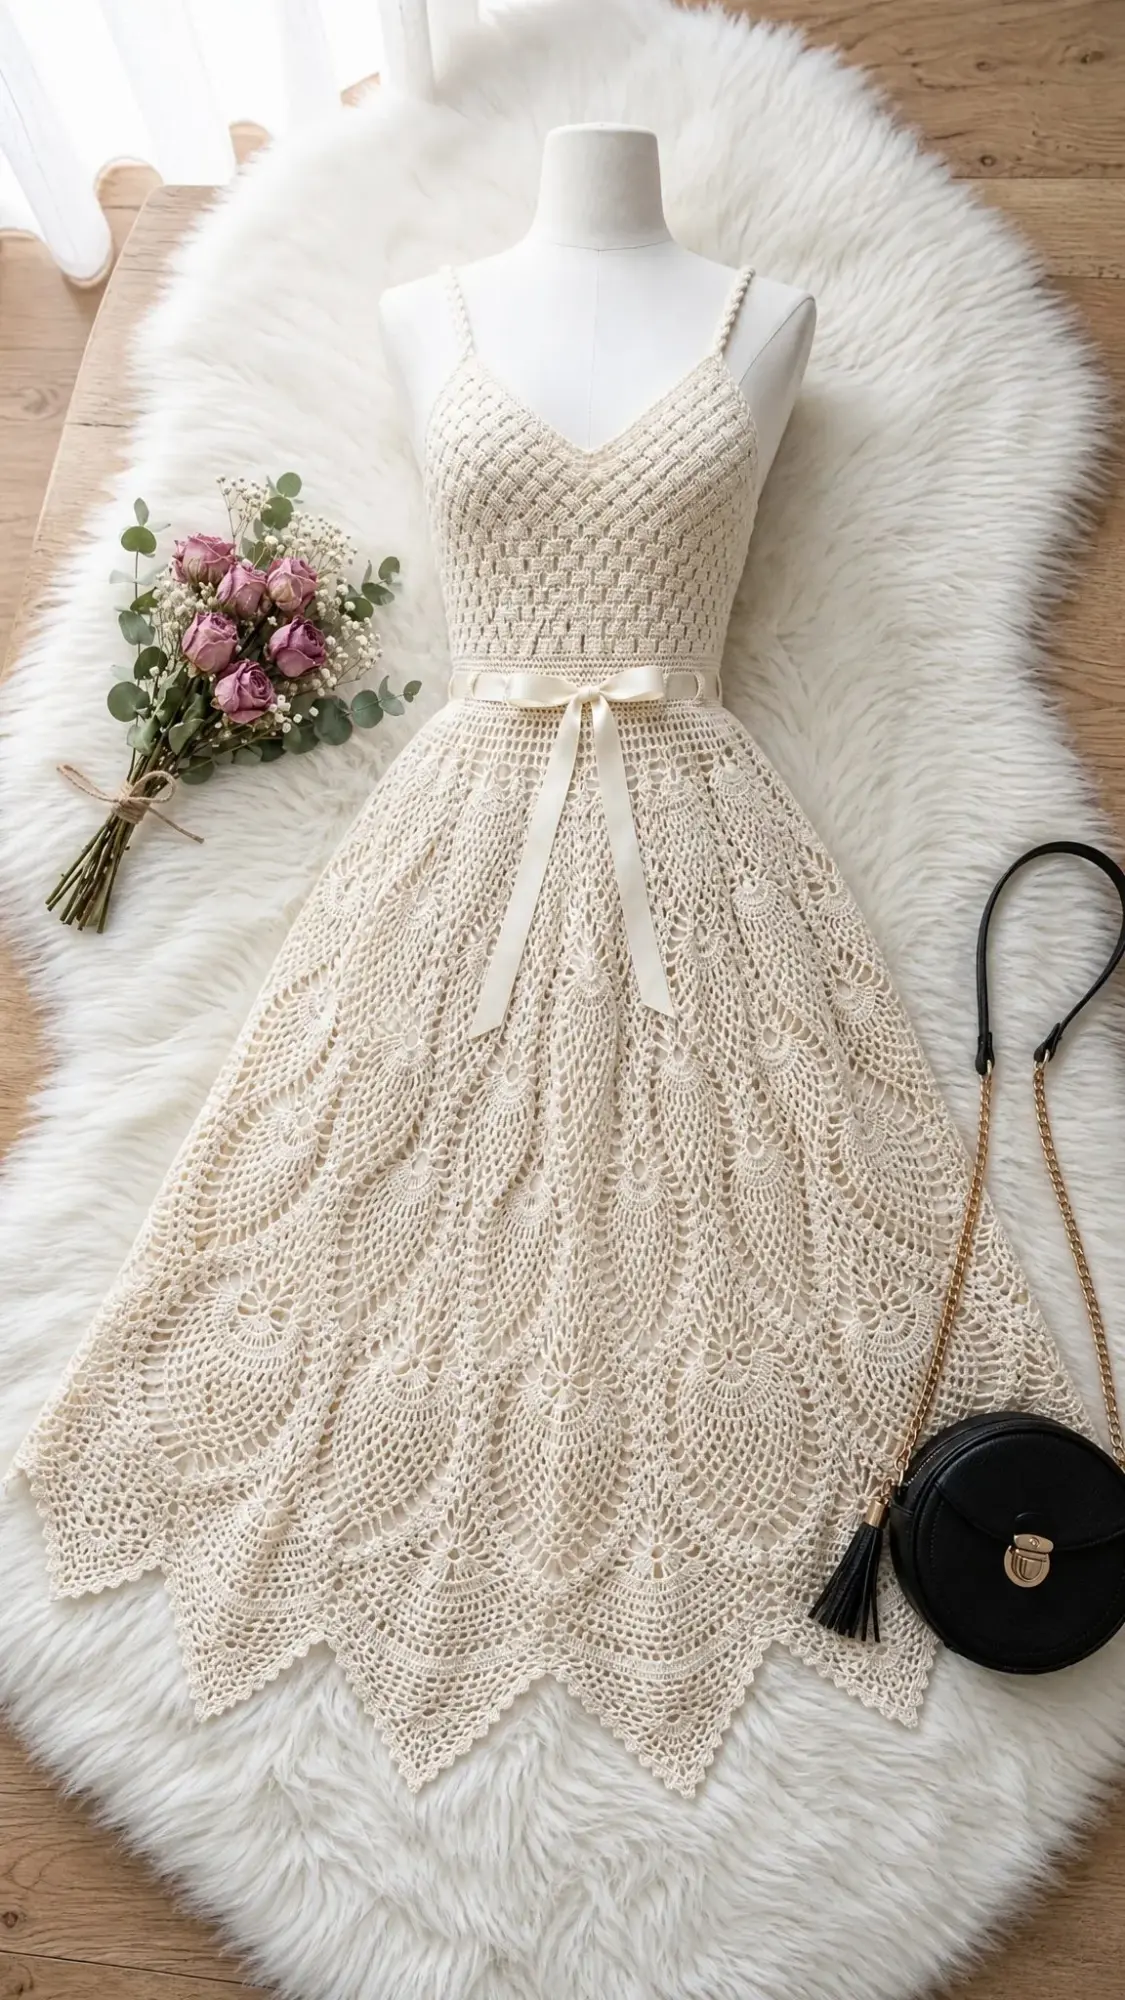
If you have been searching for a statement piece that combines romantic vintage charm with wearable elegance, this cream crochet dress delivers exactly that. The fitted basket-weave bodice keeps everything structured and flattering, while the pineapple lace skirt flows beautifully with every step. Perfect for garden parties, summer weddings, or any occasion where you want to turn heads.
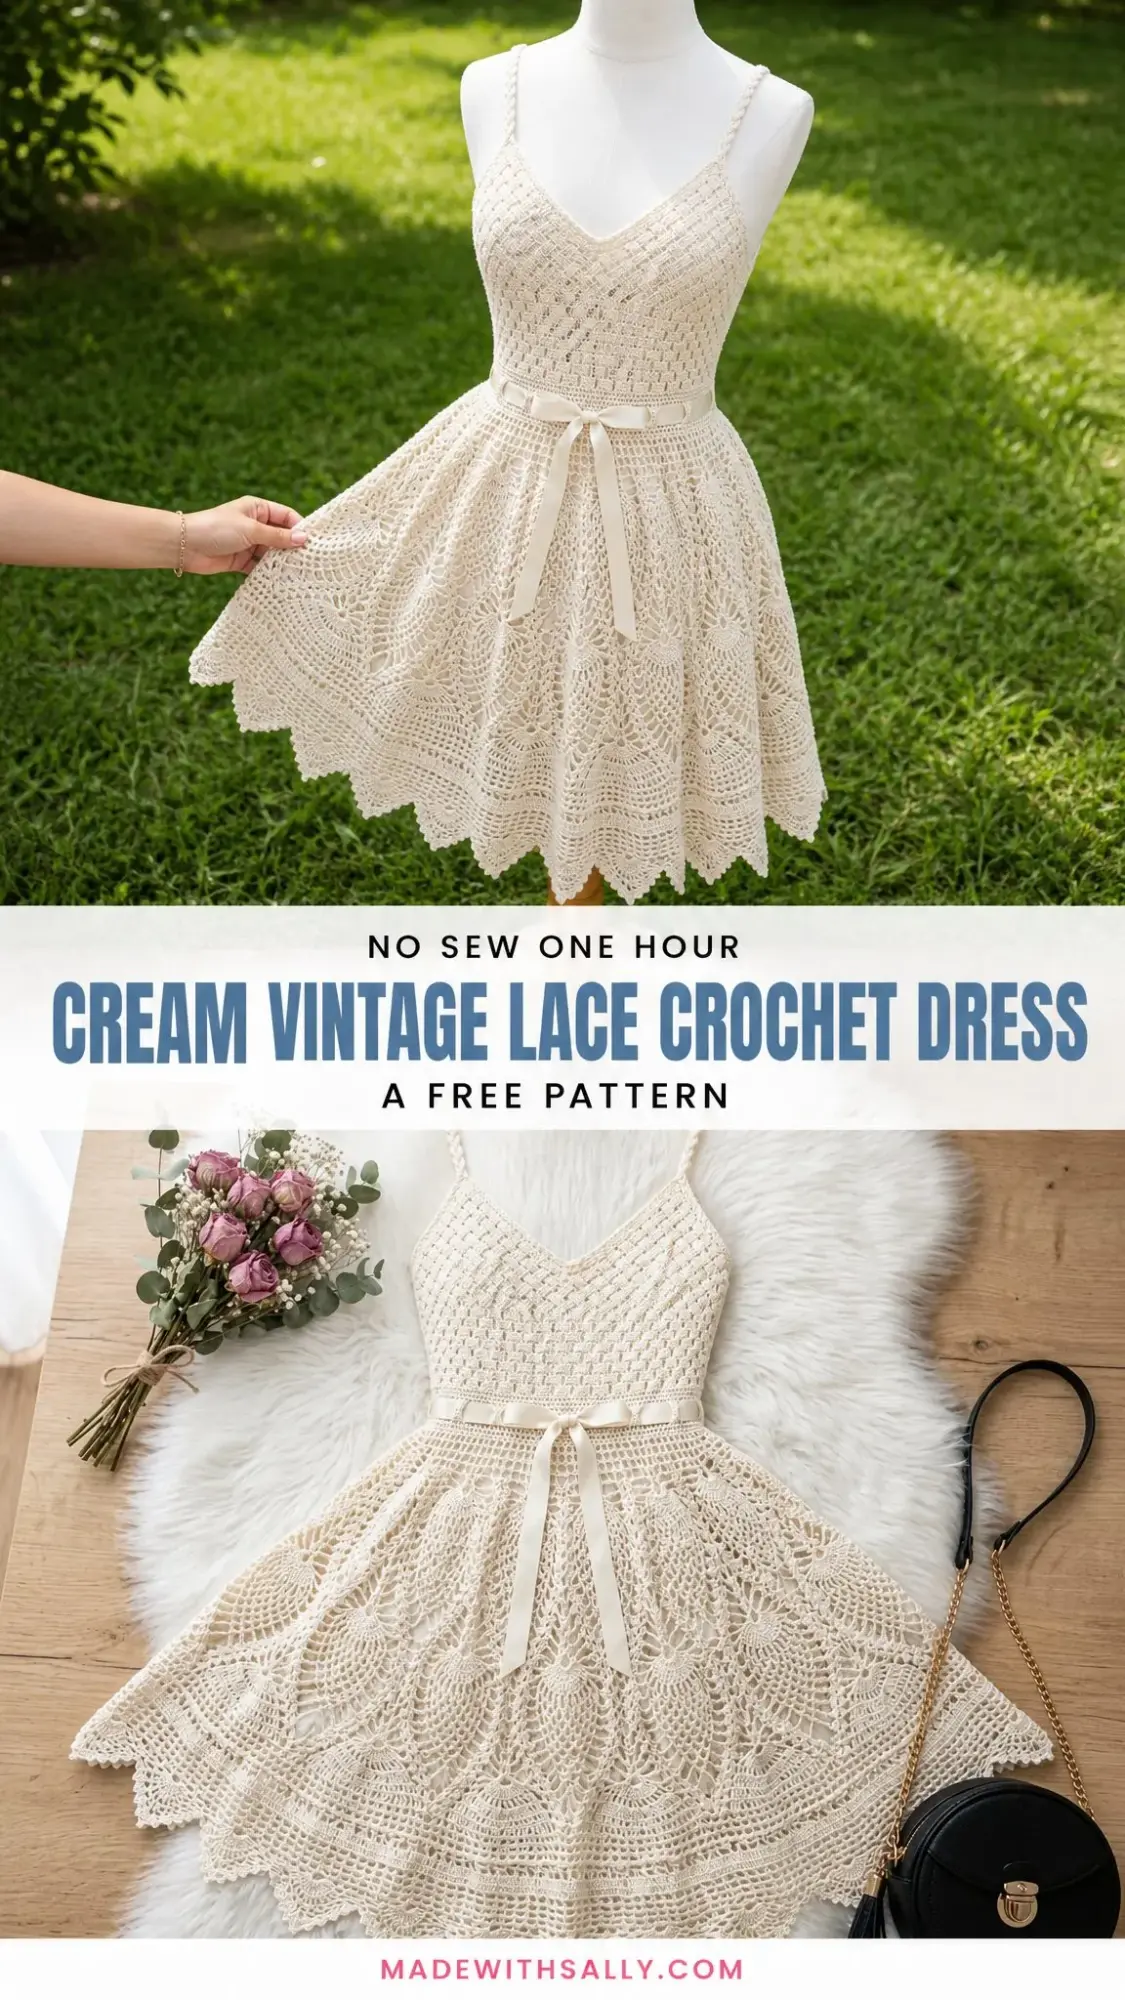
This pattern uses classic techniques that have stood the test of time. The bodice relies on front post and back post double crochet stitches to create that gorgeous woven texture. The skirt features traditional pineapple motifs that open up into the most stunning lace work when blocked properly. A satin ribbon threaded through the waist adds the finishing touch.
I will be honest with you. This is an advanced intermediate to advanced project. But if you have completed at least two fitted garments and one lace project before, you absolutely have the skills. The construction is straightforward since everything is worked in separate pieces and then assembled. Let me walk you through every single step.
About This Crochet Dress Pattern
This vintage-inspired mini dress features a fitted bodice worked flat from the bottom up, a full circle skirt worked in joined rounds from the waist down, and delicate spaghetti straps worked as twisted chains. The pieces are seamed together, and then the ribbon is threaded through eyelets at the waist.
The finished dress fits a size Small with these measurements:
Bust: 34 inches or 86 cm
Waist: 27 inches or 69 cm
Hip and skirt hem circumference: approximately 72 inches or 183 cm
Total length from shoulder to hem: approximately 28 inches or 71 cm
Bodice length from underarm to waist: 6.5 inches or 16.5 cm
Skirt length from waist to hem: approximately 17 inches or 43 cm
Strap length: approximately 10 inches or 25.5 cm each
Expect this crochet tutorial to take approximately 40 to 60 hours depending on your experience with post stitches and lace work.
Materials You Will Need
Yarn: Fingering weight, also called CYCA 1 or Super Fine. Choose 100 percent mercerized cotton or a cotton-linen blend in cream or natural off-white. You will need approximately 1,800 to 2,200 yards total, which equals roughly 1,645 to 2,012 meters.
Suggested Yarns
Paintbox Yarns Cotton 4 Ply in Vanilla Cream offers excellent stitch definition for both the post stitches and lace sections. You will need approximately 10 to 12 balls at 186 yards per 50g ball.
DMC Natura Just Cotton in Ivory (N02) has a soft drape perfect for the flowing skirt. Plan for approximately 11 to 13 balls at 169 yards per 50g ball.
Scheepjes Catona in Old Lace (130) provides premium sheen and crispness ideal for blocking lace. You will need approximately 30 to 35 balls at 62 yards per 10g ball.
When choosing a substitute yarn, look for smooth, plied fingering-weight cotton with minimal halo. Avoid loosely spun singles or yarns with stretch. The basket-weave bodice needs structure, and the pineapple lace needs sharp stitch definition to really shine.
Hooks: US B/1 (2.25 mm) for the bodice and straps. US C/2 (2.75 mm) for the skirt and lace sections. The smaller hook prevents excessive drape in the fitted bodice while the larger hook gives the skirt its romantic fullness.
Additional Materials:
Gauge Information
Getting gauge right is absolutely essential for a fitted garment like this dress. Please do not skip this step.
Bodice gauge with US B/1 hook in basket-weave pattern:
20 stitches by 12 rows equals 4 inches by 4 inches or 10 cm by 10 cm after blocking.
Skirt gauge with US C/2 hook in pineapple lace pattern:
One complete pineapple repeat spanning 24 stitches wide equals approximately 3 inches or 7.6 cm wide after blocking. One full pineapple repeat covering 14 rounds from base chain to tip equals approximately 4.5 inches or 11.4 cm tall after blocking.
A garment worked even one hook size too large will add 2 to 3 inches of unwanted ease to the bodice. Swatch it, block your swatch, and measure before you begin the actual project.
Abbreviations and Stitch Definitions
Let me explain every abbreviation you will encounter in this step by step crochet pattern.
beg = beginning
BPdc = back post double crochet, which means you insert your hook from back to front to back around the post of the stitch below, creating a recessed texture on the right side
ch = chain
ch-sp = chain space
dc = double crochet
dc2tog = double crochet two together, a decrease that combines two stitches into one
FPdc = front post double crochet, which means you insert your hook from front to back to front around the post of the stitch below, creating a raised ridge on the right side
hdc = half double crochet
rep = repeat
rnd(s) = round(s)
RS = right side
sc = single crochet
sk = skip
sl st = slip stitch
sp(s) = space(s)
st(s) = stitch(es)
tch = turning chain
tr = treble crochet
WS = wrong side
yo = yarn over
Special Stitches Explained
Basket-Weave Panel
This creates the beautiful woven texture on the bodice. You work in alternating blocks of FPdc and BPdc ridges. Each block spans 4 stitches wide and 2 rows tall, then the direction alternates to create the grid appearance.
Row A (RS, raised front block): Ch 3 (counts as dc), FPdc around each of next 3 sts, (BPdc around each of next 4 sts, FPdc around each of next 4 sts) across to last st, dc in last st.
Row B (WS, raised front block continues): Ch 3 (counts as dc), BPdc around each of next 3 sts, (FPdc around each of next 4 sts, BPdc around each of next 4 sts) across to last st, dc in last st.
After two rows of Row A and Row B, you switch. Row C mirrors Row A with FPdc and BPdc swapped, and Row D mirrors Row B with FPdc and BPdc swapped. These four rows together create one basket-weave square block.
Front Post Double Crochet (FPdc)
Yarn over, insert hook from front to back to front around the POST (that vertical stem) of the stitch below. Do not go into the top loops. Yarn over and pull up a loop, then yarn over and draw through 2 loops twice. The stitch leans toward you, creating a raised ridge on the right side.
Back Post Double Crochet (BPdc)
Yarn over, insert hook from back to front to back around the POST of the stitch below. Yarn over and pull up a loop, then yarn over and draw through 2 loops twice. The stitch recedes away from you, creating a sunken channel on the right side.
Pineapple Motif
This classic lace technique creates those stunning decorative shapes in the skirt. A pineapple is worked over a central chain loop background. It starts with 13 dc in a foundation arch and decreases by 2 stitches every right side row until ending with a single dc at the tip. The progression goes: 13 dc, 11 dc, 9 dc, 7 dc, 5 dc, 3 dc, 1 dc.
Picot
Ch 3, sl st in 3rd ch from hook. This creates those pretty little points at the hem edge between scallops.
Shell Stitch
Work (2 dc, ch 2, 2 dc) all in the same stitch or space. This counts as one shell.
V-Stitch
Work (dc, ch 2, dc) all in the same stitch or space.
Pattern Notes Before You Begin
The bodice is worked flat in two panels, front and back, then seamed at the sides. The front panel is slightly wider than the back to accommodate the V-neckline shaping.
The skirt is worked in continuous joined rounds from the waist downward. The waist edge of the skirt is attached to the bottom edge of the bodice after both pieces are completed and blocked.
Straps are worked as twisted chain cords and sewn to the bodice at the front and back after assembly.
The ribbon is threaded through a row of ch-2 eyelets worked at the waist join between the bodice and skirt.
When working post stitches, always skip the top of the stitch being worked around. The turning chain (ch-3) at the beginning of each dc row counts as 1 dc throughout.
Block all pieces before final assembly. Your pineapple lace will not open to its full width unless thoroughly wet blocked and pinned. This step makes an enormous difference in the final appearance.
Bodice Front Panel Instructions
Using your US B/1 hook and cream yarn, loosely chain 87.
Foundation Row (WS): Dc in 4th ch from hook (ch 3 counts as dc) and in each ch across. Turn. (85 dc)
This foundation row sets up 85 working stitches. The count is divisible by 8 (the basket-weave repeat) plus 5, which allows 10 full basket-weave repeats of 8 stitches each with 2 edge dc on each side.
Row 1 (RS, Basket-Weave Row A): Ch 3, turn. FPdc around each of next 3 sts, (BPdc around each of next 4 sts, FPdc around each of next 4 sts) 9 times, BPdc around each of next 4 sts, dc in top of tch. (85 sts)
Row 2 (WS, Basket-Weave Row B): Ch 3, turn. BPdc around each of next 3 sts, (FPdc around each of next 4 sts, BPdc around each of next 4 sts) 9 times, FPdc around each of next 4 sts, dc in top of tch. (85 sts)
Row 3 (RS, Basket-Weave Row C): Ch 3, turn. BPdc around each of next 3 sts, (FPdc around each of next 4 sts, BPdc around each of next 4 sts) 9 times, FPdc around each of next 4 sts, dc in top of tch. (85 sts)
Row 4 (WS, Basket-Weave Row D): Ch 3, turn. FPdc around each of next 3 sts, (BPdc around each of next 4 sts, FPdc around each of next 4 sts) 9 times, BPdc around each of next 4 sts, dc in top of tch. (85 sts)
Rows 5 through 20: Repeat Rows 1 through 4 four more times. (85 sts each row)
Checkpoint: After Row 20, the bodice front panel should measure approximately 6.5 inches or 16.5 cm tall and 17 inches or 43 cm wide. If your width is off, recheck your gauge and foundation chain.
Bodice Front Neckline and Armhole Shaping
The V-neck is formed by dividing the panel at center and working each side separately while simultaneously decreasing at the armhole edge.
Divide Panel: Work across first 36 sts in pattern as established, leave remaining 49 sts unworked. The center 13 sts will remain as the unworked V-neck gap between the two shoulder sections. Mark center 13 sts.
Left Front Shoulder
The neckline edge is at your right as you work the right side.
Row 21 (RS): Ch 3, turn. Work in patt across next 34 sts, dc2tog over next 2 sts (armhole shaping at end of row). (36 sts)
Row 22 (WS): Ch 2, turn. Sk first st, dc in next st (armhole decrease at beg of WS row), work in patt to end. (35 sts)
Row 23 (RS): Ch 3, turn. Work in patt across to last 2 sts, dc2tog. (34 sts)
Row 24 (WS): Ch 2, turn. Sk first st, dc in next st, work in patt to end. (33 sts)
Row 25 (RS): Ch 3, turn. Work in patt to last 2 sts, dc2tog. (32 sts)
No more armhole decreases after this point.
Row 26 (WS): Work even in patt. (32 sts)
Row 27 (RS): Work even in patt. (32 sts)
Fasten off.
Right Front Shoulder
Skip the center 13 sts. Rejoin yarn at RS in the 50th stitch from the right edge of the front panel, which is the first st after the center gap.
Row 21 (RS): Ch 3, work in patt across remaining 35 sts, dc in top of tch. (36 sts)
Row 22 (WS): Ch 3, turn. Work in patt to last 2 sts, dc2tog. (35 sts)
Row 23 (RS): Ch 2, turn. Sk first st, dc in next st, work in patt to end. (34 sts)
Row 24 (WS): Work in patt to last 2 sts, dc2tog. (33 sts)
Row 25 (RS): Ch 2, turn. Sk first st, dc in next st, work in patt to end. (32 sts)
Row 26 (WS): Work even in patt. (32 sts)
Row 27 (RS): Work even in patt. (32 sts)
Fasten off.
Bodice Back Panel Instructions
The back panel is worked identically to the front through Row 20 but starts on a chain of 77 for a slightly narrower back width. This gives 15 inches or 38 cm versus the front’s 17 inches or 43 cm, providing ease and allowing the spaghetti straps to sit properly.
Using US B/1 hook, chain 77.
Foundation Row (WS): Dc in 4th ch from hook and in each ch across. Turn. (75 dc)
To maintain clean edge placement, adjust Row A as follows: Ch 3, FPdc around each of next 3 sts, (BPdc around each of next 4 sts, FPdc around each of next 4 sts) 8 times, BPdc around each of next 4 sts, FPdc around each of next 3 sts, dc in top of tch. (75 sts)
Rows B, C, and D adjust accordingly to mirror this distribution.
Rows 1 through 20: Work basket-weave pattern as established, maintaining 75 sts.
Checkpoint: After Row 20, back panel should be approximately 6.5 inches or 16.5 cm tall and 15 inches or 38 cm wide.
Back Armhole Shaping
The back panel does not have a V-neck. It has a simple wide scoop. Mark center 19 sts for back neckline.
Left Back Shoulder
Row 21 (RS): Ch 3, work in patt across 26 sts, dc2tog at armhole end. (28 sts)
Row 22 (WS): Ch 2, sk 1, dc in next, work in patt to end. (27 sts)
Row 23 (RS): Work in patt to last 2 sts, dc2tog. (26 sts)
Rows 24 through 27: Work even in patt. (26 sts each row)
Fasten off.
Right Back Shoulder
Skip center 19 sts. Rejoin yarn at st 48 from right edge.
Row 21 (RS): Ch 3, work in patt to end. (28 sts)
Row 22 (WS): Work in patt to last 2 sts, dc2tog. (27 sts)
Row 23 (RS): Ch 2, sk 1, dc in next, work in patt to end. (26 sts)
Rows 24 through 27: Work even in patt. (26 sts each row)
Fasten off.
Spaghetti Straps
Make 2.
Using US B/1 hook, chain 60. Sl st into every ch across to create a tightly twisted cord. The cord will naturally twist around itself. Fasten off, leaving a 12 inch or 30 cm tail at each end for sewing. Each finished strap is approximately 10 inches or 25 cm long.
After assembly, pin straps to fit the wearer. One end of each strap attaches to the front bodice approximately 2 inches or 5 cm in from each armhole edge. The other end attaches to the back bodice approximately 1.5 inches or 3.8 cm in from each armhole edge. Sew securely with tapestry needle.
Side Seaming the Bodice
With right sides together, use your tapestry needle and cream yarn to whip stitch or mattress stitch the side seams of the front and back bodice panels together. Match rows carefully. The back panel is slightly narrower, so align the bottom edges. The 1-inch width difference distributes into the V-neck opening depth.
After seaming, the assembled bodice should measure approximately 34 inches or 86 cm bust circumference, approximately 27 inches or 69 cm waist circumference (the post stitches naturally pull in at the base), and approximately 6.5 inches or 16.5 cm in height.
Eyelet Waistband Row
With RS of bodice facing, join yarn at any side seam at the bottom (foundation) edge.
Round 1 (stabilization): Sc evenly around bottom edge of bodice. Work approximately 140 sc around the entire bottom circumference. Place marker at beg of round. Join with sl st. (140 sc)
Round 2 (eyelet round for ribbon): Ch 1, (sc in next 3 sts, ch 2, sk 2 sts) around, ending sc in last st(s) to maintain count, join with sl st. (28 ch-2 spaces)
Round 3: Ch 1, sc in each sc and 2 sc in each ch-2 space around, join with sl st. (140 sc)
Fasten off. Thread the ribbon through the ch-2 spaces of Round 2 before working Round 3 if you prefer the ribbon to sit inside the waistband tunnel. Alternatively, thread ribbon through Round 2 eyelets after completing Round 3 and tie in a bow at center front.
Skirt Instructions
The skirt is worked in joined rounds from the top (waist) down. It begins with a foundation round that increases dramatically from the 140-stitch bodice waist to 336 stitches, establishing the circle skirt fullness and the correct multiple for 14 pineapple repeats.
Using US C/2 hook, join yarn at the top of the stabilized bodice waist Round 3 with a sl st at any seam.
Skirt Round 1: Ch 3, work 2 dc in each st around, join with sl st to top of beg ch-3. (280 dc)
Skirt Round 2: Ch 3, dc in each of next 3 sts, 2 dc in next st, (dc in each of next 4 sts, 2 dc in next st) 55 times, join with sl st. (336 dc)
Now 336 is divisible by 24, which is one full pineapple repeat. This gives you 14 pineapple motifs around the skirt.
Skirt Round 3 (Set-Up Round for Pineapples): Ch 4 (counts as dc plus ch 1), sk 1 st, (dc in next st, ch 1, sk 1 st) around, join with sl st to 3rd ch of beg ch-4. (168 dc, 168 ch-1 spaces)
Continue working the pineapple lace pattern from this point, following the traditional pineapple sequence where each motif begins with 13 dc in an arch and decreases by 2 every right side round until reaching the tip.
Finishing Your Crochet Dress
Block all pieces thoroughly before final assembly. For the skirt especially, wet blocking is essential. Soak the piece in cool water, gently squeeze out excess moisture without wringing, and pin to your blocking board. Stretch those pineapple motifs open and let them dry completely.
Attach the skirt to the bodice waist using whip stitch or slip stitch, matching seams and distributing fullness evenly.
Sew straps securely in place after trying on or pinning to a dress form.
Thread your satin ribbon through the eyelet row at the waist and tie in a bow at center front.
Weave in all remaining ends.
Tips for Success with This Crochet Pattern
Take your time with the post stitches on the bodice. They can feel awkward at first, but once you get into the rhythm of the basket-weave pattern, it becomes almost meditative.
Use stitch markers generously, especially at the center of each pineapple fan in the skirt. Losing your place in lace work is frustrating, and markers prevent that headache entirely.
If the pineapple lace feels overwhelming, practice the motif on a small swatch before committing to the full skirt. Understanding how the decreases work will build your confidence.
Do not underestimate blocking. The difference between blocked and unblocked pineapple lace is truly dramatic. Your finished dress deserves that final step.
I really hope this pattern brings you as much joy to make as it will to wear. A handmade lace dress is such a special accomplishment, and I cannot wait to see your versions. If you make this cream vintage lace crochet dress, please save it to your Pinterest boards so you can find it easily later and inspire other makers. And I would absolutely love it if you left a comment below sharing your experience or any questions that came up along the way. Happy crocheting!
