
I set out to design a sweater that would feel like pure joy to wear. Something whimsical, a little bit retro, and absolutely unforgettable. I wanted that dreamy gradient effect that makes you look twice, bell sleeves with real drama, and those fluffy trims that feel fancy without being fussy. The bows? Non-negotiable. When I finished this piece and tried it on for the first time, I literally squealed. I am SO pleased with how it turned out!
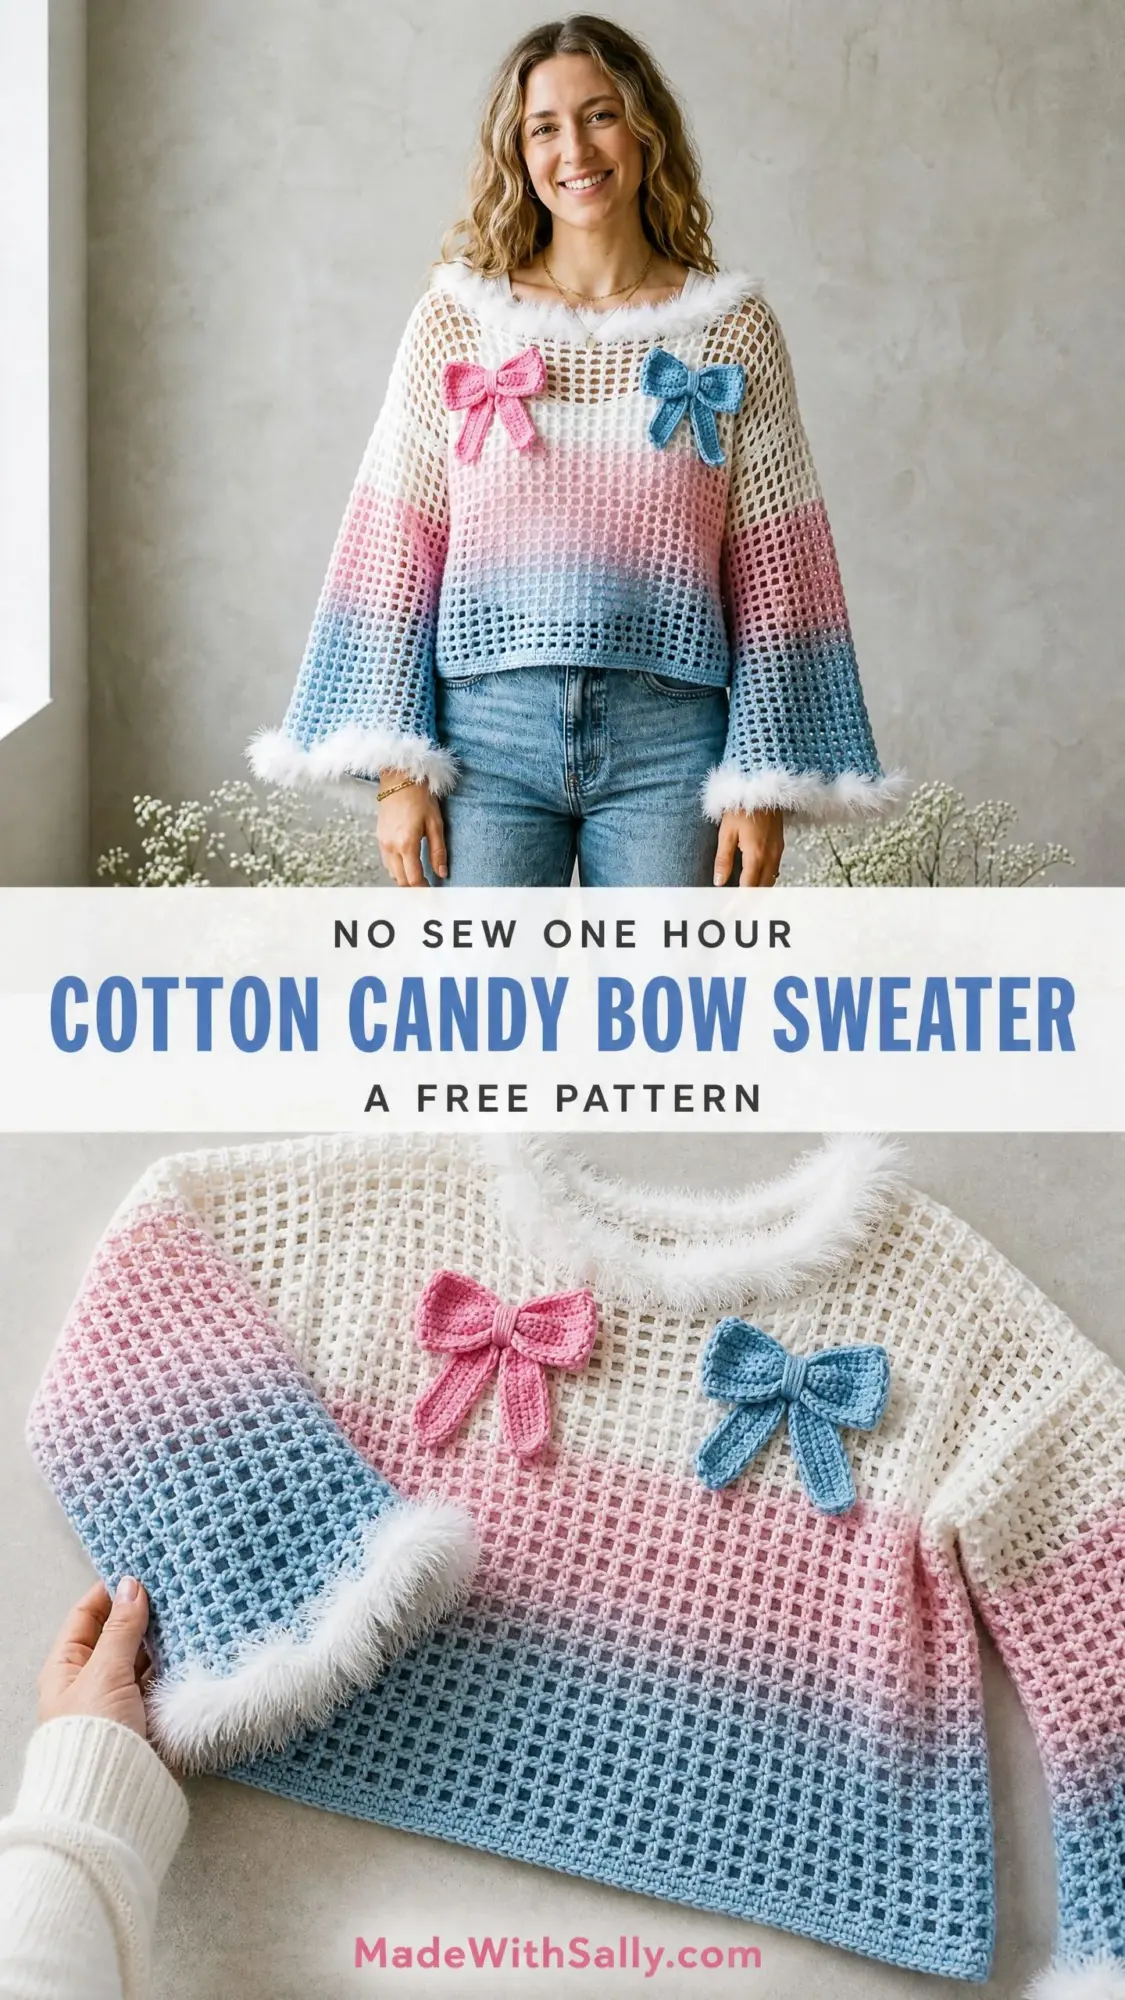
This Cotton Candy Bow Sweater combines an easy mesh stitch with gorgeous color transitions and playful details that make it a true statement piece. The construction is more approachable than it looks. You will work flat panels, join them simply, then pick up stitches for those stunning bell sleeves. The eyelash yarn trim gets added at the very end, so you can see exactly where you want that fluffy texture before committing.
Whether you are looking to level up your garment-making skills or you just want something beautiful to show off, this crochet pattern delivers. Let me walk you through every single step.
Why You Will Love This Crochet Pattern
This oversized pullover sweater is a showstopper. The open mesh creates a lightweight, breathable fabric that drapes beautifully. The gradient yarn does all the heavy lifting for that stunning white-to-pink-to-blue color transition, so you get maximum visual impact with zero complicated color changes.
The bell sleeves flare dramatically toward the wrist, giving the sweater that romantic, vintage-inspired silhouette. The fluffy eyelash trim at the neckline, cuffs, and hem adds texture and softness without overwhelming the design. And those two crocheted bows in bubblegum pink and baby blue? They are the cherry on top.
The fit is intentionally oversized and boxy. Think cozy Saturday mornings, brunch with friends, or layered over a simple tank for an effortlessly cool look.
Skill Level
I would call this an intermediate crochet pattern. The mesh stitch itself is straightforward once you get the rhythm. The trickier parts involve working top-down construction, picking up stitches around the armhole for the sleeves, and attaching the eyelash trim neatly.
If you have made a simple garment before, like a basic cardigan or a top, you will be completely fine here. If this is your first sweater, take it slow and trust the process. I have broken everything down step by step.
Time Estimate
Plan for approximately 15 to 25 hours of work, depending on your speed and which size you are making. This is not a one-evening project, but it is absolutely worth the time investment.
Finished Measurements
This pattern is written for a size Medium (US Women’s 8 to 10), fitting a 36 to 38 inch bust.
Here are the finished measurements after blocking:
Adjusting the Size
The mesh stitch repeat is a multiple of 2 stitches plus 2 for the foundation. To go up one full size (Large or XL), add 10 stitches to both the front and back foundation chains. This adds approximately 4 to 5 inches of width. To go down one size (Small or XS), subtract 10 stitches from both panels.
For length adjustments, simply add or remove rows before the hem trim. For sleeve length, add or remove rounds before the cuff trim. Always swatch and check your gauge before making size adjustments.
Materials
Yarn
Yarn A (Main Body): Approximately 700 to 800 yards of worsted weight (4) cotton or cotton-blend ombre gradient yarn in a white-to-pink-to-blue colorway. Look for a gradient skein that spans at least 300 to 400 yards so the color transition flows naturally.
Yarn B (Trim): Approximately 80 to 100 yards of bulky or super bulky (5 to 6) eyelash or faux-fur yarn in white.
Yarn C (Pink Bow): Approximately 20 to 30 yards of worsted weight (4) cotton or acrylic yarn in bubblegum pink.
Yarn D (Blue Bow): Approximately 20 to 30 yards of worsted weight (4) cotton or acrylic yarn in baby blue.
Yarn Suggestions
Here are a few options that work beautifully for this sweater:
1. Lion Brand Mandala Ombre (Worsted, 100% acrylic, 150 yards per skein): Try the colorway "Cosmic" or "Serenity" for a pastel gradient. You will need approximately 5 to 6 skeins.
2. Paintbox Yarns Simply DK (cotton blend): Select a gradient cake or pair individual skeins in cream, bubblegum pink, and baby blue. Use Russian joins to blend the colors. You will need approximately 3 skeins.
3. WeCrochet Brava Worsted (100% acrylic): Purchase three skeins in Cream, Blush, and Sky Blue. Hold sections of two colors together briefly at transition points for a gradient effect.
Any smooth worsted weight yarn with good stitch definition will work. Avoid stiff or scratchy yarns since the open mesh makes the texture very visible.
Hooks
Notions
Gauge
Using Yarn A and Hook A (US J-10 / 6.0 mm) in mesh stitch pattern:
14 stitches and 8 rows = 4 inches (10 cm), blocked
How to Make a Gauge Swatch
Chain 18. Work the mesh stitch pattern for 10 rows. Block lightly by dampening and pinning flat. Measure the center 4 inches.
If your swatch is too small, go up a hook size. If it is too big, go down. A larger hook creates a lacier, more open mesh. A smaller hook tightens the fabric. Gauge is mandatory for proper fit. Do not skip this step.
Abbreviations
Here are all the abbreviations used in this pattern, with definitions:
Special Stitches and Techniques
Mesh Stitch (Worked Flat in Rows)
This stitch creates an even grid of open squares. Each unit consists of 1 double crochet, 1 chain, and a skip.
Foundation Chain: Make a multiple of 2 chains plus 4 for the turning chain.
Row 1 (RS): Starting in the 6th chain from hook (this counts as dc, ch 1, skip 1), work 1 dc into next ch. (Ch 1, skip 1 ch, dc in next ch) across to end. Turn.
Row 2 (WS): Ch 4 (counts as dc plus ch 1), turn. Skip first dc and first ch-sp. Dc in next dc. (Ch 1, skip ch-sp, dc in next dc) across. Last dc goes into the 4th chain of the turning ch-4 from the previous row. Turn.
Row 3 and all subsequent rows: Repeat Row 2.
A note on counting: Throughout this pattern, stitch counts refer to the number of dc posts (the solid vertical stitches), not including chains.
Mesh Stitch Increase (For Sleeve Flare)
At the marked chain spaces, work (dc, ch 1, dc) into the same ch-1 space instead of just dc. This adds 1 dc post at each increase point.
Eyelash Trim Edging
With Yarn B and larger hook, join with a slip stitch to any stitch at the edge. Ch 1. Work 1 sc into each stitch and 1 sc into each chain space around the entire edge. Join with sl st to first sc. Fasten off. The fluffy fibers will naturally cover the base stitches.
Crocheted Bow
Bow Rectangle (make 2 per bow):
With Yarn C or D and Hook C (US G-6 / 4.0 mm), ch 13.
Row 1: Sc in 2nd ch from hook and in each ch across. Turn. (12 sc)
Row 2: Ch 1, sc in each sc across. Turn. (12 sc)
Rows 3 to 10: Repeat Row 2. (12 sc)
Fasten off, leaving a 6-inch tail.
Bow Center Knot:
Ch 7.
Row 1: Sc in 2nd ch from hook and in each ch across. Turn. (6 sc)
Rows 2 to 4: Ch 1, sc in each sc across. Turn. (6 sc)
Fasten off, leaving a 12-inch tail.
Assembly: Place the two rectangles side by side. Weave a strand of yarn through both at their centers, gather and cinch tightly to form the bow shape. Wrap the Center Knot piece around the cinched center and sew securely.
Pattern Notes Before You Begin
1. The sweater is constructed in two flat panels (Front and Back), each worked from the top shoulder edge down to the hem.
2. The panels are joined at the shoulders and sides, leaving armhole openings.
3. Sleeves are picked up around the armhole and worked in the round downward, with increases creating the bell flare.
4. The gradient yarn transitions naturally as you work. Start each panel at the same point in the color gradient so both match.
5. Blocking is strongly recommended. The mesh fabric evens out significantly after wet blocking.
6. The eyelash trim is attached after all main construction and blocking are complete.
7. The neckline is a wide, slightly scooped boatneck created naturally by the foundation chain width.
Step-by-Step Instructions
Back Panel
Foundation: With Yarn A and Hook A, ch 78.
Row 1 (RS): Dc in 6th ch from hook (counts as dc, ch 1, skip 1). (Ch 1, skip 1 ch, dc in next ch) across. Turn. (37 dc posts, 36 ch-1 spaces)
Row 2: Ch 4 (counts as dc, ch 1), skip first ch-sp, dc in next dc. (Ch 1, skip ch-sp, dc in next dc) across, ending with last dc in 4th ch of beg ch-5. Turn. (37 dc posts)
Rows 3 to 44: Repeat Row 2. (37 dc posts each row)
Checkpoint: The back panel should measure approximately 22 inches long and 23 inches wide after light blocking.
Fasten off.
Front Panel
Work exactly as the Back Panel, Rows 1 through 44, starting at the same gradient point in your yarn.
Fasten off.
You now have two identical flat rectangular panels.
Joining Shoulders and Sides
Lay the Front and Back panels flat with right sides facing each other.
Shoulder Seams: Using mattress stitch or slip stitch seam, join the top 8 dc posts at each upper corner.
The center 21 dc posts remain open for the neckline (approximately 12 inches wide).
Side Seams: Join the side edges from the hem upward, leaving the top 9.5 inches open on each side for the armhole. Seam from Row 44 (hem) up through Row 26, leaving Rows 1 through 25 open for the armhole.
Checkpoint: The joined body should look like a boxy rectangle with two armhole openings, each approximately 9.5 inches deep.
Sleeves (Make 2)
Sleeves are worked in the round from the armhole opening down to the cuff.
Setup Round: With RS facing, join Yarn A at the center underarm seam point. Ch 4 (counts as dc, ch 1). Working around the entire armhole opening, work (skip 1 st or 1 row end, dc, ch 1) evenly around, ending with sl st into the 3rd ch of beg ch-4 to join. (44 dc posts)
Round 1: Sl st into first ch-1 sp. Ch 4 (counts as dc, ch 1). (Dc in next dc, ch 1) around. Sl st to 3rd ch of beg ch-4 to join. (44 dc posts)
Rounds 2 to 6: Repeat Round 1. (44 dc posts each round)
Place markers at two opposite points of the sleeve for increase placement.
Round 7 (Increase Round): Work (dc, ch 1, dc) into each marked ch-1 sp instead of just dc. Continue (dc in next dc, ch 1) around. (46 dc posts)
Rounds 8 to 10: Work even. (46 dc posts)
Round 11 (Increase Round): Work increase round. (48 dc posts)
Rounds 12 to 14: Work even. (48 dc posts)
Round 15 (Increase Round): Work increase round. (50 dc posts)
Rounds 16 to 18: Work even. (50 dc posts)
Round 19 (Increase Round): Work increase round. (52 dc posts)
Rounds 20 to 22: Work even. (52 dc posts)
Round 23 (Increase Round): Work increase round. (54 dc posts)
Rounds 24 to 26: Work even. (54 dc posts)
Round 27 (Increase Round): Work increase round. (56 dc posts)
Rounds 28 to 35: Work even. (56 dc posts)
Checkpoint: Each sleeve should measure approximately 18 inches from underarm to lower edge, with a cuff circumference of approximately 28 inches.
Fasten off main yarn.
Neckline Trim
With Yarn B and larger hook, join at one shoulder seam.
Round 1: Ch 1. Sc evenly around the entire neckline opening, working 1 sc into each dc post and 1 sc into each ch-1 space. Sl st to first sc to join. (approximately 86 sc)
Fasten off Yarn B.
Sleeve Cuff Trim
With Yarn B and larger hook, join at the underarm seam at the base of one sleeve.
Round 1: Ch 1. Sc evenly around the cuff opening, working 1 sc into each dc post and 1 sc into each ch-1 space. Sl st to first sc to join. (112 sc)
Fasten off. Repeat for second sleeve.
Hem Trim
With Yarn B and larger hook, join at one side seam at the hem edge.
Round 1: Ch 1. Sc evenly around the entire hem. Sl st to first sc to join. (146 sc)
Fasten off.
Making and Attaching the Bows
Pink Bow: Make 2 Bow Rectangles and 1 Center Knot with Yarn C. Assemble as described in Special Stitches.
Blue Bow: Make 2 Bow Rectangles and 1 Center Knot with Yarn D. Assemble.
Placement: Position the pink bow on the upper left chest, approximately 4 inches down from the neckline and 4 inches in from the left shoulder seam. Sew securely.
Position the blue bow on the upper right chest, approximately 4 inches down from the neckline and 4 inches in from the right shoulder seam. Sew securely.
The two bows should sit approximately 5 to 6 inches apart.
Finishing and Blocking
Weave in all ends securely.
Wet Blocking: Submerge the finished sweater in cool water until fully saturated. Gently press out excess water without wringing. Lay flat on a blocking board or clean towels. Pin the mesh open evenly, stretching gently to finished measurements. Allow to dry completely.
Do not wet block the eyelash trim sections. If needed, use a low-heat steamer held several inches away.
Care Instructions
Hand wash in cool water with gentle detergent. Lay flat to dry. Do not tumble dry, wring, or iron directly. If using acrylic yarn, avoid steam. Cotton or cotton-blend versions can be machine washed on delicate in a mesh bag, but always lay flat to dry.
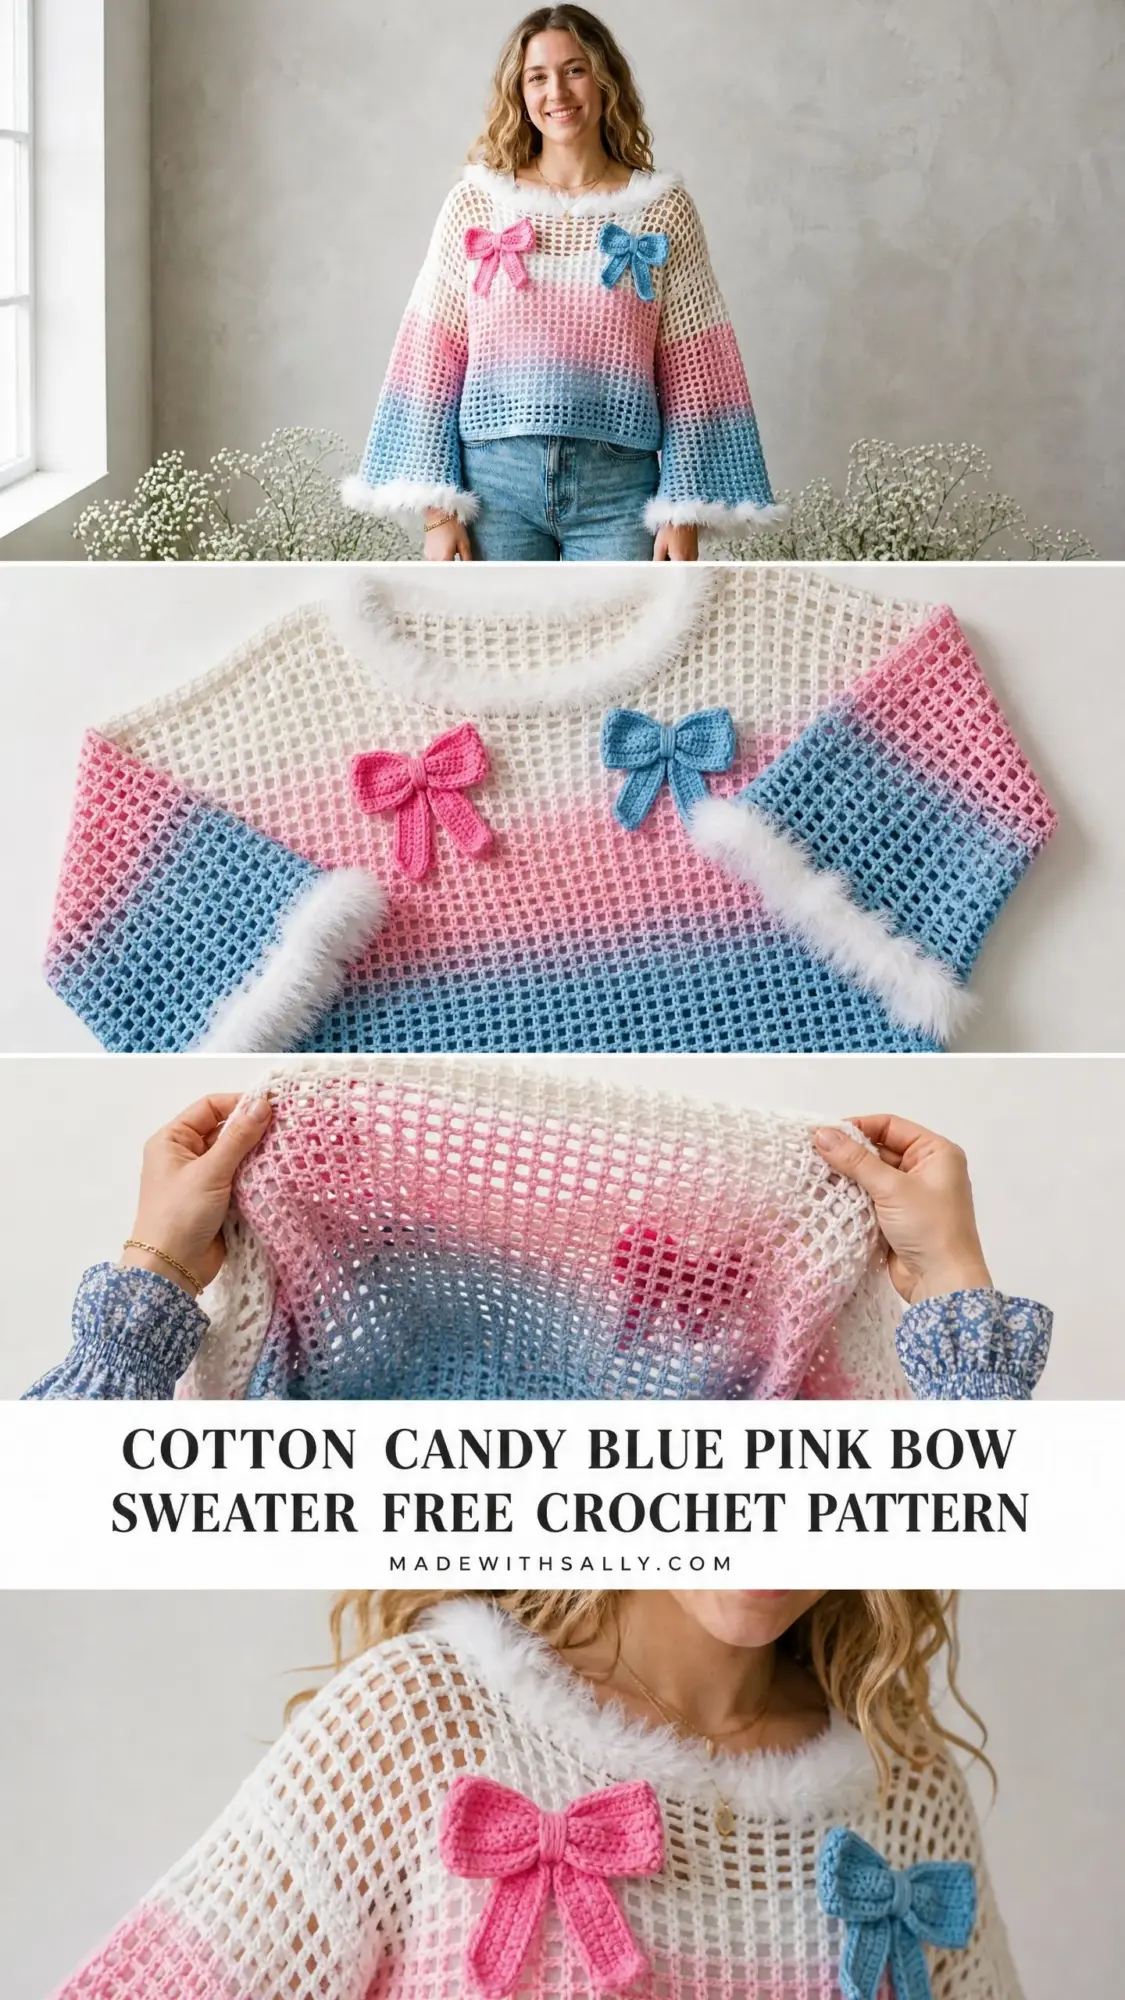
You Did It!
This Cotton Candy Bow Sweater is one of those projects that feels so rewarding to complete. Every time you slip it on, you will remember the hours of happy stitching that went into it. The gradient, the bows, the fluffy trim. It all comes together into something truly special.
Thank you so much for trusting me with your time and your yarn stash. I genuinely hope you love making this sweater as much as I loved designing it. If you finish one, please tag me on Instagram or share a photo in our Facebook group. I would absolutely love to see your version!
If this pattern caught your eye, go ahead and save it to your Pinterest boards so you can find it when you are ready to start. And if you make this sweater, drop a comment below. I read every single one, and hearing about your projects makes my day.
