
I’ve been searching for the perfect vintage-inspired baby dress pattern for months now. This one stopped me in my tracks. The square neckline, the dramatic fan-stitch skirt, that sweet little crocheted rose at the waist. It checks every single box.
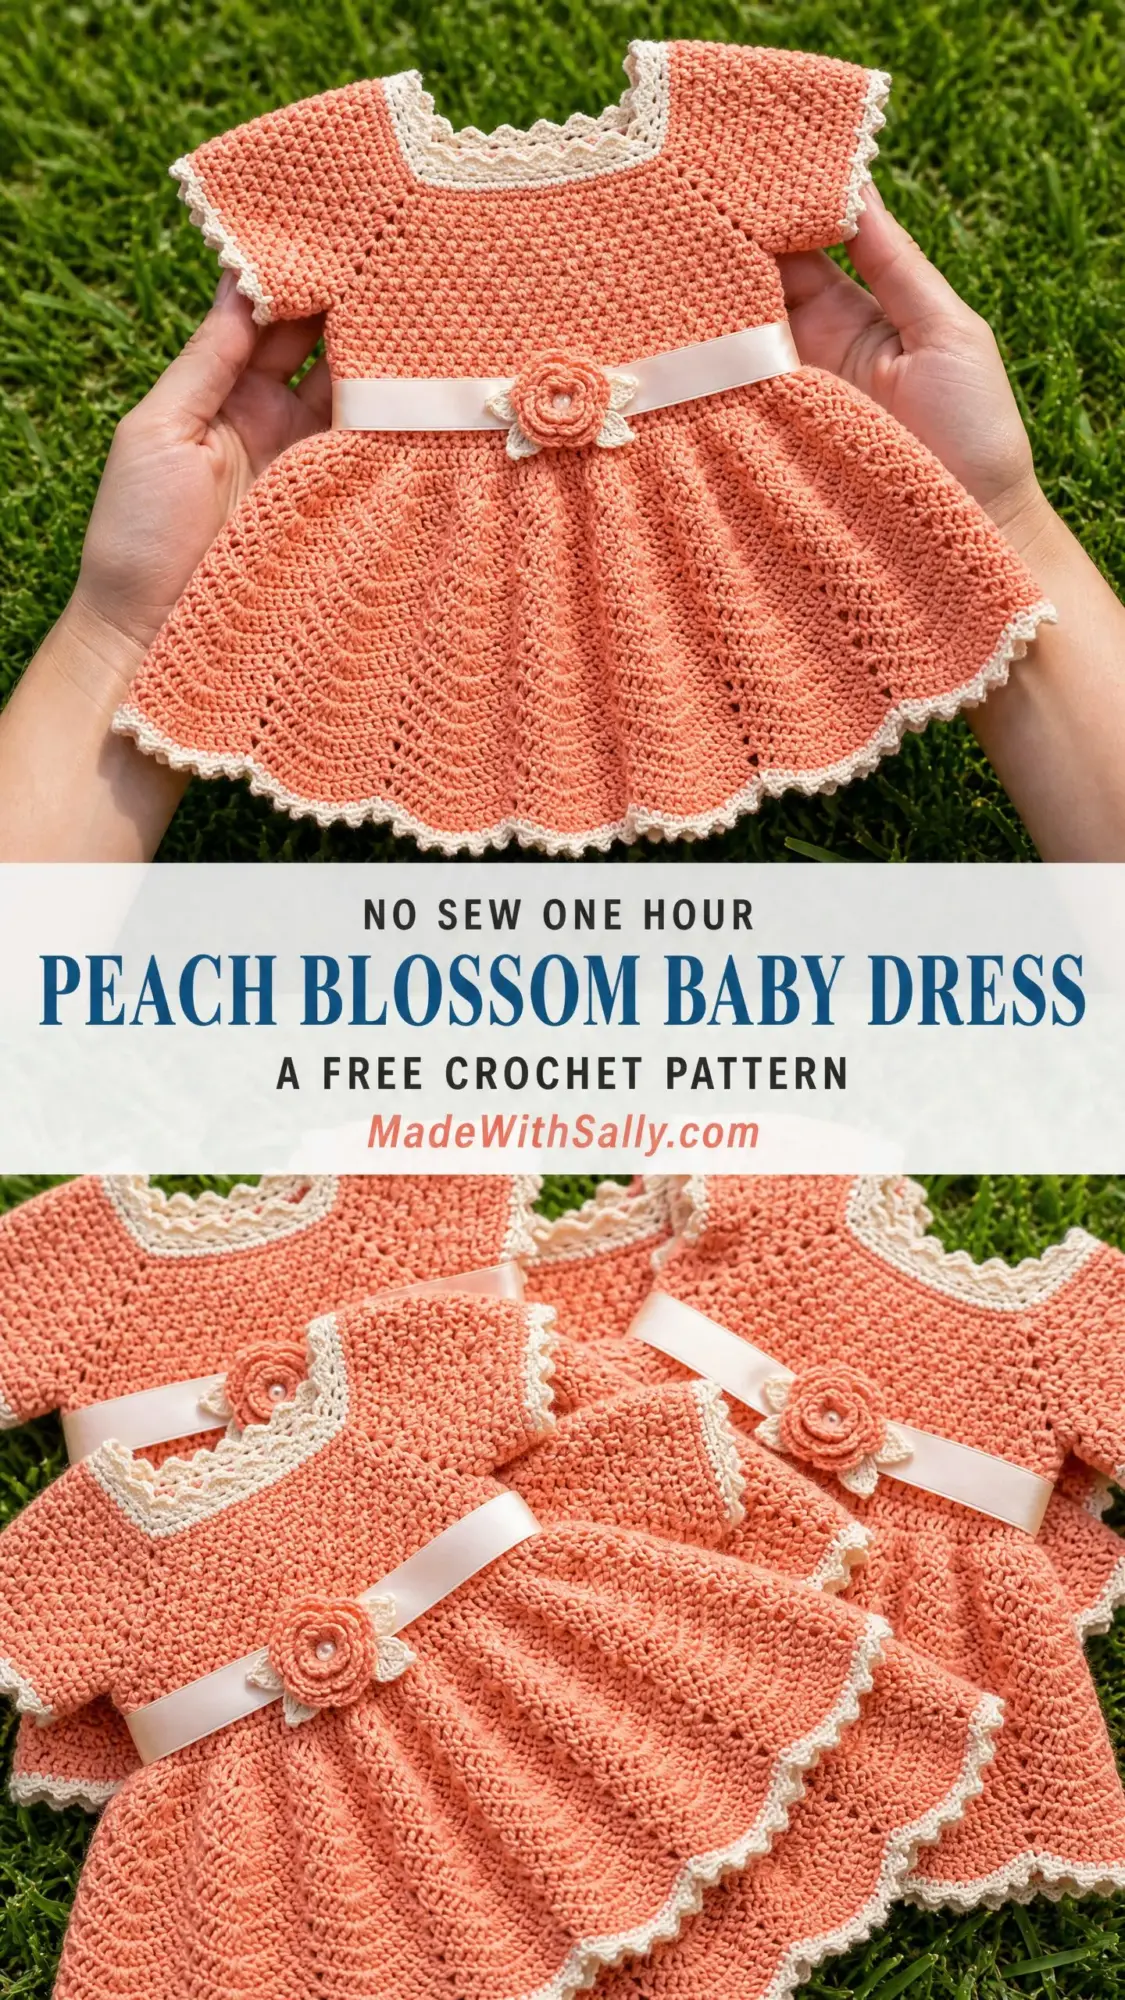
If you’ve got a baby shower coming up or you just want to create something truly heirloom-worthy, this is the pattern I’d reach for first. The Peach Blossom Baby Dress combines classic construction techniques with a show-stopping silhouette that photographs beautifully and feels special to gift.
Fair warning: this is an intermediate-level project. But don’t let that scare you off. I’ll walk you through every section, explain the tricky bits, and give you plenty of checkpoints along the way. You’ve got this.
Why This Baby Dress Pattern Stands Out
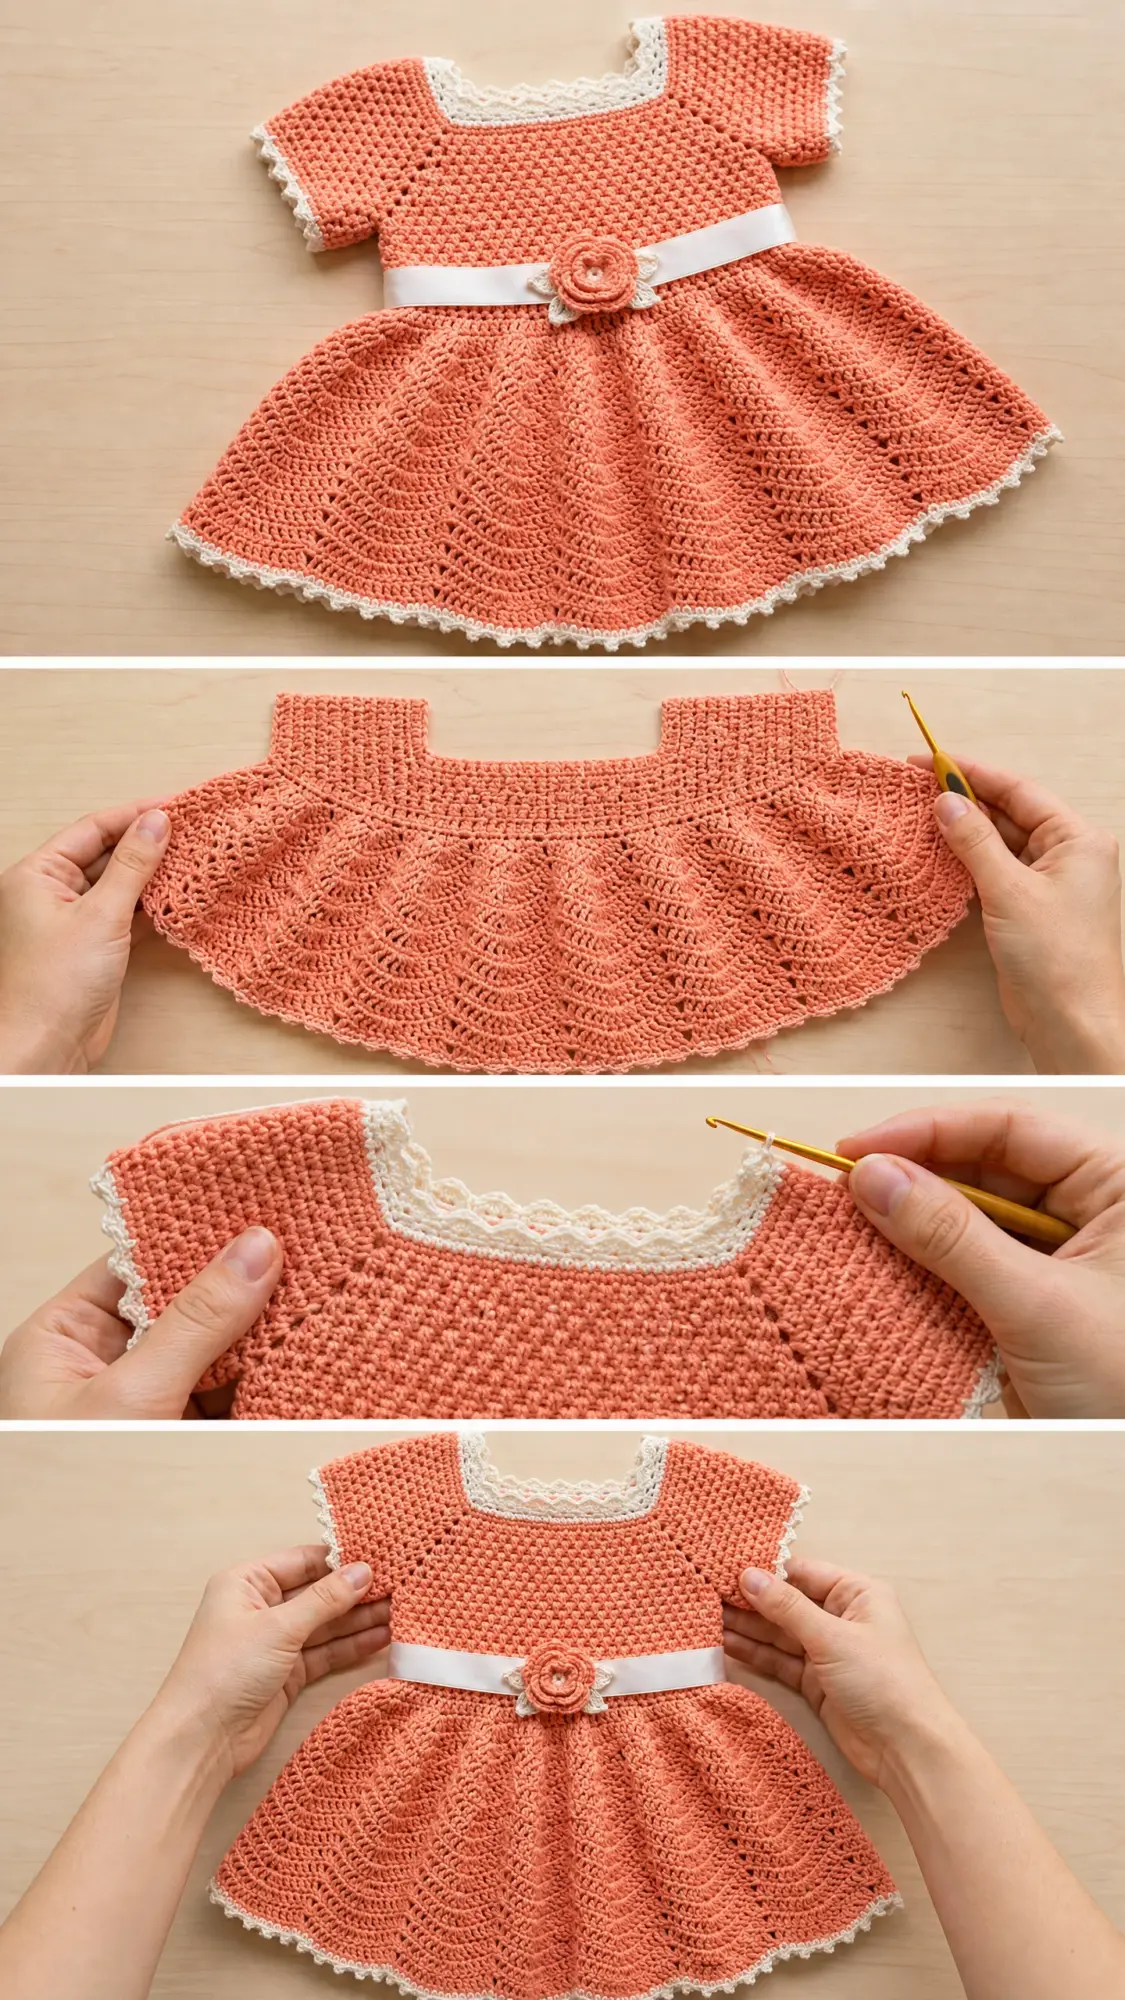
This isn’t your average baby garment. The construction method creates a truly professional finish. You’ll work the bodice flat in two pieces, seam it together, then join in the round for the skirt. The fan stitch pattern creates those gorgeous scalloped waves you see flaring out from the waist. And that cream picot-shell border around the neckline, sleeves, and hem ties everything together beautifully.
The fitted bodice with its square neckline gives this dress a timeless, almost European feel. The short cap sleeves are worked by picking up stitches around the armholes after seaming. And that sweet crocheted rose with its leaf? It’s easier to make than it looks.
Finished measurements for size 6 to 12 months:
Materials You’ll Need
Yarn:
Hook:
Notions:
Yarn Suggestions
Lion Brand Pound of Love in Sport weight works beautifully here. It’s 100% acrylic, machine-washable, and soft against baby skin. One skein in your main color and a partial skein in cream will complete the project with yardage to spare.
Paintbox Yarns Simply DK used at a tight tension is another excellent choice, especially for colder climates where you want a slightly denser fabric.
Cascade Yarns 220 Superwash Sport is the fiber choice for true heirloom quality. It’s 100% superwash merino wool, soft, washable, and shows stitch definition gorgeously.
Avoid chenille, fuzzy, or ribbon yarns. The fan stitch pattern definition will be lost with textured yarns.
Gauge (Don’t Skip This!)
22 single crochet stitches equals 4 inches or 10 cm. 24 rows of single crochet equals 4 inches or 10 cm. Work this flat with your E-4 or 3.5 mm hook, after blocking.
For the fan stitch pattern: one complete 10-stitch fan repeat measures approximately 1.8 inches or 4.6 cm wide.
Gauge matters here because this is a fitted garment. Take the time to swatch, wash it how you’ll wash the finished dress, and measure. Adjust your hook size up or down as needed.
Abbreviations and Special Stitches
Let me walk you through the abbreviations and special techniques you’ll encounter. Understanding these before you start will make the pattern flow much more smoothly.
Standard Abbreviations:
Special Stitches:
Picot: Work 1 sc in the indicated stitch, chain 3, slip stitch in top of the sc just made. This creates a small decorative knot.
Shell Stitch: Work (2 dc, ch 2, 2 dc) all in the same stitch or space. Think of it as a paired cluster that forms the base of your fan pattern.
Fan Stitch: Work (dc, ch 1) 4 times, then dc once more, all in the same stitch or space. This places 5 double crochets separated by ch-1 spaces in a single location. It’s what creates that beautiful spreading fan shape.
Picot-Shell Border: Work (sl st, ch 3, 2 dc, picot, 2 dc, ch 3, sl st) all in the same stitch or space. This creates the scalloped cream border visible on all edges.
Sc2tog (single crochet decrease): Insert hook in next stitch, yarn over and pull up loop, insert hook in following stitch, yarn over and pull up loop, yarn over and draw through all 3 loops on hook.
Important Pattern Notes Before You Begin
1. The bodice is worked flat in two pieces (front and back), then seamed at the shoulders and sides.
2. The skirt is worked in the round from the joined bodice waist down.
3. The sleeves are worked in joined rounds, picking up stitches around the armhole openings after bodice seaming.
4. All CC border sections (neckline, sleeves, hem) are worked last as a unified finishing step.
5. Turning chains: Ch 1 at the beginning of sc rows does NOT count as a stitch. Ch 3 at the beginning of dc rows DOES count as the first dc. This is consistent throughout.
6. Work with RS facing for all in-the-round sections unless stated otherwise.
7. The ribbon is NOT crocheted in. It’s threaded through eyelet holes worked at the waist after the skirt is complete.
Step-by-Step Pattern Instructions
Bodice Front
With MC and your E-4 hook, chain 51.
Row 1 (RS): Sc in 2nd ch from hook and in each ch across, turn. (50 sc)
Row 2 (WS): Ch 1, sc in each st across, turn. (50 sc)
Row 3: Ch 1, sc in each st across, turn. (50 sc)
Rows 4 through 6: Repeat Row 2. (50 sc each row)
Row 7 (shoulder shaping setup): Ch 1, sc in first 13 sts, turn leaving remaining sts unworked. This begins the right shoulder strap. (13 sc)
Rows 8 through 18 (right shoulder strap): Ch 1, sc in each st across, turn. (13 sc each row)
After Row 18, fasten off leaving a 12 inch or 30 cm tail for seaming.
Return to Row 6 stitches. Count from the left edge. Skip the center 24 stitches for the square neckline opening. Join MC in the 38th stitch of Row 6 (the 14th stitch from the left edge).
Row 7 (left shoulder strap): Ch 1, sc in same st and in each of the remaining 12 sts to left edge, turn. (13 sc)
Rows 8 through 18 (left shoulder strap): Ch 1, sc in each st across, turn. (13 sc each row)
After Row 18, fasten off leaving a 12 inch tail for seaming.
Checkpoint: Each shoulder strap should measure approximately 2 inches or 5 cm tall and 2.4 inches or 6 cm wide. The neckline opening is 24 stitches wide, approximately 4.4 inches or 11 cm across.
Bodice Back
With MC and your E-4 hook, chain 51.
Row 1 (RS): Sc in 2nd ch from hook and in each ch across, turn. (50 sc)
Rows 2 through 6: Ch 1, sc in each st across, turn. (50 sc each row)
Row 7 (right shoulder strap): Ch 1, sc in first 13 sts, turn. (13 sc)
Rows 8 through 18: Ch 1, sc in each st across, turn. (13 sc each row)
After Row 18, fasten off leaving a 12 inch tail.
Return to Row 6. Skip center 24 stitches. Join MC in 38th stitch from right edge.
Row 7 (left shoulder strap): Ch 1, sc in same st and in each of remaining 12 sts, turn. (13 sc)
Rows 8 through 18: Ch 1, sc in each st across, turn. (13 sc each row)
After Row 18, fasten off leaving a 12 inch tail.
Seaming the Bodice
Align front and back bodice pieces with RS together. Using your yarn needle and the MC tail, whip stitch or mattress stitch the right shoulder strap edges together across all 13 stitches. Repeat for the left shoulder strap. The square neckline opening is now formed.
With MC and yarn needle, seam the side edges of the bodice from the bottom of each armhole opening (Row 7 level) down to the bottom edge (Row 1/foundation chain edge). Leave the armhole openings unseamed. The armhole opening spans Rows 7 through 18 (12 rows tall) on each side, approximately 2 inches or 5 cm tall.
Checkpoint: After seaming, the bodice tube should measure approximately 3.2 inches or 8 cm tall. Chest circumference should measure approximately 18 inches or 46 cm at the widest point (the base, Row 1). The armhole opening on each side should measure approximately 2 inches tall and 2 inches wide.
Waist Joining and Eyelet Row
With RS facing, join MC at any back side seam at the bottom edge of the bodice (Row 1/foundation chain edge).
Rnd 1 (joining round): Ch 1, work 100 sc evenly around the entire bottom opening of the bodice, sl st to first sc to join. (100 sc)
Work approximately 50 sc across the front bottom edge and 50 sc across the back bottom edge, easing any fullness evenly. Place stitch markers at front and back center points and at each side seam.
Rnd 2 (eyelet round for ribbon): Ch 3 (counts as first dc), dc in next st, (ch 1, sk 1 st, dc in next 2 sts) across, ending with ch 1, sk 1 st, sl st to top of beginning ch-3 to join. (67 dc plus 33 ch-1 spaces = 100 units)
Rnd 3: Ch 1, sc in top of sl st join, sc in each dc and 1 sc in each ch-1 sp around, sl st to first sc to join. (100 sc)
The Skirt
The skirt fan stitch is worked over a multiple of 10 stitches. Your current stitch count of 100 divides evenly into 10 repeats.
Rnd 4 (increase round): Ch 1, (sc in next 4 sts, 2 sc in next st, sc in next 4 sts, 2 sc in next st) 10 times, sl st to first sc to join. (120 sc)
Rnd 5 (fan base setup): Ch 3 (counts as dc), dc in same joining st, (sk 2 sts, sc in next st, sk 2 sts, shell in next st) 19 times, sk 2 sts, sc in next st, sk 2 sts, sl st to top of beginning ch-3. (20 shells, 20 sc)
Rnd 6 (fan round 1): In ch-2 sp of each shell work a fan of 5 dc with ch 1 between each (dc, ch 1, dc, ch 1, dc, ch 1, dc, ch 1, dc). Then sc in sc of previous round. Continue around. (20 fans, 20 sc)
Rnd 7: Ch 1, sc in top of sl st join. Working across each fan: (sc in first dc, hdc in ch-1 sp, dc in center dc of fan, hdc in ch-1 sp, sc in last dc of fan, sc in sc between fans) around, sl st to first sc to join. (120 sts)
Rnd 8 (expansion to 132): Ch 1, (sc in next 9 sts, 2 sc in next st) 12 times, sl st to first sc. (132 sc)
Rnd 9 (shell base, round 2): Ch 3, dc in same joining st, (sk 2 sts, sc in next st, sk 2 sts, shell in next st) 21 times, sk 2 sts, sc in next st, sk 2 sts, sl st to top of beginning ch-3. (22 shells, 22 sc)
Rnd 10 (fan round 2): In ch-2 sp of each shell work fan of 5 dc with ch 1 between, sc in each sc between fans. (22 fans, 22 sc)
Rnd 11: Ch 1, (sc in first dc of fan, hdc in ch-1 sp, dc in center dc, hdc in ch-1 sp, sc in last dc, sc in sc between fans) around, sl st to first sc. (132 sts)
Rnd 12 (expansion): Ch 1, (sc in next 10 sts, 2 sc in next st) 12 times, sl st to first sc. (144 sc)
Rnd 13 (shell base, round 3): Ch 3, dc in same st, (sk 2, sc in next, sk 2, shell in next) 23 times, sk 2, sc in next, sk 2, sl st to top of beginning ch-3. (24 shells, 24 sc)
Rnd 14 (fan round 3): (Fan of 5 dc with ch 1 between in ch-2 sp of each shell, sc in sc between fans) around, sl st to top of beginning ch-3. (24 fans, 24 sc)
Rnd 15: Ch 1, (sc in first dc of fan, hdc in ch-1 sp, dc in center dc, hdc in ch-1 sp, sc in last dc of fan, sc in sc between fans) around, sl st to first sc. (144 sc)
Rnd 16 (expansion): Ch 1, (sc in next 11 sts, 2 sc in next st) 12 times, sl st to first sc. (156 sc)
Rnd 17 (shell base, round 4): Ch 3, dc in same st, (sk 2, sc in next, sk 2, shell in next) 25 times, sk 2, sc in next, sk 2, sl st to top of beginning ch-3. (26 shells, 26 sc)
Rnd 18 (fan round 4): (Fan of 5 dc with ch 1 between in ch-2 sp of shell, sc in sc between fans) around. (26 fans, 26 sc)
Rnd 19: Ch 1, (sc in first dc of fan, hdc in ch-1 sp, dc in center dc, hdc in ch-1 sp, sc in last dc of fan, sc in sc between fans) around, sl st to first sc. (156 sc)
Rnd 20 (expansion): Ch 1, (sc in next 12 sts, 2 sc in next st) 12 times, sl st to first sc. (168 sc)
Rnd 21 (shell base, round 5): Ch 3, dc in same st, (sk 2, sc in next, sk 2, shell in next) 27 times, sk 2, sc in next, sk 2, sl st to top of beginning ch-3. (28 shells, 28 sc)
Rnd 22 (fan round 5): (Fan of 5 dc with ch 1 between in ch-2 sp of shell, sc in sc between fans) around. (28 fans, 28 sc)
Rnd 23: Ch 1, (sc in first dc of fan, hdc in ch-1 sp, dc in center dc, hdc in ch-1 sp, sc in last dc of fan, sc in sc between fans) around, sl st to first sc. (168 sc)
Checkpoint: After Rnd 23, the skirt should measure approximately 5.5 inches or 14 cm from the waist join. The hem circumference at this point is approximately 30 inches or 76 cm. The fan scallops should be clearly defined and the fabric should drape softly outward.
Rnd 24 (pre-hem expansion): Ch 1, (sc in next 13 sts, 2 sc in next st) 12 times, sl st to first sc. (180 sc)
Rnd 25 (shell base, round 6): Ch 3, dc in same st, (sk 2, sc in next, sk 2, shell in next) 29 times, sk 2, sc in next, sk 2, sl st to top of beginning ch-3. (30 shells, 30 sc)
Rnd 26 (fan round 6): (Fan of 5 dc with ch 1 between in ch-2 sp of shell, sc in sc between fans) around. (30 fans, 30 sc)
Rnd 27: Ch 1, (sc in first dc of fan, hdc in ch-1 sp, dc in center dc, hdc in ch-1 sp, sc in last dc of fan, sc in sc between fans) around, sl st to first sc. (180 sc)
Rnd 28 (hem foundation): Ch 1, sc in each st around, sl st to first sc. (180 sc)
Fasten off MC. Join CC.
Hem Border
Rnd 29 (hem border): With CC, ch 1, (sl st in next 2 sts, picot-shell in next st, sl st in next 2 sts) around, sl st to beginning sl st to join.
For the hem version of the picot-shell: work (sl st, ch 3, 2 dc, ch 3, sl st in top of first ch-3 sp made, 2 dc, ch 3, sl st) all in same stitch.
Each 5-stitch group uses 5 stitches. 180 divided by 5 equals 36 picot-shell groups. (36 picot-shells)
Fasten off CC. Weave in ends.
Checkpoint: The completed skirt including hem border should measure approximately 7 inches or 18 cm from waist to bottom of picot hem.
Cap Sleeves
Each armhole is approximately 12 rows tall and spans the 13-stitch shoulder strap width. You’ll pick up approximately 38 stitches around each armhole.
With RS facing, join MC at underarm seam of one armhole.
Rnd 1: Ch 1, work 38 sc evenly around armhole opening, sl st to first sc. (38 sc)
Rnd 2: Ch 1, (sc in next 3 sts, sc2tog) 7 times, sc in remaining 3 sts, sl st to first sc. (31 sc)
Rnd 3: Ch 1, sc in each st around, sl st to first sc. (31 sc)
Rnd 4 (sleeve hem): Ch 1, sc in each st around, sl st to first sc. (31 sc)
Fasten off MC. Join CC.
Rnd 5 (sleeve border): With CC, ch 1, (sl st in next 2 sts, picot in next st) around ending with sl st in last st, sl st to beginning sl st. (approximately 10 picots)
Fasten off CC. Weave in ends. Repeat for second sleeve.
Neckline Border
With RS facing and CC, join at center back right shoulder seam.
Rnd 1: Ch 1, work sc evenly around entire neckline opening: 13 sc across right back strap top edge, 13 sc across right front strap top edge, 24 sc across front neckline bottom, 13 sc across left front strap top edge, 13 sc across left back strap top edge, 24 sc across back neckline bottom, sl st to first sc to join. (100 sc)
Place markers at each corner of the square neckline.
Rnd 2 (picot neckline border): Ch 1, (sl st in next 2 sts, picot in next st) around entire neckline, working 3 sl st at each corner marker instead of 2 to prevent puckering, sl st to beginning sl st to join.
Fasten off CC.
Back Button Loop (Optional)
With CC, join at top right corner of back neckline. Ch 8, sl st to same corner. Fasten off. Sew one small button to corresponding left corner of back neckline.
Alternatively, extend the satin ribbon through the back neckline corners and tie in a bow.
Waist Ribbon
Thread the satin ribbon through the eyelet spaces of Rnd 2 of the waist section, beginning and ending at center front. Tie the ribbon ends in a bow or square knot at center front, leaving the tails approximately 3 inches or 7.5 cm long on each side.
Crocheted Rose Embellishment
With MC and larger hook, chain 36.
Row 1: Sc in 2nd ch from hook, (ch 3, sk 1 ch, sc in next ch) across. (17 ch-3 spaces, 18 sc)
Row 2: Ch 1, turn, (sc, hdc, 3 dc, hdc, sc) in each ch-3 sp across. (17 petals)
Do not fasten off. Roll the strip tightly from one end, spiraling the petals outward. With yarn needle, secure the base with several stitches through all layers. The rose should be approximately 1 inch or 2.5 cm in diameter.
Rose Leaf
With MC and larger hook, chain 10.
Row 1: Sc in 2nd ch from hook, hdc in next ch, dc in next 3 ch, hdc in next ch, sc in next ch, 3 sc in last ch (tip of leaf). Working back along opposite side of foundation chain: sc in next ch, hdc in next ch, dc in next 3 ch, hdc in next ch, sc in last ch, sl st to first sc. (approximately 20 sts around leaf)
Fasten off. Sew the rose and leaf to the center front of the ribbon.
Finishing Your Peach Blossom Baby Dress
Block all pieces gently before final assembly if needed. This dress benefits from a light steam block to open up the fan stitches and help the skirt drape beautifully.
Weave in all remaining ends securely. For baby items, I like to weave ends back through themselves a second time for extra security during washing.
The completed dress should measure approximately 14 inches from shoulder to hem. Give it a final press, add the ribbon and rose, and step back to admire your work.
Tips for Success
Take your time with the fan stitch pattern. The rhythm becomes second nature after the first couple of repeats, but those first few rounds require attention.
Use plenty of stitch markers. Mark the beginning of each round and the boundaries of pattern repeats. It saves so much frogging later.
Count your stitches at each checkpoint. The pattern gives you specific measurements and stitch counts at key points. Use them.
The rose is more forgiving than it looks. Even if your petals aren’t perfectly even, the rolling and stitching hides a lot. Just keep it tight at the base.
Thank you so much for choosing this pattern for your next project. I truly hope you love making it as much as I loved putting it together. There’s something so satisfying about creating a little dress that might become a family keepsake.
If you make one, I’d absolutely love to see it. Tag me on Instagram or share it in my Facebook group. Seeing your finished projects honestly makes my whole day.
Save this pattern to your Pinterest boards so you can find it when you’re ready to start, and please drop a comment below if you give it a try. I love hearing how it turns out for you!
