
I have been dreaming about creating the perfect fall market bag for ages. Something that would feel cozy and seasonal without being too trendy to use year after year. When I finally sat down to design this tote, I knew exactly what I wanted: classic granny squares in warm harvest colors, a sturdy structure that would actually hold things, and handles comfortable enough for a trip to the farmers market or a day of running errands.
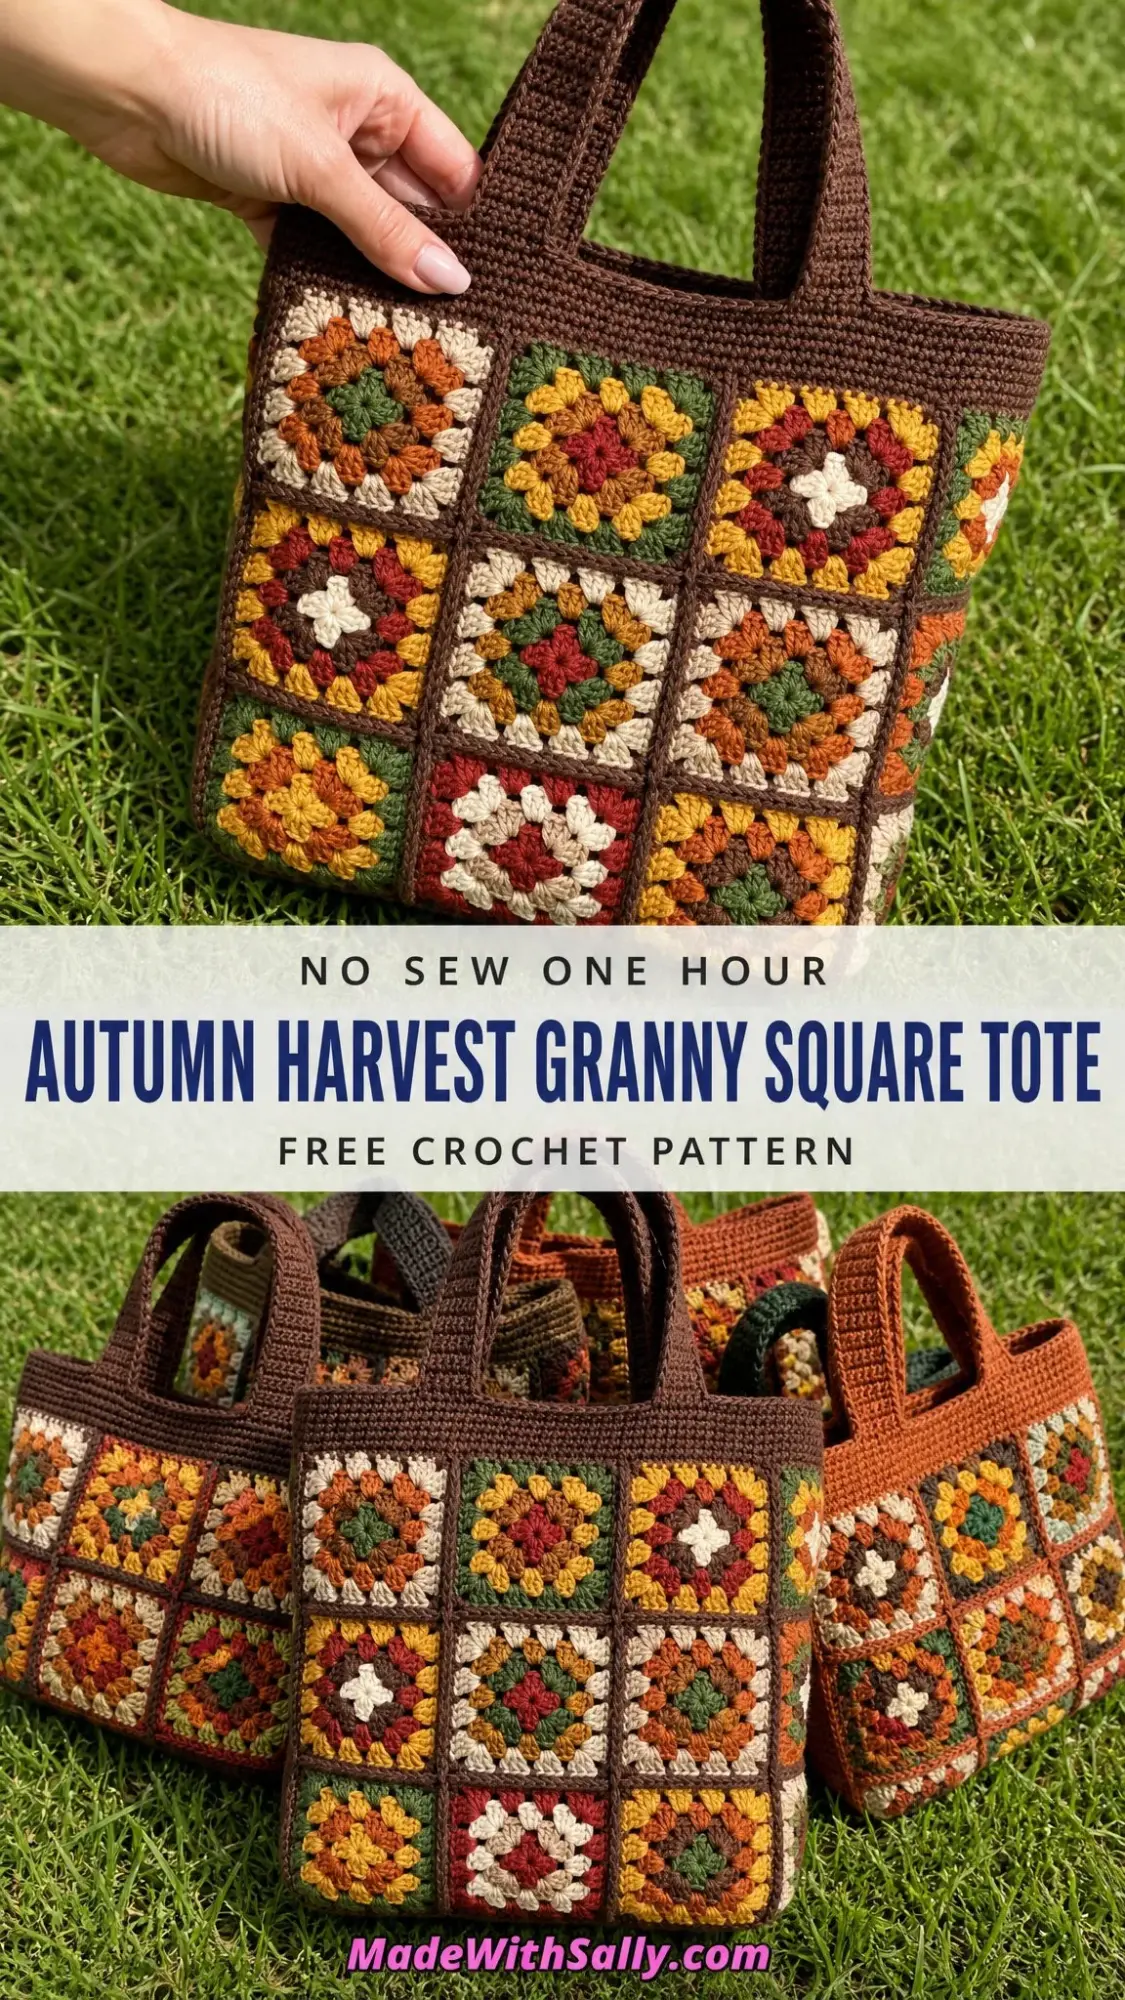
The chocolate brown framing on every square was the decision that pulled everything together. It gives the bag that patchwork quilt feeling while keeping the whole design cohesive and polished. I wanted something that looked intentional, not chaotic.
I am SO pleased with how this one turned out. The colors remind me of falling leaves and warm apple cider, and the construction is way more straightforward than it looks. If you have been wanting to try a granny square bag but felt intimidated, this is your sign to go for it.
About This Autumn Harvest Granny Square Tote
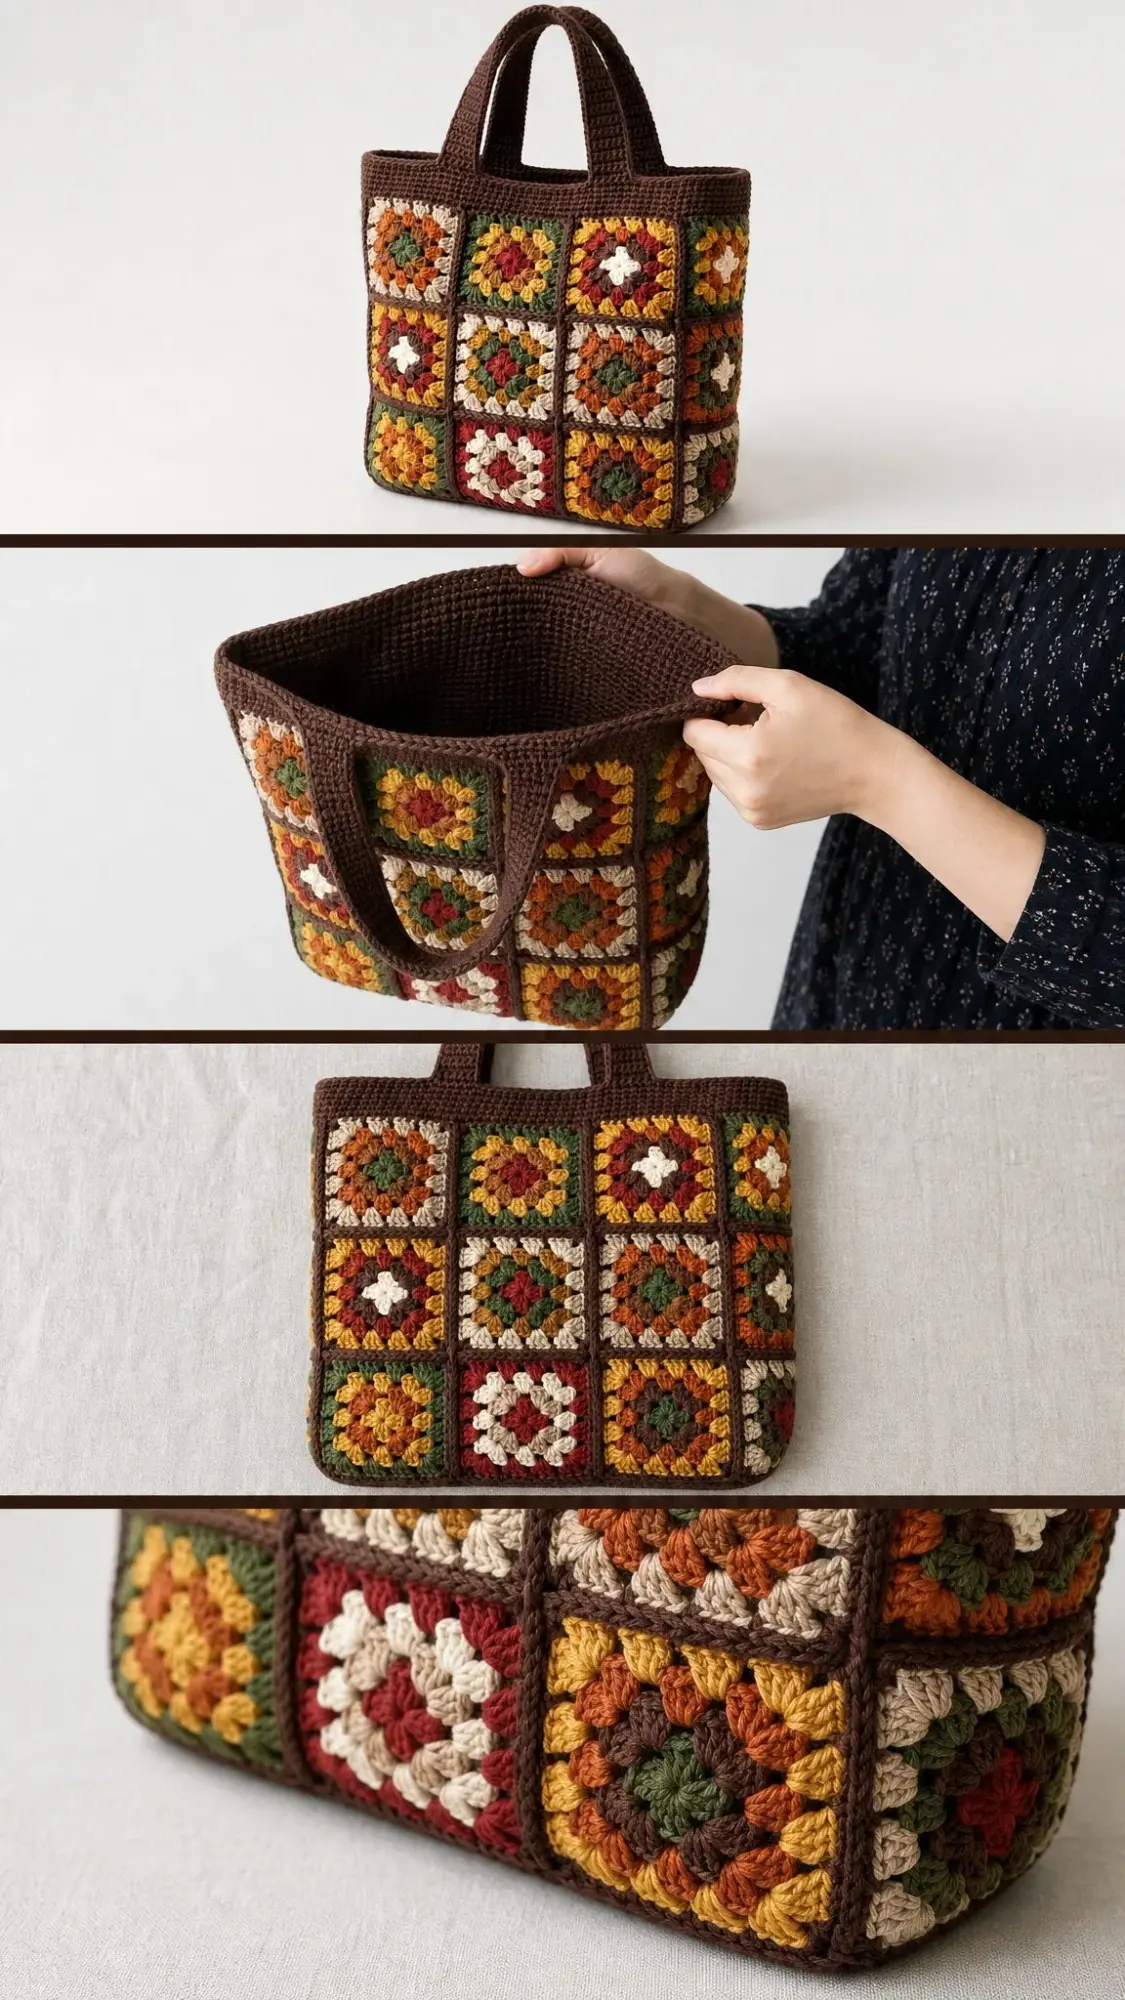
This tote is built from twenty-four individual granny squares in toasted golds, rust, sage, brick, and cream. Each square gets framed with a final round of chocolate brown yarn, which creates that beautiful unified patchwork look when everything comes together. The squares are joined into panels, closed at the bottom with a firm base, and finished with a smooth brown band and sturdy twin handles.
The finished bag measures approximately 12 inches wide, 13.5 inches tall, and 4 inches deep. The handle drop sits around 9 inches, making it comfortable for carrying on your shoulder or in your hand.
What I love most about this project is its portability. Since each square is worked separately, you can toss a few in your purse and stitch them during lunch breaks, waiting rooms, or lazy evenings on the couch. Then when you have all twenty-four ready, the assembly comes together in one satisfying session.
Skill Level
This pattern is rated easy intermediate. You should be comfortable with basic crochet stitches and working in the round. If you have made a granny square before, you are absolutely ready for this project.
The main techniques you will use include the magic ring (or a chain-4 ring if you prefer), double crochet clusters, and single crochet seaming. Nothing here is complicated on its own. The magic is in the assembly.
Materials You Will Need
Yarn: Worsted weight or Aran weight yarn (CYC 4) in a smooth cotton or cotton blend. Cotton gives this bag its crisp, structured stitches and helps it hold its shape beautifully.
You will need approximately 650 to 750 yards total across your color palette:
| Color | Approximate Yardage |
|---|---|
| Brown (main color) | 300 yards / 275 meters |
| Gold | 80 yards / 73 meters |
| Rust | 80 yards / 73 meters |
| Sage | 80 yards / 73 meters |
| Brick | 80 yards / 73 meters |
| Cream | 80 yards / 73 meters |
The brown takes the largest share because it is used for Round 4 of every single square, plus all the joining, the base, the top band, and both handles.
Suggested Yarns:
Hook: 5.0 mm (US H/8) crochet hook
Notions:
Gauge
One finished four-round granny square should measure 4 inches by 4 inches (10 cm by 10 cm). In granny rows, four 3-dc groups across should measure approximately 4 inches.
Gauge matters here because it determines your final bag size. If your squares are coming out larger, try going down a hook size. If they are smaller, go up a hook size. Take time to swatch before diving in.
Abbreviations
Here are all the abbreviations used in this pattern, written in US crochet terms:
UK crocheters: US double crochet equals UK treble (tr), and US single crochet equals UK double crochet (dc). Substitute throughout and everything works identically.
Special Stitches
3-dc group (also called a cluster): Three double crochet stitches worked into the same space. This is the building block of every granny round.
Corner: Work (3 dc, ch 2, 3 dc) all in one chain-2 space. This creates the corner increase that keeps your square flat and square-shaped.
Magic ring: An adjustable loop that lets you close the center of your work tightly. If you are not comfortable with the magic ring, you can chain 4 and join with a slip stitch to form a ring instead.
Pattern Notes Before You Begin
Part 1: Making the Granny Squares (Make 24)
Each square is worked in the round with the right side facing throughout. You will change colors at the start of each round according to your chosen color recipe. Round 4 is brown on every square.
Round 1 (Center Color)
Make a magic ring. Chain 3 (this counts as your first dc), then work 2 dc in the ring. Chain 2.
Work 3 dc in the ring, chain 2. Repeat from * two more times.
Join with a slip stitch to the top of the beginning chain-3.
(4 groups / 12 dc, 4 ch-2 corners)
Round 2 (Color 2)
Slip stitch into the nearest chain-2 corner space. Chain 3 (counts as first dc), work (2 dc, ch 2, 3 dc) in the same corner space.
Chain 1, work (3 dc, ch 2, 3 dc) in the next corner space. Repeat from * two more times. Chain 1.
Join with a slip stitch to the top of the beginning chain-3.
(8 groups / 24 dc)
Round 3 (Color 3)
Slip stitch into a corner space. Chain 3, work (2 dc, ch 2, 3 dc) in the same corner space.
Chain 1, work 3 dc in the next chain-1 side space, chain 1, work (3 dc, ch 2, 3 dc) in the next corner space. Repeat from * around, ending with chain 1, 3 dc in the last side space, chain 1.
Join with a slip stitch.
(12 groups / 36 dc)
Round 4 (Brown on Every Square)
Slip stitch into a corner space. Chain 3, work (2 dc, ch 2, 3 dc) in the same corner space.
[Chain 1, work 3 dc in the next side space] twice, chain 1, work (3 dc, ch 2, 3 dc) in the next corner space. Repeat from * around, ending with [chain 1, 3 dc in side space] twice, chain 1.
Join with a slip stitch. Fasten off.
(16 groups / 48 dc)
Repeat until you have 24 squares total. Block each one to 4 inches (10 cm) before assembly.
Color Recipes and Layout
Every square shares the brown Round 4. For the scrappy harvest look shown in the photos, rotate the inner three rounds freely. No two neighboring squares need to match exactly.
Here are five reliable color combinations to get you started:
| Recipe | Round 1 | Round 2 | Round 3 |
|---|---|---|---|
| A | Gold | Rust | Cream |
| B | Brick | Sage | Gold |
| C | Cream | Rust | Sage |
| D | Sage | Gold | Rust |
| E | Rust | Cream | Brick |
Layout: Arrange 9 squares for the front panel and 9 squares for the back panel, each in a 3-wide by 3-tall grid. Set aside 3 squares for each side panel (1 wide by 3 tall). Shuffle your squares around until the colors feel balanced before you start joining.
Part 2: Joining the Panels
Join with brown yarn so the seams disappear into each square’s brown frame. Hold two squares with wrong sides together and work through both inner loops for a flat, sturdy seam.
Step 1: Build the Front and Back Panels
With right side facing and brown yarn, single crochet the squares together in rows first, then single crochet the rows together. Each square edge holds 13 stitches (3 groups plus corners), so one seam equals approximately (13 sc per square edge).
Step 2: Add the Side Panels
Seam the 3 squares of each side panel into a strip. Join one side strip between the front and back panels along the right edges. (3 squares per side)
Step 3: Close Into a Tube
Join the remaining side strip along the left edges so the body forms a continuous loop, open at the top and bottom. (8 squares around, 3 squares tall)
Part 3: The Base
Round 1
With brown yarn and right side facing, single crochet evenly around the entire bottom opening. Work about 16 sc across each front/back square edge and 16 sc across each side edge. (approximately 104 sc)
Closing the Base
Turn the bag inside out. Single crochet the front-bottom edge to the back-bottom edge across, flattening the side squares into the base corners. Fasten off. Turn the bag right side out. (approximately 52 sc seam)
Part 4: The Top Band
Rounds 1 through 5
With brown yarn, single crochet evenly around the top opening. Join. Work 5 rounds even in single crochet. Do not turn between rounds. (approximately 104 sc per round)
Part 5: The Handles (Make 2)
Placement and Rows
On the front band, mark two points approximately 3 inches (7.5 cm) in from each side. Join brown yarn, chain 1, then single crochet 8 stitches across.
Work in single crochet rows for approximately 80 rows (about 16 inches or 40 cm) until the strap reaches the matching points on the opposite side. Single crochet the end down to the band securely. (8 sc per row)
Repeat for Second Handle
Make the second handle the same way on the back band, mirroring the placement. (2 handles total)
For sturdier straps: Fold each handle in half lengthwise and whip stitch the edges together. This creates a thicker, more comfortable strap that will not stretch out over time.
Finishing and Care
Weave in any remaining ends on the wrong side and trim close to the fabric.
Steam block or wet block the finished bag. Gently square the corners and flatten the base so it stands on its own.
Optional lining: Cut fabric to match the inner panels plus half an inch for seam allowance. Sew the fabric into a pouch shape and hand stitch it just below the top band. A magnetic snap at center top adds a tidy closure.
Care instructions:
Customizing the Size
This bag scales beautifully because it is built from whole squares. Each added column or row changes the size by one square, which is approximately 4 inches.
Bigger Beach Bag: Use 4 squares wide by 4 squares tall on front and back, with 2-wide sides. This gives you a bag roughly 16 by 18 inches.
Little Grab Pouch: Work 2 squares wide by 2 squares tall panels with single-square sides. This creates a cute pouch around 8 by 9 inches.
Other Easy Tweaks:
Whenever you change the square count, keep the top band and base stitch counts at approximately 16 sc per square edge and everything will still line up perfectly.
Why Cotton Yarn Works Best
I specifically recommend cotton or a cotton blend for this project because of how it holds structure. Acrylic yarn tends to stretch and relax over time, which means your bag might lose its shape after a few uses. Cotton stays crisp, washes well, and only gets softer with use while maintaining that structured tote silhouette.
If you prefer the feel of acrylic, look for a cotton-acrylic blend that gives you some of the structure benefits while still being soft and easy to work with.
Tips for Success
Block before joining. I cannot stress this enough. Taking the time to wet block or steam block your squares to exactly 4 inches makes assembly so much easier. Your edges will line up, your seams will be even, and the finished bag will look professional.
Use a yarn needle for joining. While you can crochet the seams together, I find that using a yarn needle and whip stitching through the inner loops gives a flatter, neater finish that blends into the brown framing.
Do not stress about perfect color placement. The beauty of this design is in the scrappy, varied look. As long as you avoid putting two identical squares right next to each other, the random placement creates visual interest.
Try on the handles before attaching. Hold the straps up to your shoulder and check the length feels comfortable for how you plan to carry the bag. Some people prefer shorter handles for hand carrying, while others want a longer drop for shoulder wear.
Final Thoughts on This Crochet Pattern
This Autumn Harvest Granny Square Tote has become one of my favorite makes. It is the kind of project that looks impressive but is actually quite relaxing to work on. The repetitive nature of granny squares is almost meditative, and watching the color combinations come together never gets old.
Whether you are making this for yourself, as a gift, or to sell at a craft fair, I hope you enjoy every stitch. The combination of portable square-making and satisfying assembly makes this a project you will want to make again in different color palettes.
Thank you so much for choosing this pattern. I would absolutely love to see your finished totes! If you make one, please share a photo on Instagram or in my Facebook group. Seeing your creations is honestly the best part of designing patterns.
If you loved this pattern, save it to your Pinterest boards so you can find it easily when you are ready to start. And if you do make this tote, drop a comment below. I would love to hear which color combination you chose!
