
I’ve been looking for the perfect tapestry crochet bag pattern for months. Something bold enough to make a statement but practical enough for everyday use. This Forest Green Diamond Tapestry Tote is exactly what I had in mind, and I’m thrilled to share it with you today.
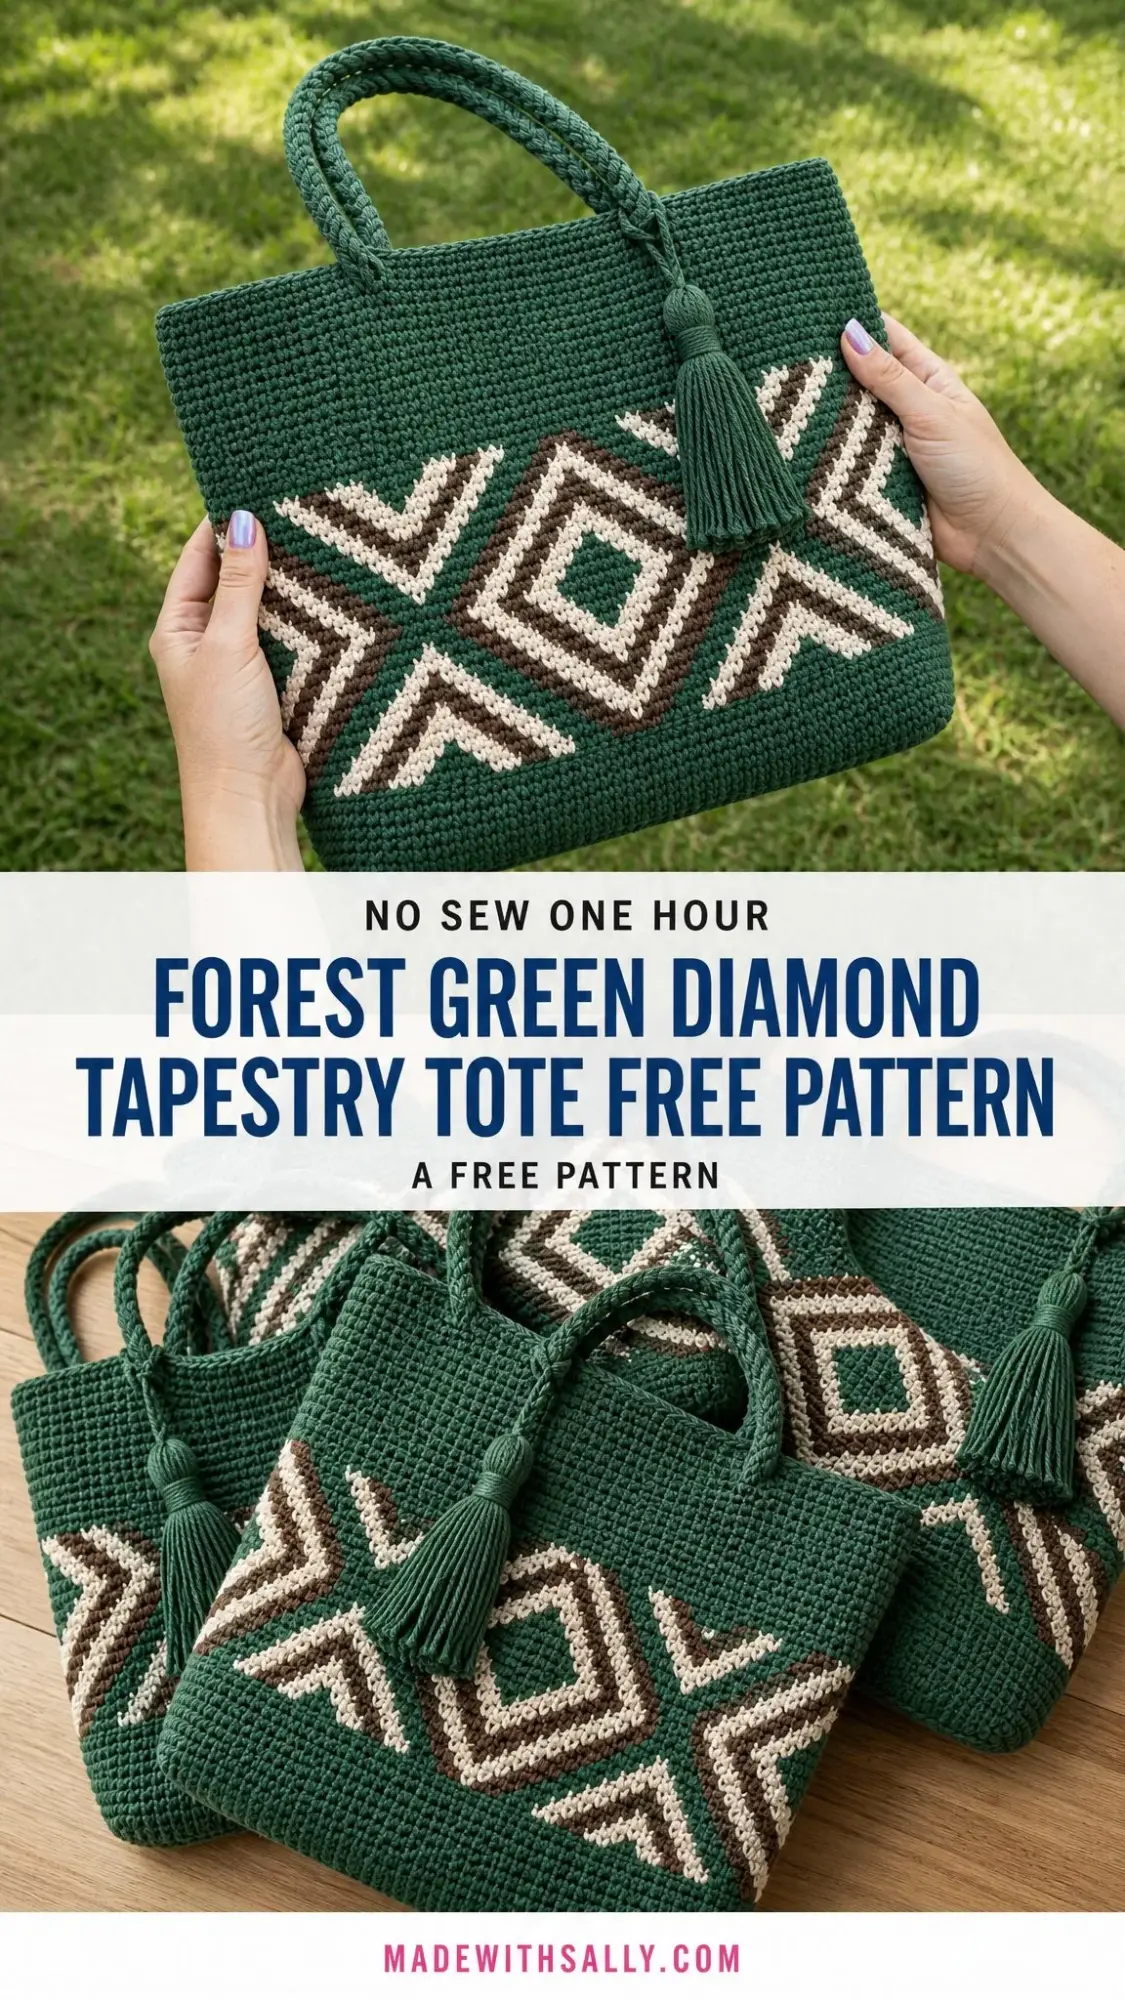
The geometric diamond motif gives this bag such a striking look. Cream and brown lines pop against that deep forest green background. And those braided handles with the coordinating tassel? Chef’s kiss.
If you’ve been wanting to try tapestry crochet but felt intimidated, this is your project. Yes, it requires focus. Yes, you’ll be carrying multiple yarn colors. But I’ll walk you through every single step, and you’ll end up with a bag that looks like it came from a high-end boutique.
What Makes This Tapestry Crochet Tote Special
This isn’t your average crochet bag. The tapestry single crochet technique creates a thick, structured fabric that holds its shape beautifully. Unlike regular colorwork where you might have loose strands on the back, tapestry crochet encases unused yarns inside each stitch. The result? A neat, padded fabric with no messy floats.
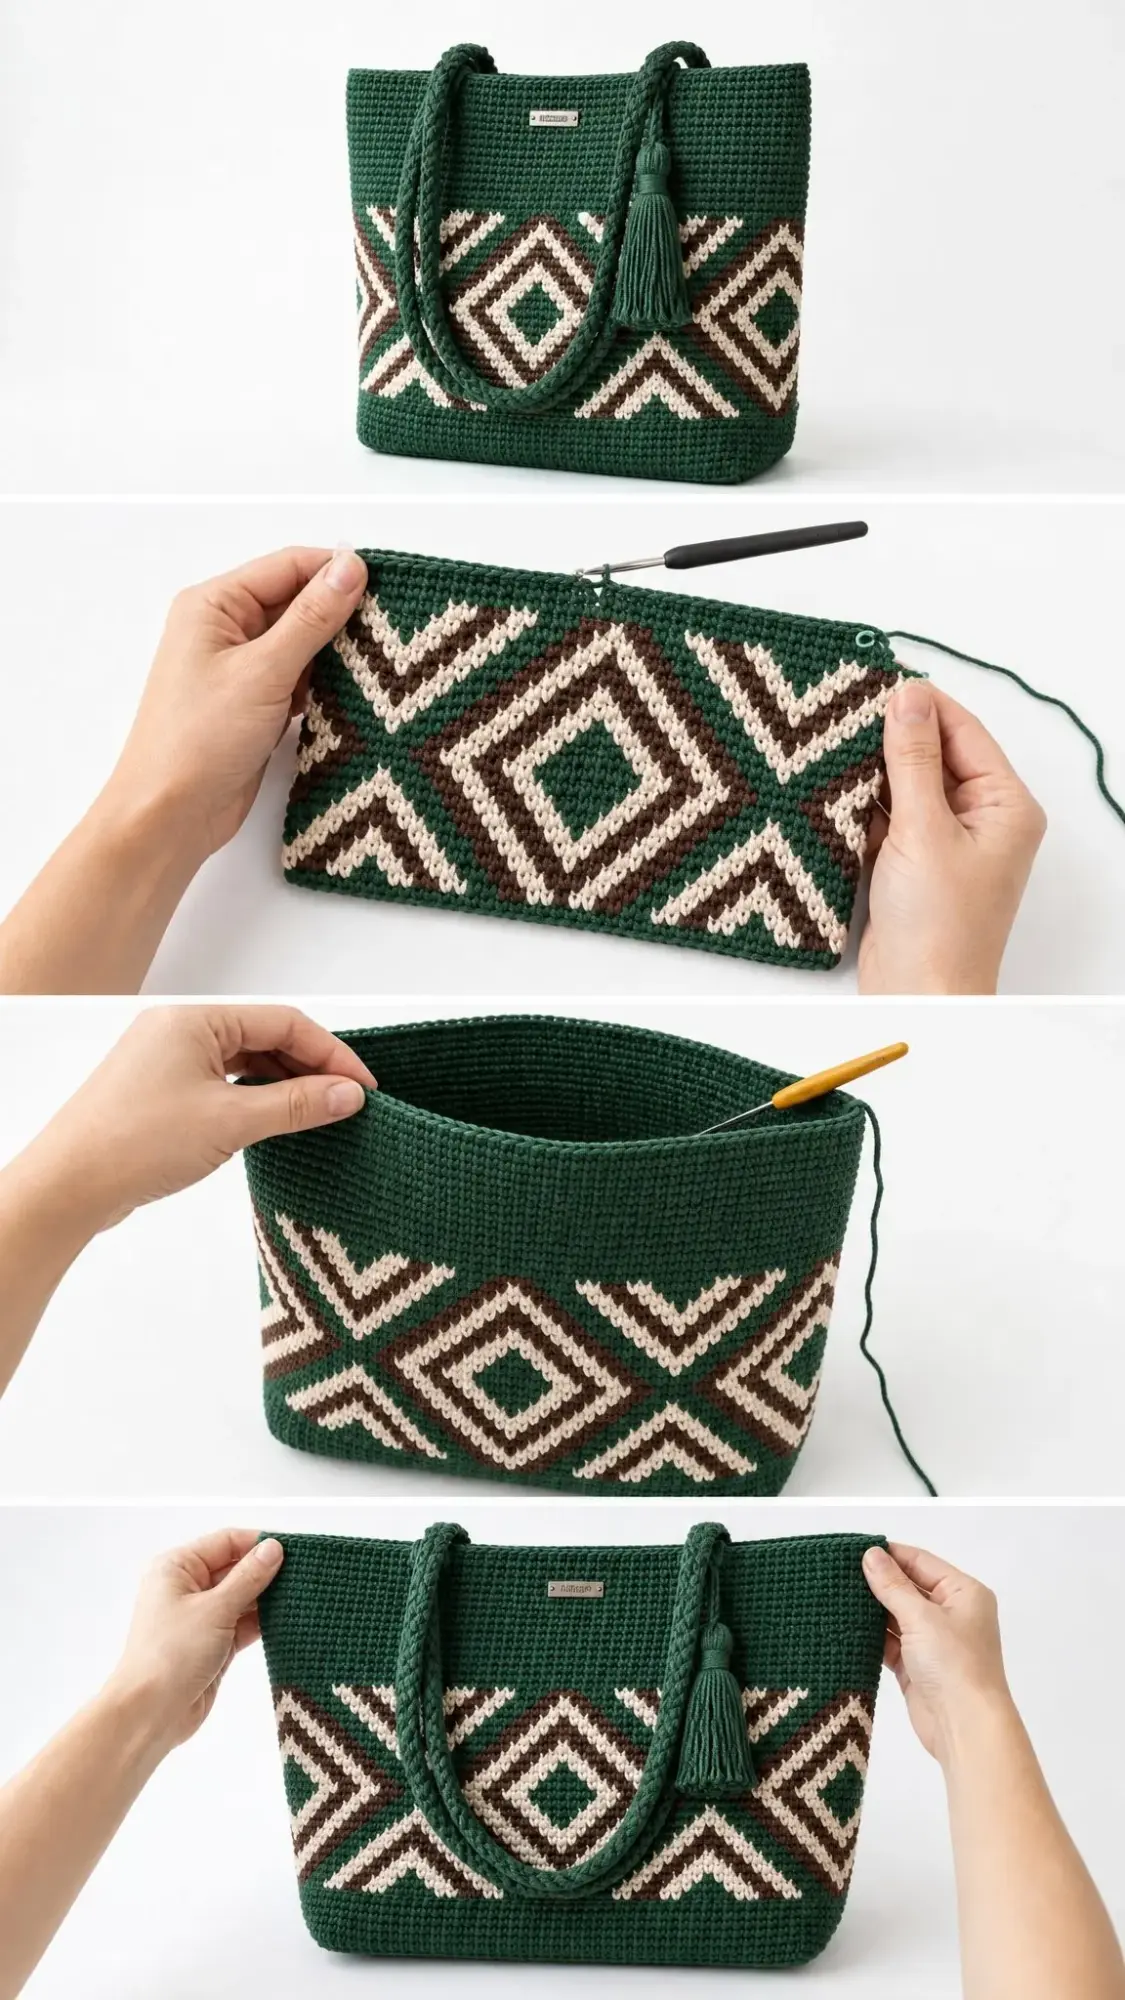
The Aztec-inspired diamond pattern covers the lower two-thirds of the bag, while the upper section stays solid green for a clean, modern finish. It’s the perfect balance of decorative and practical.
At approximately 16 inches wide by 14 inches tall by 5 inches deep, this tote fits everything. Laptop, water bottle, wallet, snacks, a paperback for the commute. The braided handles sit comfortably on your shoulder, and that little tassel adds a handcrafted touch that always gets compliments.
Skill Level and Time Commitment
I’ll be honest with you. This is an intermediate to advanced project. You should feel comfortable with:
That said, if you’ve made a few projects and want to level up your skills, this is an excellent challenge. The techniques aren’t complicated individually. They just require attention and practice.
Time estimate: Plan for 20 to 28 hours of crochet time. The colorwork rounds move slower than plain single crochet because you’re managing three yarns. Handle construction and finishing add another 2 to 3 hours. Spread it over a few weeks and enjoy the process.
Materials You’ll Need
Yarn
You’ll need worsted weight (medium, weight 4) cotton or cotton-blend yarn with good stitch definition. Cotton works better than acrylic here because it creates a stiffer fabric that holds the bag’s shape.
Color A (Forest Green): approximately 600 yards (550 meters)
Color B (Cream/Off-White): approximately 180 yards (165 meters)
Color C (Brown/Chocolate): approximately 120 yards (110 meters)
Recommended Yarn Options
Lion Brand 24/7 Cotton in Grass, Ecru, and Coffee is my top pick. This 100-percent mercerized cotton has excellent stitch definition and holds its shape beautifully. It’s widely available and machine washable.
WeCrochet Dishie Worsted in Fern, Cream, and Walnut works wonderfully too. The matte finish and tight plying read beautifully in tapestry work.
Paintbox Yarns Cotton DK held double is another option if you prefer a slightly softer hand.
Avoid fuzzy or textured yarns. They’ll obscure your beautiful diamond motif.
Hook
US size G-6 (4.0 mm) crochet hook
This is slightly smaller than typical for worsted weight, and that’s intentional. The tighter gauge creates a firm, dense fabric that gives your bag structure.
Notions
Gauge
20 single crochet by 22 rows equals 4 inches by 4 inches (10 cm by 10 cm) worked in tapestry single crochet with two strands carried, using a US G-6 (4.0 mm) hook. Measure after blocking.
To check gauge: Chain 26 with Color A, carry Color B alongside without working it. Work single crochet flat for 26 rows. Fasten off, block, and measure the center 4-inch square.
If your swatch is too big, go down a hook size. Too small, go up. For this bag, erring toward firm is preferred.
Abbreviations
Let me break down every abbreviation you’ll see in this pattern:
ch (chain): The foundation stitch that creates your starting row. Yarn over, pull through the loop on your hook.
sc (single crochet): Insert hook into stitch, yarn over and pull up a loop (2 loops on hook), yarn over and pull through both loops.
sl st (slip stitch): Insert hook, yarn over, pull through stitch and loop on hook in one motion.
st/sts (stitch/stitches): Individual crochet stitches.
BLO (back loop only): Work into only the back loop of the stitch, leaving the front loop unworked.
FLO (front loop only): Work into only the front loop of the stitch.
RS (right side): The public-facing side of your work.
WS (wrong side): The inside or back of your work.
pm (place marker): Put a stitch marker in the indicated stitch.
sm (slip marker): Move your marker from the old stitch to the new one.
rep (repeat): Do the instruction sequence again.
rnd (round): One complete circuit when working in the round.
tsc (tapestry single crochet): Single crochet while carrying unused yarn colors inside the stitch. See detailed instructions below.
Special Techniques
Tapestry Single Crochet (tsc)
This is the star technique of this pattern. Don’t worry if it feels awkward at first. It becomes second nature quickly.
Step 1: Before beginning a section where you’ll carry a non-working color, lay the non-working yarn strand along the top of the row or round, pointing in the direction you’re working.
Step 2: Insert your hook into the next stitch as normal.
Step 3: As you draw up a loop, the non-working strand lies over the top of the stitch opening so it becomes encased.
Step 4: Complete the single crochet (sc) as usual. Yarn over with working color, draw through both loops.
Step 5: The non-working strand is now trapped inside the completed stitch. The working yarn forms the visible surface.
Step 6: To switch colors mid-round, work the last pull-through of the stitch BEFORE the color change with the NEW color. The switch happens on the final yarn-over of the stitch immediately before the first stitch of the new color.
Step 7: The old color becomes the carried yarn. The new color becomes the working yarn. They swap roles.
Important: Always carry all non-working strands throughout every stitch, even through long runs of a single color. This keeps tension consistent and prevents any strand from being loose inside the bag.
Braided Cord for Handles
Step 1: Cut 9 strands of Color A, each measuring 80 inches (203 cm).
Step 2: Hold all 9 strands together. Fold the bundle in half to find the midpoint.
Step 3: Use a slip knot or tied knot at one end to secure the 18 working ends together at the folded end.
Step 4: Divide the 18 strands into three groups of 6 strands each.
Step 5: Braid the three groups in a standard 3-strand braid, pulling firmly and evenly, until the braided section measures 28 inches (71 cm).
Step 6: Tie off the end firmly with a small length of yarn. This tail will be hidden inside the attachment seam.
Step 7: Make two identical braided cords.
Keep your braid tension firm and consistent. Loose braiding creates a floppy strap that stretches under load.
Tassel
Step 1: Cut approximately 40 strands of Color A, each 10 inches (25.5 cm).
Step 2: Align all strands and fold the bundle in half.
Step 3: Cut one separate strand approximately 18 inches (46 cm) long.
Step 4: Fold the long strand in half to find its midpoint. Place the fold of the tassel bundle over this midpoint.
Step 5: Use the long strand to lash tightly around the neck of the tassel, approximately 1 inch (2.5 cm) below the fold. Wrap 6 to 8 times and knot securely.
Step 6: Thread the two ends of the lashing strand onto a tapestry needle and pull them up through the center of the tassel head to form the hanging loop.
Step 7: Trim the tassel ends to an even length of approximately 4 inches (10 cm) below the neck wrap.
Pattern Notes Before You Begin
1. The bag base is worked flat in rows. The bag body is worked in continuous rounds after picking up stitches around all four edges of the base. Use a stitch marker to mark the beginning of each round and move it up with each new round.
2. The tapestry motif begins at Round 1 of the body and spans Rounds 1 through 60. Rounds 61 through 77 are worked in solid Color A only.
3. Color B and Color C are carried throughout ALL rounds of the body section, even during the solid green upper rounds. This maintains consistent fabric thickness and tension. Do not cut these yarns at the end of the motif section.
4. The total body circumference is 210 stitches. The front face is 80 stitches (exactly 4 repeats of the 20-stitch motif). The back face is 80 stitches. Each side panel is 25 stitches.
5. Place your beginning-of-round marker at what will become the right side seam of the bag. This keeps any color-change jog at the side, least visible in wear.
The Base Instructions
Using Color A and a US G-6 (4.0 mm) hook, chain 81.
Row 1 (RS): Starting in the 2nd chain from hook, sc in each chain across. Turn. (80 sc)
Rows 2 through 27: Ch 1, sc in each st across. Turn. (80 sc each row)
Row 28: Ch 1, sc in each st across. Do not turn. Do not fasten off. (80 sc)
Checkpoint: The finished base should measure approximately 16 inches (40.5 cm) long and 5 inches (12.5 cm) wide.
Joining for the Round
Do not fasten off after Row 28. You’ll now pick up stitches around all four edges of the base to form the working circumference for the body.
Introduce Color B and Color C strands at your starting position. You’ll carry all three colors from this point forward throughout all body rounds, using tapestry single crochet (tsc) throughout.
Begin the pickup at the corner where Row 28 ends.
Short end A (right side): Work 25 sc evenly spaced across the short end, one sc per row end edge. (25 sc)
Long edge A (bottom): Work into the remaining loops of the foundation chain, sc in each loop across. (80 sc)
Short end B (left side): Work 25 sc evenly spaced across the opposite short end. (25 sc)
Long edge B (live stitches from Row 28): sc in each of the 80 live stitches. (80 sc)
Total pickup round: 25 + 80 + 25 + 80 = 210 sc
Place a stitch marker in the first stitch you worked on Short End A. This is your beginning-of-round marker. Move it up each round.
Checkpoint: You should have exactly 210 stitches in your working round.
Body Round Structure
Work in continuous rounds using tsc throughout. Carry Color B and Color C in every stitch of every round, even when they aren’t the active color.
The 210-stitch round breaks down as follows:
Place additional markers at stitch 26 (start of front panel), stitch 106 (start of left side panel), and stitch 131 (start of back panel).
The Tapestry Motif Chart
The motif pattern below is written for one 20-stitch repeat. Work this repeat 4 times across each of the front and back panels per round.
Color key:
One vertical motif repeat equals 30 rounds. Work rounds 1 to 30 once, then work rounds 1 to 30 again (rounds 31 to 60) to complete two full vertical motif repeats.
Round 1: Position 1: A, 2: A, 3: A, 4: A, 5: A, 6: A, 7: A, 8: A, 9: A, 10: B, 11: B, 12: A, 13: A, 14: A, 15: A, 16: A, 17: A, 18: A, 19: A, 20: A
Round 2: 1: A, 2: A, 3: A, 4: A, 5: A, 6: A, 7: A, 8: A, 9: B, 10: C, 11: C, 12: B, 13: A, 14: A, 15: A, 16: A, 17: A, 18: A, 19: A, 20: A
Round 3: 1: A, 2: A, 3: A, 4: A, 5: A, 6: A, 7: A, 8: B, 9: C, 10: A, 11: A, 12: C, 13: B, 14: A, 15: A, 16: A, 17: A, 18: A, 19: A, 20: A
Round 4: 1: A, 2: A, 3: A, 4: A, 5: A, 6: A, 7: B, 8: C, 9: A, 10: A, 11: A, 12: A, 13: C, 14: B, 15: A, 16: A, 17: A, 18: A, 19: A, 20: A
Round 5: 1: A, 2: A, 3: A, 4: A, 5: A, 6: B, 7: C, 8: A, 9: A, 10: A, 11: A, 12: A, 13: A, 14: C, 15: B, 16: A, 17: A, 18: A, 19: A, 20: A
Round 6: 1: A, 2: A, 3: A, 4: A, 5: B, 6: C, 7: A, 8: A, 9: A, 10: A, 11: A, 12: A, 13: A, 14: A, 15: C, 16: B, 17: A, 18: A, 19: A, 20: A
Round 7: 1: A, 2: A, 3: A, 4: B, 5: C, 6: A, 7: A, 8: A, 9: A, 10: A, 11: A, 12: A, 13: A, 14: A, 15: A, 16: C, 17: B, 18: A, 19: A, 20: A
Round 8: 1: A, 2: A, 3: B, 4: C, 5: A, 6: A, 7: A, 8: A, 9: A, 10: A, 11: A, 12: A, 13: A, 14: A, 15: A, 16: A, 17: C, 18: B, 19: A, 20: A
Round 9: 1: A, 2: B, 3: C, 4: A, 5: A, 6: A, 7: A, 8: A, 9: A, 10: A, 11: A, 12: A, 13: A, 14: A, 15: A, 16: A, 17: A, 18: C, 19: B, 20: A
Round 10: 1: B, 2: C, 3: A, 4: A, 5: A, 6: A, 7: A, 8: A, 9: A, 10: A, 11: A, 12: A, 13: A, 14: A, 15: A, 16: A, 17: A, 18: A, 19: C, 20: B
Round 11: 1: C, 2: A, 3: A, 4: A, 5: A, 6: A, 7: A, 8: A, 9: A, 10: B, 11: B, 12: A, 13: A, 14: A, 15: A, 16: A, 17: A, 18: A, 19: A, 20: C
Round 12: 1: A, 2: A, 3: A, 4: A, 5: A, 6: A, 7: A, 8: A, 9: B, 10: C, 11: C, 12: B, 13: A, 14: A, 15: A, 16: A, 17: A, 18: A, 19: A, 20: A
Round 13: 1: A, 2: A, 3: A, 4: A, 5: A, 6: A, 7: A, 8: B, 9: C, 10: B, 11: B, 12: C, 13: B, 14: A, 15: A, 16: A, 17: A, 18: A, 19: A, 20: A
Round 14: 1: A, 2: A, 3: A, 4: A, 5: A, 6: A, 7: B, 8: C, 9: B, 10: A, 11: A, 12: B, 13: C, 14: B, 15: A, 16: A, 17: A, 18: A, 19: A, 20: A
Round 15: 1: A, 2: A, 3: A, 4: A, 5: A, 6: B, 7: C, 8: B, 9: A, 10: A, 11: A, 12: A, 13: B, 14: C, 15: B, 16: A, 17: A, 18: A, 19: A, 20: A
Round 16: 1: A, 2: A, 3: A, 4: A, 5: B, 6: C, 7: B, 8: A, 9: A, 10: A, 11: A, 12: A, 13: A, 14: B, 15: C, 16: B, 17: A, 18: A, 19: A, 20: A
Continue following the chart pattern through Round 30, then repeat Rounds 1 through 30 for Rounds 31 through 60.
Upper Body Rounds
Rounds 61 through 77: Work all 210 stitches in solid Color A. Continue carrying Color B and Color C inside your stitches to maintain consistent fabric thickness.
After Round 77, slip stitch to join. Fasten off and weave in ends.
Handle Attachment
Position your two braided handles on the front and back panels. Each handle should attach approximately 6 inches from the side seams, creating comfortable shoulder-width spacing.
Use Color A and a tapestry needle to whipstitch each handle end securely to the inside top edge of the bag. Reinforce with multiple passes through the braid and bag fabric. The handles should feel very secure since they’ll bear weight during use.
Tassel Attachment
Attach your completed tassel to one handle attachment point. Thread the tassel’s hanging loop through several stitches at the handle base, then secure by pulling the tassel body through its own loop.
Finishing Your Tapestry Tote
Weave in all remaining ends securely. For colorwork projects, I recommend weaving ends through stitches of the matching color to keep everything invisible.
Blocking: Wet block your completed bag by submerging it in lukewarm water for 15 minutes. Gently squeeze out excess water without wringing. Shape the bag by hand, ensuring the bottom is flat and the sides are straight. Let dry completely.
Optional base insert: Cut a piece of plastic canvas to 16 inches by 5 inches and slide it into the bottom of the bag for extra structure.
Optional lining: If you’d like a lined interior, cut two pieces of cotton fabric to the bag dimensions plus seam allowance, sew together, and hand-stitch to the inside top edge.
Tips for Tapestry Crochet Success
Keep your tension consistent. This is the single most important factor in tapestry work. If your carried yarns are too loose, they’ll show through. Too tight, and your fabric will pucker.
Practice on a swatch first. Work a small sample with all three colors before starting the bag. Get comfortable with the color changes.
Check your work frequently. It’s much easier to fix a mistake in the current round than to rip back several rounds of colorwork.
Take breaks. Tapestry crochet requires focus. Rest your eyes and hands regularly.
Thank you so much for choosing this pattern for your next project. I can’t wait to see your finished totes! If you make one, please tag me on Instagram or share in our Facebook group. I love seeing how different yarn choices bring this design to life.
Save this pattern to your Pinterest crochet board so you can find it when you’re ready to start. And if you have any questions along the way, drop a comment below. Happy crocheting!
