
I don’t know about you, but I have a serious weakness for bold graphic patterns. There’s just something about a crisp black and white design that makes me feel like I’ve got my life together, even when my yarn stash says otherwise.
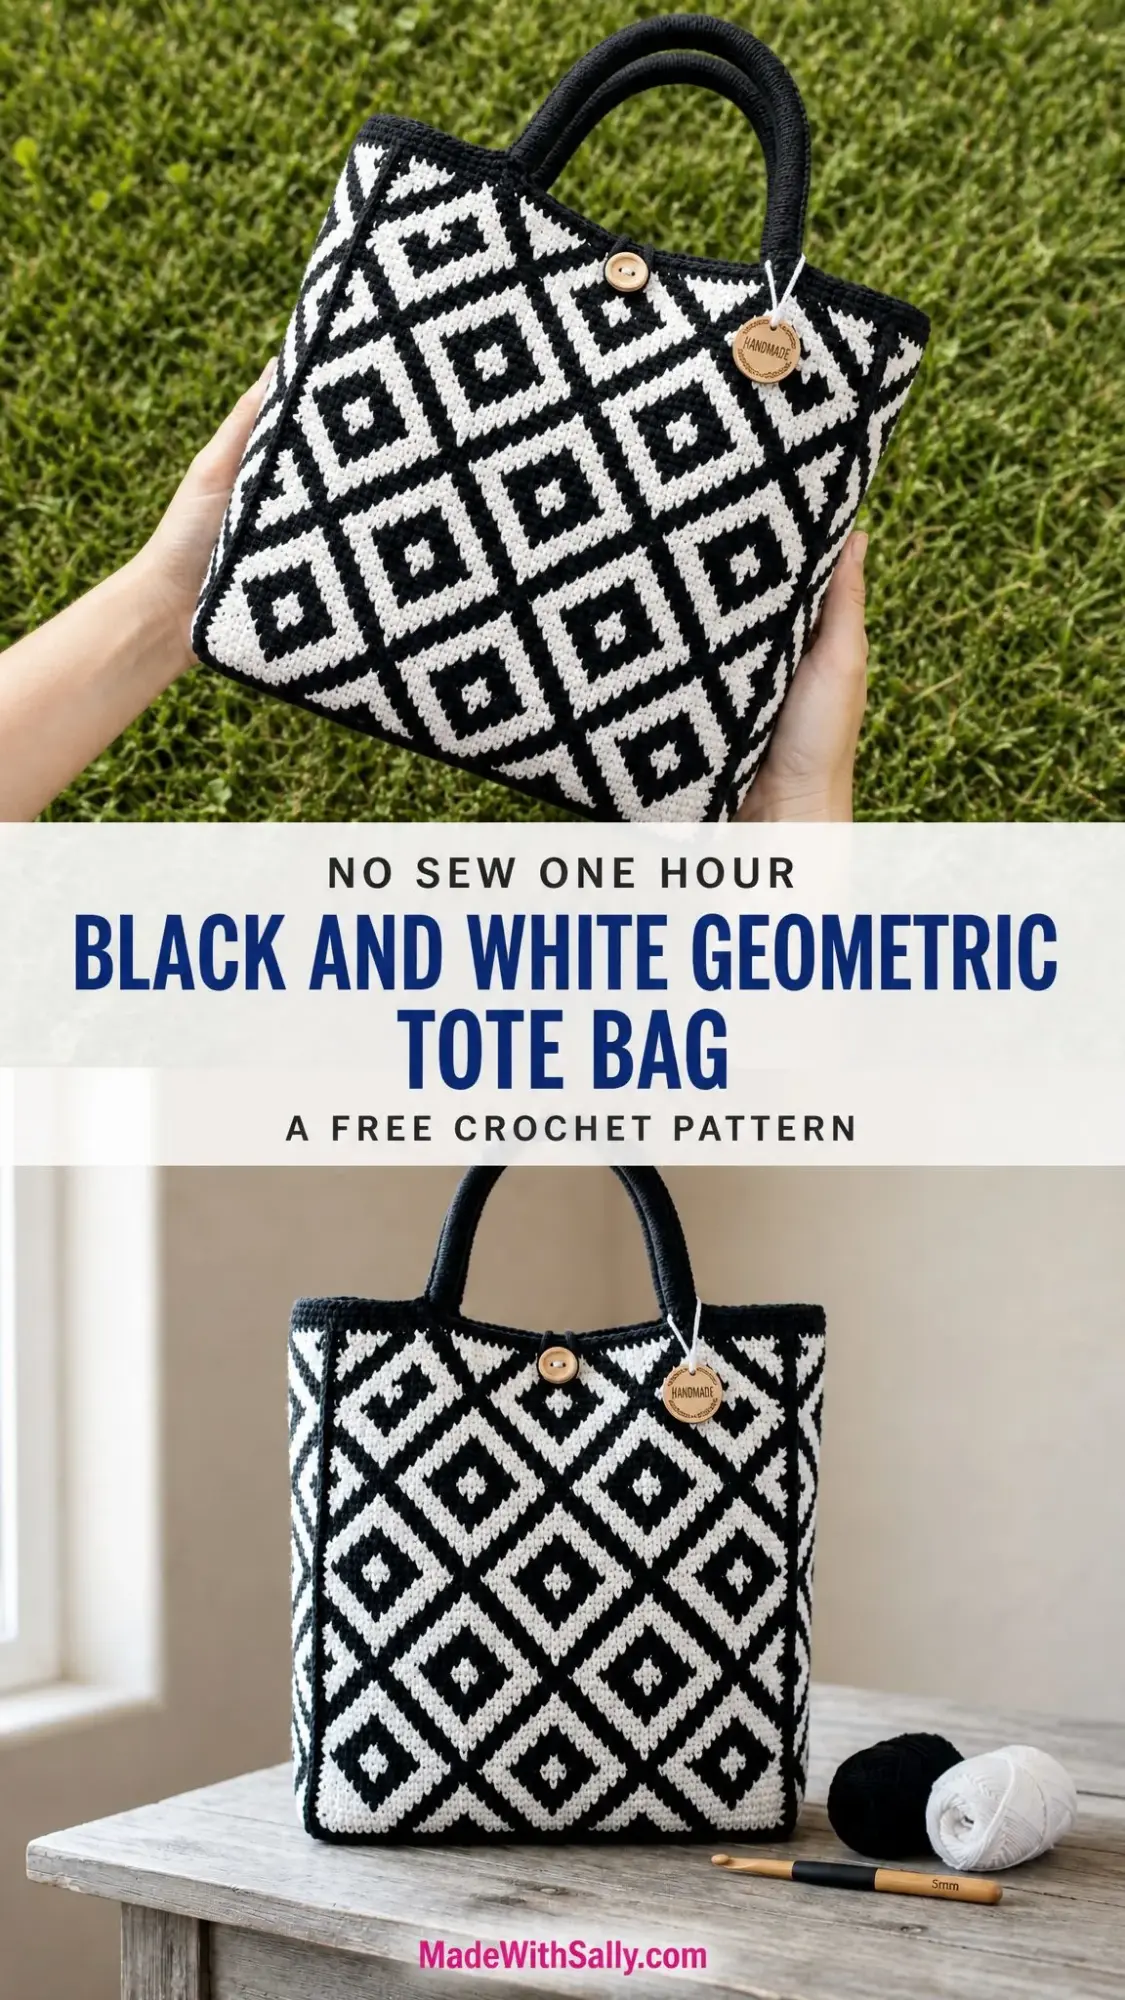
This Geometric Diamond Tote is exactly that kind of project. It looks incredibly sophisticated, but it’s really just single crochet worked in the round with a color chart to follow. All the visual impact with none of the complicated techniques.
If you’ve been curious about tapestry crochet but felt intimidated, this tote is your perfect entry point. You’ll carry both colors as you work, letting those stunning diamonds emerge stitch by stitch. By the end, you’ll have a structured, stand-on-its-own bag that looks like it belongs in a boutique.
About This Geometric Tote Bag Pattern
This modern tapestry crochet tote features a striking geometric diamond motif worked seamlessly in the round. The construction starts with a flat rectangular base, then you’ll pick up stitches around all four edges and work upward to create the body. The result is a boxy, structured silhouette with firm sides that holds its shape beautifully.
Skill Level: Confident Beginner+
Time to Make: 10 to 14 hours
Construction: Seamless round
Technique: Tapestry crochet
Finished Size: Approximately 12 inches wide by 13 inches tall by 4 inches deep (30 by 33 by 10 cm), measured flat and unstuffed. The handles add about 4 inches (10 cm) of rise.
Materials You’ll Need
Yarn: Worsted or Aran weight cotton
Recommended yarn options include:
Hook: 4.0 mm (US G/6)
Notions:
Gauge
16 single crochet stitches by 18 rounds equals 4 inches / 10 cm in single crochet, worked in the tapestry pattern.
Important: Work tightly. A firm fabric is what keeps this tote standing upright on its own. Take time to make a gauge swatch before starting, and adjust your hook size if needed.
Abbreviations and Special Stitches
This pattern uses US crochet terminology. UK crocheters, note that US single crochet (sc) equals UK double crochet (dc).
Tapestry Single Crochet
This is the key technique for this entire project, and it’s simpler than it sounds.
Work your single crochet as usual, but lay the unused color yarn along the top of the previous round and crochet over it. This means the carried yarn gets hidden inside your stitches as you go.
To change colors, work the final yarn over of your last stitch in the new color. So if you’re switching from black to white, you’d insert your hook, pull up a loop with black, then yarn over with white and pull through both loops.
The hidden strand keeps both colors ready at all times and gives your fabric that firm, woven feel that makes tapestry crochet so distinctive.
Pattern Notes Before You Begin
Read through these notes before you start. They’ll save you confusion later.
1. The body is worked in joined rounds, not a spiral. Join each round with a slip stitch and chain 1 to begin the next round. The chain 1 does not count as a stitch.
2. Carry both colors throughout. Never cut your yarn between motifs. Both colors travel with you the entire time.
3. Keep your carried strand relaxed. If you pull it too tight, your fabric will pucker and your diamonds won’t lie flat.
4. The motif is a 16 stitch by 16 round repeat. Read every chart row from right to left, then repeat it 8 times around the bag.
Reading the Diamond Chart
Each square on the chart represents one single crochet stitch. Filled squares are Color A (black), and open squares are Color B (ivory). Bold lines on the chart mark the 8 stitch quarters to help you keep track.
One full tile equals 16 stitches wide, and you’ll repeat it 8 times for a total of 128 stitches around the bag.
The Base
The base is worked flat in Color B as a firm rectangle, then edged to set up your 128 stitches for the body. Turn at the end of each row.
Foundation: With B, ch 49. (49 ch)
Row 1: Sc in 2nd ch from hook and in each ch across. Turn. (48 sc)
Rows 2 through 16: Ch 1, sc in each st across. Turn. (48 sc)
Do not turn after Row 16. Instead, continue around all four edges to pick up the body round.
Pick-up Round: Ch 1; sc in each of 48 sts across the top edge, work 16 sc evenly down the side edge, 48 sc across the foundation edge, 16 sc evenly up the second side edge; join with sl st to first sc. (128 sc)
Tip: Aim for one single crochet per row end along the short sides. Landing on exactly 128 stitches keeps the diamond repeat perfectly even, so take a moment to count before moving on. If you’re off by a stitch or two, adjust by adding or skipping a stitch along one of the short sides.
The Body in Pattern
Now the diamonds begin! Join Color A and carry both colors as you work. Each round is 128 single crochet stitches. Join with a slip stitch and chain 1 to start each new round.
Set-up Round: With B, ch 1; working in BLO (back loop only), sc in each st around. Join. (128 sc)
This round creates a crisp fold line that marks where your base ends and your sides begin. It’s a small detail that makes a big difference in the finished look.
Rounds 1 through 16: Join A. Work tapestry sc following the chart, repeating the 16 stitch motif 8 times around. Join each round. (128 sc)
Rounds 17 through 54: Continue in pattern, repeating chart Rounds 1 through 16 vertically until 54 pattern rounds are complete. This gives you approximately 12 inches / 30 cm from the base fold. (128 sc)
Watch the count: Every round stays at 128 single crochet stitches. If a round drifts, the most common cause is the join. Make sure you’re not accidentally adding or skipping a stitch at the seam where you join.
Top Edge and Handles
Top Band
Fasten off Color A and continue in Color B for a clean ink to ivory transition, then finish with a solid black rim to frame the bag.
Rounds 55 through 57: With B, ch 1, sc in each st around. Join. (128 sc)
Rounds 58 through 60: Join A, ch 1, sc in each st around. Join. Fasten off after Round 60. (128 sc)
Handles (Make 2)
The handles are worked as long firm cords in Color A.
Foundation: With A, ch 61. (61 ch)
Row 1: Sc in 2nd ch from hook and in each ch across. Turn. (60 sc)
Rows 2 through 4: Ch 1, sc in each st across. Turn. Fasten off, leaving a long tail for seaming. (60 sc)
Handle Placement and Assembly
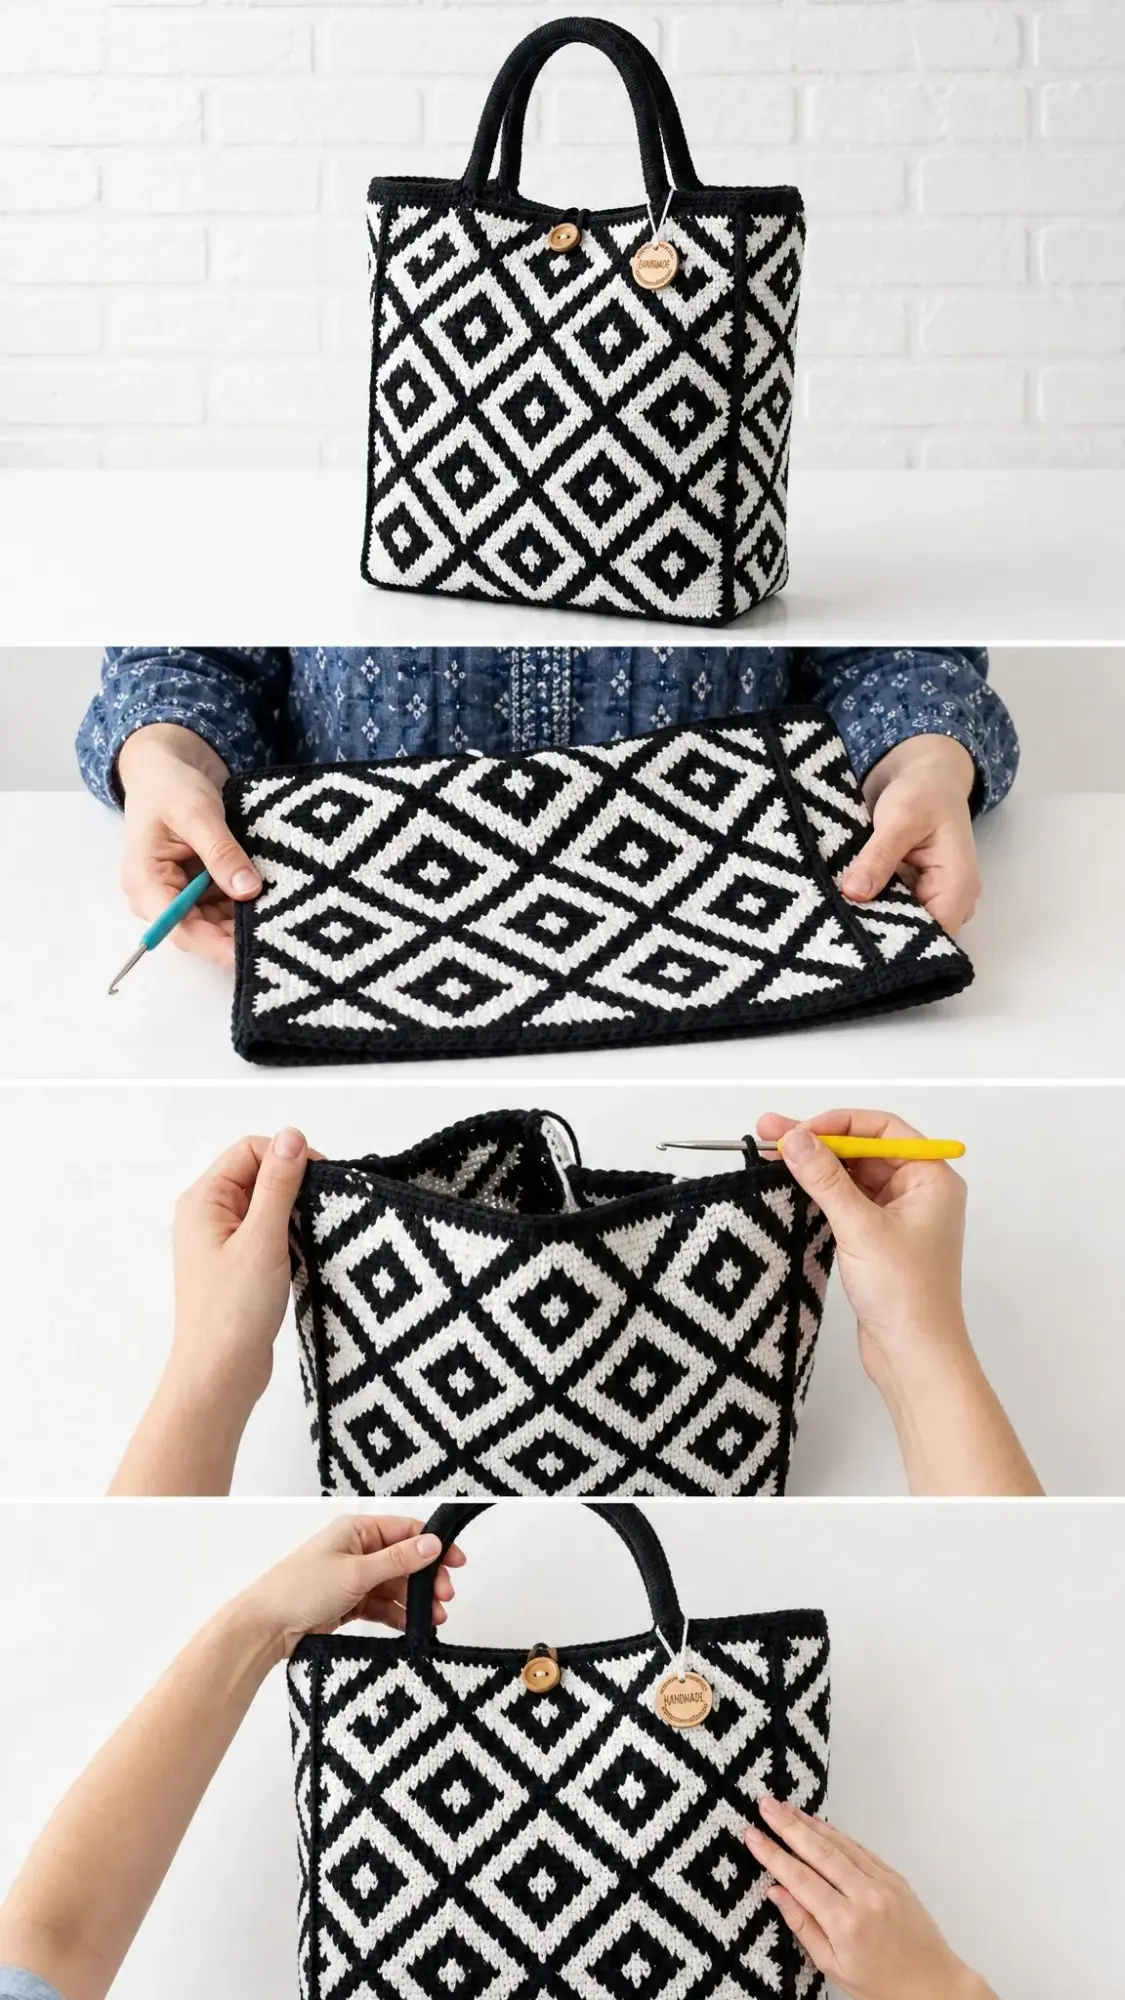
Fold each handle strip lengthwise and whip stitch the long edge closed to form a rounded cord. This creates a comfortable, sturdy handle that won’t dig into your hands.
Position the handle ends about 3 inches / 7.5 cm in from each side seam on both the front and back of the bag. Sew firmly to the inside of the top band using your yarn needle and the long tail you left.
Add the wooden button to the front center as a decorative accent. Stitch through the fabric and knot securely on the inside.
Finishing Your Tote
Weave in all ends on the inside of the bag, working tails along same color stitches so they disappear completely.
Shape the corners by pinching and shaping the four corners of the base so the tote stands square. This is what gives it that structured, boxy look.
Add a base insert (optional but recommended) by cutting a piece of firm fabric or plastic canvas to fit the base and dropping it inside. This helps the bag hold its shape, especially when you’re carrying heavier items.
Steam block lightly from the wrong side, smoothing the diamonds flat. Let the bag dry fully before using it.
Care Instructions
Washing
Hand wash cool with a gentle detergent. To keep the black and ivory crisp, wash the colors separately the first few times. Avoid soaking, as high contrast cotton can bleed if left wet together for too long.
Drying and Shaping
Press out excess water in a towel. Do not wring. Reshape the base into a rectangle, stand the tote upright, and air dry away from direct heat.
Everyday Care
Empty the bag and store it upright so the sides hold their shape. A quick steam refreshes the diamonds any time they start to soften.
Sizing and Variations
Changing the Width or Depth
Add or remove stitches in multiples of 16 to keep the diamond repeat even. Each extra 16 stitches around adds roughly 4 inches / 10 cm of circumference. Adjust the base rectangle to match. Every 4 stitches of base width equals about 1 inch / 2.5 cm.
Making It Taller or Shorter
Work more or fewer pattern rounds in full 16 round motif repeats so the diamonds finish cleanly at the top band. Each motif repeat adds about 3.5 inches / 9 cm of height.
Color Play
The chart works beautifully in any two high contrast shades. Try terracotta and cream for a warm boho vibe, or navy and natural for a classic nautical look. The key is keeping one light and one dark so the diamonds stay sharp and defined.
Troubleshooting Tips
My stitch count keeps changing: This almost always happens at the join. Make sure your chain 1 at the beginning of each round doesn’t count as a stitch, and that you’re working into the first actual stitch, not the chain.
The carried yarn shows through: You might be crocheting too loosely. Try going down a hook size or simply pulling your stitches a bit tighter.
My diamonds look wonky: Check that you’re reading the chart from right to left on every round and repeating it exactly 8 times. Sometimes it helps to place a stitch marker at the beginning of each 16 stitch repeat.
The fabric is too stiff/too floppy: Adjust your hook size. A smaller hook creates firmer fabric (great for structure), while a larger hook creates softer fabric (not ideal for this project).
Why This Pattern Works for Tapestry Crochet Beginners
If you’ve never tried tapestry crochet before, this tote is an excellent first project. The single crochet stitch is familiar and forgiving. The chart repeat is straightforward once you get into the rhythm. And working in the round means no seaming at the end.
Plus, the bold geometric design is very forgiving of small imperfections. Even if your tension varies slightly or you make a minor mistake, the overall effect is still stunning.
I hope you love making this Black and White Geometric Tote as much as I do. It’s one of those projects that feels meditative once you get going, watching those diamonds appear row by row.
If you make one, I’d absolutely love to see it! Tag me on Instagram or share a photo in our Facebook group. And if you want to save this pattern for later, go ahead and pin it to your favorite Pinterest board so you can find it when you’re ready to start. Drop a comment below and let me know what colors you’re thinking of using!
