
I call this one the Navy and Gold Granny Square Bag, and it has been sitting in my project notebook for longer than I care to admit. The original sketch was just a quick doodle with the note "on-point squares, lattice effect, teardrop shape" scribbled underneath. I finally brought it to life last spring when I found the perfect mustard gold yarn at my local craft store and knew immediately it needed to be paired with a deep, rich navy.
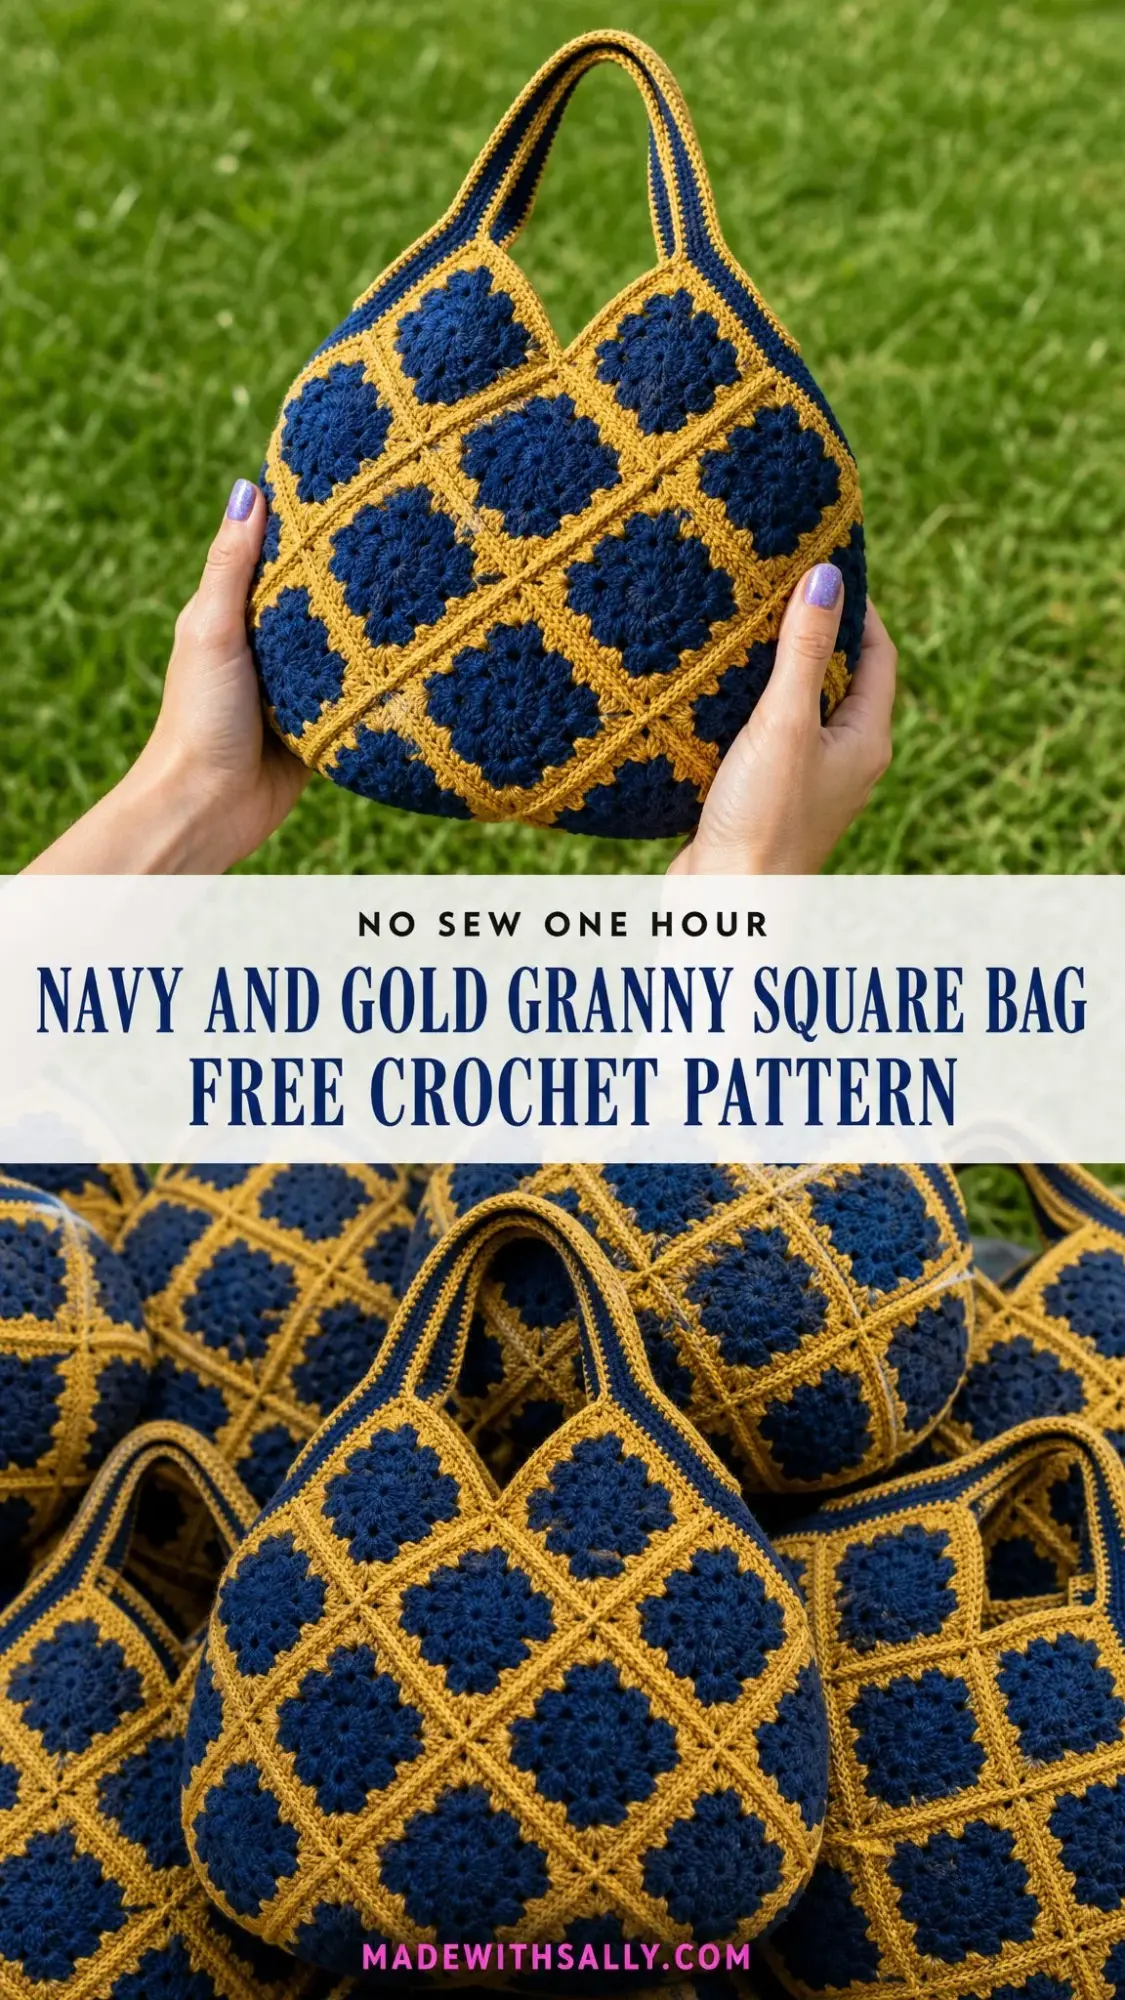
This bag holds a special place in my heart because it combines two things I absolutely love: classic granny squares and clever construction. The squares sit on point, which means their corners point up and down instead of side to side. When you join them together, the gold borders create this gorgeous continuous diamond lattice pattern that looks far more complicated than it actually is.
If you have made a basic granny square before, you can absolutely make this bag. The construction is straightforward once you understand the layout, and I will walk you through every single step.
About This Crochet Pattern
This Navy and Gold Granny Square Bag is a roomy handheld tote built from thirty-two granny squares set on point. Each square features a navy flower center wrapped in a golden border. When the squares are joined together, those borders read as a continuous diamond lattice across the entire bag. The rounded base and gently curved sides come from folding and seaming two square panels together.
Skill Level: Confident Beginner
Time to Make: 18 to 26 hours
Finished Size: 13 × 14 × 4 inches (33 × 35.5 × 10 cm), excluding handles. Handle drop is about 6 inches (15 cm).
This is the kind of project that looks impressive at the farmers market or as a gift, but the actual techniques involved are surprisingly accessible. If you can chain, single crochet, and double crochet, you have all the skills you need.
Materials You Will Need
Gathering your materials before you start makes the whole process smoother. Here is everything you need for this crochet bag pattern:
Yarn:
Suggested Yarns:
Hook:
Notions:
Cotton yarn works beautifully for this project because it gives the bag structure and holds its shape well. It also has a lovely drape that makes the lattice pattern really pop.
Gauge
One finished granny square should measure 4.5 inches (11.5 cm) square after blocking, worked through Round 4 with a 5.0 mm hook.
In plain double crochet (dc): 14 dc × 8 rows = 4 inches (10 cm)
Gauge is not critical for fit since this is a bag rather than a garment, but it will affect your finished size and how much yarn you use. I recommend making one test square and blocking it before you commit to making all thirty-two.
Abbreviations (US Crochet Terms)
Let me walk you through all the abbreviations used in this pattern. If you are more familiar with UK terms, I have included a conversion note below.
For UK Crocheters: US single crochet equals UK double crochet. US double crochet equals UK treble crochet. Substitute throughout and the stitch counts stay the same.
Special Stitches
These special stitches are what give the granny squares their distinctive flower appearance and clean corners.
3-dc Cluster (cl)
Work 3 double crochets in the same space, but leave the last loop of each stitch on the hook. You will have 4 loops on your hook. Then yarn over and pull through all loops to close. This forms one petal of the navy flower. (1 cl made)
Corner
Work (3 dc, ch 2, 3 dc) all in the same corner ch-2 space. This is the standard granny corner that squares the motif. (6 dc and 1 ch-2 space made)
Flat Single Crochet Join
Hold two squares with wrong sides together. Working through both back loops, single crochet across to join. Chain 1 over each corner so the seam lies flat and forms a visible ridge on the right side. This ridge is what gives the lattice its raised, defined look.
Pattern Notes
Before you begin, here are a few important things to keep in mind:
How to Make the Granny Square
Make 32 squares in total. Each uses navy for Rounds 1 and 2 (the flower) and gold for Rounds 3 and 4 (the border). Your finished square should measure 4.5 inches (11.5 cm).
With navy, make a magic ring.
Round 1
Ch 3 (counts as dc), 11 dc in ring. Pull ring closed, sl st to top of beginning ch-3. (12 dc)
Round 2
Ch 1. Work 1 cl in next st, ch 2, skip next st. Repeat from * around. You will have 6 petals made. Sl st to top of first cl. Fasten off navy. (6 cl, 6 ch-2 sp)
Round 3
Join gold in any ch-2 sp. Ch 3, 2 dc in same sp (this is half a corner). *Ch 1, 3 dc in next sp, ch 1**, (3 dc, ch 2, 3 dc) in next sp to make a corner. Repeat from twice, then from to ** once. 3 dc in first sp, ch 2, sl st to top of ch-3.
You now have 4 corners and 1 side cluster between each. (24 dc, 4 corners)
Round 4
Sl st into corner sp. Ch 3, (2 dc, ch 2, 3 dc) in same corner. *[Ch 1, 3 dc in next ch-1 sp] across to next corner, ch 1**, (3 dc, ch 2, 3 dc) in corner. Repeat from around, ending from to **. Sl st to top of ch-3.
Fasten off, leaving a 12 inch (30 cm) tail for joining. (48 dc, 12 dc per side, 4 corners)
Square Tally
You need 16 squares for the front panel and 16 squares for the back panel. Block all 32 to a uniform 4.5 inches (11.5 cm) before joining.
Reading the Layout
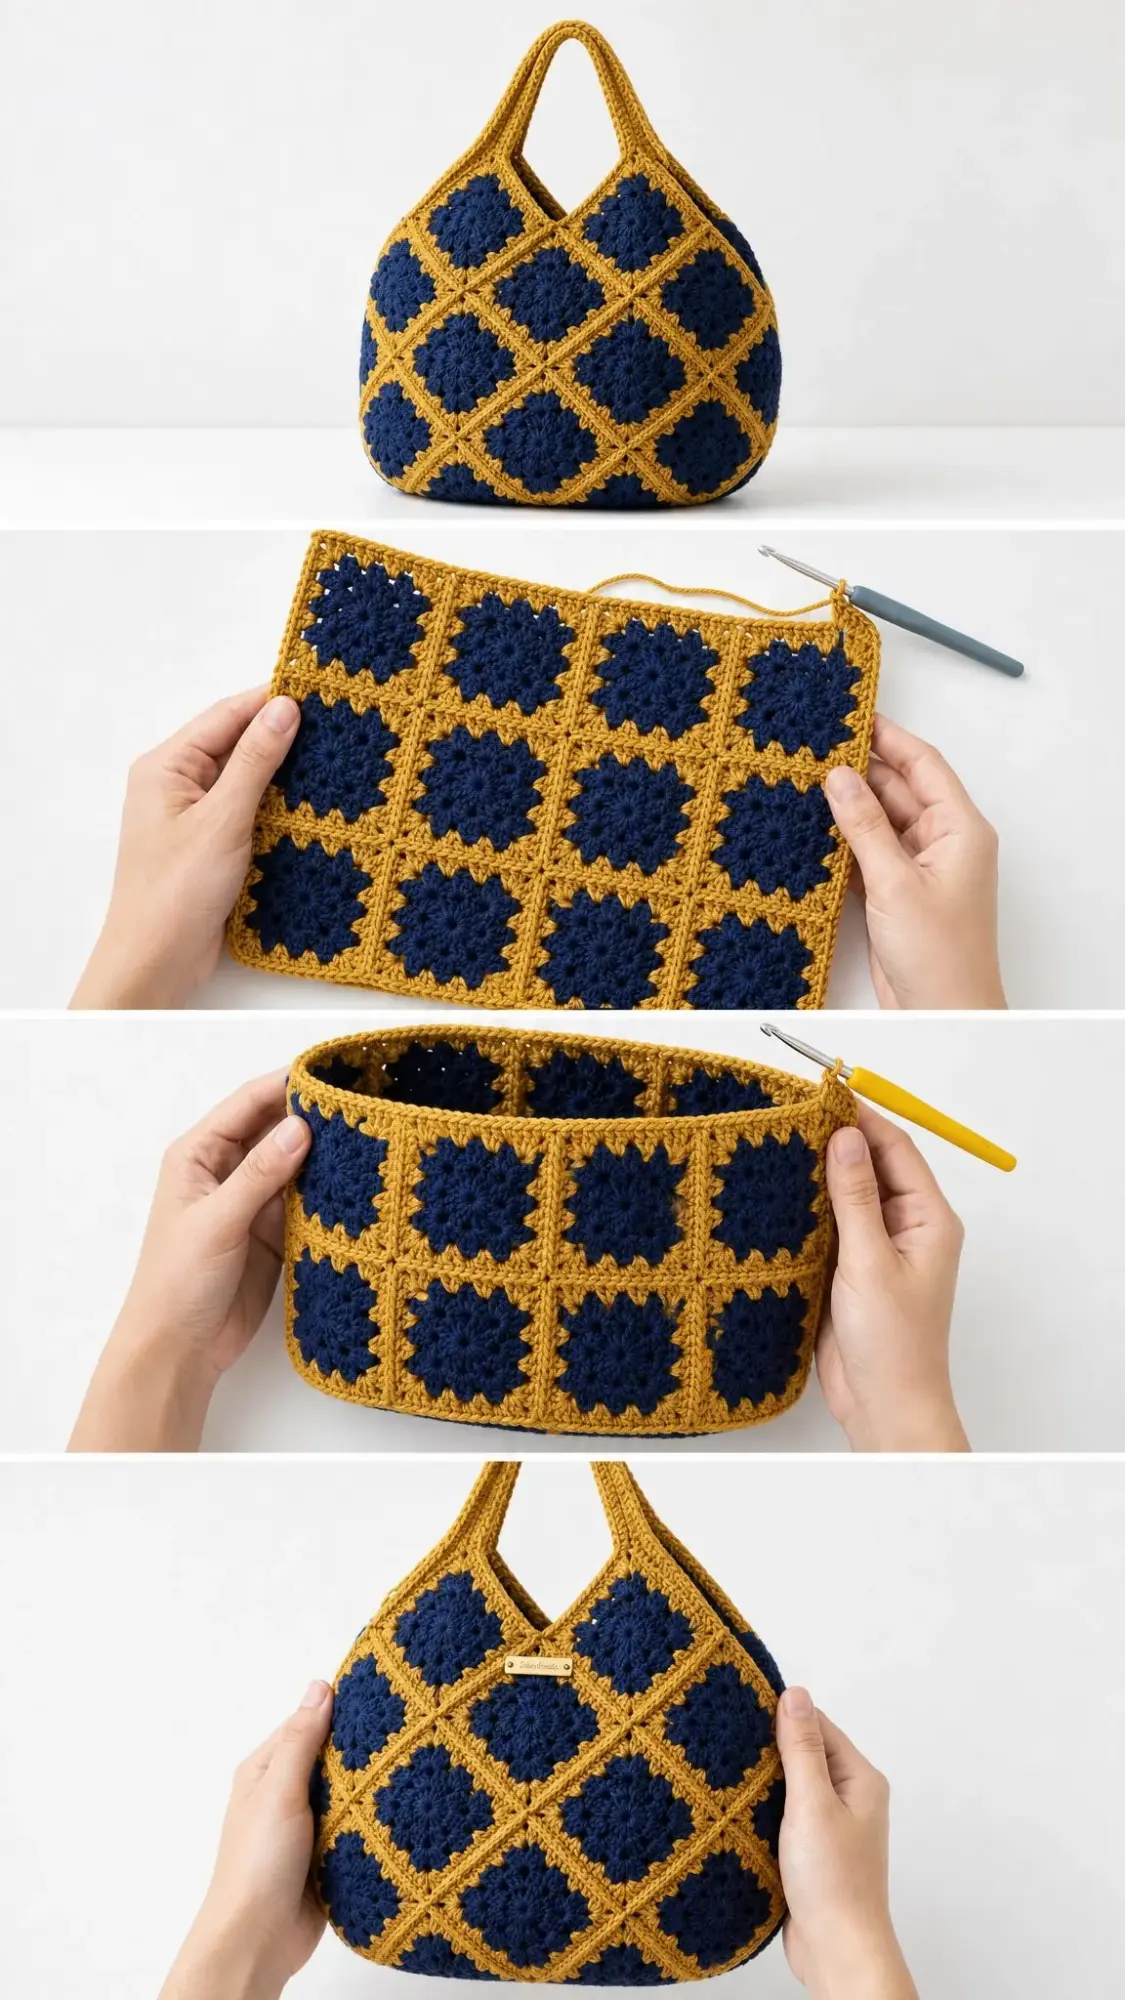
Each panel is a 4 × 4 grid of squares set on point, which means the squares are turned 45 degrees so their corners point up and down. When joined, the gold borders of neighboring squares meet to form the continuous diamond lattice. The four outer corners of the grid become the rounded edges of the bag once seamed.
Before You Join
Take a moment to prepare:
This step might seem unnecessary, but trust me, it saves a lot of frustration later.
Making and Joining the Squares
Join each panel first, then seam the two panels into the bag.
Step 1: Join Into Rows
With gold and the flat sc join, connect 4 squares side by side to make a row. Work through back loops only across one full side of each square.
Repeat to make 4 rows of 4 for the front, and 4 more rows for the back. (8 rows total)
Step 2: Join Rows Into Panels
Join the 4 rows of each set top to bottom with the same flat sc join. Match corners carefully and ch 1 at each junction so seams stay flat.
You now have two 4×4 panels. (2 panels)
Tip: Always join with the right side facing you so the ridge of the seam lands on the outside. That ridge is what gives the lattice its raised, defined look.
Shaping the Body
The teardrop shape comes from how the two on-point panels are seamed together along their lower edges.
Seam 1
Place the two panels wrong sides together with flowers facing out. With gold, flat sc join up the right side, across the bottom point, and up the left side. Leave the top open for the bag opening.
Ch 1 around each outer corner so the base curves smoothly. (3 joined edges)
Round A: Top Edging
Join gold at one top corner. Ch 1, sc evenly around the entire open top. Work 1 sc in each st and 1 sc in each ch-1 sp. Sl st to first sc. (approximately 96 sc)
Round B
Ch 1, sc in each sc around to firm up the opening. Sl st to first sc. Do not fasten off if continuing straight into the handles. (approximately 96 sc)
Shaping Note: Because the squares sit on point, the side corners naturally pull the body into the rounded, slightly pointed base shown. A little blocking at the bottom point sharpens the silhouette.
The Handles
Two sturdy straps rise from the top edge, featuring gold on the outside with a slim navy edge that mirrors the bag body.
Mark two handle positions on the front top edge. Each should span 22 stitches, centered with a gap between them. Repeat on the back so the handles align.
Row 1
With gold, join at the first marker. Ch 1, sc in each of the next 22 sts. Turn. (22 sc)
Rows 2 through 40
Ch 1, sc in each st across. Turn. Repeat until the strap measures about 13 inches (33 cm), or your preferred length. (22 sc each row)
Edging
With navy, sc evenly down both long edges of each strap. This creates the navy trim and adds strength. Fasten off. (2 navy edges per strap)
Join the Handles
Match each front strap end to its back counterpart and seam with sc to form two continuous handles. Reinforce the base of each handle with a few extra stitches. (2 handles)
Strength Tip: For a heavier carry, work the handles holding two strands of gold together. You can also slip a length of cotton cord inside as you seam the strap closed.
Finishing and Care
Finishing
Weave in all remaining ends on the wrong side and trim closely.
Wet-block the whole bag by shaping the rounded base, squaring the lattice, and letting it dry fully over a towel-stuffed form.
Optional Lining: Cut fabric to the flattened bag shape plus 1/2 inch seam allowance. Sew into a pouch and hand-stitch inside the top edge for added structure and to hold contents securely.
Care Instructions
Washing: Hand wash cool with mild soap. Do not wring. Press water out gently.
Drying: Reshape and dry flat, away from direct heat and sun to protect the colors.
Storage: Store stuffed lightly so the rounded base keeps its shape.
Cotton Note: Cotton may relax with use. A quick re-block refreshes the lattice and brings back that crisp look.
How to Customize the Size
The square-panel construction makes resizing simple. You can change the grid, the square size, or the handles to create your perfect bag.
Bigger Tote: Use a 5×5 grid per panel (50 squares total) for roughly a 16 inch (41 cm) wide bag.
Mini Bag: Drop to a 3×3 grid (18 squares) for a sweet handheld pouch.
Larger Squares: Add a 5th gold round to each square (about 5.5 inches / 14 cm) for a softer, slouchier bag with fewer squares.
Shoulder Strap: Work the handle rows to 22 inches (56 cm) for a comfortable over-the-shoulder drop.
Color Play: Swap navy for charcoal or forest green. Keep the gold lattice for the same graphic effect.
Yarn Weight: Move to DK weight with a 4.0 mm hook for a finer, lighter bag. Expect about 12% smaller finished size.
Keep the Math Easy: Whatever grid you choose, make the front and back panels match, keep the square count even, and always end each round with its stitch count so resizing stays predictable.
Final Thoughts on This Granny Square Bag Crochet Pattern
This Navy and Gold Granny Square Bag has become one of my most-requested designs, and I think it is because the combination of classic granny squares and modern construction creates something truly special. The on-point layout transforms a simple motif into an eye-catching diamond lattice, and the teardrop shape means this bag holds more than you would expect while still looking elegant.
Whether you make it in the original navy and gold or choose your own color combination, this bag is sure to become a go-to accessory. The cotton construction means it is sturdy enough for everyday use, and the handles are reinforced to carry whatever you need.
I hope you enjoy making this pattern as much as I enjoyed designing it. Thank you so much for choosing to crochet with me today! If you make this bag, I would absolutely love to see it. Tag me on Instagram or share a photo in my Facebook group so I can cheer you on.
If you want to come back to this Navy and Gold Granny Square Bag pattern later, go ahead and save it to your Pinterest boards so you can find it easily. And if you have any questions or want to share how yours turned out, drop a comment below. I read every single one and love hearing from you!
