Last month I walked into my home office and realized I could barely see my desk under the chaos. Pens everywhere. Sticky notes falling off surfaces. A journal I kept losing under stacks of paper. I stood there thinking, "I need pockets. On my wall. Right now." So I grabbed some chunky cotton yarn and started crocheting, and honestly? This wall organizer might be the most useful thing I have ever made for myself. It hangs right next to my desk now, holding everything I reach for daily, and it looks so much prettier than those plastic organizers from the office supply store.
If you have been wanting to crochet something practical that you will actually use every single day, this dusty rose office wall organizer crochet pattern is exactly what you need. The construction is simpler than it looks, and the chunky yarn makes it work up surprisingly fast.
Why You Will Love This Wall Organizer Crochet Pattern
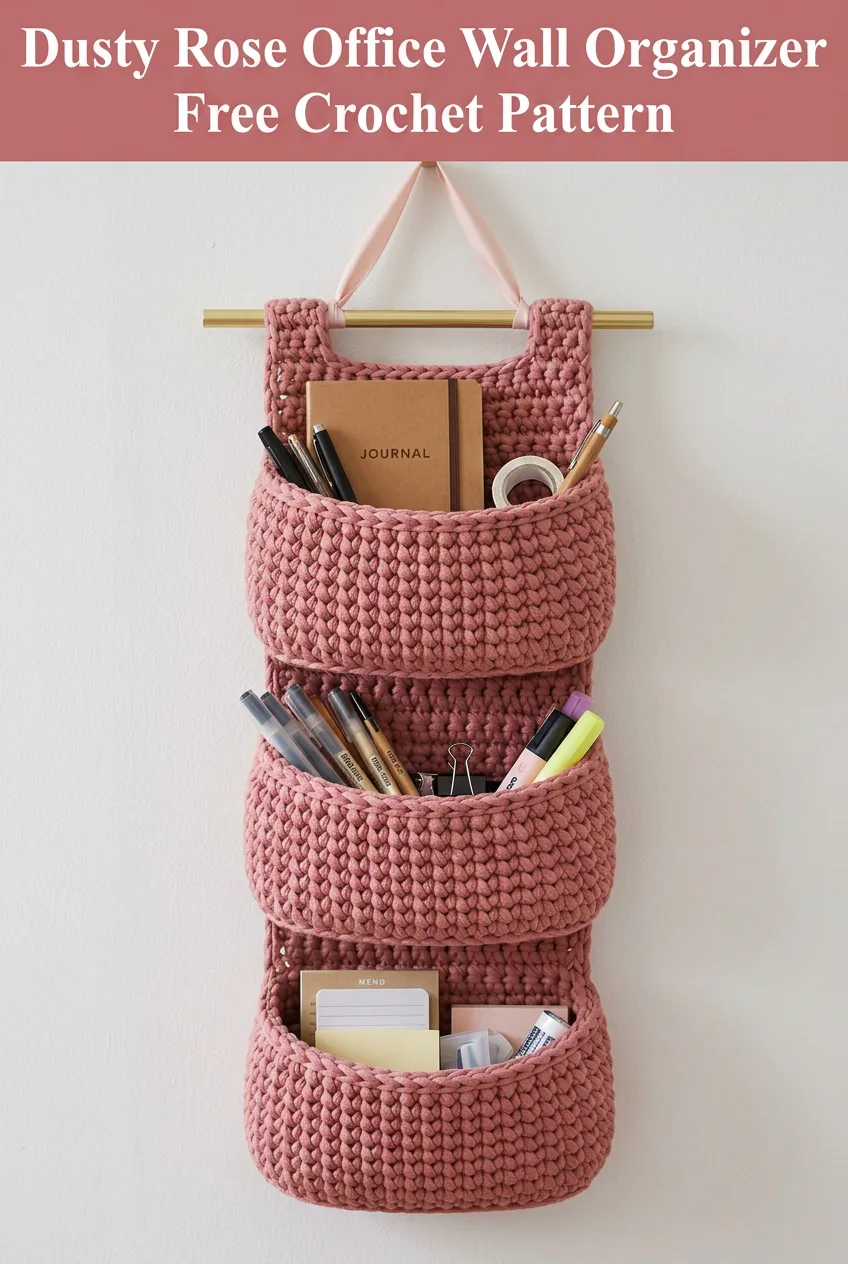
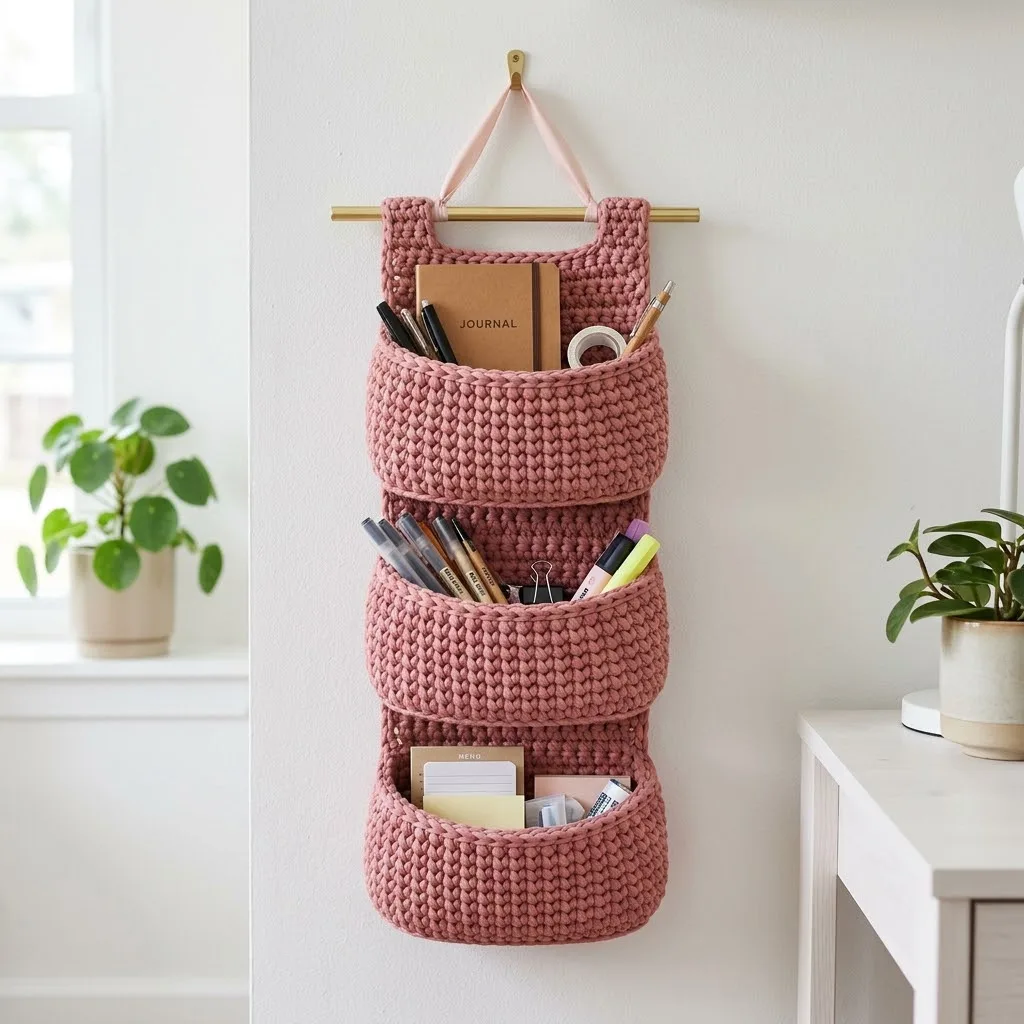
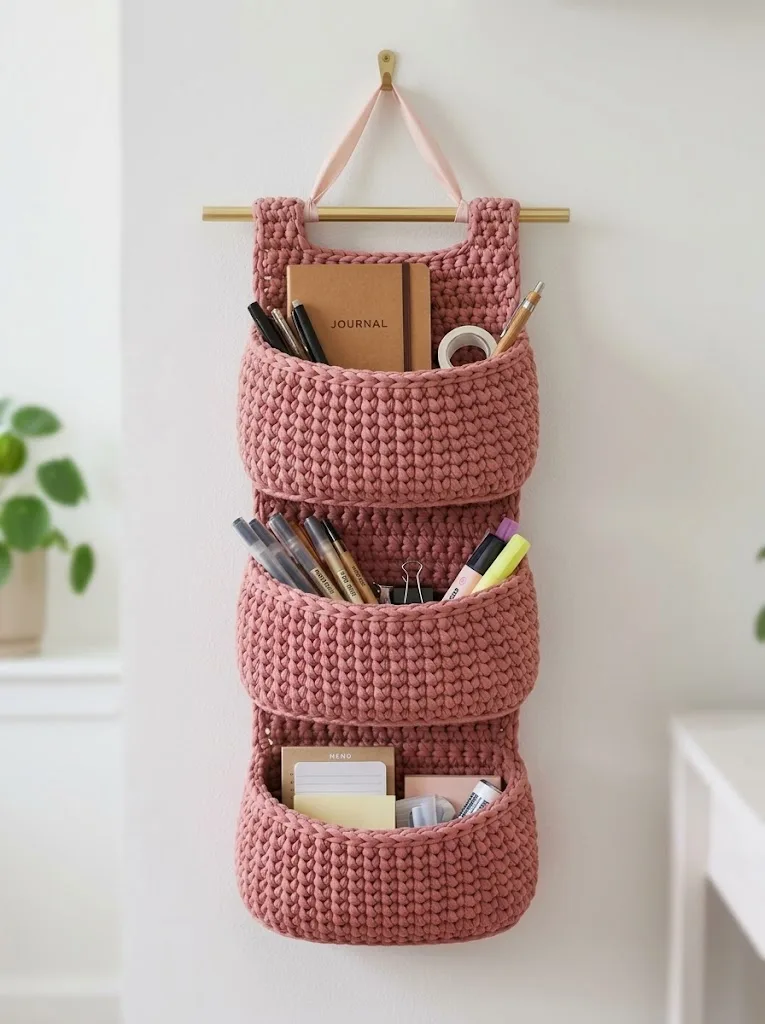
This hanging wall organizer features three generous pockets attached to a sturdy backing panel. Each pocket is deep enough to hold journals, pens, highlighters, notepads, tape, and all those little supplies that tend to clutter up a workspace.
The entire piece hangs from a decorative dowel rod that slides through two crocheted loops at the top. A simple ribbon or leather cord attached to the dowel makes it easy to hang from a wall hook or over a door.
What makes this pattern beginner friendly:
The finished organizer measures approximately 10 inches wide and 24 inches long from the hanging loops to the bottom of the lowest pocket. Each pocket is about 6 inches deep. You can absolutely adjust these dimensions by adding or subtracting rows.
Materials You Will Need
Yarn:
Hook:
Notions:
Gauge
Gauge matters for this project because you want the fabric sturdy enough to hold items without stretching and sagging.
10 stitches and 12 rows = 4 inches in single crochet
Work a small swatch before starting. If your swatch is too loose and floppy, go down a hook size. If it feels stiff and hard to work, go up a hook size.
Abbreviations and Stitch Definitions
Ch = Chain. Wrap yarn over hook, pull through loop on hook. This creates a foundation for your work.
Sc = Single crochet. Insert hook into stitch, yarn over, pull up a loop (2 loops on hook), yarn over, pull through both loops. This is the most basic crochet stitch and creates a dense, sturdy fabric.
Sl st = Slip stitch. Insert hook into stitch, yarn over, pull through stitch and loop on hook in one motion. Used for joining and finishing.
St(s) = Stitch(es)
Rep = Repeat
Pattern Notes Before You Begin
This wall organizer is constructed in separate pieces that get sewn together at the end. You will make:
1. One back panel
2. Three pockets (all identical)
3. Two hanging loops
A few tips to keep in mind:
The back panel and pockets are worked in rows. You will chain 1 at the beginning of each row, but this turning chain does not count as a stitch. Always work your first single crochet into the very first stitch of the row.
When counting your stitches, count the actual single crochets, not the turning chain.
Work into both loops of each stitch unless otherwise noted. This creates a sturdy, structured fabric perfect for holding weight.
Do not worry if your edges look a little uneven as you work. They will be hidden when you sew the pockets to the back panel.
Step by Step Crochet Pattern
Back Panel
The back panel forms the foundation of your wall organizer. All three pockets will be sewn onto this piece.
Foundation: Ch 27
Row 1: Sc in 2nd ch from hook and in each ch across. (26 sts)
Row 2: Ch 1, turn. Sc in each st across. (26 sts)
Rows 3 through 72: Rep Row 2.
After Row 72, you should have a rectangular panel measuring approximately 10 inches wide and 24 inches long.
Fasten off and weave in your ends.
Helpful tip: Place a stitch marker at the beginning of Row 1 to help you keep track of which side is the right side. This will make assembly easier later.
Pockets (Make 3)
Each pocket is worked as a flat rectangle, then folded and sewn to create depth.
Foundation: Ch 27
Row 1: Sc in 2nd ch from hook and in each ch across. (26 sts)
Row 2: Ch 1, turn. Sc in each st across. (26 sts)
Rows 3 through 24: Rep Row 2.
After Row 24, your pocket piece should measure approximately 10 inches wide and 8 inches tall.
Do not fasten off yet.
Creating the rolled edge:
The top of each pocket has a nice rolled edge that adds structure and visual interest. Here is how to create it:
Row 25: Ch 1, turn. Working in front loops only, sc in each st across. (26 sts)
Rows 26 through 28: Ch 1, turn. Sc in each st across, working through both loops. (26 sts)
Fasten off leaving a 12 inch tail for sewing.
The front loop only row creates a natural fold line. When you look at your pocket piece, you will see that Rows 25 through 28 want to curl toward the front, creating that lovely rolled edge visible in the finished organizer.
Repeat these instructions to make 3 pockets total.
Hanging Loops (Make 2)
These loops slide over the dowel rod at the top of the organizer.
Foundation: Ch 6
Row 1: Sc in 2nd ch from hook and in each ch across. (5 sts)
Row 2: Ch 1, turn. Sc in each st across. (5 sts)
Rows 3 through 20: Rep Row 2.
After Row 20, your strip should measure approximately 2 inches wide and about 7 inches long.
Fasten off leaving a 10 inch tail for sewing.
Repeat to make a second hanging loop.
Assembly Instructions
Now comes the satisfying part. Putting all your pieces together transforms those flat rectangles into a functional wall organizer.
Attaching the Hanging Loops
1. Lay your back panel flat with the right side facing up.
2. Take one hanging loop strip and fold it in half to create a loop.
3. Position it at the top corner of the back panel, about 1 inch from the side edge. The folded loop should extend about 2 inches above the top edge of the back panel.
4. Using your tapestry needle and the tail, whip stitch the ends of the loop securely to the back panel. Stitch through both layers of the loop and through the back panel.
5. Repeat with the second hanging loop on the opposite corner.
Test your loops by sliding the dowel rod through them. They should fit snugly but allow the rod to slide freely.
Positioning and Attaching the Pockets
The three pockets are spaced evenly down the back panel.
Pocket placement from top to bottom:
To attach each pocket:
1. Lay the back panel flat, right side up.
2. Place the pocket piece on top, right side facing you.
3. Align the side edges and bottom edge where you want the pocket to sit.
4. The rolled edge at the top should curl toward you, creating the pocket opening.
5. Pin or clip in place if helpful.
6. Using your tapestry needle and the long tail, whip stitch along the bottom edge first.
7. Then whip stitch up each side edge, stopping when you reach the fold line (Row 25).
8. Do not sew the rolled edge closed. That stays open as your pocket opening.
Important: As you sew the sides, the fabric between the back panel and pocket front naturally creates depth. You can gently push the pocket outward as you sew to encourage a nice rounded shape.
Repeat for all three pockets.
Finishing the Dowel and Hanger
1. Slide the dowel rod through both hanging loops.
2. Cut your ribbon or leather cord to approximately 18 inches, or whatever length suits your hanging space.
3. Tie each end of the ribbon to the dowel, creating a loop for hanging.
4. Alternatively, you can crochet a simple chain about 30 chains long and tie that to the dowel for a coordinated look.
Customization Ideas
Different sizes: Add or subtract 6 stitches to your foundation chain to make the organizer wider or narrower. Add or subtract rows to the back panel to make it longer or shorter.
More or fewer pockets: This same construction works with two pockets or four. Just adjust the spacing on your back panel.
Deeper pockets: Add more rows to each pocket piece before the rolled edge section.
Color blocking: Make each pocket a different color, or alternate colors for a rainbow effect.
Labels: Crochet or embroider small labels for each pocket. "Pens," "Notes," "Supplies."
Nursery version: Scale this up slightly and use it beside a changing table for diapers, wipes, and creams.
Bathroom version: Hang it on the back of a door for toiletries and hair accessories.
Care Instructions
Because this organizer uses cotton yarn, it can be spot cleaned with a damp cloth. If it needs a deeper clean, hand wash in cool water with mild soap. Lay flat to dry, reshaping the pockets while damp.
Avoid machine washing or drying, as the weight of wet cotton can stretch the piece out of shape.
Troubleshooting Common Issues
My pockets are too floppy: Your gauge may be too loose. Try going down a hook size, or consider using a stiffer yarn like T-shirt yarn.
The rolled edge is not curling: Make sure you worked Row 25 in the front loops only. This creates the fold line. If you accidentally worked through both loops, that row will lie flat.
My stitch count keeps changing: Count your stitches at the end of every row until you feel confident. Remember that the turning chain does not count as a stitch.
The pockets are bulging funny: When you sew them to the back panel, make sure you are only sewing the edges. Do not catch the middle of the pocket fabric in your stitches.
I hope this dusty rose office wall organizer crochet pattern brings some order and beauty to your workspace, or wherever you decide to hang it. Crocheting something practical that you will see and use every day is one of the most satisfying feelings.
Thank you so much for choosing this pattern. I would absolutely love to see your finished organizer, so please tag me on Instagram or share it in our Facebook group. Seeing your makes truly brightens my day.
If this pattern helped you get organized in the cutest way possible, save it to your Pinterest boards so you can find it again later or share it with a friend who needs some wall storage. And if you make one, drop a comment below. I always love hearing which colors you chose and where you ended up hanging it!
