
I found this design sketched in the back of an old project notebook from years ago. I had scribbled "lavender flower bag, bamboo handles, fancy but sturdy" with a rough drawing of puffy flowers inside squares. Life got busy, and that little sketch sat there waiting.
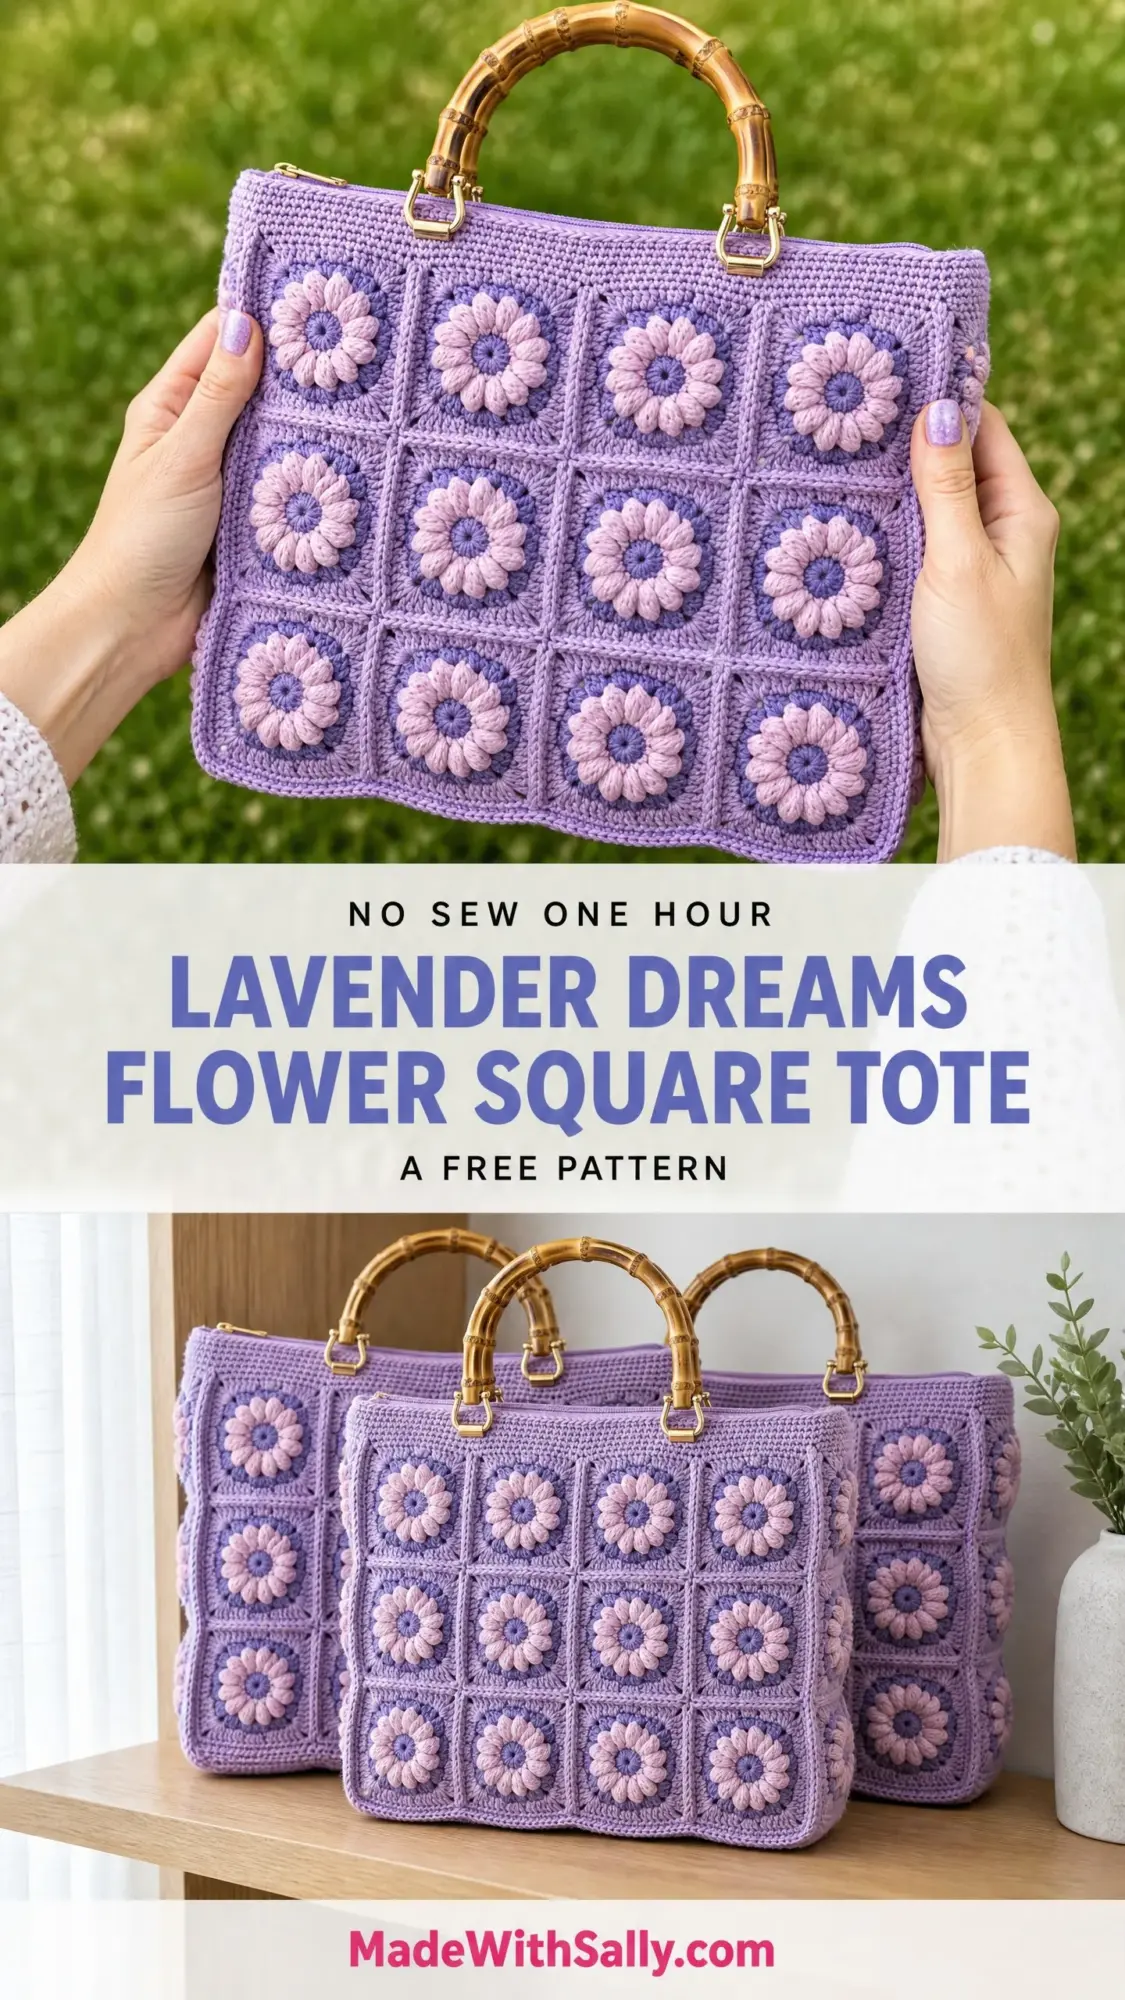
Well, she finally got her moment. I’m calling her Lavender Dreams because honestly, that’s what she feels like to me. Soft purple tones, dimensional daisies that pop right off the fabric, and those gorgeous bamboo handles that make the whole thing feel like something you’d find in a boutique.
This structured tote bag is built entirely from flower granny squares joined together, and the construction is more straightforward than it looks. If you can work in the round and you’re comfortable with puff stitches, you can absolutely make this bag. Let me walk you through every single step.
About This Crochet Tote Bag Pattern
The Lavender Dreams tote features a grid of dimensional flower squares, each with a raised puff stitch daisy at the center. The flowers are worked in two contrasting shades of purple and pink, set against a solid lavender background. The finished bag has a firm, structured silhouette that actually stands up on its own.
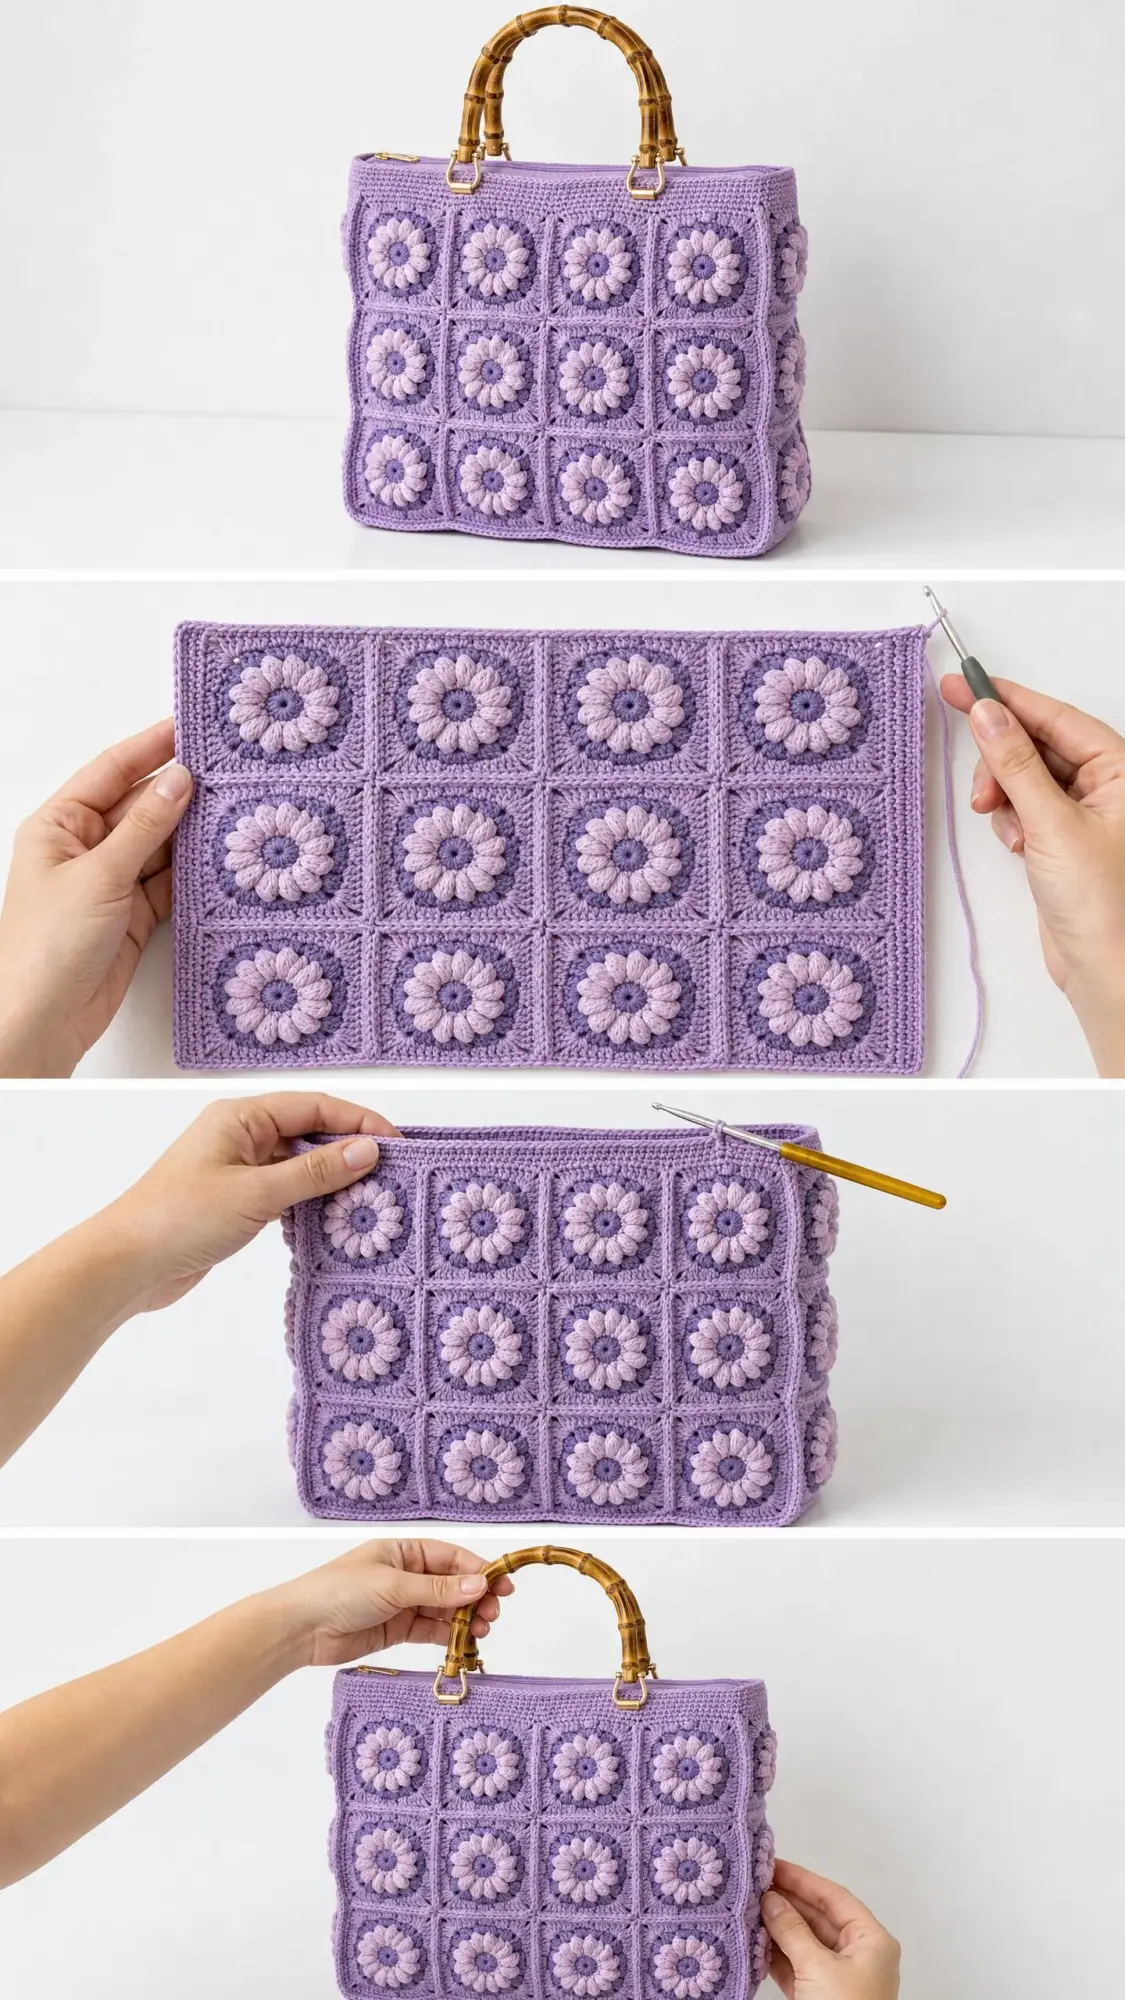
What makes this design special is the construction technique. Each flower motif is worked in the round, then the squares are joined flat using a slip stitch join. You’ll assemble front and back panels, add side gussets for depth, finish with a top border, and attach bamboo handles with gold D-ring hardware. A zipper closure and fabric lining complete the professional look.
Finished dimensions: approximately 13 inches wide by 11 inches tall by 2.5 inches deep, not including handles.
Skill level: Intermediate. You should be comfortable working in the round, creating puff stitches, and doing basic finishing work like sewing in a zipper and inserting a fabric lining.
Time estimate: approximately 25 to 35 hours for an average intermediate crocheter, not including blocking or lining time.
Materials You’ll Need
Yarn:
Yarn suggestions that work beautifully:
1. Lion Brand 24/7 Cotton in Lavender (Color A), Dusty Pink (Color B), and Periwinkle (Color C). This 100% mercerized cotton holds stitch definition beautifully.
2. Paintbox Yarns Simply DK Cotton in Wisteria (Color A), Blush Pink (Color B), and Cornflower Blue (Color C).
3. WeCrochet Dishie in Alfalfa (Color A), Begonia (Color B), and Sky (Color C).
Important substitution note: Choose a yarn with low stretch and good stitch definition. Cotton or cotton linen blends work best for bags because they hold their shape. Avoid acrylic only yarns because the finished bag will be too soft and lose its structured silhouette.
Hook: US size G-6 / 4.0 mm crochet hook
Notions:
Gauge
One completed flower square equals 3.25 inches by 3.25 inches after blocking, measured from outer edge to outer edge.
Alternatively: 16 single crochet stitches by 20 rows equals 4 inches by 4 inches in single crochet with Color A and G-6 hook.
Gauge is critical for this project. The bag dimensions depend directly on square size. If your square is larger than 3.25 inches, go down a half hook size. If smaller, go up a half hook size. Please make a test square before committing to all 35.
Abbreviations and Special Stitches
Let me define every stitch abbreviation you’ll encounter in this pattern:
How to Work the Puff Stitch (ps)
This is the star of the show. The puff stitch creates those gorgeous dimensional flower petals.
Step 1: Yarn over, insert hook into indicated stitch or space.
Step 2: Yarn over and draw up a loop to approximately 0.5 inch tall. You now have 3 loops on the hook.
Step 3: Yarn over, insert hook into the same stitch or space.
Step 4: Yarn over and draw up a loop to the same height. You now have 5 loops on the hook.
Step 5: Yarn over, insert hook into the same stitch or space.
Step 6: Yarn over and draw up a loop to the same height. You now have 7 loops on the hook.
Step 7: Yarn over and draw through all 7 loops on the hook.
Step 8: Chain 1 to close the puff stitch. This closing chain 1 does NOT count as a stitch.
The key is keeping those loops consistently tall and loose. If you pull them too tight, your puff won’t puff!
Standing Double Crochet
Use this to start a round with a new color without a starting chain.
Step 1: Make a slip knot and place on hook.
Step 2: Yarn over, insert hook into indicated stitch or space.
Step 3: Yarn over and draw up a loop.
Step 4: Yarn over and draw through first 2 loops.
Step 5: Yarn over and draw through remaining 2 loops.
Pattern Notes Before You Begin
1. Each flower square is worked in the round with the right side always facing you. Do not turn between rounds.
2. Total squares needed: 35 squares (12 front, 12 back, 4 left gusset, 4 right gusset, 3 bottom gusset).
3. Color changes: fasten off and weave in ends after each color round unless otherwise instructed.
4. All rounds begin with a standing stitch or a starting chain that counts as the first stitch, as specified.
Flower Square Instructions (Make 35 Total)
Use Color C for Rounds 1 and 2.
Use Color B for Rounds 3 and 4.
Use Color A for Rounds 5 and 6.
Round 1 (Color C)
Make a magic ring.
Chain 1 (does not count as a stitch now or ever in this pattern unless specified).
Work 6 sc into the magic ring.
Pull ring closed.
Sl st to first sc to join.
(6 sc)
Round 2 (Color C)
Chain 1.
Work 2 sc into each sc around.
Sl st to first sc to join.
Fasten off Color C.
(12 sc)
Round 3 (Color B)
Join Color B with a standing dc into any sc.
Work 1 more dc into the same sc (2 dc in first st).
[Work 2 dc into next sc] 11 times.
Sl st to first standing dc to join.
(24 dc)
Round 4 (Color B)
Chain 1.
Working in front loops only for the entire round, [ps in next st, sl st in next st] 12 times.
You will have 12 puff stitches and 12 slip stitches alternating around.
Sl st to base of first ps to join.
Fasten off Color B.
(12 ps, 12 sl sts; 24 sts total in front loops)
Important note: Working in front loops only for Round 4 leaves the back loops of Round 3 free. Round 5 will be worked into those back loops. This is what creates the raised dimensional flower sitting forward from the background. Pretty clever, right?
Round 5 (Color A)
Join Color A with a standing sc into any back loop of Round 3 stitches (behind the puff stitches).
Work 1 sc into each remaining back loop of Round 3 around.
Sl st to first sc to join.
(24 sc)
Round 6 (Color A)
This round creates the square shape. Follow these steps exactly:
Sl st into the 2nd sc of Round 5 to position at a grouping center.
Chain 3 (counts as first dc of a 3-dc group).
2 dc in same st.
Ch 2. (First corner established.)
Skip 2 sts.
3 dc in next st.
Skip 2 sts.
3 dc in next st.
Ch 2. (Second corner established.)
Skip 2 sts.
3 dc in next st.
Skip 2 sts.
3 dc in next st.
Ch 2. (Third corner established.)
Skip 2 sts.
3 dc in next st.
Skip 2 sts.
3 dc in next st.
Ch 2. (Fourth corner established.)
Skip 2 sts.
3 dc in next st.
Skip 2 sts.
Sl st to top of beginning ch-3 to join.
Fasten off Color A.
(36 dc, 4 ch-2 corner spaces)
Checkpoint
After completing one square it should be flat and approximately 3.25 inches by 3.25 inches when lightly blocked. The flower petals should stand up dimensional from the background. If your square is pulling into a cup shape, you are working too tightly. If it is ruffling, you are working too loosely.
Assembling the Panels
You will join all 35 squares using a flat slip stitch join on the wrong side with Color A.
Flat Seam Join Method
Hold two squares with wrong sides together, matching edges.
Join Color A with a sl st through both corner ch-2 spaces simultaneously.
Ch 1.
[Insert hook through both corresponding dc stitches on each square, yo and draw through, yo and draw through 2 loops] across the side.
Work 1 sc through both corner ch-2 spaces at the far end.
Fasten off.
Panel Layout
Assembly Order
Step 1: Join front panel squares into 3 columns of 4. Join columns together to form the full front panel.
Step 2: Repeat for back panel.
Step 3: Join left side gusset squares into one column of 4.
Step 4: Repeat for right side gusset.
Step 5: Join bottom gusset squares into one row of 3.
Step 6: Join left gusset column to left edge of front panel.
Step 7: Join bottom gusset row to bottom edge of front panel.
Step 8: Join right gusset column to right edge of front panel.
Step 9: Join back panel to remaining open edges of gussets and bottom gusset, creating the 3-dimensional bag body.
After assembling, the bag should stand on its own on a flat surface.
Top Border
The top border is worked around the entire top opening of the bag with Color A. Turn bag RS out.
Round 1 (RS facing):
Join Color A at any top corner join with a standing sc.
Work sc evenly around the entire top opening, working 1 sc per dc stitch of the top edge squares, 1 sc per ch-1 joining seam, and 3 sc into each outer corner of the top opening.
Join with sl st to first sc.
(approximately 90 sc)
Round 2 (RS facing):
Chain 1.
Sc in each sc around.
Sl st to first sc to join.
(90 sc)
Round 3 (RS facing):
Chain 1.
Sc in each sc around.
Sl st to first sc to join.
Fasten off.
(90 sc)
D-Ring Handle Tabs (Make 4)
Each tab is a short rectangle that will fold through a D-ring.
With Color A and G-6 hook:
Foundation: Chain 7.
Row 1: Sc in 2nd ch from hook and in each ch across. Turn.
(6 sc)
Rows 2 through 6: Chain 1. Sc in each sc across. Turn.
(6 sc per row)
After Row 6 do not fasten off. Fold tab in half so that Row 1 and Row 6 are aligned. Thread a D-ring onto the folded tab so it sits at the fold. Sl st through both Row 1 and Row 6 simultaneously across all 6 stitches to close the tab into a loop, securing the D-ring inside.
Fasten off leaving a 12-inch tail for sewing.
Attaching Tabs and Handles
On the front panel top border, measure 3.5 inches in from each side seam. Place 2 tabs on the front, spaced 3 inches apart at center, so the D-rings face upward at the top edge. Repeat for the back panel.
Using the tapestry needle and the long tail, sew each tab securely to the inside of the top border. Thread the bamboo handle’s attachment hardware through the corresponding 2 D-rings on each side.
Zipper Installation
Pin the 14-inch zipper along the inside top edge so that the zipper pull is centered and the zipper tape aligns just below the top border. Hand sew the zipper tape to the inside of the top border using small whipstitches. Fold the top border over the zipper tape toward the inside and whipstitch in place, encasing the zipper neatly.
Lining
With RS of lining fabric together, sew the two main lining pieces together at the sides using a 0.5-inch seam allowance. Sew the lining gusset strip around the bottom and side interior of the lining. Leave the top open. Turn down 0.75 inch at the top of the lining to the WS and press.
Place lining inside the bag with WS of lining facing WS of crochet fabric. Pin the folded top edge of the lining just below the top border inside the bag. Slip stitch the lining to the bag interior all around the top edge.
Finishing and Blocking
Weave in all remaining ends securely. Wet block by submerging the completed bag in cool water, gently pressing out excess water in a towel, then shaping the bag on a blocking mat to the correct dimensions. Pin corners square and leave to dry completely away from direct sunlight.
Care Instructions
Machine wash cold on a gentle cycle inside a mesh laundry bag. Lay flat to dry. Do not place in dryer. Hand washing in cool water is preferred for longest life of the bamboo handles. Wipe bamboo handles with a slightly damp cloth only.
Size Customization Tips
To make a larger tote, add one more column of squares to the front and back panels (4 columns by 4 rows equals 16 squares per panel), and add 1 more square to each gusset column. Each additional square adds approximately 3.25 inches to the width or height.
To make a smaller clutch version, use 2 columns by 3 rows for front and back panels (6 squares each), eliminate the gusset entirely, and seam the sides flat.
I really hope you love making this Lavender Dreams flower square tote as much as I loved designing it. She’s a labor of love, but the finished bag is absolutely stunning and so satisfying to carry around. If you make one, I would genuinely love to see it! Tag me on Instagram or share in our Facebook group.
If this pattern is calling your name, go ahead and save it to your Pinterest boards so you can find it when you’re ready to start. And please drop a comment below if you make one. I read every single comment and your makes absolutely make my day!
