
"I could never crochet something that looks like that." I hear this all the time when crafters spot projects with embroidered details and applique flowers. But here is the truth: if you can single crochet, you can absolutely make this diary cover. The fancy bits are just simple chains formed into loops and a few basic embroidery stitches you probably already know from sewing on buttons.
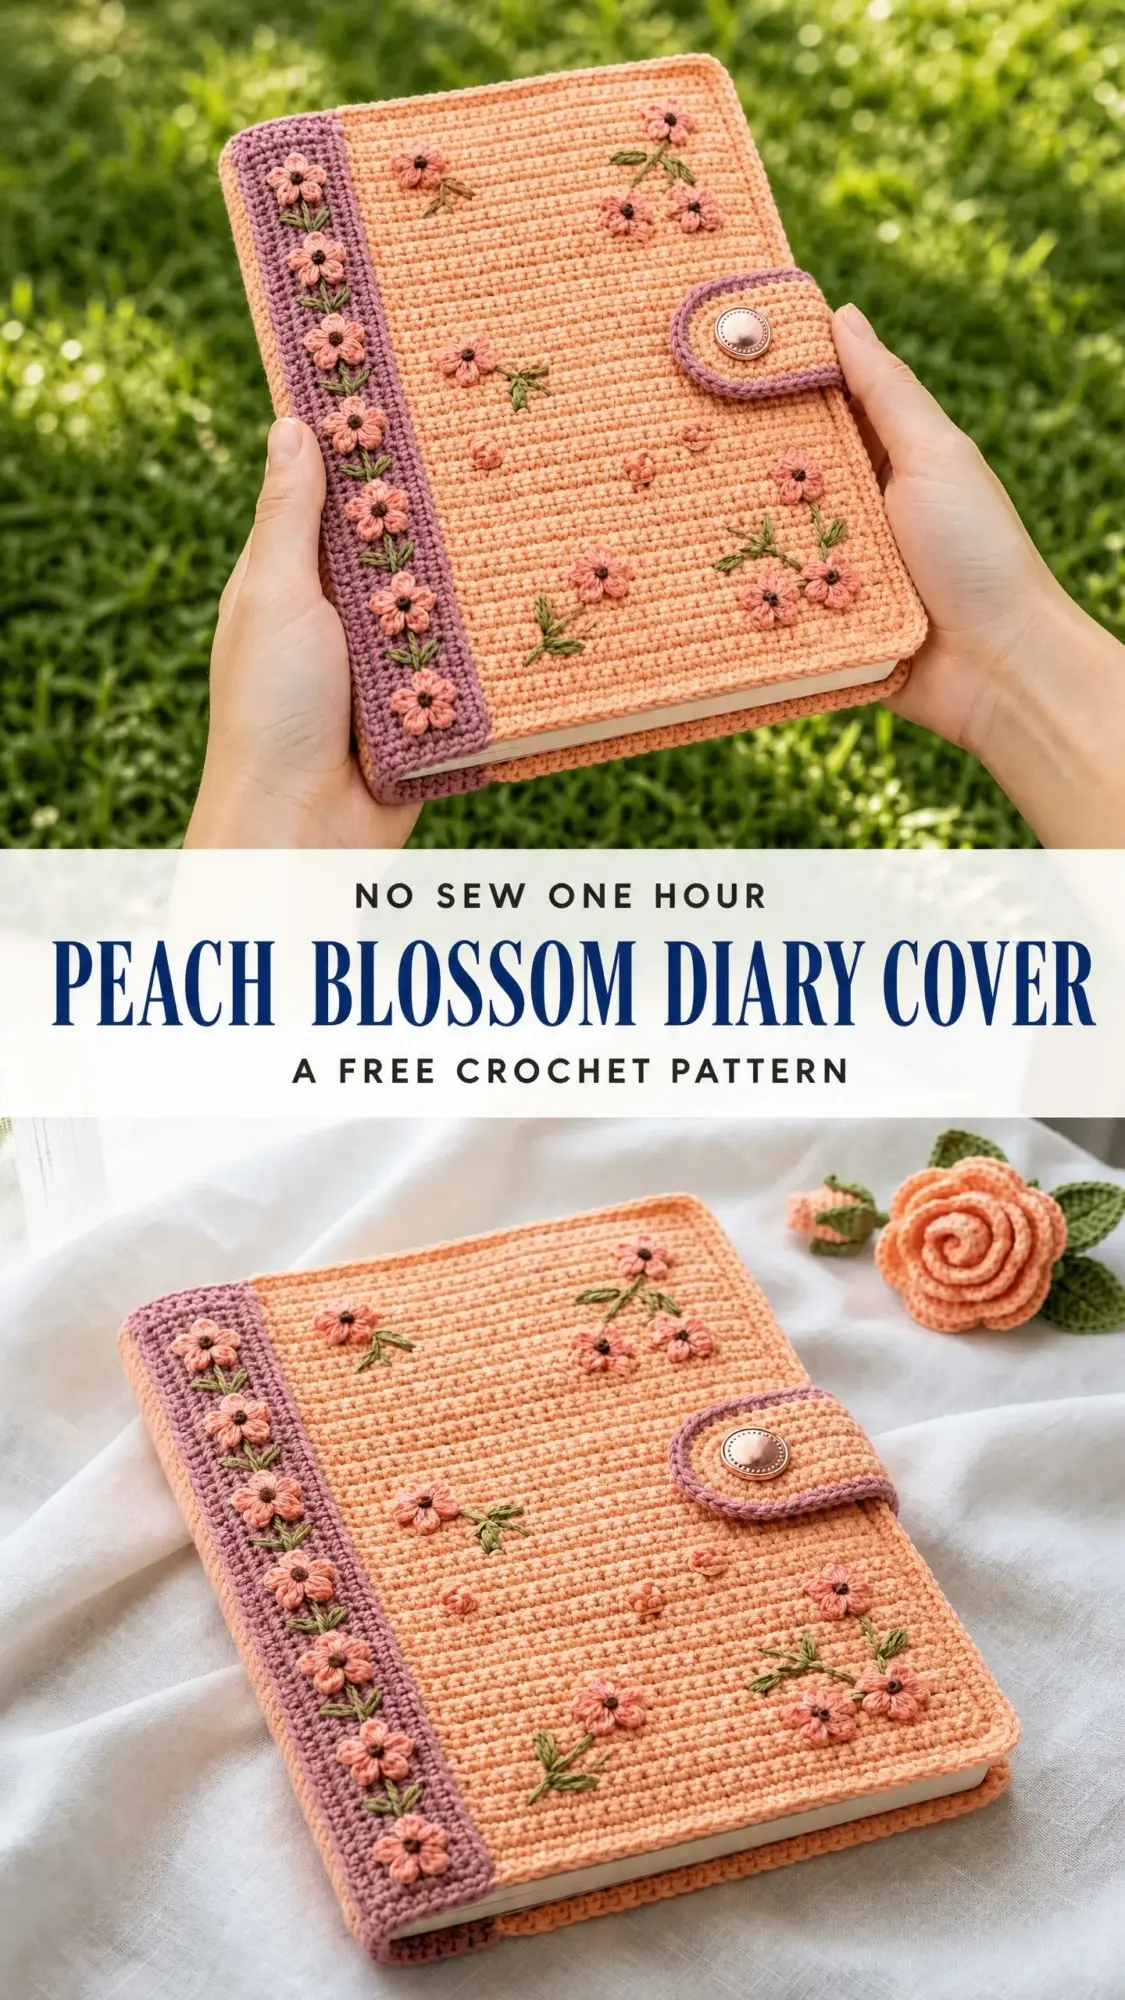
This peach blossom diary cover looks like it belongs in a boutique gift shop, but the construction is wonderfully straightforward. You are essentially making two flat rectangles, stitching them together, and then adding cute flowers on top. That is it. No complicated shaping, no confusing increases, no frogging in frustration at midnight.
Whether you are a confident beginner ready to level up or an experienced crocheter looking for a satisfying project, this pattern meets you where you are. I am going to walk you through every single step, explain every stitch, and give you all the little tips that make the difference between "meh" and "wow." Let us make something beautiful together.
Why You Will Love This Crochet Diary Cover Pattern
This project hits that sweet spot between impressive results and achievable construction. The dense single crochet (sc) fabric creates a sturdy cover that protects your notebook while looking absolutely gorgeous. The subtle horizontal ribbing comes from working in the back loop only (BLO), which sounds fancy but is actually one of the easiest texture techniques to master.
The modular design means you work each piece separately before joining. No wrestling with awkward angles or trying to crochet around notebook corners. You make flat panels, seam them together, add your flowers, and slip your notebook inside. Simple.
Plus, this makes an incredible handmade gift. Imagine giving a journal lover in your life a custom cover in their favorite colors. Birthday present? Sorted. Teacher appreciation gift? Perfect. Treat for yourself? Absolutely.
Materials You Will Need
Yarn:
Hooks:
Notions:
Recommended Yarn Options
Option 1: Paintbox Yarns Simply DK (100% cotton, 137 yards per 50 g ball). Use Peach Orange for MC, Dusty Rose for CA, Blush Pink for CB, and Grass Green for CC.
Option 2: Lion Brand 24/7 Cotton (100% mercerized cotton, 186 yards per 100 g ball). Use Peach for MC, Blush for CA, Rose for CB, and Fern for CC.
Option 3: Drops Safran (100% Egyptian cotton, 175 yards per 50 g ball). Use shade 07 for MC, shade 18 for CA, shade 05 for CB, and shade 11 for CC.
Stick with smooth DK-weight or light worsted cotton yarn. Avoid anything fuzzy or textured because it will hide that beautiful ribbed texture and make embroidery tricky.
Finished Measurements
These measurements fit a standard A5 notebook measuring approximately 5.8 inches by 8.3 inches (14.8 cm by 21 cm).
Gauge
6 stitches and 7 rows = 1 inch (2.5 cm) in back-loop-only single crochet with MC and US D-3 hook, after blocking.
To make a gauge swatch: Chain 20. Work BLO sc across for 15 rows. Block flat. Measure the center 6 stitches by 7 rows. Adjust hook size if needed.
I know gauge swatches feel tedious, but please do not skip this step. The cover needs to fit snugly around your notebook. Too loose and it will slip around. Too tight and you will struggle to insert the notebook covers.
Skill Level
Intermediate. You should be comfortable with single crochet, working in back loops only, seaming panels together, and basic embroidery. Nothing here is genuinely difficult, but neatness and consistent tension matter for a polished result.
Time estimate: Approximately 8 to 12 hours total, including panels, flowers, embroidery, and finishing.
Abbreviations and Stitch Definitions
Let me break down every abbreviation you will encounter. Even if you know these, a quick refresher never hurts.
Special Stitch: Back-Loop-Only Single Crochet (BLO sc)
Insert your hook under the back loop only of the indicated stitch. That is the loop farthest from you as the work faces you. Yarn over and pull up a loop. Yarn over again and draw through both loops on your hook. One BLO sc complete.
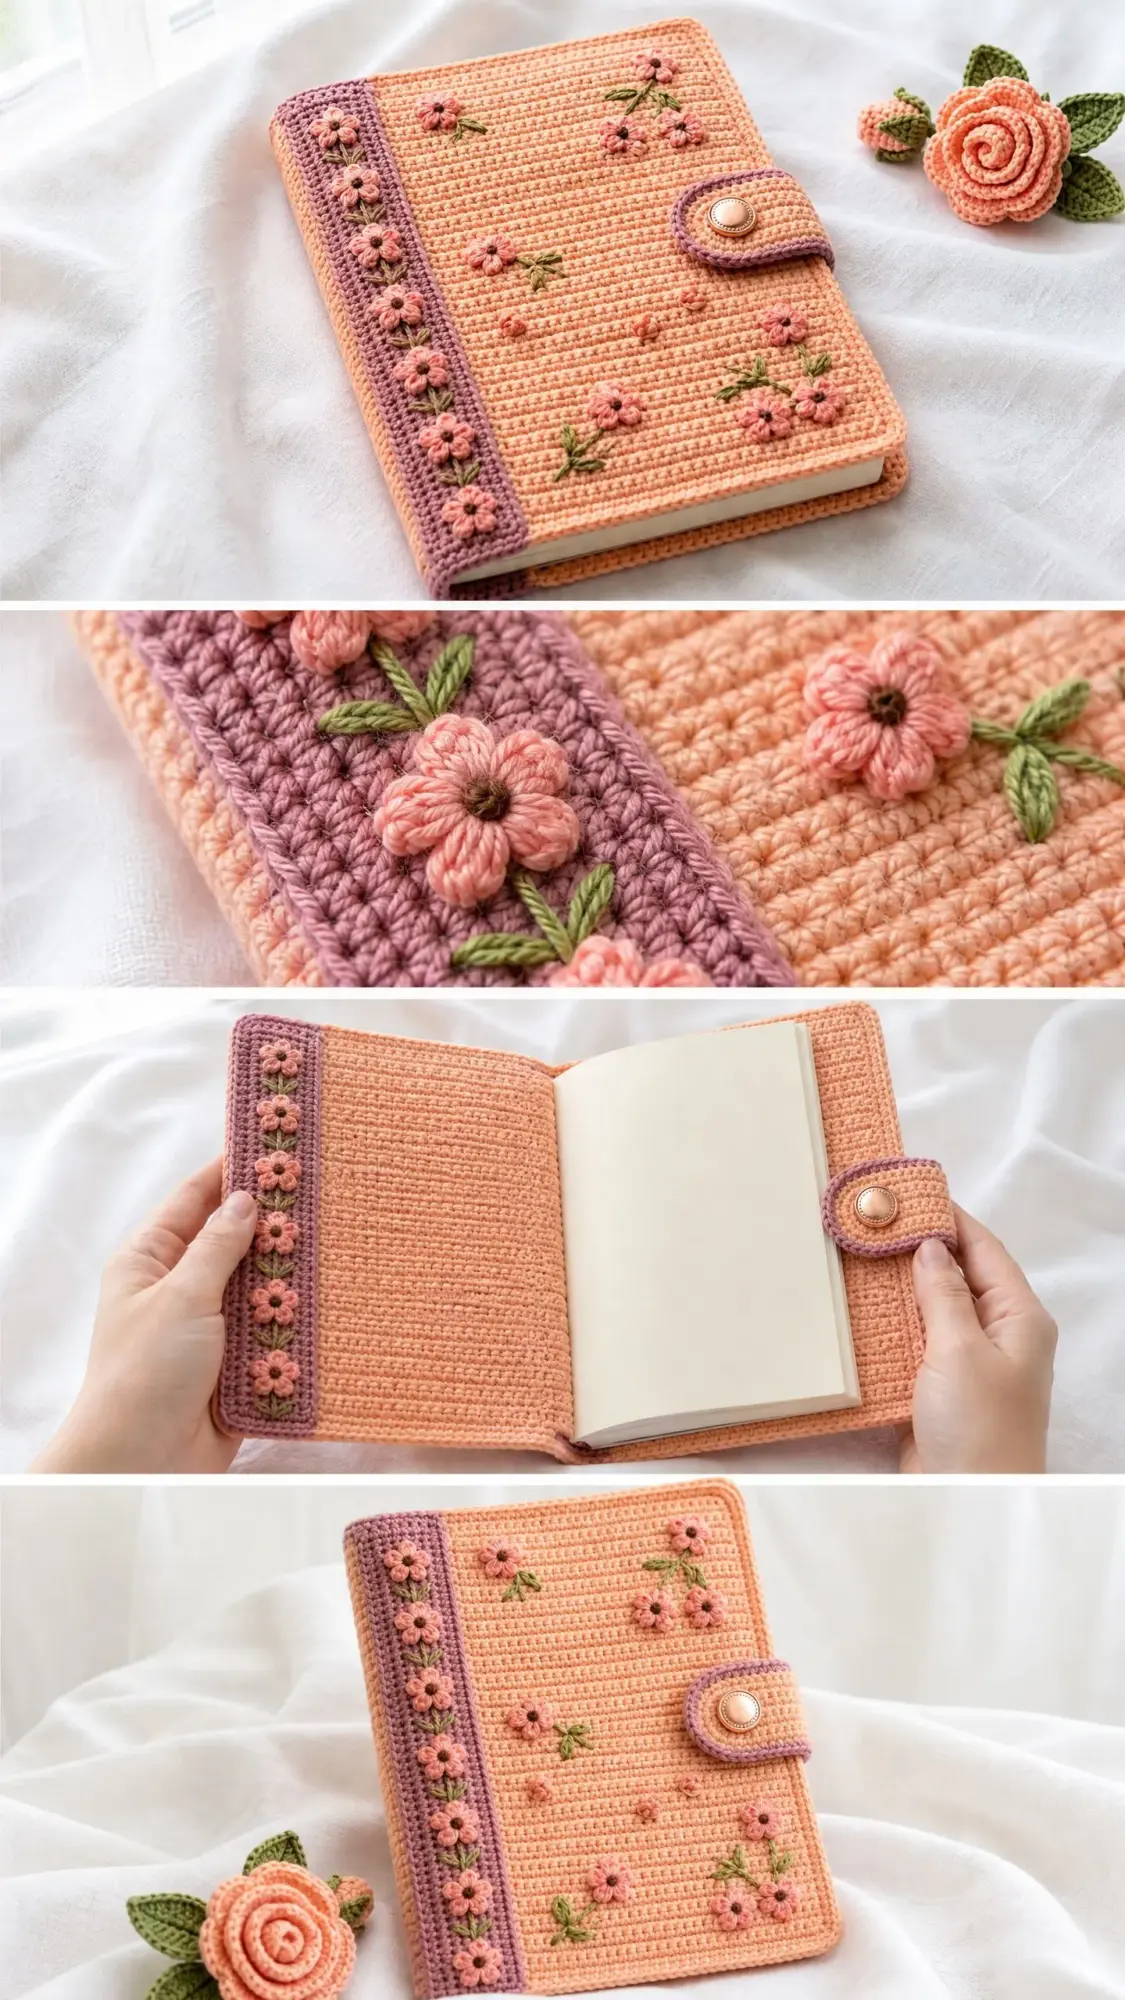
This creates those lovely horizontal ridges you see in the photos. It looks like a completely different stitch but uses the exact same motion as regular single crochet.
Step-by-Step Crochet Pattern Instructions
Back Panel
With MC and D-3 hook, chain 39.
Row 1 (RS): Sc in 2nd ch from hook and in each ch across. Ch 1, turn. (38 sc)
Row 2: BLO sc in each st across. Ch 1, turn. (38 sc)
Rows 3 through 60: Repeat Row 2. Ch 1, turn at the end of each row. (38 sc each row)
After Row 60, do not turn. Fasten off and weave in ends.
Checkpoint: Your back panel should measure approximately 6.25 inches wide by 8.5 inches tall after light blocking. If it is significantly off, check your gauge.
Front Panel
With MC and D-3 hook, chain 39.
Row 1 (RS): Sc in 2nd ch from hook and in each ch across. Ch 1, turn. (38 sc)
Row 2: BLO sc in each st across. Ch 1, turn. (38 sc)
Rows 3 through 60: Repeat Row 2. Ch 1, turn at the end of each row. (38 sc each row)
After Row 60, do not turn. Fasten off and weave in ends.
Block both panels before continuing. Cotton yarn loves a good blocking session and will even out beautifully.
Button Loop Tab
With CA and D-3 hook, chain 5.
Row 1: Sc in 2nd ch from hook and in each ch across. Ch 1, turn. (4 sc)
Row 2: BLO sc in each st across. Ch 1, turn. (4 sc)
Rows 3 through 10: Repeat Row 2. Ch 1, turn. (4 sc each row)
Fasten off, leaving a 14-inch tail for sewing.
Fold the tab in half widthwise to form a loop approximately 0.75 inch long. Pin the open raw ends together and set aside.
Assembling the Cover
Step 1: Align panels.
Place the back panel flat with RS facing up. Place the front panel on top with RS also facing up (both right sides out). The two wrong sides face each other in the middle. Align all four edges precisely.
Step 2: Insert button tab.
Position the folded button loop tab so its raw ends are sandwiched between the two panels at the right edge, centered at approximately 4.25 inches from the bottom edge. The loop extends outward to the right. Pin in place.
Step 3: Seam top edge.
With CA and D-3 hook, working through both panels together, begin at the top right corner. Work a row of sl st through both layers across the top edge. (38 sl sts) Fasten off.
Step 4: Seam bottom edge.
With CA and D-3 hook, working through both panels together, begin at the bottom right corner. Work a row of sl st through both layers across the bottom edge, securing the button tab raw ends as you pass through that area. (38 sl sts) Fasten off.
Step 5: Do not seam the left edge (spine side) or the right edge. The left edge remains open for the notebook spine.
Spine Border Strip
With CA and D-3 hook, chain 9.
Row 1: Sc in 2nd ch from hook and in each ch across. Ch 1, turn. (8 sc)
Row 2: Sc in each st across. Ch 1, turn. (8 sc)
Rows 3 through 60: Repeat Row 2. Ch 1, turn. (8 sc each row)
After Row 60, fasten off, leaving a 24-inch tail for sewing.
Sewing the spine strip: Position the strip vertically along the left side of the assembled cover front. Using CA threaded on a tapestry needle, whipstitch the right long edge of the strip to the left column of stitches on the front panel. Then fold the strip around to the back panel and whipstitch the left long edge to the back panel. Stitch the short ends neatly to close.
Daisy Applique Flowers
Make 18 flowers total using CB and the C-2 hook:
Daisy Applique Flower Instructions:
With CB and smaller hook (C-2), make a magic ring (or ch 4, sl st to form ring).
Round 1: Ch 1, work 6 sc into ring, sl st to first sc to join. (6 sc)
Round 2: For each petal, ch 6, sl st back into the base sc you just left, then sl st into the next sc. Repeat until 6 petals are complete. Fasten off, leaving a 10-inch tail for sewing.
Pull your starting tail tight to close the center. Press each flower flat with a damp cloth before sewing onto the cover.
Flower Placement
Front panel clusters:
Spine strip: Space 6 flowers evenly along the strip vertically, first flower 0.75 inch from top, last flower 0.75 inch from bottom.
Pin each flower in position. Using the long tail, sew the flower center firmly with 4 to 6 anchoring stitches.
Embroidered Stems and Leaves
Using CC threaded on a tapestry needle, add stems and leaves to complete the floral design.
For front panel clusters: Bring all three stems down to a single point, then continue with one shared stem approximately 0.75 inch below. Add one leaf pair at the junction and one at the stem base.
For spine strip flowers: Work one straight-stitch stem approximately 0.5 inch below each flower, with a pair of lazy daisy leaves at the base.
Lazy daisy stitch: Bring your needle up at the leaf base. Loop your thread and insert the needle back into the same hole. Bring the needle tip out at the leaf tip, catching the loop. Tack the loop down with a small straight stitch.
Attaching the Closure
For a magnetic snap: Carefully part the yarn fibers at the center right edge of the front panel, approximately 4.25 inches from the bottom. Insert the snap prongs through to the wrong side and press the washer over them. Repeat for the other snap half on the back panel.
For a button: Sew the button to the right edge of the back panel at the same position using CB or CA yarn.
Blocking Your Finished Diary Cover
Fill a basin with cool water. Submerge your completed cover and gently press to saturate. Do not wring. Roll in a clean towel to remove excess water. Place the cover over your closed A5 notebook (wrapped in a plastic bag to protect from moisture). Pin the four corners square on a blocking mat. Allow to dry completely, approximately 24 hours.
Blocking over the actual notebook ensures a perfect fit. Trust me on this one.
Size Customization Tips
For A6 notebooks (approximately 4.1 by 5.8 inches): Work each panel for 25 stitches across and 41 rows tall. Reduce the spine strip to 5 stitches across and 41 rows tall.
For B5 journals (approximately 6.9 by 9.8 inches): Work each panel for 42 stitches across and 69 rows tall.
General formula: Panel stitch count = desired width in inches multiplied by 6. Panel row count = desired height in inches multiplied by 7. Add 2 extra rows for seam take-up.
Care Instructions
Machine wash on gentle cycle in cold water inside a mesh laundry bag, or hand wash in cool water. Reshape while damp. Lay flat to dry away from direct sunlight. Do not tumble dry. If pressing is needed, use a damp cloth and low heat on the wrong side only.
Pattern Notes and Tips for Success
Mark the right side of your work on Row 1 with a stitch marker. The RS shows clear horizontal ridges from the BLO technique.
All turning chains are ch 1 and do not count as stitches. This keeps your edges neat and your stitch counts consistent.
Block before seaming. Blocked panels are much easier to align and join evenly.
If your cover feels slightly tight when inserting the notebook, block it a second time stretched over the closed notebook.
Take your time with flower placement. Pin everything first and step back to look at the overall arrangement before sewing anything down.
I hope this crochet diary cover pattern brings you as much joy to make as it will to use. There is something wonderfully satisfying about creating a handmade home for your thoughts and plans. If you make one, I would absolutely love to see it. Tag me on Instagram or share a photo on Facebook. Seeing your creations genuinely makes my day.
Save this pattern to your Pinterest boards so you can find it whenever you are ready to start stitching. And please drop a comment below if you make one. I love hearing which color combinations you choose and how your covers turn out!
