
I’ve been looking for the perfect spring tote pattern for ages, and this one checks every single box. The Spring Garden Granny Tote combines classic granny mesh with a colorful puff stitch border that honestly makes me smile every time I look at it. It’s roomy enough for farmers market runs, sturdy enough for everyday errands, and pretty enough to get compliments from strangers. This is my new favorite warm weather bag pattern, and I think it might become yours too.
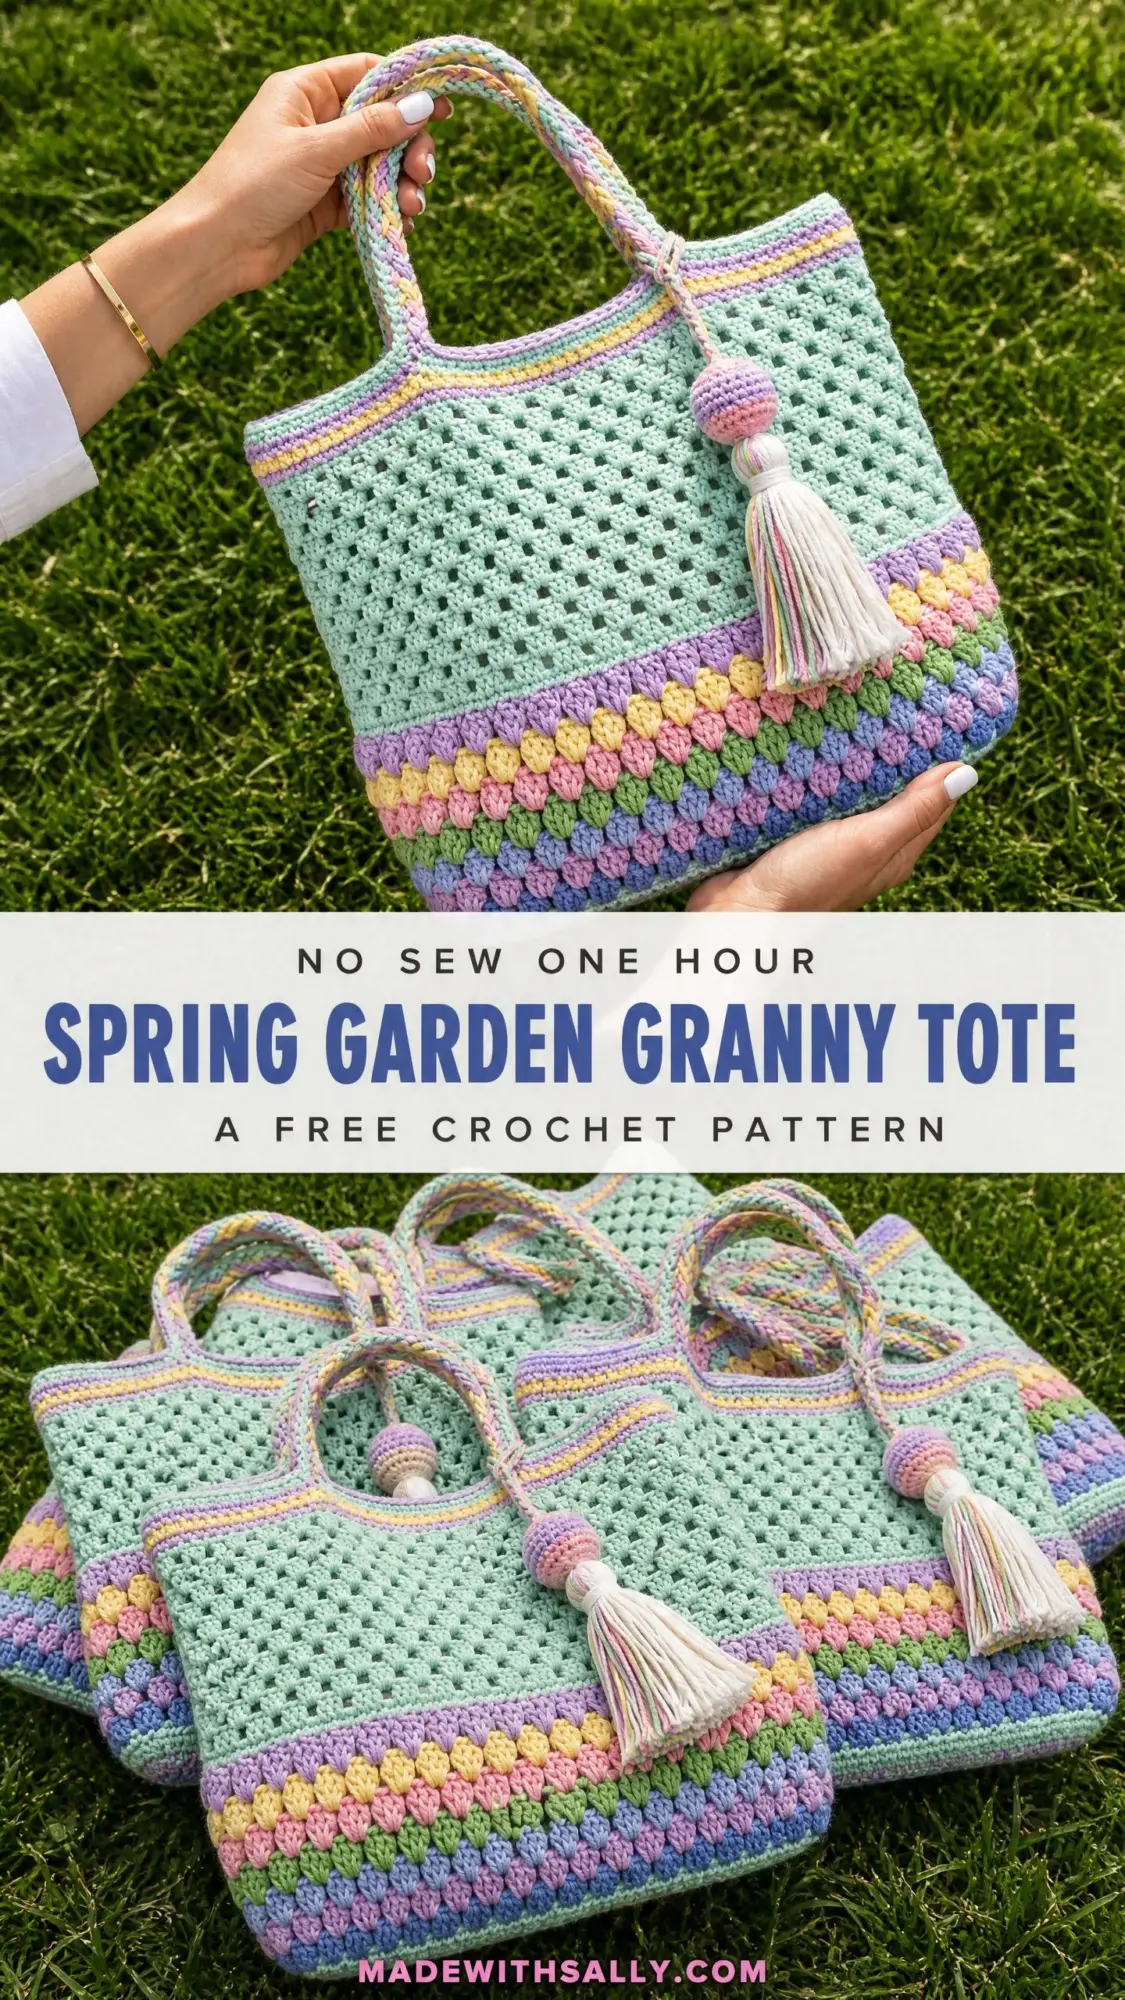
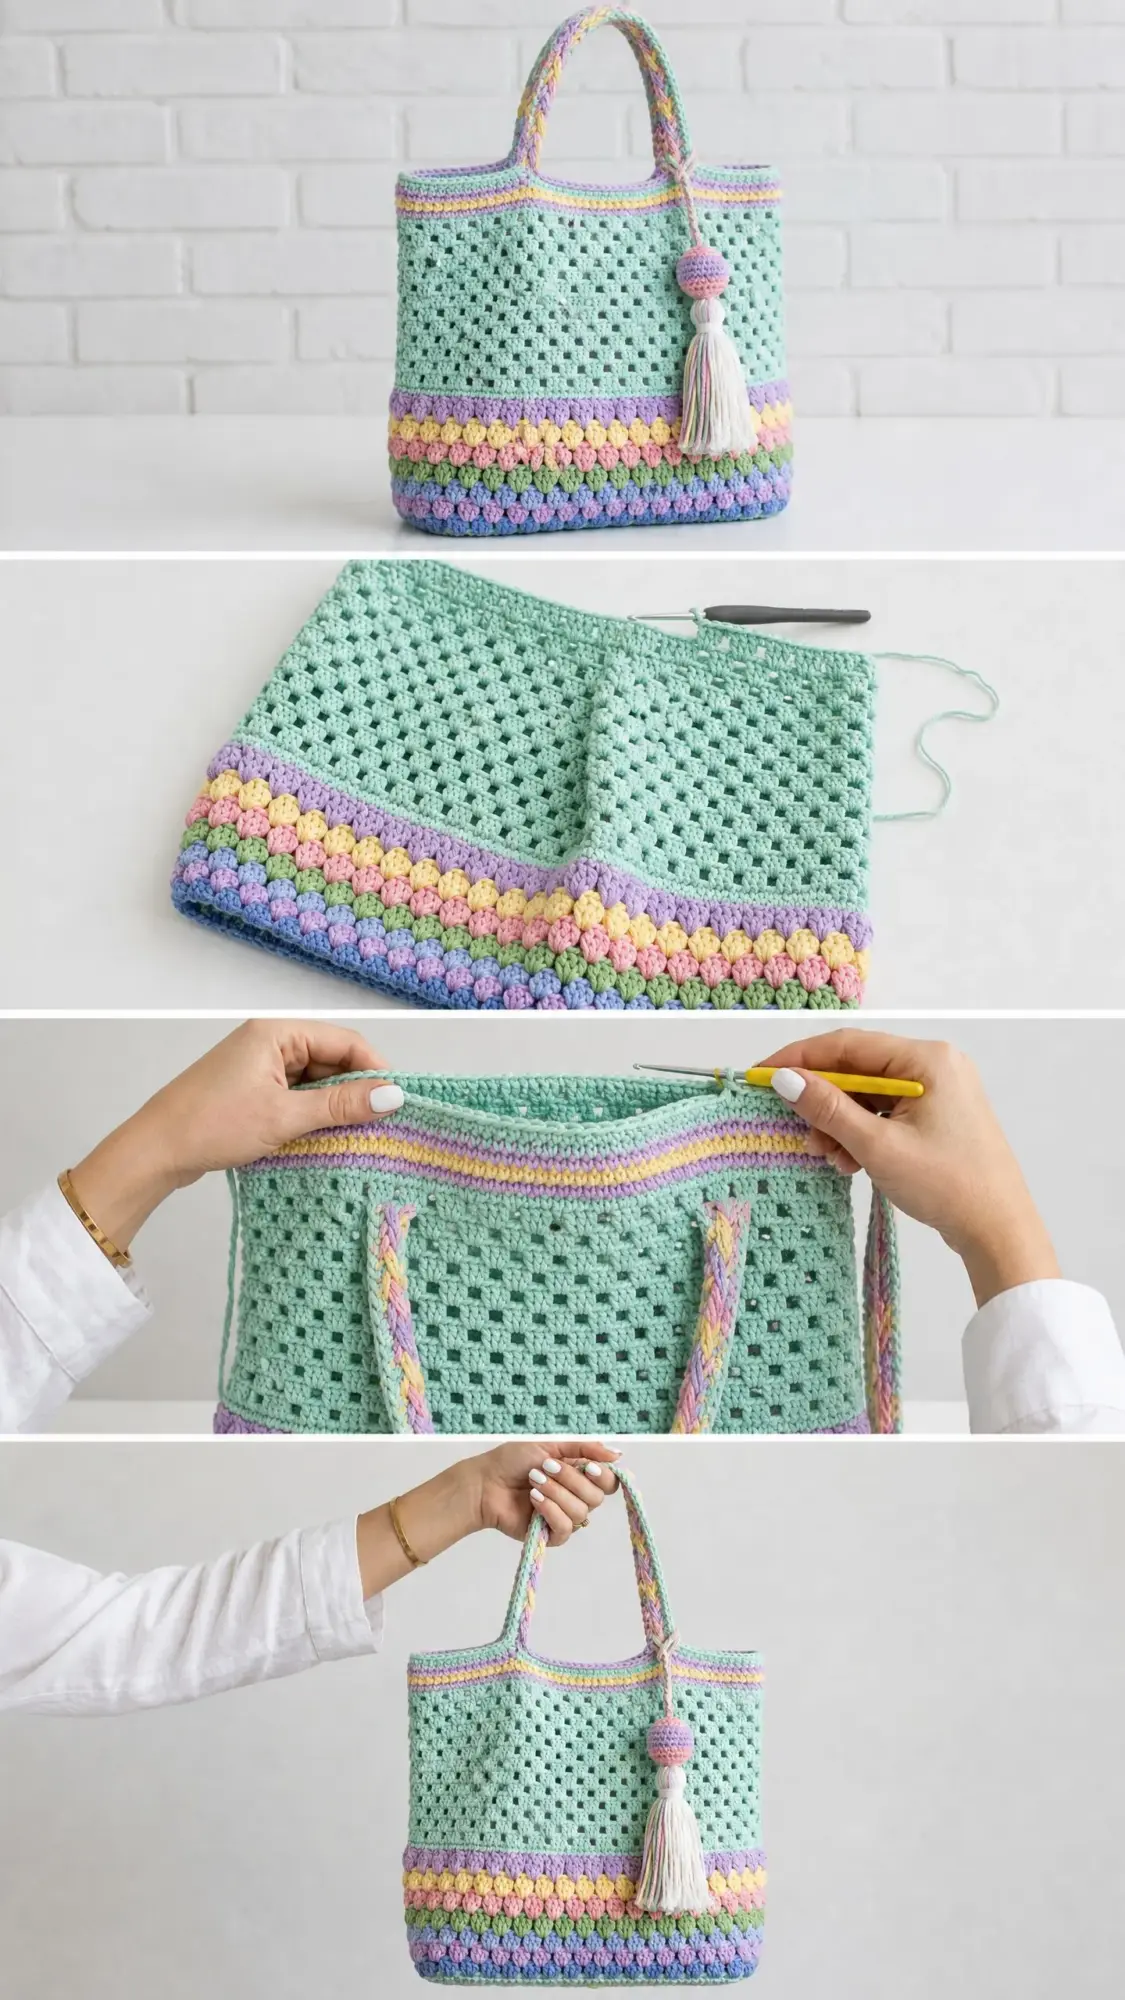
The construction is clever without being complicated. You start with a flat rectangular base, work the walls in the round using that gorgeous open granny mesh, then finish with bands of cheerful puff stitches at the bottom and stripes at the top. The braided handles give it that handmade artisan look, and the crocheted bead tassel adds the perfect finishing touch. If you’ve made a basic granny square before, you can absolutely tackle this project.
Fair warning: this is an intermediate level pattern that will take around 15 to 22 hours to complete. But every hour is enjoyable, the techniques build on each other logically, and the finished bag is something you’ll use constantly. Let’s walk through everything you need to know.
What Makes This Crochet Tote Bag Pattern Special
This isn’t just another market bag. The Spring Garden Granny Tote has a structured flat bottom that actually stands up on its own. The granny mesh body provides airflow and stretch while the puff stitch border adds visual weight and keeps smaller items from slipping through at the base.
The color palette is soft and springlike. Think mint green, lavender, yellow, pink, and periwinkle blue working together in perfect harmony. The main body stays consistent in mint, letting the decorative elements shine without overwhelming the design.
Finished dimensions come out to approximately 13 inches wide by 13.5 inches tall, not including handles. The base measures roughly 13 inches by 4.5 inches. In metric, that’s about 33 cm wide by 34 cm tall with an 11.5 cm deep base.
Materials You’ll Need
Gathering your supplies before starting makes the whole process smoother. Here’s exactly what this crochet tutorial requires.
Yarn
You’ll need worsted weight cotton yarn in several colors:
Great yarn options include Lion Brand 24/7 Cotton, Paintbox Yarns Simply DK Cotton, or WeCrochet Dishie. Any smooth worsted weight cotton that achieves gauge will work beautifully. Avoid fuzzy or textured yarns since stitch definition really matters for this design.
Hook and Notions
Gauge
Getting gauge right ensures your finished bag matches the intended size.
With Color A and your J/10 hook working the granny mesh panel: 3 granny clusters (each cluster equals 3 double crochets) and 3 chain 1 spaces should equal approximately 3.5 inches or 9 cm wide. Three rows of granny mesh should measure about 2.5 inches or 6.4 cm tall.
For single crochet stripe rows: 14 single crochets equal 4 inches or 10 cm, and 16 rows of single crochet equal 4 inches or 10 cm.
Make a small swatch before diving into the full project. If your gauge runs large, try going down a hook size. If it runs small, go up a size.
Abbreviations and Stitch Definitions
Let me break down every stitch abbreviation you’ll encounter in this step by step pattern. If you’re newer to crochet patterns, bookmark this section.
Special Stitches for This Crochet Pattern
These techniques give the bag its distinctive look.
Granny Cluster
This forms the building blocks of the mesh body. Yarn over, insert hook into the designated chain space, yarn over and pull up a loop, yarn over and pull through two loops on hook. That’s one double crochet. Keeping your hook in the same space, work two more double crochets into that same chain space. You now have three double crochets worked into one space. This group of three is one granny cluster.
Chain 1 Granny Mesh
Work one granny cluster into a chain space, chain 1, skip the next cluster or space, work one granny cluster into the next chain space, chain 1. Repeat across or around. This creates the open lace grid visible in the body of the bag. It looks intricate but becomes rhythmic quickly.
Puff Stitch
This creates the rounded bobble texture at the bottom of the bag. Yarn over, insert hook into the stitch, yarn over and pull up a loop to the height of a double crochet. Without removing your hook, yarn over and insert into the same stitch again, yarn over and pull up another loop. Repeat one more time so you have seven loops on your hook. Yarn over and pull through all seven loops. Chain 1 to close and secure the puff.
Don’t stress if your first few puff stitches look uneven. They take practice, and blocking helps even everything out.
Standing Single Crochet
This starts a new color without a visible slip stitch. Make a slip knot with your new yarn color. Insert hook into the designated stitch, pull up a loop (two loops on hook), yarn over and pull through both loops.
Braided Handle Construction
Cut 9 strands of yarn for each handle at the required length. Separate into three groups of 3 strands each. Align all strands evenly, anchor at one end by folding over a stitch or pinning to a surface. Braid by alternating the outer left group over the center, then the outer right group over the center. Continue until the full length is braided. Secure both ends.
Pattern Instructions
Now for the actual making. Take your time with each section, and don’t hesitate to use stitch markers liberally.
Section 1: The Base
The base is worked flat in rows of single crochet to create a firm rectangular foundation.
With Color A and your J hook, chain 47.
Row 1 (RS): Single crochet in 2nd chain from hook and in each chain across. Turn. (46 sc)
Rows 2 through 16: Chain 1, single crochet in each stitch across. Turn. (46 sc)
After Row 16, do not turn and do not fasten off.
Checkpoint: Your base should measure approximately 13 inches wide by 4.5 inches tall. It should be a firm rectangle.
Section 2: Join for Working in the Round
Without turning, rotate your work so you’re working along the long edge. You’ll now pick up stitches along all four sides of the rectangle to begin working the walls in the round.
Set up Round (sc edging): Still with Color A, chain 1. Place a stitch marker at this first corner.
Work 16 single crochets evenly along the short right side edge of the base (1 sc per row end, 16 rows). Place stitch marker at second corner. Work 46 single crochets across the top edge of the base into the starting chain. Place stitch marker at third corner. Work 16 single crochets evenly along the short left side edge. Place stitch marker at fourth corner. Work 46 single crochets across the bottom of Row 16. Join with slip stitch to first single crochet of this round. (124 sc total: 46 + 16 + 46 + 16)
Checkpoint: You now have 124 single crochets around the perimeter with 4 marked corners. The bag is now worked in the round with the right side facing out.
Section 3: Granny Mesh Body
This is where the magic happens. The granny mesh creates that beautiful open texture.
Round 1 of Mesh (Color A): Chain 3 (counts as first double crochet of first cluster here and throughout mesh section). Work 2 more double crochets into same corner stitch (first cluster made). Chain 2 (corner). Skip 1 stitch. Work 3 dc cluster into next stitch, chain 1, skip 2 stitches repeat 14 more times along front (15 clusters total along front). At corner stitch: work 3 dc cluster, chain 2. Skip 1 stitch. Work 3 dc cluster into next stitch, chain 1, skip 2 stitches repeat 4 more times along side (5 clusters total along side). At corner stitch: work 3 dc cluster, chain 2. Skip 1 stitch. Work 3 dc cluster into next stitch, chain 1, skip 2 stitches repeat 14 more times along back (15 clusters total). At corner stitch: work 3 dc cluster, chain 2. Skip 1 stitch. Work 3 dc cluster into next stitch, chain 1, skip 2 stitches repeat 4 more times along remaining side (5 clusters total). Join with slip stitch to top of beginning chain 3. (40 clusters, 4 ch-2 corner spaces)
Round 2 of Mesh (Color A): Slip stitch into next 2 double crochets and into chain 2 corner space. Chain 3, 2 double crochets into same corner space (cluster). Chain 2 (corner). Work 3 dc cluster into next chain 1 space, chain 1 repeat 15 times (15 clusters along front). Cluster into corner space, chain 2. Work 3 dc cluster into next chain 1 space, chain 1 repeat 5 times (5 clusters along side). Cluster into corner space, chain 2. Work 3 dc cluster into next chain 1 space, chain 1 repeat 15 times (15 clusters along back). Cluster into corner space, chain 2. Work 3 dc cluster into next chain 1 space, chain 1 repeat 5 times (5 clusters along remaining side). Join with slip stitch to top of beginning chain 3. (40 clusters, 4 ch-2 corner spaces)
Rounds 3 through 16 of Mesh (Color A): Repeat Round 2 exactly for all remaining mesh rounds. (40 clusters, 4 ch-2 corner spaces per round)
Checkpoint: After completing all 16 mesh rounds, the body should measure approximately 13 inches tall from base to top. The open grid texture should look even and consistent.
Section 4: Top Stripe Band
After the final mesh round, the top stripe band is worked in single crochet rounds.
You’ll work single crochet across the top, treating the top of each cluster as 3 single crochets and each chain 1 space as 1 single crochet, and each chain 2 corner as 2 single crochets. Adjust at corners as needed to reach 164 stitches.
Stripe Round 1 (Color B, Lavender): Join with slip stitch to any top stitch. Chain 1, single crochet in each stitch around. Join with slip stitch to first single crochet. (164 sc)
Stripe Round 2 (Color B): Chain 1, single crochet in each stitch around. Join with slip stitch to first single crochet. (164 sc)
Stripe Round 3 (Color C, Yellow): Chain 1, single crochet in each stitch around. Join with slip stitch to first single crochet. (164 sc)
Stripe Round 4 (Color C): Chain 1, single crochet in each stitch around. Join with slip stitch to first single crochet. (164 sc)
Stripe Round 5 (Multicolor or Color A): Chain 1, single crochet in each stitch around. Join with slip stitch to first single crochet. (164 sc)
Stripe Round 6 (Color B): Chain 1, single crochet in each stitch around. Join with slip stitch to first single crochet. (164 sc)
Stripe Round 7 (Color B): Chain 1, single crochet in each stitch around. Join with slip stitch to first single crochet. Do not fasten off. (164 sc)
Final Top Edge Round (Color B): Chain 1, single crochet in each stitch around. Join with slip stitch to first single crochet. Fasten off and weave in ends. (164 sc)
Checkpoint: The top stripe band adds approximately 1.5 inches of height. It should look like a neat band of horizontal stripes in pastel lavender, yellow, and a mint or multicolor accent row.
Section 5: Puff Stitch Border
This decorative border is worked at the bottom of the bag, just above the base.
Hold the bag with the base facing down. Attach color to the Set up Round (the first round of single crochet at the very bottom of the bag walls). You’ll work outward rounds of puff stitches, stacking them so each round sits just above the previous one.
Puff Border Round 1 (Color F, Periwinkle Blue): Join Color F with slip stitch to any stitch of the Set up Round. Chain 2. Puff stitch into next stitch, chain 1, skip 1 stitch repeat around. Join with slip stitch to top of first puff stitch. (82 puff stitches, 82 ch-1 spaces)
Puff Border Round 2 (Color E, Green): Join Color E to any chain 1 space. Chain 2. Puff stitch into next chain 1 space, chain 1 repeat around. Join with slip stitch to top of first puff stitch. (82 puff stitches)
Puff Border Round 3 (Color D, Pink): Join Color D to any chain 1 space. Chain 2. Puff stitch into next chain 1 space, chain 1 repeat around. Join with slip stitch to top of first puff stitch. (82 puff stitches)
Puff Border Round 4 (Color C, Yellow): Join Color C to any chain 1 space. Chain 2. Puff stitch into next chain 1 space, chain 1 repeat around. Join with slip stitch to top of first puff stitch. (82 puff stitches)
Puff Border Round 5 (Color B, Lavender): Join Color B to any chain 1 space. Chain 2. Puff stitch into next chain 1 space, chain 1 repeat around. Join with slip stitch to top of first puff stitch. Fasten off. (82 puff stitches)
Checkpoint: After all 5 puff border rounds, the bottom of the bag should have a cheerful multi row puff texture in 5 pastel colors: periwinkle at the base, then green, pink, yellow, lavender at the top. This section adds approximately 2.5 to 3 inches in height.
Section 6: Handle Construction
Each handle is a braided rope attached at 4 points on the top edge.
For each handle, cut 18 strands of Color A (or a mix of Colors A, B, and C for a pastel braided effect), each strand measuring 60 inches long.
Divide into 3 groups of 6 strands each. Fold all strands in half so each working group is now 30 inches long and doubled. Braid tightly and evenly for the full working length. Knot at each end to secure. Trim ends neatly.
Each finished handle should be approximately 22 to 24 inches long when braided, which gives a comfortable shoulder carry drop of approximately 11 to 12 inches when attached.
Make 2 handles.
Handle Attachment: Position the first handle on the front and back of the bag, centered on each panel. Place attachment points approximately 3.5 inches from each side edge.
Thread yarn needle with a length of Color A. Fold the knotted end of the handle over the top edge of the bag by approximately 1 inch. Whipstitch the folded end firmly to the inside of the bag at the attachment point, going through multiple layers at least 10 to 12 times. Reinforce with a second pass. Repeat for all 4 attachment points.
For additional stability, work a row of single crochet directly over the attachment point on the inside, encasing the handle end in crochet. This is strongly recommended for a bag that will carry weight.
Section 7: Crocheted Bead and Tassel
The crocheted bead is a small stuffed sphere worked in Color G.
Crocheted Bead:
With Color G and J hook, make a magic ring.
Round 1: 6 single crochet into magic ring. (6 sc)
Round 2: 2 single crochet in each stitch around. (12 sc)
Round 3: Single crochet in next stitch, 2 single crochet in next stitch repeat around. (18 sc)
Round 4: Single crochet in each stitch around. (18 sc)
Round 5: Single crochet in next stitch, single crochet 2 together repeat around. (12 sc)
Round 6: Single crochet 2 together around. (6 sc)
Stuff the bead lightly with yarn scraps or fiberfill. Fasten off leaving a long tail. Thread tail through the 6 remaining stitches and pull tight to close. Weave in ends.
Tassel:
Cut approximately 60 strands of Color H, each 12 inches long. Bundle all strands together and fold in half to create a tassel approximately 6 inches long.
Cut a 16 inch length of Color G. Wrap it tightly around the folded bundle approximately 0.75 inch below the top fold, winding 8 to 10 times. Thread the wrapping strand through itself to secure. Leave 8 inches for attaching the crocheted bead.
Thread the long tail from the crocheted bead through the fold at the top of the tassel. Pull the bead down to sit just above the wrapped portion. Stitch the bead in place using the tail, wrapping around the neck of the tassel and through the bead a few times. Secure with a knot and weave in.
Attach the tassel to one handle at the point where that handle meets the top left corner of the bag front by looping a strand of Color A through the top fold of the tassel and through a stitch at the handle junction, then knotting securely.
Trim tassel ends evenly with scissors.
Finishing and Blocking Your Tote Bag
Weave in all yarn ends thoroughly using a yarn needle. Work tails back through at least 1 to 2 inches of stitches in two directions to prevent unraveling.
Wet blocking is recommended for cotton yarns. Submerge the finished bag in cool water, gently squeeze out excess water without wringing, then reshape on a flat surface to the finished dimensions. Use blocking mats and pins to hold the walls straight and the base flat while drying. Allow to dry completely before handling.
Optional Fabric Lining
Cut two pieces of fabric each measuring 14 inches wide by 14 inches tall, and one base piece 14 inches wide by 5.5 inches tall. Sew the two side pieces to the base piece along the long edges with right sides together, using a 0.5 inch seam allowance. Sew side seams together. Fold the top edge over by 0.75 inch and press. Insert lining into bag with wrong side of lining facing wrong side of bag. Slipstitch lining to the inside of the top edge, just below the stripe band, using a sewing needle and matching thread. Install a magnetic snap closure centered on front and back lining panels before inserting, if desired.
Size Customization Tips
Want to make this tote bigger or smaller? Here are some guidelines.
To make the bag wider: Add stitches to the starting chain in multiples of 3 to maintain the cluster chain 1 repeat. Each additional 6 chains adds approximately 1.5 inches of width. Adjust the number of clusters in the mesh rounds accordingly.
To make the bag taller: Add more mesh rounds in Section 3. Two additional mesh rounds add approximately 1.25 inches of height.
To make the bag shorter: Reduce the number of mesh rounds. The minimum recommended for a functional tote is 10 mesh rounds.
Care Instructions
Machine wash on a gentle cycle in cool water, or hand wash. Lay flat to dry. Do not tumble dry, iron, or bleach. Cotton yarns may be lightly steamed with a garment steamer held at a distance if the bag loses its shape after use.
Tips for Success with This Beginner Friendly Crochet Pattern
Even though this is an intermediate pattern, keeping a few things in mind will help you succeed.
Use stitch markers generously. Mark your corners, mark the beginning of your rounds, mark anything that helps you keep track.
Count your stitches at checkpoints. The pattern includes checkpoint notes for a reason. Taking two minutes to count can save you hours of frogging.
Practice your puff stitches first. Work a small swatch of puff stitches before tackling the border. Getting consistent tension makes a huge difference in the finished look.
Don’t pull your color changes too tight. When switching colors, maintain the same tension you’ve been using. Tight joins create puckers.
Block before attaching handles. Wet blocking your bag body before adding the handles ensures everything is squared up properly.
Thank you so much for choosing this pattern for your next project. I genuinely love how this bag comes together, and I hope you do too. If you make one, I would absolutely love to see it. Tag me on Instagram or share a photo on Facebook so I can admire your work.
If this pattern caught your eye, go ahead and save it to your Pinterest boards so you can find it easily when you’re ready to start. And please leave a comment below if you make this bag. I love hearing which color combinations you choose and seeing how each maker puts their own spin on the design. Happy crocheting!
