
I don’t know about you, but I’ve always been drawn to wearable pieces that make a statement without saying a word. Something that catches the light, turns heads at a farmers market, and makes you feel like you’re wrapped in actual art.
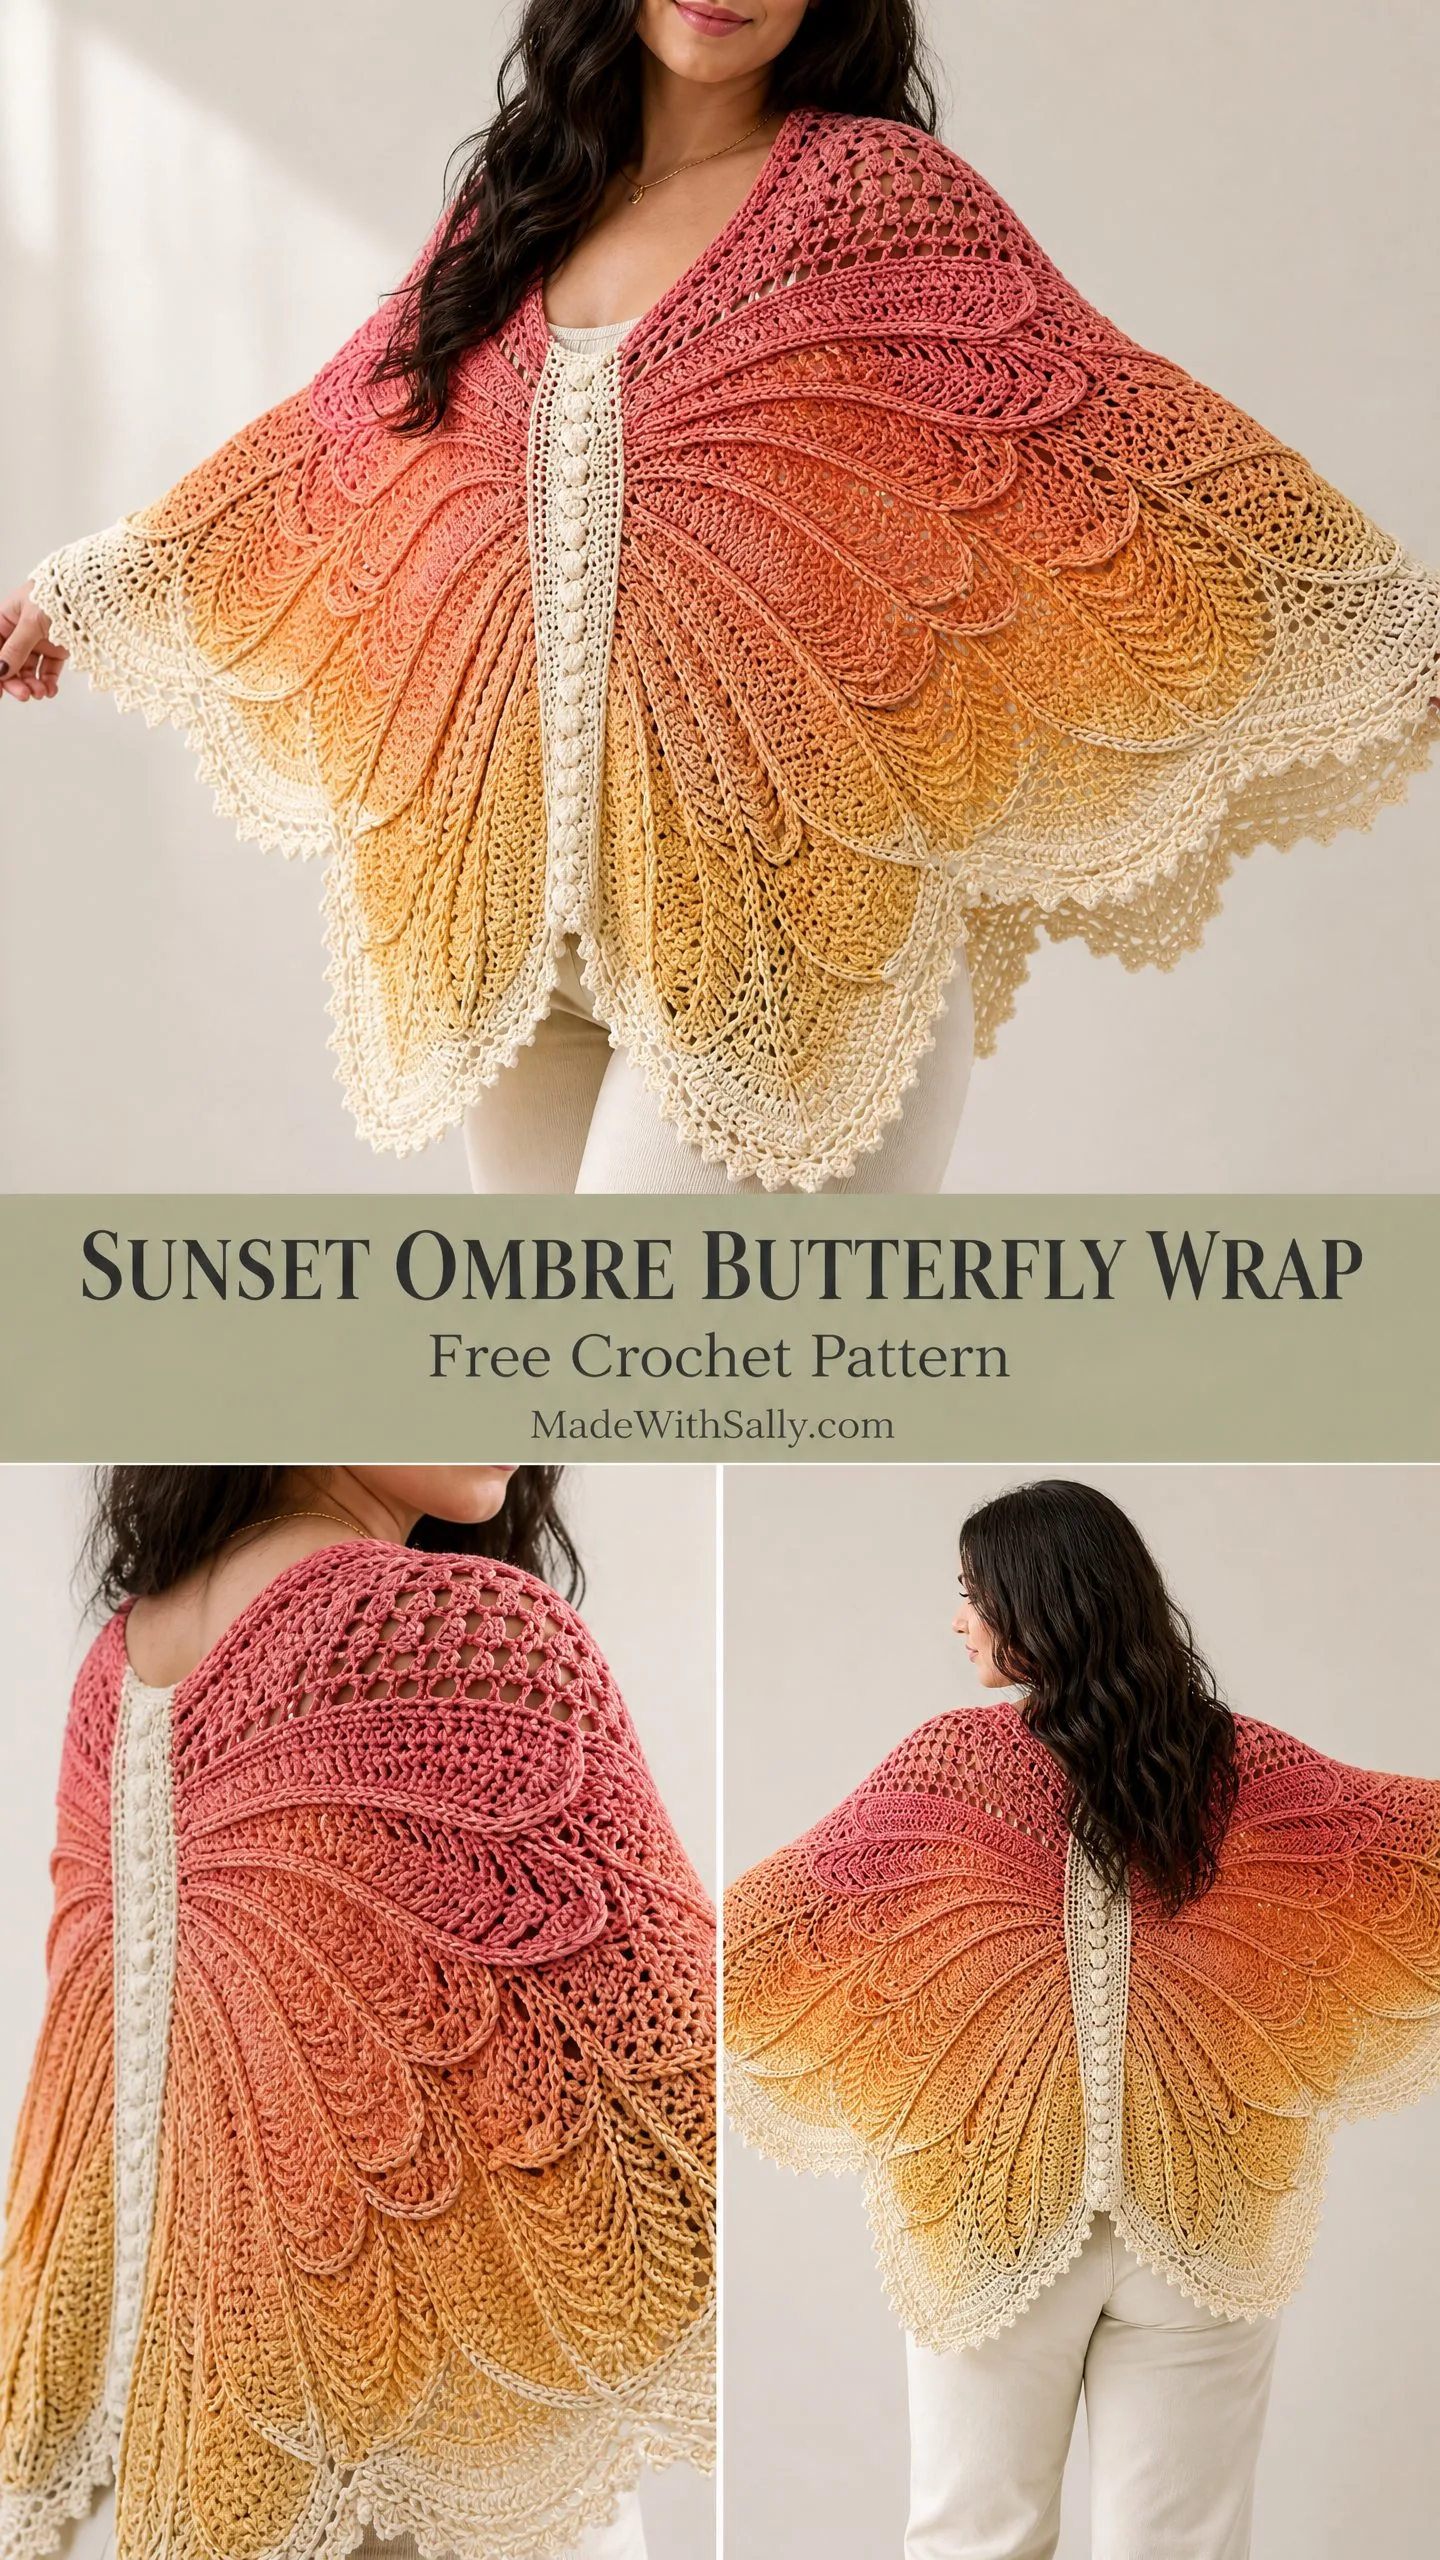
This butterfly wrap delivers all of that and more. The gradient color shift from deep rose down through coral, peach, golden yellow, and cream creates a sunset effect that looks far more complicated than it actually is. When you spread your arms, those wing panels fan out in the most dramatic way.
The construction is surprisingly straightforward once you understand the rhythm. You’re working top down in one flat piece, no seaming required. The feather and fan stitch creates those gorgeous radiating petal textures you see in the finished wrap. If you’ve tackled a lace shawl before, you’ve absolutely got the skills for this project.
About This Butterfly Wrap Crochet Pattern
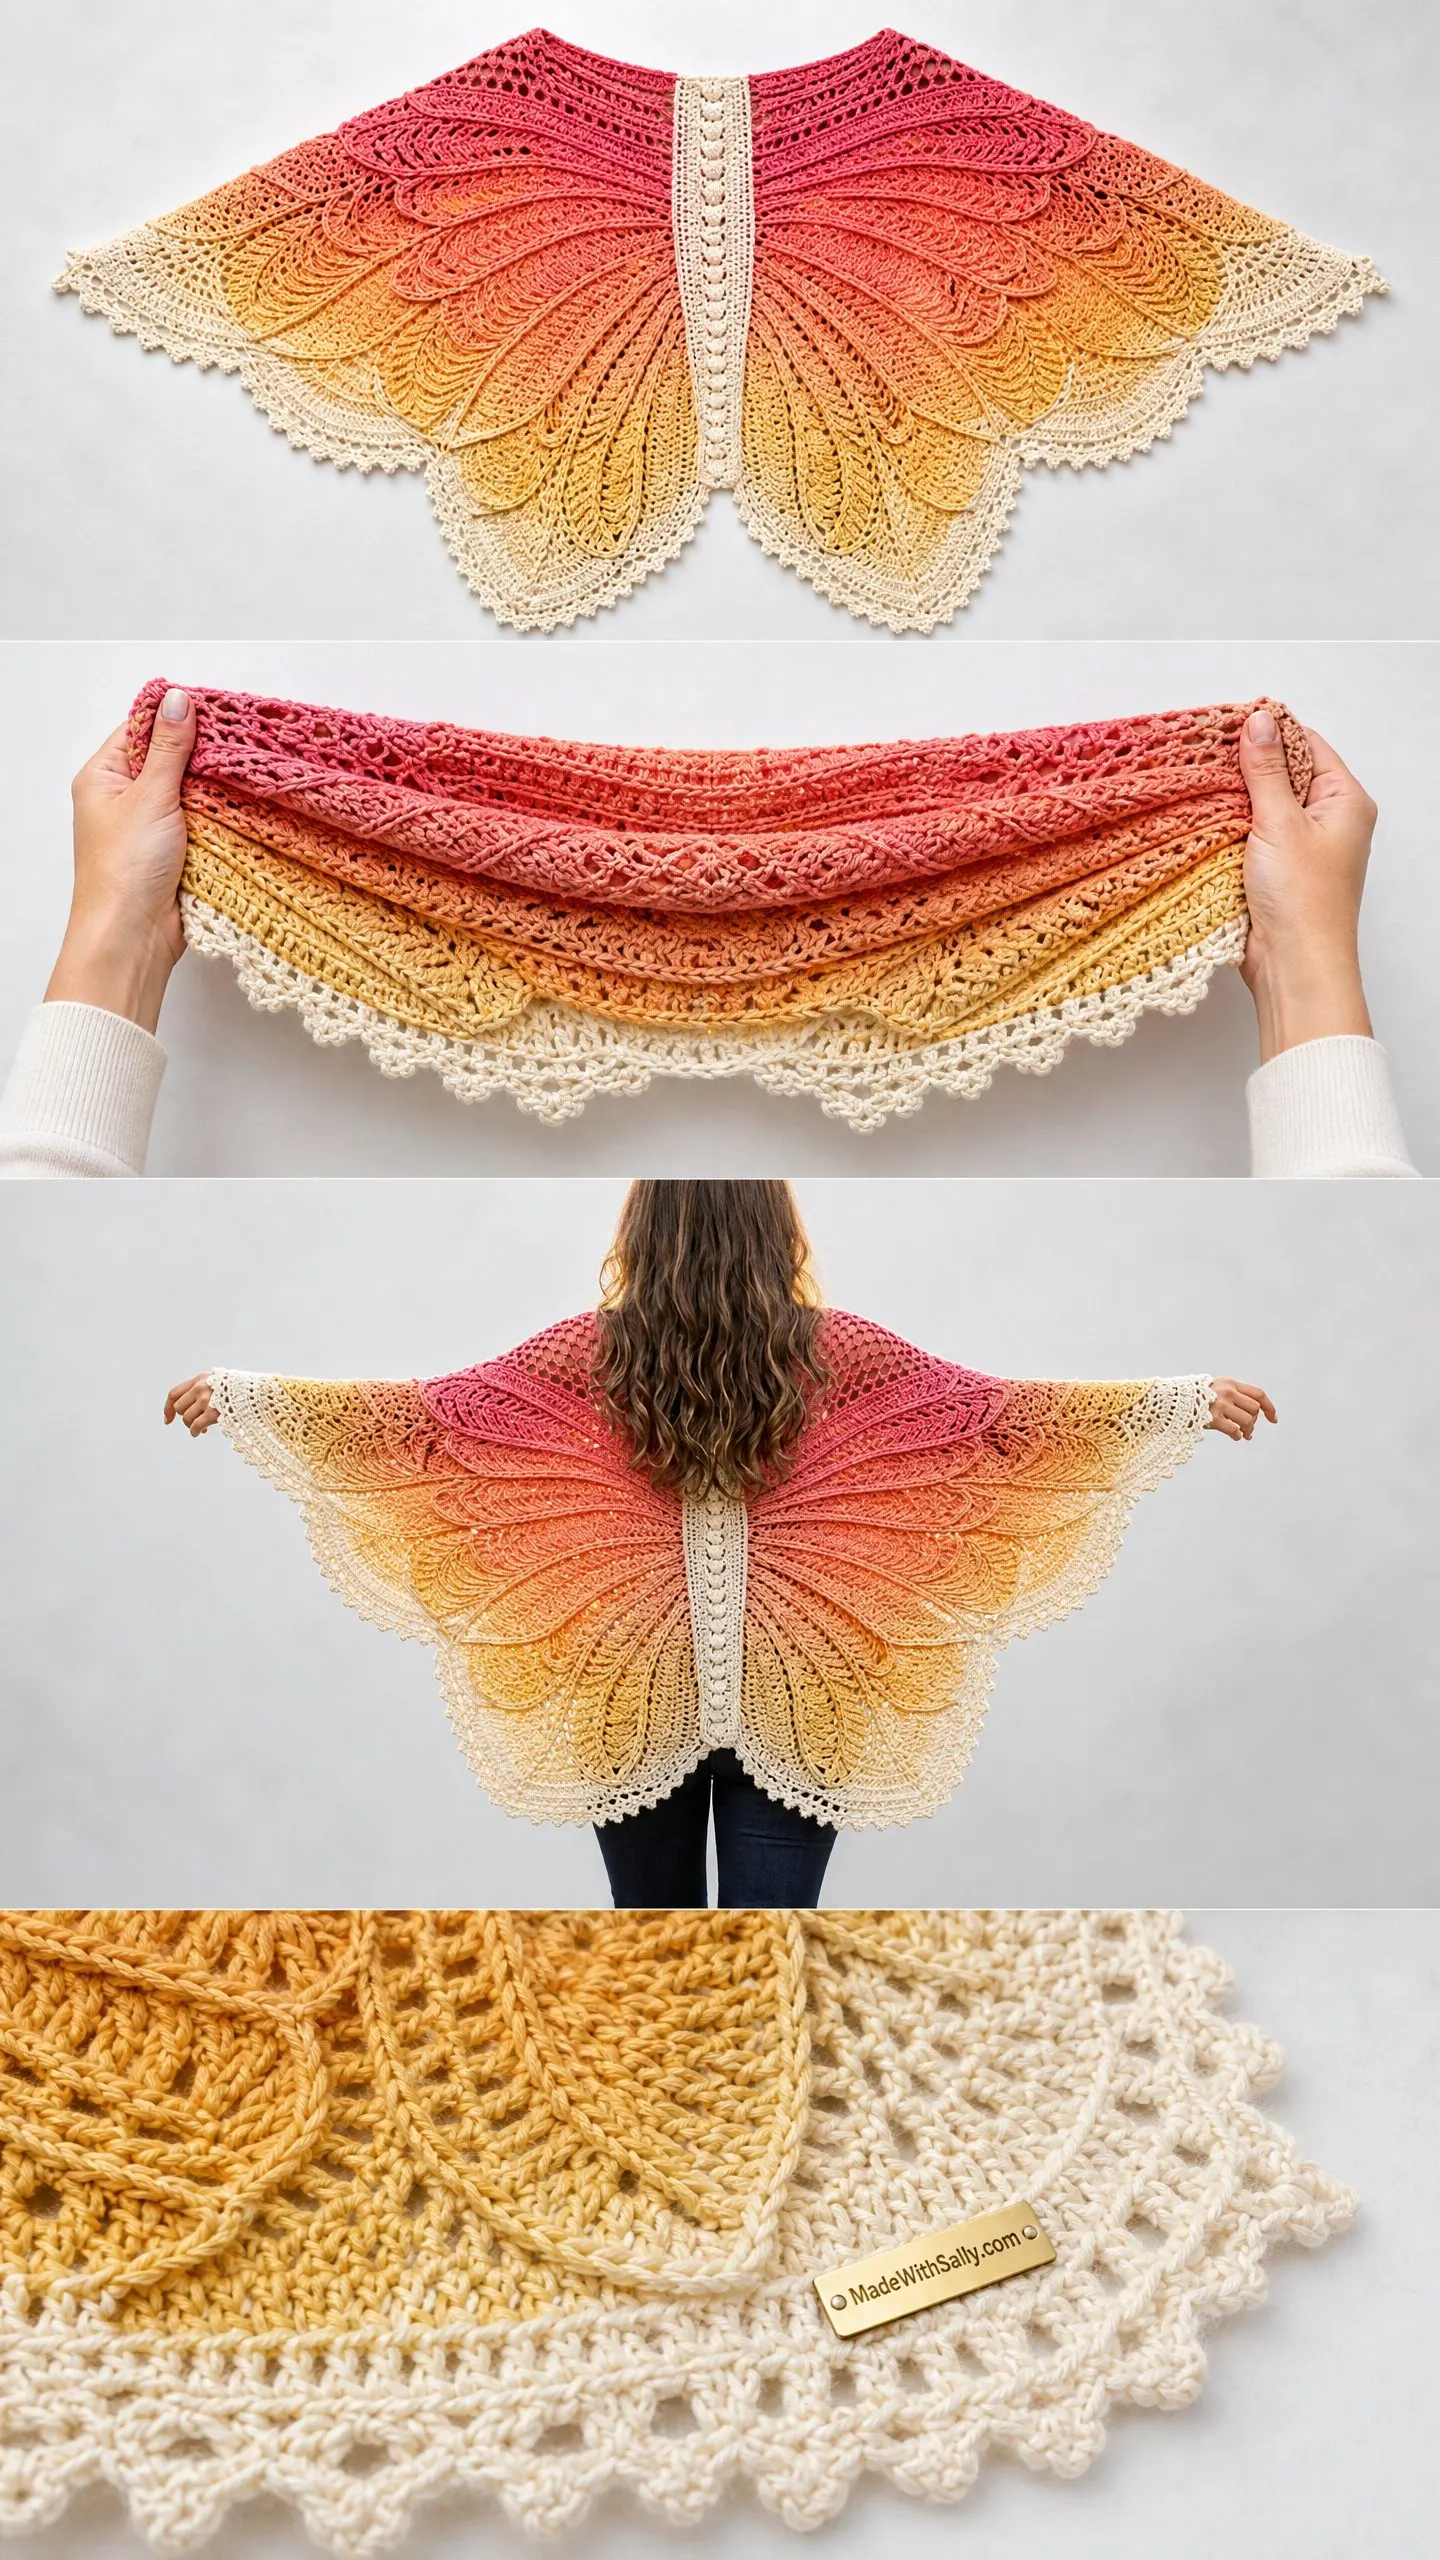
This wearable art piece drapes from your shoulders and fans open into two symmetrical wing panels on each side. The radiating stitch motifs create a layered, petal-like texture that’s visible from both front and back. A central spine of decorative picots runs vertically down the back center, dividing the two wings beautifully.
The wrap works up in DK weight yarn with a gorgeous gradient colorway. You can use a single gradient cake for seamless color transitions, or work with five separate skeins if you prefer more control over the color placement.
Finished measurements: The wingspan stretches approximately 68 inches (173 cm) from tip to tip. The length from the top of the neckline to the hem at center back measures approximately 28 inches (71 cm). These dimensions reflect the blocked piece.
Skill level: Advanced intermediate. You’ll need familiarity with working long foundation rows, managing large stitch counts, and executing the feather and fan stitch repeat consistently. If you’re comfortable with lace shawls and top-down garment construction, you can absolutely tackle this within a weekend to two weeks.
Time estimate: Approximately 20 to 35 hours total, depending on your working speed.
Materials You’ll Need
Yarn: Approximately 1200 to 1400 yards (1097 to 1280 meters) of DK weight yarn (CYCA 3 Light) in a gradient colorway.
If working with a single gradient cake, look for approximately 1300 yards.
If working with separate skeins, you’ll need:
Hooks:
Additional materials:
Yarn Suggestions
Paintbox Yarns Simply DK in a gradient set (Rose, Coral, Peach, Banana Cream, Paper White). This is 100 percent acrylic with excellent stitch definition. Each skein is 137 yards, so purchase 2 skeins of each color.
WeCrochet Chroma DK comes in gradient cake format with approximately 1260 yards per cake. The 70 percent superwash wool and 30 percent nylon blend blocks beautifully. One cake in a sunset colorway is sufficient.
Lion Brand Pound of Love in coordinated tones (Dusty Pink, Peach, Banana, Vanilla) offers 1020 yards per skein. It’s 100 percent premium acrylic and machine washable.
Avoid very fuzzy or heavily textured yarns. They’ll obscure the beautiful feather and fan detail you’re working so hard to create.
Gauge
18 stitches and 10 rows = 4 inches (10 cm) in the feather and fan pattern, blocked, using US G-6 / 4.0 mm hook and DK weight yarn.
To make a gauge swatch, chain 40 and work the feather and fan stitch pattern for 14 rows. Fasten off, wet block the swatch, and measure the center 4 inches once dry.
Gauge matters here. Going up half a hook size adds approximately 4 to 6 inches to your wingspan.
Abbreviations
Before we dive in, let me walk you through every abbreviation you’ll encounter:
Special Stitches
Feather and Fan Unit
This stitch creates the radiating petal appearance that defines the entire wrap. It’s worked over a multiple of 18 stitches plus 2 edge stitches.
Step 1: Work a 3-dc cluster over the next 3 stitches: yo, insert hook in next st, yo, pull up a loop, yo, pull through 2 loops. Repeat this in the next 2 stitches, then yo and pull through all 4 loops on hook. This is your decrease portion.
Step 2: Ch 2, skip 0 stitches (the cluster sits over the base stitches), dc in next stitch.
Step 3: (dc in next st, ch 1) 5 times, dc in next st. This is the fan or increase portion that creates the beautiful open lattice.
Step 4: Work another 3-dc cluster over the next 3 stitches to close the fan.
Picot
Ch 3, sl st in the 3rd chain from hook. This creates a small decorative knot used in the border and along the center spine.
Shell
(dc, ch 1, dc, ch 1, dc) all in the same stitch or space. Used in the border edging.
V-Stitch (V-st)
(dc, ch 2, dc) all in the same stitch or space. Used in the yoke mesh section.
Increase Fan (inc-fan)
Work (dc, ch 1) 5 times then dc all into the same stitch or space. That’s 6 dc total with 5 ch-1 spaces between them.
Pattern Notes
Read through these before starting. Trust me, it’ll save you from frogging later.
1. The wrap is worked from the top down, beginning at the center back neckline.
2. Four increase points are maintained throughout: the far left edge, the junction between the left wing and center spine, the junction between the right wing and center spine, and the far right edge. You’ll add 8 stitches every RS row (2 at each point).
3. The center spine runs vertically from neckline to hem and visually separates the two wings.
4. The yoke (approximately the first 10 rows) uses a V-stitch mesh pattern for the open lacework at the shoulder area.
5. The main body (rows 11 through 56) uses the feather and fan pattern.
6. Color transitions if using separate skeins:
To change color, work the last stitch until 2 loops remain on hook, then draw the new color through both loops.
7. WS rows are worked even with no increases.
8. Place stitch markers at all four increase points and move them up as you work.
9. All rows are turned at the end. Ch 3 counts as first dc throughout.
Step by Step Crochet Pattern Instructions
Yoke Section (Rows 1 through 10, Color A)
Foundation: With Color A and G-6 hook, chain 78.
Row 1 (RS): Dc in 4th ch from hook (ch-3 counts as first dc). Dc in each ch across. Turn. (76 dc)
Row 2 (WS): Ch 3 (counts as dc), dc in next 2 sts, ch 2, sk 2 sts, (V-st in next st, ch 1, sk 2 sts) 23 times, V-st in next st, ch 2, sk 2 sts, dc in last 3 sts. Turn. (24 V-sts, plus 6 edge dc)
Place stitch markers in the two ch-2 spaces near each edge. These mark your future increase junction points.
Row 3 (RS): Ch 3 (counts as dc), dc in next 2 dc, (3 dc in ch-2 sp, V-st in ch-2 sp of next V-st, ch 1) across to last edge section, 3 dc in final ch-2 sp, dc in last 3 sts. Increase 8 sts evenly across (2 sts at each marker point). (84 sts)
Row 4 (WS): Work even in V-st mesh pattern. (84 sts)
Row 5 (RS): Increase 8 sts at 4 marker points. (92 sts)
Row 6 (WS): Work even. (92 sts)
Row 7 (RS): Increase 8 sts at 4 marker points. (100 sts)
Row 8 (WS): Work even. (100 sts)
Row 9 (RS): Increase 8 sts at 4 marker points. (108 sts)
Row 10 (WS): Work even in V-st mesh. Transition to Color B at final yo of last st if using separate skeins. (108 sts)
Checkpoint: The piece should measure approximately 4 inches (10 cm) from foundation edge and span approximately 24 inches (61 cm) across.
Body Section (Rows 11 through 56, Colors B through E)
Now we introduce the feather and fan pattern. The stitch repeat is 18 stitches, and at row 11 your 108-stitch count divides evenly into 6 complete repeats.
Row 11 (RS, Color B): Ch 3 (counts as dc).
Edge: dc in first 2 sts.
Feather and fan sequence: (dec-cl over next 3 sts, ch 2, dc in next st, (ch 1, dc in next st) 5 times, ch 2, dec-cl over next 3 sts) 5 times, dec-cl over next 3 sts, ch 2, dc in next st, (ch 1, dc in next st) 5 times, ch 2, dec-cl over next 3 sts.
Edge: dc in last 2 sts.
At the two center-spine markers, work an additional (ch 2, dc, ch 2) cluster. At the two edge markers, work 2 dc instead of the standard dec-cl. (116 sts)
Row 12 (WS): Ch 3, dc in each st and ch-1 sp across. Do not dc into the larger ch-2 spaces at spine junctions; instead ch 2 over those. (116 sts)
Continue the feather and fan pattern with increases at 4 marked positions on every RS row:
Rows 13-22: Continue pattern as established.
Checkpoint after Row 22: Piece should measure approximately 10 to 11 inches (25 to 28 cm) from neckline. Wingspan should be approximately 35 inches (89 cm).
Rows 23-34 (Color C):
Checkpoint after Row 34: Piece should measure approximately 15 to 16 inches (38 to 41 cm). Wingspan should be approximately 46 inches (117 cm).
Rows 35-46 (Color D):
Checkpoint after Row 46: Piece should measure approximately 21 to 22 inches (53 to 56 cm). Wingspan should be approximately 57 inches (145 cm).
Rows 47-56 (Color E):
Final checkpoint: Piece should measure approximately 27 to 28 inches (69 to 71 cm) from neckline. Wingspan should be approximately 65 to 66 inches (165 to 168 cm) before border.
Border
The border consists of two passes in Color E.
Border Round 1 (foundation): With RS facing, join yarn at bottom right corner of right front edge. Ch 1.
Right front edge: Sc evenly up the right front edge, approximately 1 sc per row end (approximately 56 sc). Place marker at top right corner.
Neckline: Sc across the foundation chain edge (76 sc). Place markers at each top corner.
Left front edge: Sc evenly down (approximately 56 sc). Place marker at bottom left corner.
Hem: Sc across the lower hem, working 1 sc into each st and each ch-1 sp (approximately 292 sc). Work 3 sc into each corner wingtip. Sl st to first sc. (Approximately 482 sc total)
Border Round 2 (picot-shell edging): With RS facing, sl st to first sc of right front edge.
Shell-picot sequence: (sk 2 sc, shell in next sc, sk 2 sc, sc in next sc) around entire perimeter.
At the neckline: (sc in next sc, picot, sc in next sc) across.
At each wingtip corner: work 2 shells separated by a picot.
Continue up the left front edge to mirror the right. Sl st to first st to close. Fasten off.
Center Spine Picot Column
This decorative element is added after the main body is complete.
With Color E and your crochet hook, work a surface slip stitch chain along the center spine ch-2 spaces from neckline to hem.
Insert hook into first spine ch-2 sp at neckline, draw up a loop of Color E, (ch 3, sl st in 3rd ch from hook to form picot, sl st into next spine ch-2 sp) down the entire column. Fasten off. Repeat on the opposite face.
Size Customization Tips
To make smaller: Work fewer body rows, stopping when you reach desired length. Each pair of rows adds approximately 0.5 inch (1.3 cm) in length and 0.9 inch (2.3 cm) in wingspan.
To make larger: Continue feather and fan rows beyond Row 56. Budget approximately 50 additional yards per color section.
To adjust width: Increase the starting foundation chain by a multiple of 18 for each additional feather and fan repeat.
Finishing and Blocking
Weave in all yarn ends securely, at least 2 inches in one direction then back. Trim close.
Wet blocking is strongly recommended:
1. Submerge the wrap in cool water with gentle wool wash. Press gently to saturate. Do not wring.
2. Roll in a clean dry towel and press firmly to remove excess water.
3. Lay on blocking mats, RS up. Pin the center neckline first, then the two front edges. Pin the wingtips out to the full 68-inch span. Pin the hem edge, gently stretching the scallops.
4. Allow to dry completely, 12 to 24 hours.
5. Remove pins. Your feather and fan pattern should now be fully open and gorgeous.
Care Instructions
For superwash wool or wool-blend: Hand wash in cool water with gentle wool wash. Lay flat to dry.
For acrylic or acrylic blend: Machine wash on gentle cycle in a mesh bag. Tumble dry on low or lay flat.
Do not hang to dry. Do not iron directly. Store folded flat or rolled.
I hope you love making this butterfly wrap as much as I loved designing it. The moment you spread your arms and see those wings fan out in all their sunset glory, you’ll know every stitch was worth it.
If this pattern caught your eye, go ahead and save it to your Pinterest boards so you can find it when you’re ready to cast on. And please, if you make one, drop a comment below or tag me on social media. I absolutely love seeing your finished projects and hearing which colorways you chose. Happy crocheting!
