
I call this one "The Tiny Turtle Top," and honestly, it has been living rent-free in my head since I first sketched it out two years ago. Back then, I was deep in a Pokemon phase (again) and kept thinking about how cute it would be to wear Squirtle instead of just collecting plushies of him. The notebook page with my original scribbles is still tucked into my yarn stash somewhere, covered in question marks and crossed-out stitch counts.
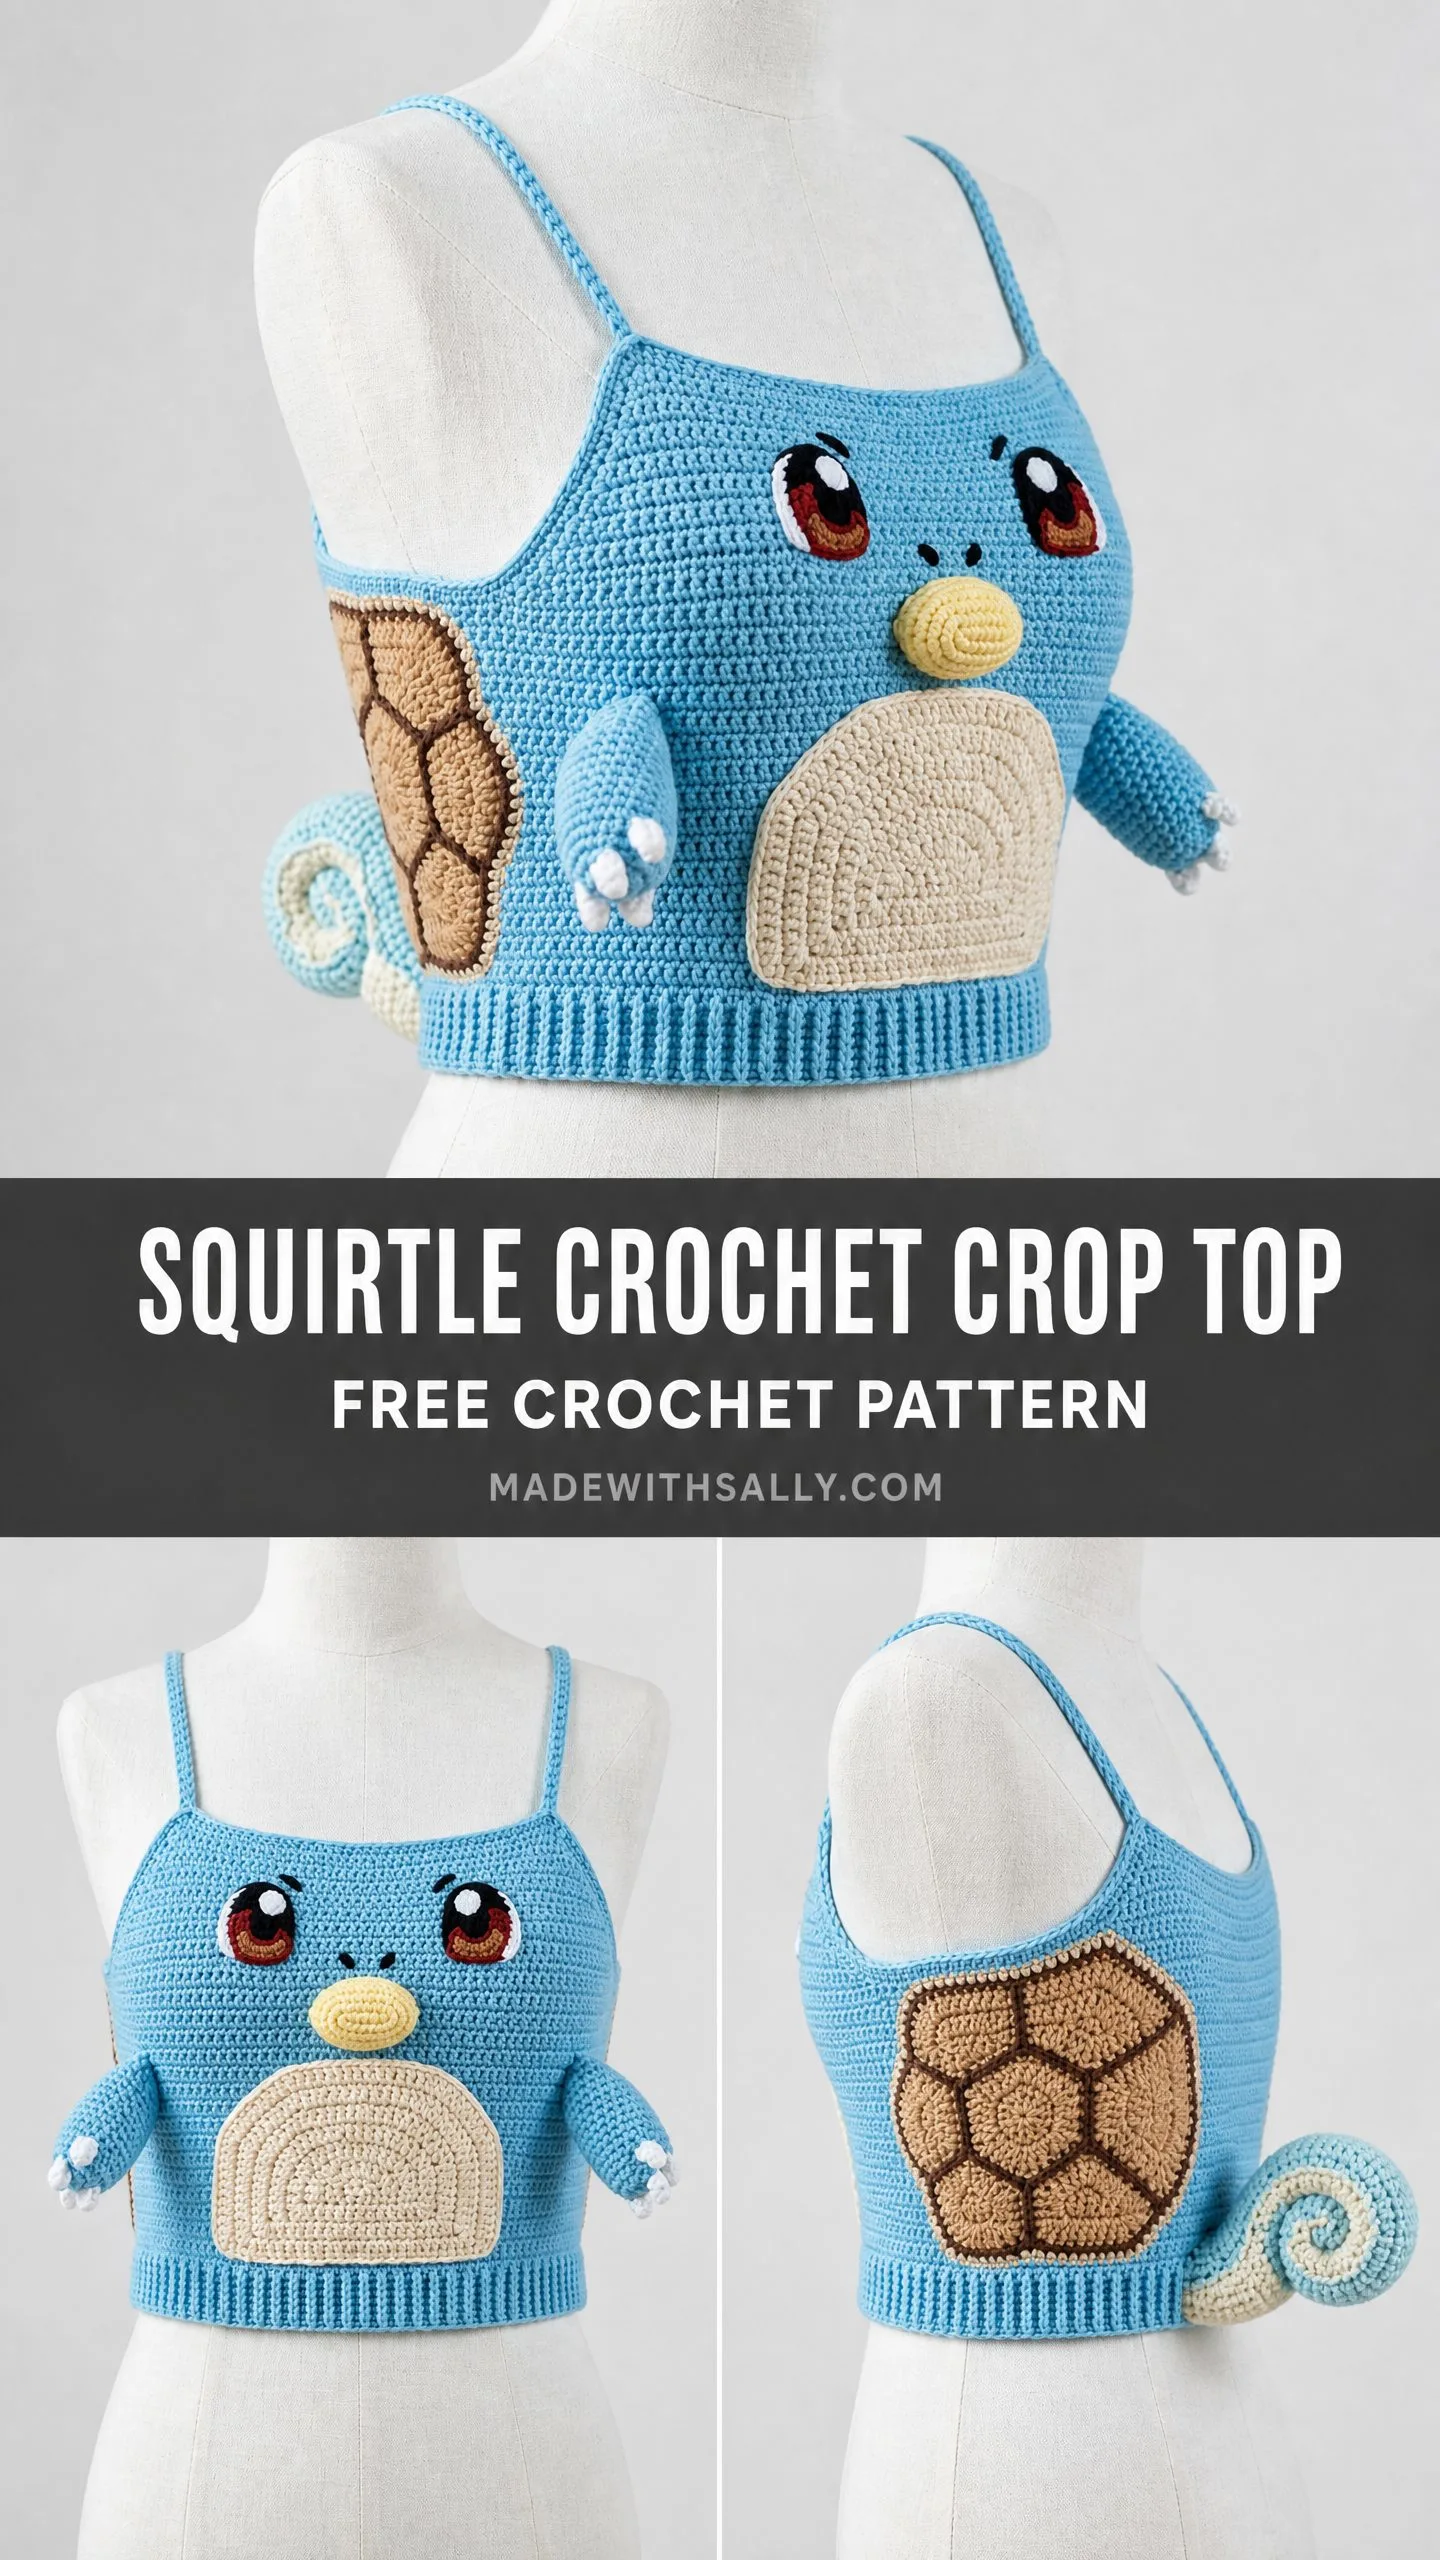
What started as a silly idea became one of my most beloved makes. I designed this crop top to capture all of Squirtle’s charm, complete with his sweet face, that iconic shell pattern, those stubby little arms, and yes, the curly tail that wraps around the side. Every time I wear it, someone asks where I got it. The answer is always the same: I made it myself, and now you can too.
This is not a quick weekend project. It is a labor of love that takes around 25 to 40 hours depending on your pace. But every single hour is worth it when you slip this over your head and become the coolest Pokemon trainer at any convention, party, or grocery store run.
About This Crochet Pattern
This Squirtle crochet crop top pattern is rated intermediate to advanced. You will need experience working flat panels, seaming pieces together, creating colorwork, doing surface embroidery for facial details, and constructing multiple three-dimensional applique pieces. If you have made garments before and dabbled in amigurumi, you have got this.
The construction is simpler than the finished piece looks. You will make two flat rectangular panels for the front and back body, join them at the sides, add thin spaghetti straps, then attach all the fun stuff: the face, belly patch, shell panels, arms, and that adorable curled tail. The magic happens in the applique work.
The base pattern fits a size Small/Medium, designed for a 32 to 36 inch bust with approximately 12 to 13 inches of ease. The finished garment measures about 28 inches around at the hem and 7 inches from hem to underarm. Size customization tips are included at the end.
Materials You Will Need
Gather your supplies before diving in. Nothing kills momentum like realizing you are out of the right color halfway through.
Yarn (all worsted weight):
Hooks:
Additional supplies:
Yarn recommendations: Lion Brand Pound of Love works beautifully and is budget-friendly. Paintbox Yarns Simply DK at a tighter gauge gives excellent stitch definition. For a splurge, Cascade 220 Superwash adds lovely drape and holds its shape. Avoid fuzzy or textured yarns because your applique details will get lost.
Gauge
16 stitches and 18 rows = 4 inches (10 cm) in single crochet using the H-5 hook.
Please do not skip this step. I know swatching feels tedious, but gauge matters enormously for garments. Even half a stitch difference over 4 inches multiplies across 70 stitches and will throw off your entire fit. Swatch it, block it, measure it, then start.
Abbreviations and Stitch Definitions
Let me walk you through every stitch you will encounter.
ch chain: Yarn over, pull through the loop on your hook. This creates your foundation.
sl st slip stitch: Insert hook, yarn over, pull through both the stitch and the loop on your hook in one motion. Used for joining and surface work.
sc single crochet: Insert hook into the stitch, yarn over and pull up a loop (two loops on hook), yarn over and pull through both loops. Your bread and butter stitch for this entire project.
hdc half double crochet: Yarn over, insert hook, pull up a loop (three loops), yarn over and pull through all three.
dc double crochet: Yarn over, insert hook, pull up a loop, yarn over and pull through two loops, yarn over and pull through remaining two loops.
sc2tog single crochet two together (decrease): Insert hook in first stitch, pull up a loop, insert hook in next stitch, pull up a loop (three loops on hook), yarn over and pull through all three. This decreases your stitch count by one.
inc increase: Work two single crochets into the same stitch.
BLO back loop only: Instead of inserting your hook under both loops of the V, insert it only under the back loop. Creates a ribbed texture.
RS right side: The side that faces outward when worn.
WS wrong side: The inside of the garment.
Special Techniques
Ribbing Stitch: Work single crochet in the back loop only across every row. This creates stretchy ridges that mimic knitted ribbing. All hem bands and strap edges use this technique.
Surface Slip Stitch: With right side facing and yarn behind the work, insert your hook from front to back through the fabric. Pull up a loop of the new color, then work slip stitches across the surface to create raised outlines. Keep your tension relaxed to avoid puckering. This is how you will create the hexagon shell pattern.
Single Crochet Join: Hold two panels with wrong sides together. Insert your hook through both layers simultaneously and single crochet through both. This creates a ridge, which you will position on the inside of the garment.
Step-by-Step Instructions
Section 1: Hem Ribbing
The hem is worked sideways first, then you pick up stitches along the long edge to build the body upward. Make two identical strips.
Hem Ribbing Strip (make 2)
Using Color A and your H-5 hook:
Row 1: Ch 9. Sc in 2nd ch from hook and in each ch across, turn. (8 sc)
Row 2: Ch 1, sc in BLO across, turn. (8 sc)
Row 3: Ch 1, sc in BLO across, turn. (8 sc)
Repeat Row 2 until your strip measures 14 inches long. This takes approximately 63 rows.
Do not fasten off. Rotate the strip 90 degrees to work along the long edge.
Checkpoint: Each ribbing strip should measure 14 inches long and about 2 inches wide.
Picking Up Stitches for the Body
With the long edge facing you and right side up, sc evenly along the long edge. Place 1 sc per row end. You should have approximately 56 sc across the 14-inch edge.
If your count is slightly off, add or skip pickup points every few inches to reach exactly 56 stitches. This becomes Row 1 of your body panel.
Section 2: Body Panels (Make 2)
Both front and back panels are worked identically at this stage.
Rows 1 through 32: Ch 1, sc in each st across, turn. (56 sc)
Work straight for 32 rows total. Fasten off on the front panel. You can fasten off on the back panel too or leave it live for seaming.
Checkpoint: Each panel should measure approximately 14 inches wide and 7 inches tall above the ribbing. Total height including the ribbing band is about 9 inches.
Section 3: Seaming the Panels
Turn both panels right sides together (wrong sides facing out). Seam only the lower 5 inches of each side edge using the single crochet join method or mattress stitch. Leave the upper portion open for the arms. The straps will bridge the front and back at the top corners.
Turn right side out when finished.
Section 4: Straps (Make 2)
Switch to your G-6 hook for a firmer texture.
Using Color A:
Row 1: Ch 5. Sc in 2nd ch from hook and in each ch across, turn. (4 sc)
Row 2: Ch 1, sc in each st across, turn. (4 sc)
Repeat Row 2 until the strap measures 11 inches long, approximately 50 rows.
Fasten off, leaving a long tail. Sew one end to the top front corner and the other end to the corresponding back corner. Try the top on or use a dress form to adjust length before securing permanently.
Section 5: Upper Trim Band
Join Color A at any point along the top opening. Ch 1, then sc evenly around the entire neckline opening. Aim for about 1 sc per row end on the sides and 1 sc per stitch across the top edges. Slip stitch to the first sc to join. Fasten off.
This gives you a clean, polished edge around the chest opening.
Applique Pieces
This is where Squirtle comes to life. Take your time with these. They are the heart of the entire design.
Squirtle Face
Using Color A and your G-6 hook:
Ch 20.
Row 1: Sc in 2nd ch from hook and in each ch across, turn. (19 sc)
Row 2: Ch 1, 2 sc in first st, sc across to last st, 2 sc in last st, turn. (21 sc)
Row 3: Ch 1, 2 sc in first st, sc across to last st, 2 sc in last st, turn. (23 sc)
Rows 4 through 11: Ch 1, sc across, turn. (23 sc)
Row 12: Ch 1, sc2tog, sc across to last 2 sts, sc2tog, turn. (21 sc)
Row 13: Ch 1, sc2tog, sc across to last 2 sts, sc2tog, turn. (19 sc)
Row 14: Ch 1, sc across, turn. (19 sc)
Fasten off with a long tail. Work one row of sc around the entire perimeter, placing 3 sc in each corner to round the shape. This creates a smooth oval.
Center the face on the front panel about 1 inch below the top edge. Pin and sew around the perimeter. You can lightly stuff it for a puffed look or leave it flat.
Squirtle Eyes (Make 2)
Using Color F and G-6 hook:
Rnd 1: Magic ring, 6 sc in ring, sl st to join. (6 sc)
Rnd 2: Ch 1, 2 sc in each st around, sl st to join. (12 sc)
Rnd 3: Ch 1, (sc in next st, 2 sc in next st) 6 times, sl st to join. (18 sc)
Rnd 4: Ch 1, sc in each st around, sl st to join. (18 sc)
Fasten off with a sewing tail.
For the eye highlights, use Color G:
Rnd 1: Magic ring, 6 sc in ring, sl st to join. (6 sc)
Fasten off. Sew one white circle onto each eye at the upper right area.
Using Color H, embroider solid pupils in the center using satin stitch or clustered French knots.
Sew both eyes onto the face, spaced about 1.5 inches apart from center to center.
Squirtle Snout
Using Color E and G-6 hook:
Rnd 1: Magic ring, 6 sc in ring, sl st to join. (6 sc)
Rnd 2: Ch 1, 2 sc in each st around, sl st to join. (12 sc)
Rnd 3: Ch 1, (sc in next st, 2 sc in next st) 6 times, sl st to join. (18 sc)
Rnd 4: Ch 1, sc in each st around, sl st to join. (18 sc)
Rnd 5: Ch 1, (sc in next 2 sts, 2 sc in next st) 6 times, sl st to join. (24 sc)
Rnd 6: Ch 1, sc in each st around, sl st to join. (24 sc)
Rnd 7: Ch 1, (sc in next 2 sts, sc2tog) 6 times, sl st to join. (18 sc)
Stuff lightly with fiberfill.
Rnd 8: Ch 1, (sc in next st, sc2tog) 6 times, sl st to join. (12 sc)
Rnd 9: Ch 1, (sc2tog) 6 times, sl st to join. (6 sc)
Fasten off and close the gap. Sew centered on the face below the eyes. Use Color H to embroider two small curved nostrils above the snout.
Belly Patch
Using Color B and H-5 hook:
Ch 14.
Row 1: Sc in 2nd ch from hook and in each ch across, turn. (13 sc)
Row 2: Ch 1, 2 sc in first st, sc to last st, 2 sc in last st, turn. (15 sc)
Row 3: Ch 1, 2 sc in first st, sc to last st, 2 sc in last st, turn. (17 sc)
Rows 4 through 8: Ch 1, sc across, turn. (17 sc)
Row 9: Ch 1, sc2tog, sc to last 2 sts, sc2tog, turn. (15 sc)
Row 10: Ch 1, sc2tog, sc to last 2 sts, sc2tog, turn. (13 sc)
Row 11: Ch 1, sc across, turn. (13 sc)
Row 12: Ch 1, sc2tog, sc to last 2 sts, sc2tog. (11 sc)
Fasten off with a tail. Work an sc border around the entire piece. Sew onto the lower center front, about 1 inch below the face.
Using Color D, embroider 2 to 3 curved lines across the belly to suggest Squirtle’s characteristic arc markings.
Shell Side Panels (Make 2)
Using Color C and G-6 hook:
Ch 14.
Row 1: Sc in 2nd ch from hook and in each ch across, turn. (13 sc)
Row 2: Ch 1, 2 sc in first st, sc to last st, 2 sc in last st, turn. (15 sc)
Row 3: Ch 1, 2 sc in first st, sc to last st, 2 sc in last st, turn. (17 sc)
Rows 4 through 11: Ch 1, sc across, turn. (17 sc)
Row 12: Ch 1, sc2tog, sc to last 2 sts, sc2tog, turn. (15 sc)
Row 13: Ch 1, sc2tog, sc to last 2 sts, sc2tog, turn. (13 sc)
Fasten off. Work an sc border around the perimeter.
Adding hexagon outlines: Using Color D and the surface slip stitch method, create hexagonal cell shapes across each shell panel. Each hexagon should span about 1 to 1.25 inches across. Arrange 4 to 6 hexagons per panel in a honeycomb pattern. Slight irregularity is charming here.
Sew one shell panel to each side of the crop top, between the side seam and back center, about 1 to 1.5 inches above the hem.
Squirtle Arms (Make 2)
Using Color A and G-6 hook:
Rnd 1: Magic ring, 6 sc in ring, sl st to join. (6 sc)
Rnd 2: Ch 1, 2 sc in each st around, sl st to join. (12 sc)
Rnds 3 and 4: Ch 1, sc in each st around, sl st to join. (12 sc)
Rnd 5: Ch 1, (sc2tog, sc in next 4 sts) 2 times, sl st to join. (10 sc)
Rnds 6 through 9: Ch 1, sc in each st around, sl st to join. (10 sc)
Stuff lightly. Flatten the open end and seam closed.
Using Color G, sew or embroider 3 small oval bumps at the rounded end for toe tips.
Sew one arm to each side of the front panel, angled slightly downward, about 1 inch to each side of the belly.
Squirtle Tail
Using Color A and G-6 hook:
Rnd 1: Magic ring, 6 sc in ring, sl st to join. (6 sc)
Rnd 2: Ch 1, 2 sc in each st around, sl st to join. (12 sc)
Rnds 3 through 5: Ch 1, sc in each st around, sl st to join. (12 sc)
Rnd 6: Ch 1, (sc2tog, sc in next 4 sts) 2 times, sl st to join. (10 sc)
Rnds 7 through 10: Ch 1, sc in each st around, sl st to join. (10 sc)
Rnd 11: Ch 1, (sc2tog, sc in next 3 sts) 2 times, sl st to join. (8 sc)
Rnds 12 through 14: Ch 1, sc in each st around, sl st to join. (8 sc)
Rnd 15: Ch 1, (sc2tog, sc in next 2 sts) 2 times, sl st to join. (6 sc)
Rnds 16 and 17: Ch 1, sc in each st around, sl st to join. (6 sc)
Rnd 18: Ch 1, sc2tog, sc in next 4 sts, sl st to join. (5 sc)
Rnd 19: Ch 1, sc in each st around, sl st to join. (5 sc)
Rnd 20: Ch 1, sc2tog, sc in next 3 sts, sl st to join. (4 sc)
Fasten off and close the tip. Stuff very lightly throughout.
Creating the curl: Wrap the tail around a pen or dowel and steam block or mist with water. Let it dry in place to set the curled shape. Alternatively, sew the tip to a point about two-thirds down the tail’s length to force a permanent curl.
Sew the open base of the tail to the left side seam at the lower edge, with the curl spiraling outward.
Finishing Touches
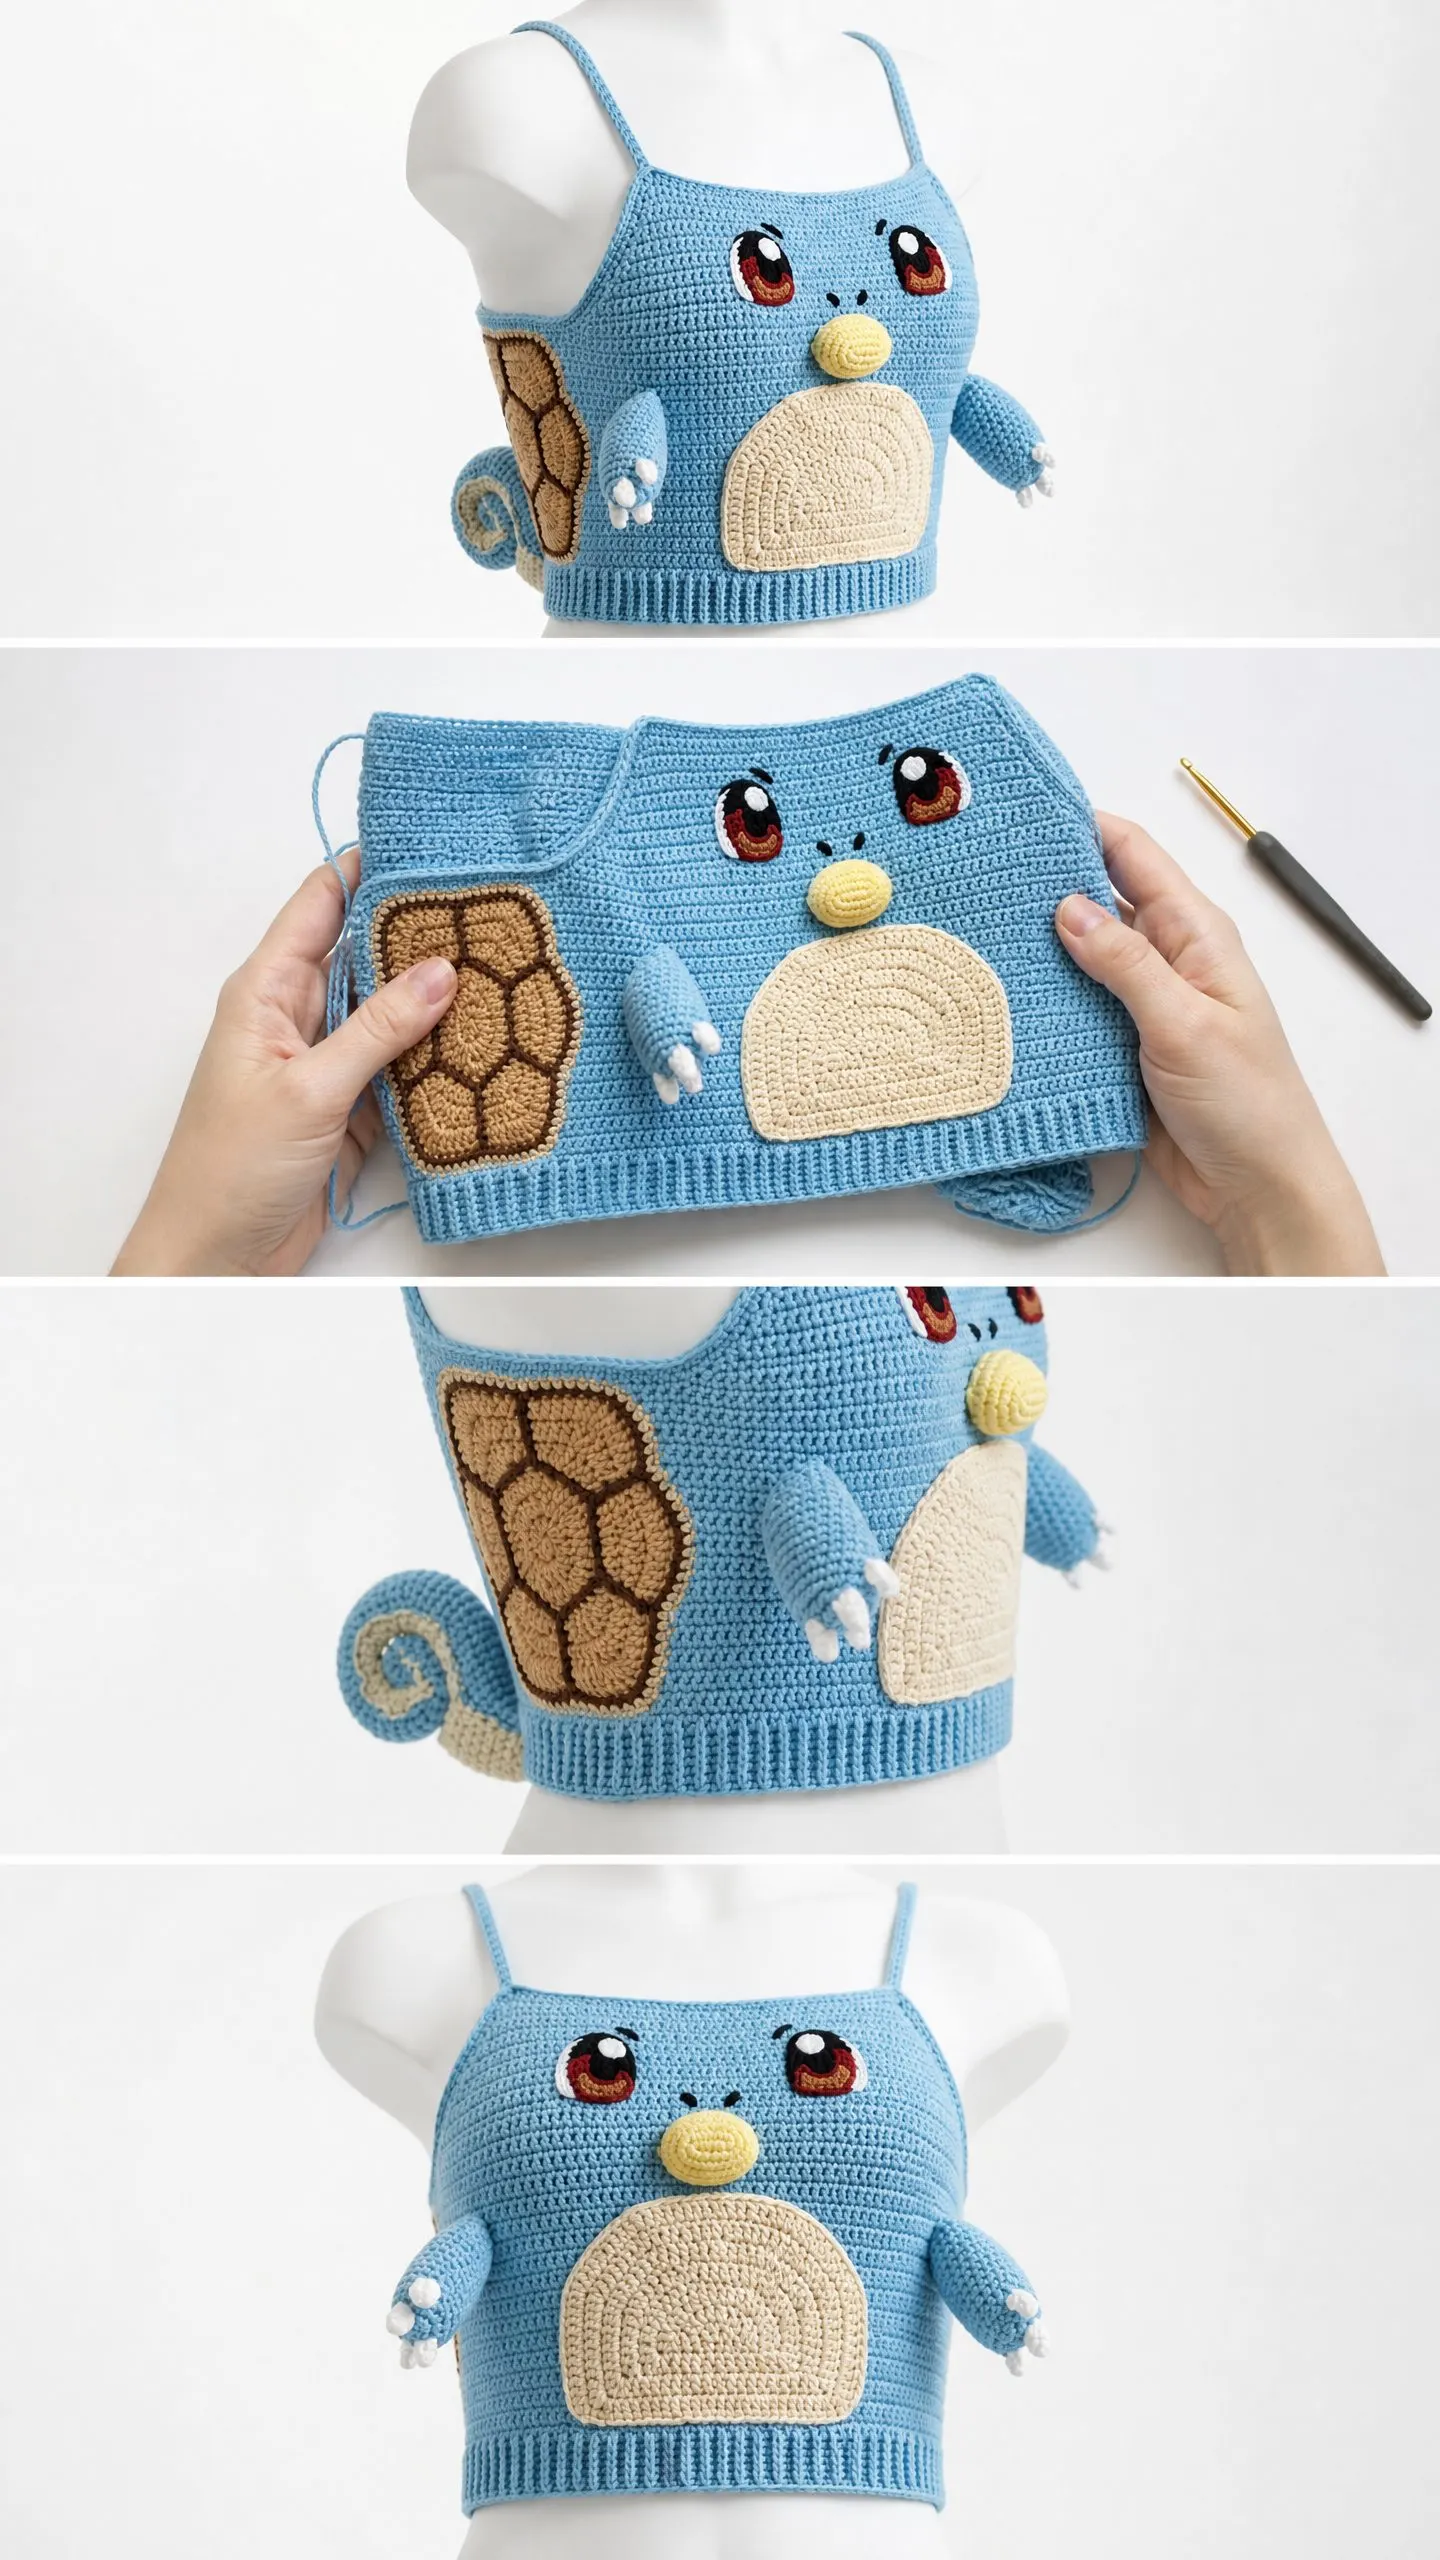
Weave in all your ends. Block the entire garment gently to even out your stitches. Take photos because you just made something incredible.
Final Thoughts on This Squirtle Crochet Crop Top Pattern
You did it. You crocheted a wearable piece of Pokemon art. This crochet pattern takes patience and attention to detail, but the payoff is a truly one-of-a-kind garment that showcases your skills and your love for a childhood favorite.
Thank you so much for choosing this pattern and trusting me to guide you through it. I cannot wait to see your versions. If you make this top, please tag me on Instagram or share a photo in my Facebook group. Seeing your finished projects genuinely makes my day.
If you loved this project, go ahead and save it to your Pinterest boards so you can find it again later. And please drop a comment below if you make your own Tiny Turtle Top. I would love to hear how it turned out for you.
