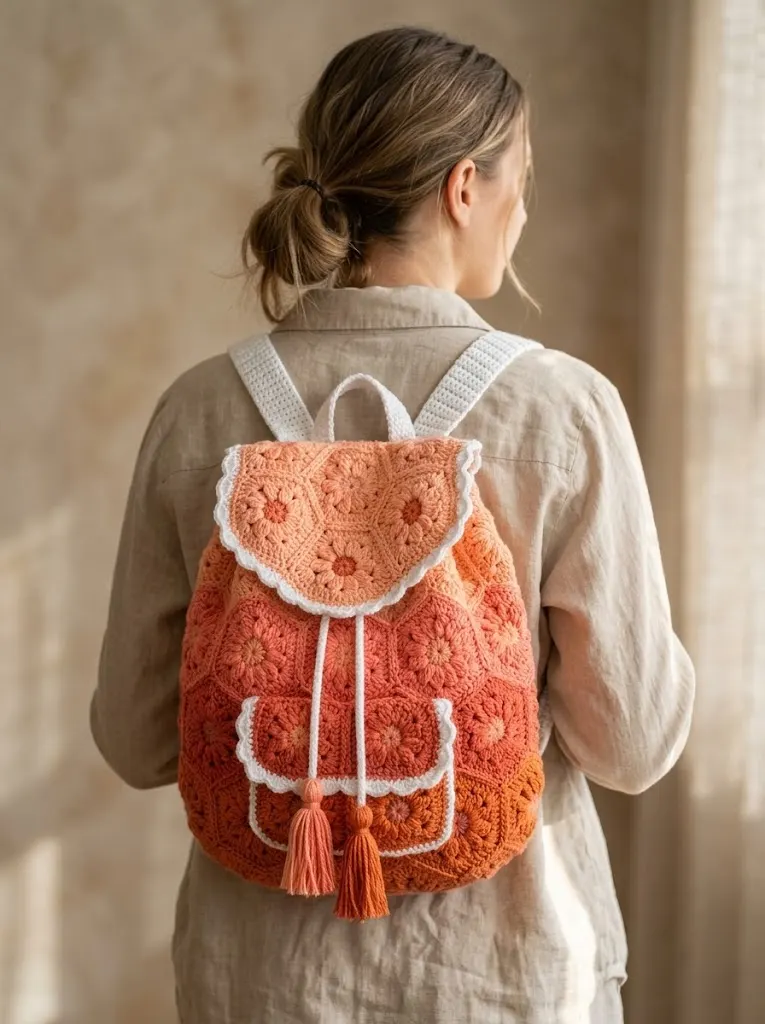
I’ve been looking for the perfect summer backpack pattern for ages, and this one finally checked every box on my list. The gradient color flow, the vintage granny square charm, the functional design. This is my favourite type of project because it combines a classic technique with a modern, wearable result. If you’ve been wanting to make a statement piece that showcases your crochet skills, this Sunset Ombre Gradient Granny Backpack is exactly what you need.
About This Crochet Pattern
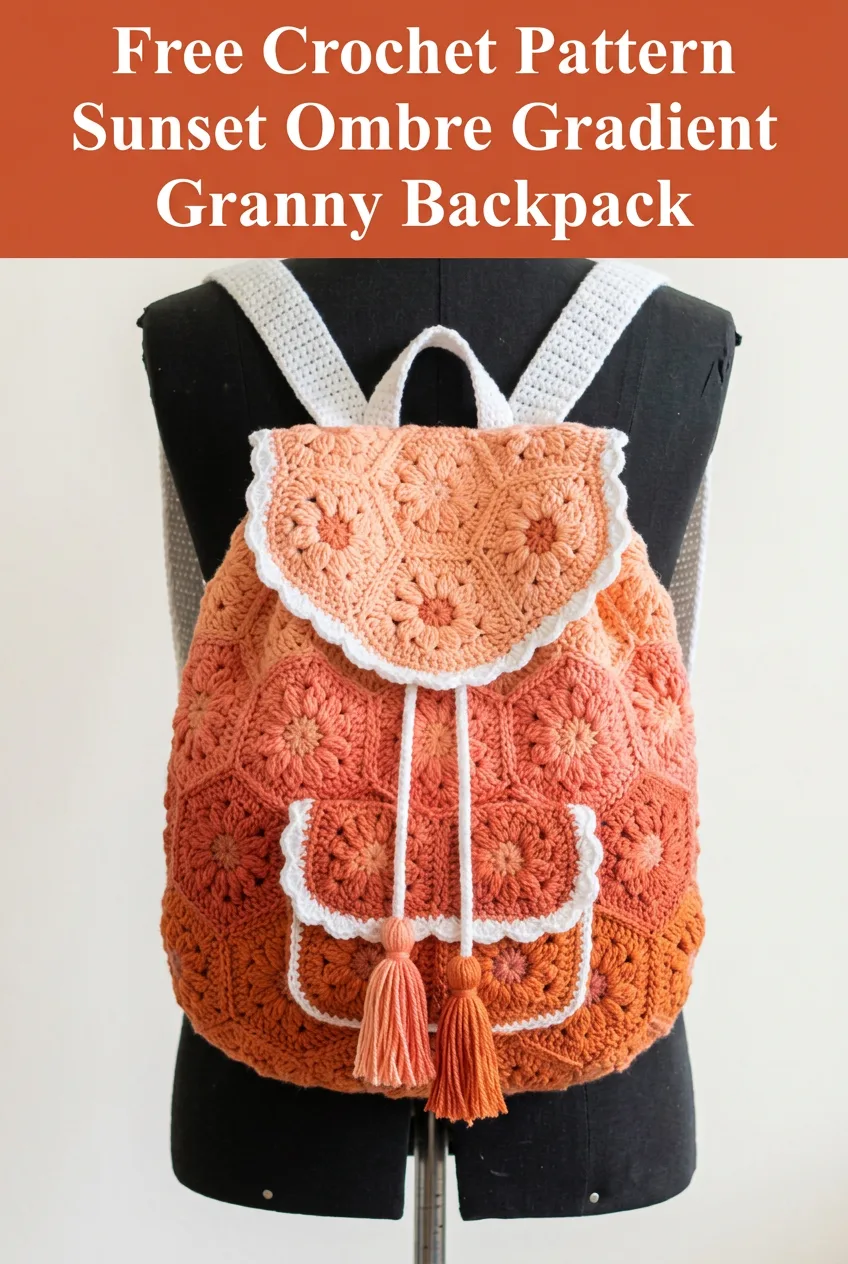
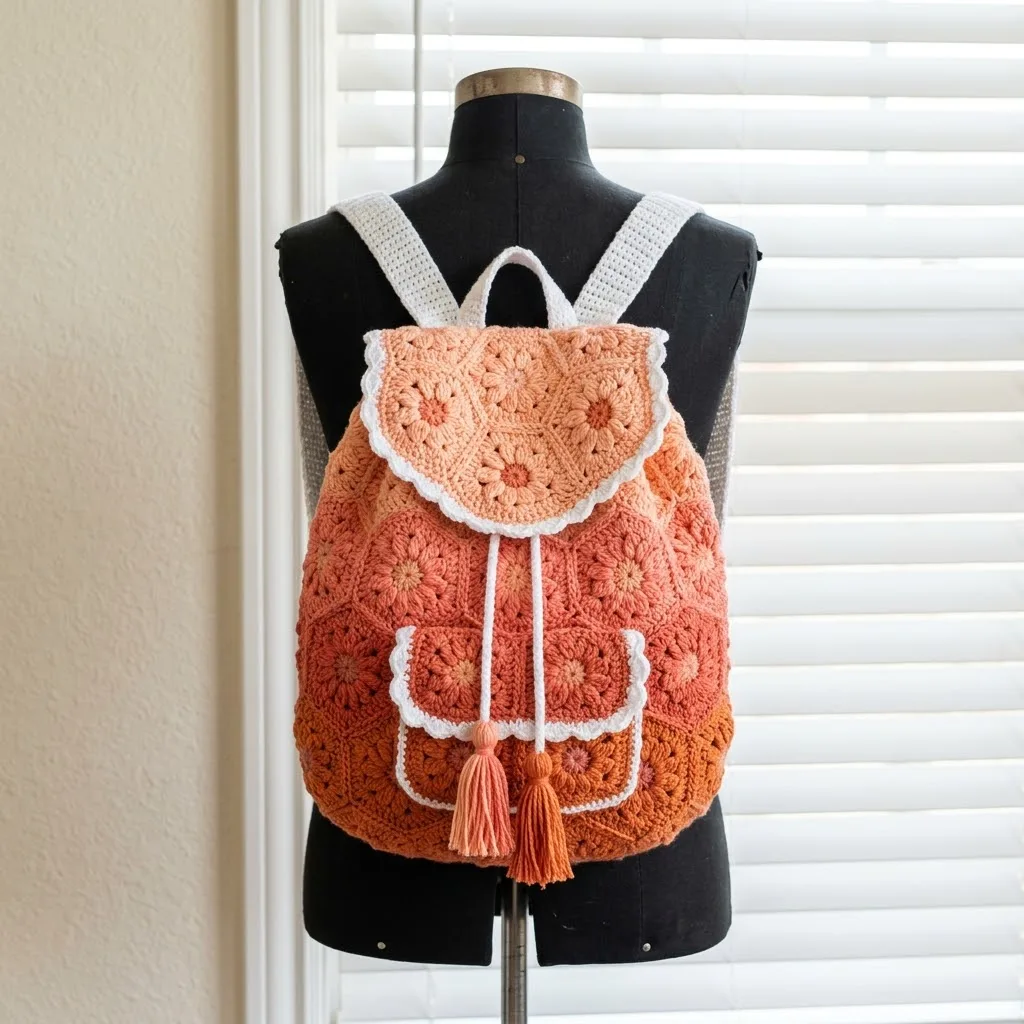
This stunning backpack features African flower hexagon motifs arranged in a beautiful ombre gradient from soft peach at the top down through coral, terracotta, and deep burnt orange at the bottom. The white contrast edging and straps give it a fresh, clean finish that makes those sunset colors really pop.
What I love most about this design is how the hexagon motifs create natural visual interest without complicated colorwork within each motif. You’re simply making the same hexagon shape in different shades, then joining them strategically to create that gorgeous gradient effect.
The finished backpack measures approximately 12 inches wide by 14 inches tall, not including the flap. It’s roomy enough for daily essentials like a wallet, phone, water bottle, and a small crochet project for on-the-go stitching.
Skill Level
This crochet backpack pattern is intermediate level. You should be comfortable with basic crochet stitches, working in the round, and joining motifs. If you’ve made granny squares or hexagon motifs before, you have the skills needed for this project.
Don’t let the word intermediate scare you. The hexagon motif itself uses familiar stitches. The challenge comes from keeping track of your color placement and taking time with the assembly. I’ll walk you through every step.
Materials Needed
Yarn:
– Color A, light peach: 150 yards
– Color B, medium coral: 150 yards
– Color C, terracotta: 150 yards
– Color D, burnt orange: 150 yards
– Color E, white: 200 yards for edging, straps, and accent details
I recommend 100% cotton yarn for this project. Cotton holds its shape beautifully for bags and gives a crisp stitch definition that really shows off the flower centers. Acrylic works too if you prefer, but the bag may stretch more with heavy use.
Hook:
Notions:
Gauge
One completed hexagon motif measures approximately 4 inches from flat edge to flat edge. Gauge matters for this project because it determines your final bag size and whether your motifs will join properly.
Abbreviations and Stitch Definitions
Before we dive in, let me define every stitch you’ll encounter:
African Flower Hexagon Motif Pattern
You’ll need a total of 28 hexagon motifs for this backpack. Here’s how the color distribution breaks down:
Each motif uses its main color for rounds 1 through 3, then switches to white (Color E) for the final round.
Round 1 (Flower Center)
With your main color, make a magic ring.
Ch 1 (does not count as a stitch throughout), work 6 sc into the ring. Sl st to the first sc to join. Pull the magic ring closed. (6 sc)
If magic rings intimidate you, that’s completely normal. You can substitute ch 4 and sl st to the first chain to form a ring instead. Then work your 6 sc into that ring.
Round 2 (Petal Round)
Ch 1, work (sc, ch 1, puff stitch, ch 1, sc) all in the first stitch. This creates your first petal.
Work (sc, ch 1, puff stitch, ch 1, sc) in each of the remaining 5 stitches around. Sl st to the first sc to join. (6 petals, 6 puff stitches)
Take your time with the puff stitches. They can feel awkward at first, but once you get the rhythm, they work up quickly. The key is pulling up tall loops so you have enough slack to pull through all 11 loops at the end.
Round 3 (Filling Between Petals)
This round fills in the spaces between your petals to start forming the hexagon shape.
Sl st into the ch-1 space before the first puff stitch. Ch 2 (counts as first hdc here).
Work (2 hdc, ch 2, 2 hdc) into the top of the puff stitch. This is your first corner.
Hdc into the next ch-1 space (between the puff and the sc). Hdc into the space between the two sc stitches (where the petals meet). Hdc into the next ch-1 space (before the next puff stitch).
Repeat the corner sequence: (2 hdc, ch 2, 2 hdc) into the top of the puff stitch.
Continue around, working 3 hdc between each puff stitch and a corner into each puff stitch. End with hdc in the last ch-1 space. Sl st to the top of the beginning ch-2 to join. (6 corners, 30 hdc total plus 6 ch-2 corner spaces)
Fasten off your main color and weave in the end.
Round 4 (Border Round in White)
Join Color E (white) in any ch-2 corner space with a sl st.
Ch 3 (counts as dc), work (dc, ch 1, 2 dc) in the same corner space.
Dc in each hdc across the side (this will be 5 dc between corners).
Work (2 dc, ch 1, 2 dc) in the next corner space.
Continue around, working 5 dc along each flat edge and the corner cluster in each ch-2 space.
End by working the final dc of the last side. Sl st to the top of the beginning ch-3 to join. (6 corners, 9 dc per side)
Fasten off and weave in ends.
Repeat this process for all 28 hexagons. I know, that sounds like a lot. But these motifs are small and satisfying. Put on a good podcast or your favourite show and enjoy the process.
Assembling the Backpack Body
Lay out your completed hexagons in a gradient arrangement. You want the lightest colors at the top and darkest at the bottom. The bag body requires 20 hexagons arranged in 4 horizontal rows of 5 motifs each.
Row 1 (top): 4 Color A motifs plus 1 Color B motif
Row 2: 4 Color B motifs plus 1 Color C motif
Row 3: 4 Color C motifs plus 1 Color D motif
Row 4 (bottom): 4 Color D motifs
Joining Method
I recommend using a whip stitch join with white yarn for this backpack. It creates a visible seam that becomes part of the design and matches the white border on each motif.
Hold two hexagons with right sides facing. Working through the back loops only of both pieces, whip stitch across one flat edge, going through corresponding stitches. Keep your tension even but not too tight.
First, join the hexagons into horizontal rows. Then join your rows together, offsetting them slightly so the hexagons nestle into each other naturally. Finally, join the side edges to form a tube.
Bottom Panel
For the bottom of the backpack, join 3 hexagons in Color D in a triangular arrangement. Attach this to the bottom edge of your bag tube, easing it to fit. You may need to add a few stitches of single crochet around the edge to help everything connect smoothly.
Backpack Flap
The flap uses 4 hexagons in Color A, arranged in a curved pattern. Join 3 hexagons in a row, then attach the fourth hexagon to create a rounded flap shape.
Flap Edging
Join white yarn at one corner of the flap.
Round 1: Sc evenly around the curved edge of the flap, working approximately 2 sc per dc and 3 sc in each corner. Sl st to join.
Round 2: Ch 1, work (sc, ch 2, sc) in the first stitch. Skip 1 stitch. Repeat (sc, ch 2, sc, skip 1) around for a scalloped edge. Sl st to join. Fasten off.
Attach the straight edge of the flap to the back top edge of the backpack body using whip stitch.
Front Pocket
The front pocket uses 2 hexagons in coordinating colors. Join them side by side, then add the white scalloped edging around three sides (leaving the top open).
Sew the pocket to the front of the backpack at a pleasing height.
Drawstring Channel
Join white yarn at the top edge of the backpack.
Round 1: Work sc evenly around the top opening. Sl st to join. (approximately 60 sc, adjust to your actual stitch count)
Rounds 2-4: Ch 1, sc in each st around. Sl st to join. (60 sc per round)
Round 5 (eyelet round): Ch 1, sc in the first st, ch 2, skip 2 sts, repeat around. This creates holes for the drawstring. Sl st to join.
Rounds 6-7: Ch 1, sc in each sc and 2 sc in each ch-2 space around. Sl st to join.
Fasten off and weave in ends.
Shoulder Straps
Make 2 straps.
With Color E (white), ch 9.
Row 1: Sc in the 2nd ch from hook and in each ch across. Ch 1, turn. (8 sc)
Rows 2-120: Sc in each st across. Ch 1, turn. (8 sc)
This creates a strap approximately 30 inches long. Adjust the length to your preference by adding or removing rows.
Fasten off, leaving a long tail for sewing.
Attach the straps to the back of the backpack, positioning them at the top corners and bottom sides for comfortable wear.
Drawstring Cord
Ch 150 with white yarn (or use a twisted cord or braided yarn for extra durability). Thread through the eyelet round of the drawstring channel.
Tassels
For the coordinating tassels shown, wrap yarn around a 4-inch piece of cardboard 30 times. Cut one end, tie at the top, and wrap below the top to create the tassel head. Trim the ends evenly.
Make 2 tassels in coordinating peach and coral shades. Attach to the ends of the drawstring cord.
Finishing Touches
Weave in all remaining ends throughout the project.
For added durability, consider adding a fabric lining inside the bag. Cut fabric to match the bag shape with seam allowance, sew it together, and hand-stitch it inside the crocheted shell.
Block the empty backpack by gently steaming or wet blocking to even out your stitches and help the hexagons lay flat.
I hope you absolutely love making this Sunset Ombre Gradient Granny Backpack crochet pattern as much as I loved designing it. The gradient effect really does look like a summer sunset, and those African flower hexagons are so satisfying to stitch.
Thank you so much for choosing this pattern for your next crochet project. If you make this backpack, I would love to see it! Tag me on Instagram or share your finished photos in our Facebook group. Seeing your creations truly makes my day.
If this Sunset Ombre Gradient Granny Backpack pattern caught your eye, go ahead and save it to your Pinterest boards so you can find it when you’re ready to cast on. And please drop a comment below if you make one. I love hearing which color combinations you choose!
