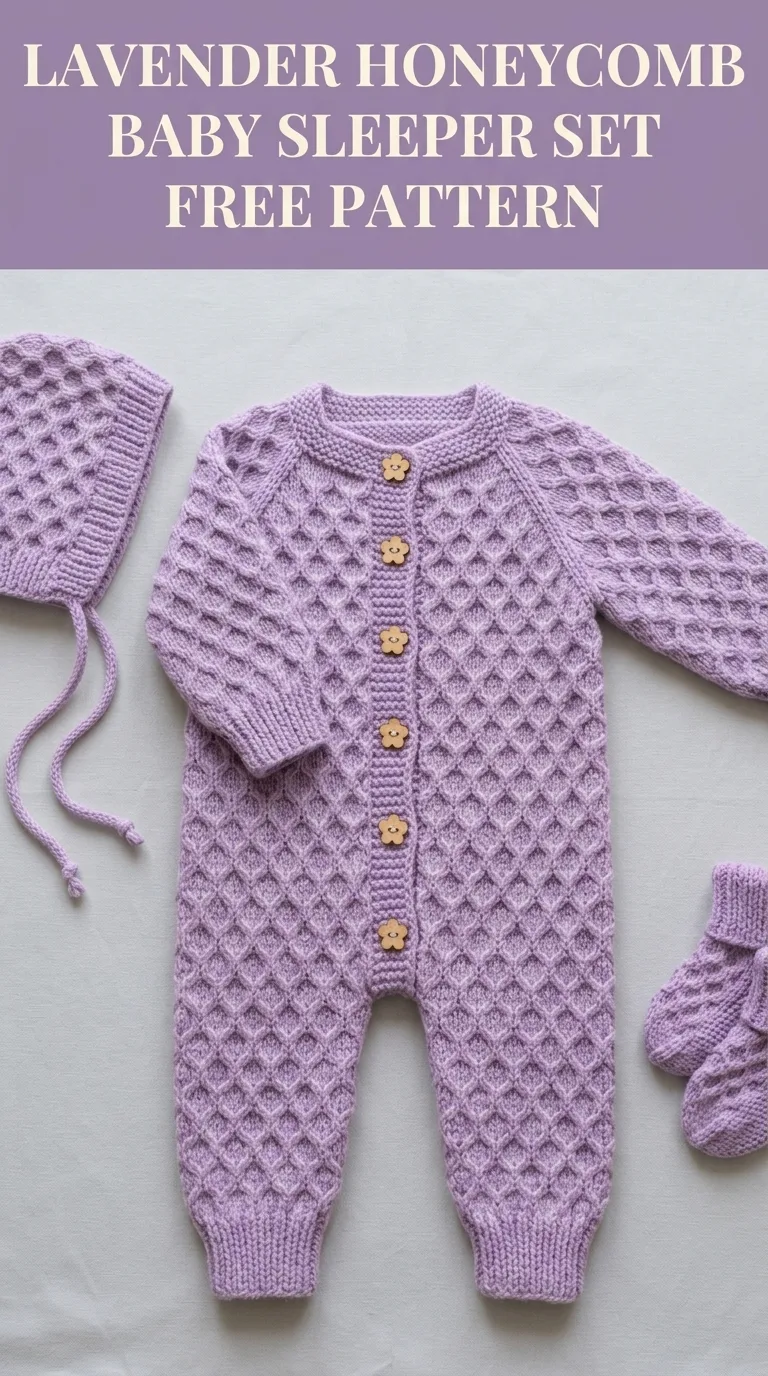
There is something undeniably special about creating handmade clothes for the tiniest people in our lives. This lavender honeycomb baby sleeper set combines classic texture with modern elegance, resulting in a three-piece ensemble that will become a treasured heirloom. The set includes a full-length button-front romper, a matching bonnet with ties, and the sweetest little booties. If you can work basic stitches and follow a repeating pattern, you absolutely can make this. I promise.
I designed this crochet pattern with intermediate crafters in mind, but a confident beginner who takes their time will do beautifully. The honeycomb texture looks far more complicated than it actually is. Once you get into the rhythm, your hands will memorize the movements and you can crochet while watching your favorite show.
Why This Baby Sleeper Set Works So Well
The honeycomb stitch pattern creates natural stretch and cushiony texture, making this set perfect for baby’s delicate skin. Unlike some textured stitches that can feel stiff, the honeycomb drapes softly while still providing warmth. The dimensional puff clusters trap air, giving the fabric gentle insulation without bulk.
This crochet tutorial walks you through every single piece. You will learn how to construct the romper from the legs up, shape the armholes, create set-in sleeves, add a ribbed button band, craft a fitted bonnet, and finish with coordinating booties. Everything a baby needs for coming home from the hospital or a special photo session.
Materials You Will Need
Before diving into the step by step instructions, gather these supplies:
Yarn:
Hooks:
Notions:
Gauge:
20 stitches and 16 rows = 4 inches in honeycomb pattern with 3.5mm hook
Please, please check your gauge. Baby garments need accurate sizing, and the honeycomb stitch can vary dramatically between crocheters. Make a 5-inch swatch and measure the center 4 inches. Adjust your hook size up or down until you match.
Finished Measurements
This pattern fits babies 0 to 6 months. Adjust by adding or subtracting pattern repeats for different sizes.
Stitch Abbreviations and Definitions
Let me explain every stitch before we begin. You will reference this section often.
ch = chain: yarn over, pull through loop on hook
sl st = slip stitch: insert hook, yarn over, pull through stitch and loop on hook in one motion
sc = single crochet: insert hook, yarn over, pull up loop (2 loops on hook), yarn over, pull through both loops
hdc = half double crochet: yarn over, insert hook, yarn over, pull up loop (3 loops), yarn over, pull through all 3 loops
dc = double crochet: yarn over, insert hook, yarn over, pull up loop (3 loops), yarn over, pull through 2 loops, yarn over, pull through remaining 2 loops
FPdc = front post double crochet: yarn over, insert hook from front to back to front around the post of indicated stitch, complete as regular dc
BPdc = back post double crochet: yarn over, insert hook from back to front to back around the post, complete as regular dc
puff st = puff stitch: (yarn over, insert hook in stitch, pull up loop) 3 times in same stitch (7 loops on hook), yarn over, pull through all 7 loops
sk = skip
st(s) = stitch(es)
rep = repeat
Understanding the Honeycomb Pattern
The honeycomb texture comes from alternating rows of puff stitches with offset placement. This creates those lovely dimensional diamonds you see across the fabric. Here is how to practice before starting the garment.
Foundation: Ch 23
Row 1: Sc in 2nd ch from hook and each ch across, turn. (22 sts)
Row 2: Ch 1, sc in first st, *puff st in next st, sc in next st, rep from * across, turn. (22 sts, 10 puff sts)
Row 3: Ch 1, sc in each st across, turn. (22 sts)
Row 4: Ch 1, sc in first 2 sts, *puff st in next st, sc in next st, rep from * to last st, sc in last st, turn. (22 sts, 10 puff sts)
Row 5: Ch 1, sc in each st across, turn. (22 sts)
Repeat Rows 2 through 5 for honeycomb pattern. Notice how the puff stitches on Row 4 sit between the puffs from Row 2. That offset creates the honeycomb effect.
Part One: The Romper Legs (Make 2)
We build the romper from the ankles up, then join at the crotch. This construction method creates the smoothest fit.
Ribbed Cuff:
Using 3.0mm hook, ch 8.
Row 1: Sc in 2nd ch from hook and each ch across, turn. (7 sts)
Rows 2 through 28: Ch 1, sc in back loop only of each st across, turn. (7 sts)
Do not fasten off. Rotate work 90 degrees to crochet along the long edge of the ribbing.
Joining Round: Ch 1, work 28 sc evenly along the row ends, sl st to first sc to join into round. (28 sts)
Switch to 3.5mm hook.
Leg Round 1: Ch 1, sc in each st around, sl st to join. (28 sts)
Leg Round 2: Ch 1, sc in first st, *puff st in next st, sc in next st, rep from * around, ending with puff st, sl st to join. (28 sts)
Leg Round 3: Ch 1, sc in each st around, sl st to join. (28 sts)
Leg Round 4: Ch 1, sc in first 2 sts, *puff st in next st, sc in next st, rep from * around, sl st to join. (28 sts)
Leg Round 5: Ch 1, sc in each st around, sl st to join. (28 sts)
Repeat Rounds 2 through 5 for honeycomb pattern.
Shaping the Leg:
Continue in honeycomb pattern, increasing for thigh as follows:
Increase Round (work every 8th round, 4 times total): Work in pattern to last st, 2 sc in last st, sl st to join. (32 sts after round 1 of increases, 36 sts after round 2, 40 sts after round 3, 44 sts after round 4)
Continue until leg measures 10 inches from cuff, ending with a plain sc round. Fasten off first leg. Complete second leg but do not fasten off.
Part Two: Joining the Legs and Body
This is the part that feels tricky, but I promise it makes sense once you see it come together.
Joining Round: With second leg still on hook, ch 4 (this creates the crotch gusset). Hold first leg with right side facing, sc in marked center back st of first leg, continue in honeycomb pattern around first leg, ch 4, continue in pattern around second leg, sl st to join. (96 sts including chains)
Body Round 1: Ch 1, sc in each st and ch around, sl st to join. (96 sts)
Continue in honeycomb pattern for body. Work even for 6 inches from crotch join.
Armhole Shaping:
Next Round: Ch 1, work 24 sts in pattern (front right), ch 4, sk 24 sts (armhole), work 24 sts (back), ch 4, sk 24 sts (armhole), sl st to join.
Continue in pattern on remaining sts plus chains (56 sts) for 2 more inches for yoke, maintaining honeycomb pattern. Fasten off.
Part Three: Sleeves (Make 2)
Ribbed Cuff:
Using 3.0mm hook, ch 6.
Row 1: Sc in 2nd ch from hook and each ch across, turn. (5 sts)
Rows 2 through 20: Ch 1, sc in BLO of each st across, turn. (5 sts)
Join into round along long edge. (20 sts)
Switch to 3.5mm hook.
Work honeycomb pattern in rounds, increasing 2 sts every 6th round until you have 32 sts. Continue until sleeve measures 7 inches.
Sleeve Cap:
Work back and forth in rows, decreasing 1 st each side every row for 6 rows. (20 sts remaining)
Fasten off, leaving long tail. Sew sleeves into armholes.
Part Four: Button Band
Using 3.0mm hook, join yarn at bottom right front edge.
Row 1: Work sc evenly up right front, around neckline, and down left front. Turn.
Rows 2 through 5: Ch 1, sc in BLO across, turn.
On Row 3 of left side (buttonhole side), create 6 evenly spaced buttonholes: ch 2, sk 2, continue in pattern.
Fasten off. Sew buttons opposite buttonholes.
Part Five: Bonnet
Main Panel:
Ch 37.
Work honeycomb pattern flat for 28 rows. Fold in half, seam back of bonnet.
Face Edging:
Using 3.0mm hook, join yarn at bottom corner. Work ribbed edging around face opening for 6 rows. Add ch 50 ties at each corner.
Part Six: Booties (Make 2)
Sole:
Ch 10. Work 3 sc in 2nd ch, sc across, 3 sc in last ch, continue around opposite side. (20 sts)
Increase at each end for 2 more rounds. (28 sts)
Sides:
Work honeycomb pattern for 8 rounds.
Toe Shaping:
Decrease 6 sts evenly across front over 2 rounds. Continue ankle ribbing for 10 rows. Fasten off.
Finishing Your Baby Sleeper Set
Weave in all ends using your yarn needle. I cannot stress enough how important this step is for baby items. Little fingers love to find loose threads.
Block your pieces gently. For wool blends, pin to measurements and steam lightly. For cotton, wet block by soaking, squeezing in a towel, and pinning flat to dry.
Sew on buttons securely with doubled thread, knotting on the inside where baby cannot access.
Tips for Success with This Crochet Pattern
The honeycomb stitch creates a fabric that curls slightly at the edges. This is normal and blocking helps. The ribbed bands also counteract curling.
If your puff stitches look uneven at first, keep going. They smooth out dramatically after blocking.
Count your stitches frequently, especially in the honeycomb sections. Those puff stitches can be sneaky, and accidentally working into the top of a puff versus beside it changes your stitch count.
Take breaks. Puff stitches require more yarn overs than basic stitches, and your hands will thank you for stretching every 30 minutes.
Making This Baby Sleeper Set Your Own
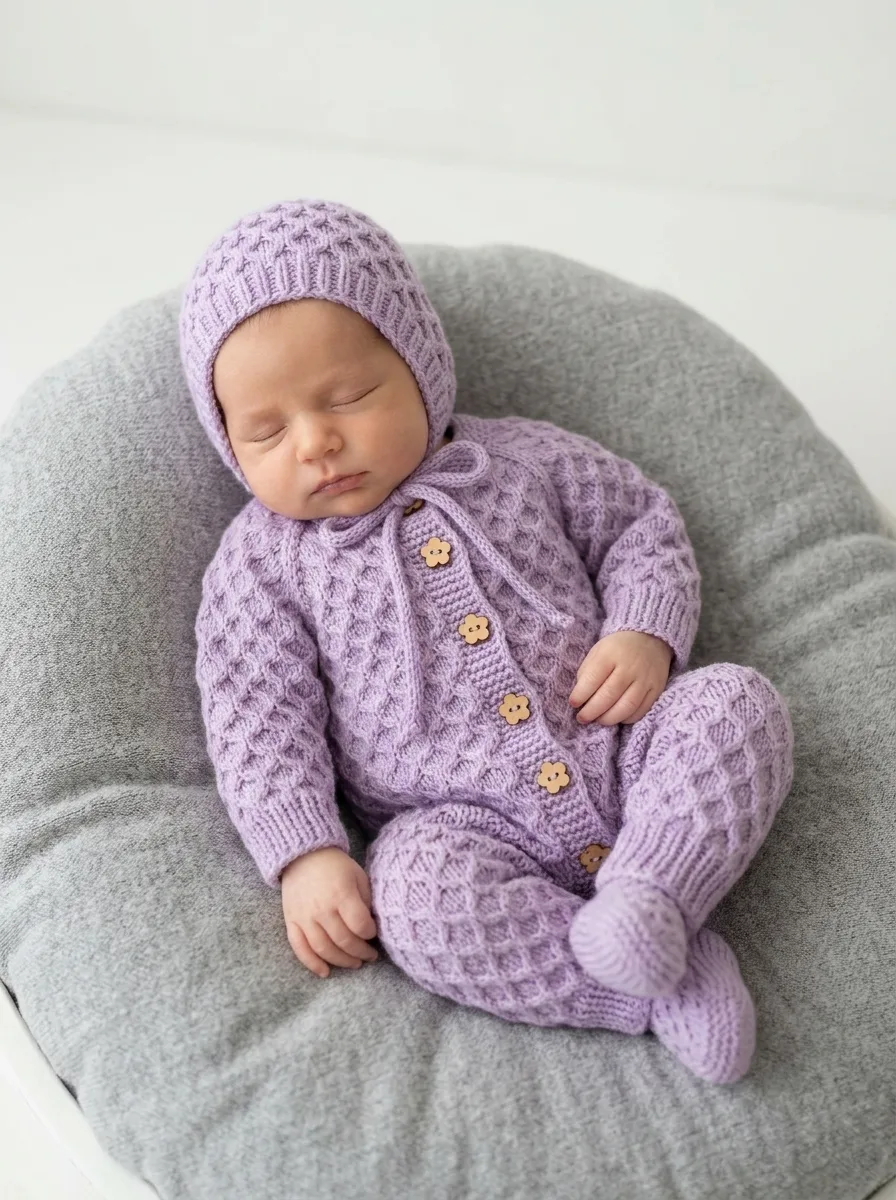
While the lavender colorway shown here is absolutely dreamy, this pattern works beautifully in any soft baby shade. Mint green, butter yellow, soft peach, or classic white would all be stunning choices. For a more modern look, try charcoal gray or dusty rose.
You can also substitute the flower buttons for simple wooden rounds, pearl buttons, or even crocheted button loops if you prefer buttonless construction.
I really hope you love making this baby sleeper set as much as I loved designing it. These are the projects that remind me why I fell in love with crochet in the first place. Creating something soft and beautiful for a new little life is one of the most meaningful things we can do with our hooks and yarn.
If this pattern brightened your day or inspired your next project, I would be so grateful if you saved it to your Pinterest boards so you can find it easily when you are ready to start. And please, drop a comment below when you make yours. I genuinely love seeing your finished pieces and hearing how the pattern worked for you. Happy crocheting, friend.
