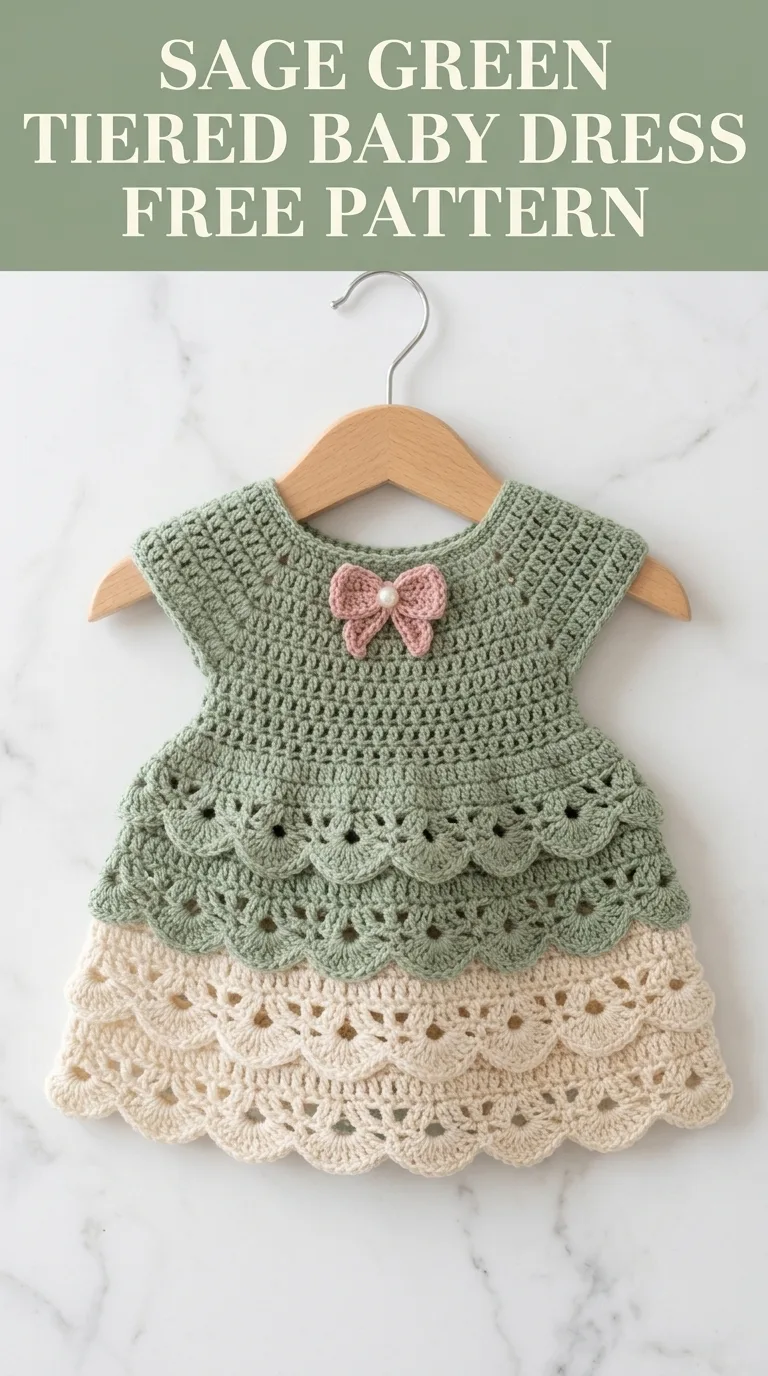
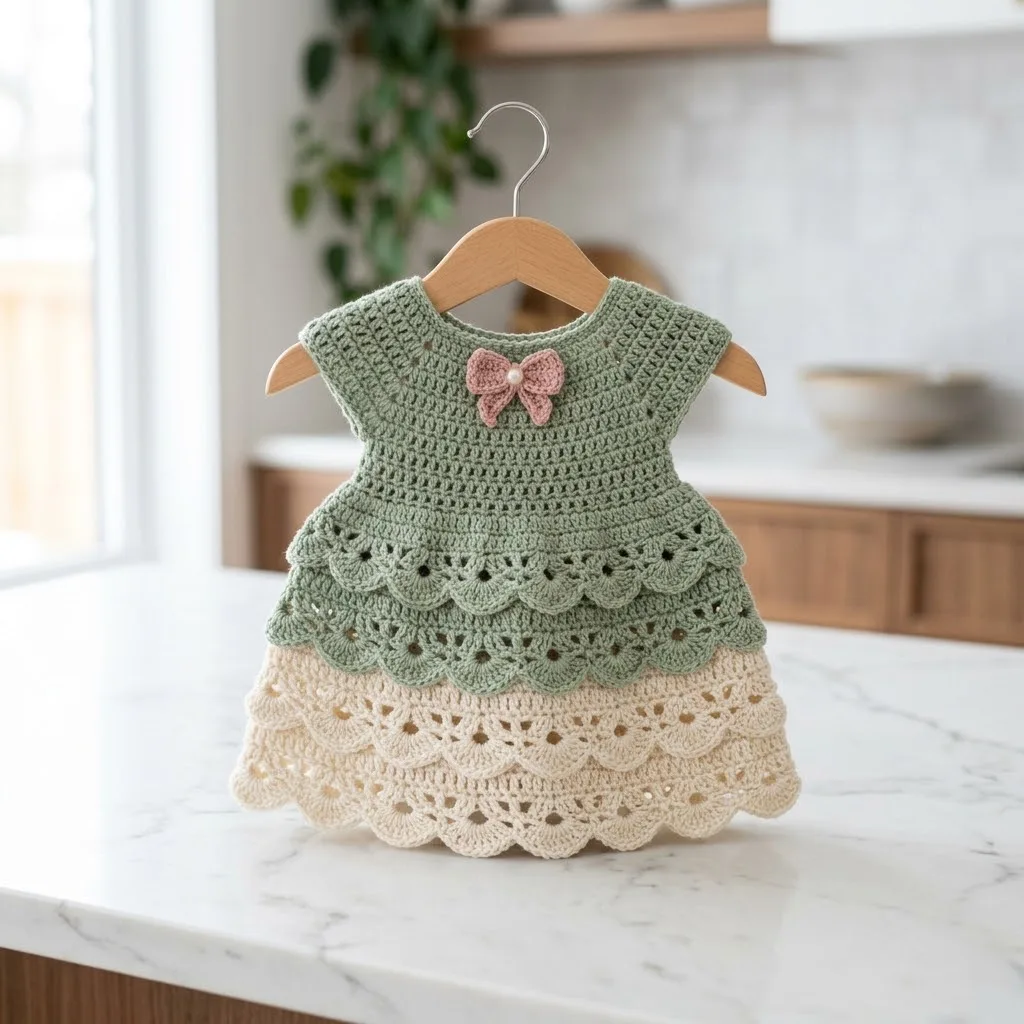
I designed this little dress with one clear goal in mind. I wanted something that looked intricate and heirloom-worthy but could actually be made by someone who has never tackled baby garments before. The tiered skirt, the delicate scalloped edges, the sweet bow accent. I am SO pleased with how this turned out! This sage green tiered baby dress combines simple stitches with clever construction to create something that looks far more complicated than it actually is.
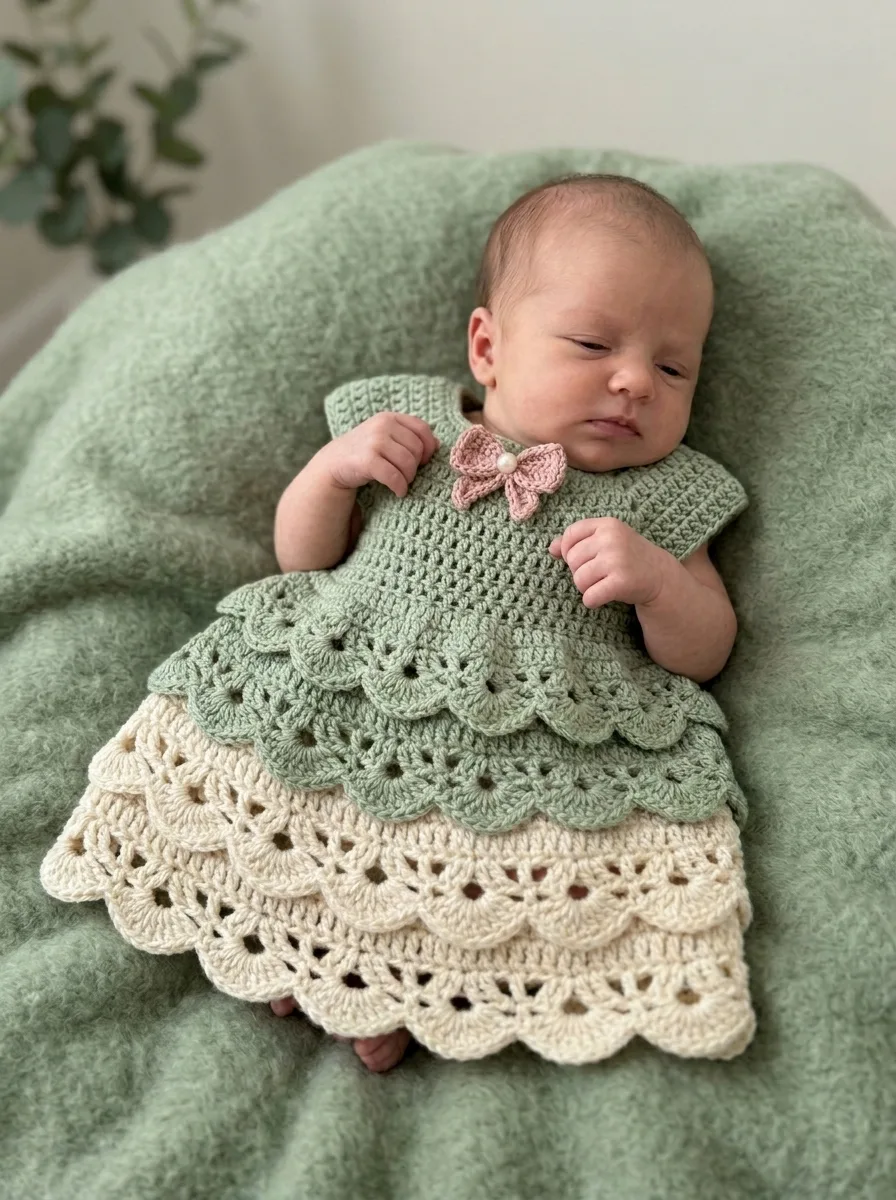
This crochet baby dress pattern works up surprisingly fast once you understand the rhythm of each section. The bodice is straightforward rows of basic stitches. The skirt tiers are where the magic happens, and I promise they are easier than they look. By the end of this tutorial, you will have a gorgeous handmade baby dress perfect for photo shoots, special occasions, or everyday wear.
Why You Will Love This Crochet Baby Dress Pattern
Let me tell you what makes this design special. The construction is top-down, which means you start at the neckline and work your way to the hem. No seaming the bodice to the skirt. No awkward joins. Everything flows together naturally.
The color blocking between the sage green bodice and cream lower tier creates visual interest without complicated colorwork. You simply change yarn colors at a natural break point. The tiered effect comes from working scallop rows that overlap each other slightly, giving that beautiful layered look.
Skill level: Confident beginner to intermediate. If you can chain, single crochet, double crochet, and follow a simple repeat, you can make this dress.
Materials Needed for the Crochet Baby Dress
Yarn:
I recommend a soft cotton or cotton blend for this project. Baby skin is sensitive, and cotton breathes beautifully in warmer weather. Acrylic blends work well too and are machine washable, which parents always appreciate.
Hook:
Notions:
Gauge:
18 stitches and 10 rows = 4 inches in double crochet with 4.0mm hook
Always check your gauge before starting. This dress is sized for 6 to 12 months, but gauge differences can significantly affect the final fit.
Finished Measurements
Abbreviations and Stitch Definitions
Before we dive into the pattern, let me define every stitch you will use. I want you to feel confident before you pick up your hook.
ch = chain: Yarn over, pull through the loop on your hook. This creates the foundation and adds height.
sl st = slip stitch: Insert hook, yarn over, pull through both the stitch and the loop on your hook in one motion. Used for joining and moving across stitches invisibly.
sc = single crochet: Insert hook, yarn over, pull up a loop (2 loops on hook), yarn over, pull through both loops. A short, tight stitch.
dc = double crochet: Yarn over, insert hook, yarn over, pull up a loop (3 loops on hook), yarn over, pull through 2 loops, yarn over, pull through remaining 2 loops. A taller stitch that creates nice drape.
sk = skip: Miss the indicated number of stitches.
sp = space: The gap or hole created between stitches, often where you will place your next stitch.
shell = A group of stitches worked into the same stitch or space. For this pattern, a shell is 5 dc in one stitch unless noted otherwise.
Sage Green Tiered Baby Dress Pattern Instructions
Bodice Section
The bodice is worked flat in rows, then joined to work in the round for the skirt. We will create the front, back, and cap sleeves all in one piece with strategic increases.
Row 1 (Foundation): With sage green yarn and 4.0mm hook, ch 57. Dc in 4th ch from hook (the skipped chains count as your first dc), dc in each ch across. Turn. (55 dc)
Row 2: Ch 3 (counts as dc here and throughout), dc in each st across. Turn. (55 dc)
Row 3 (Increase row for sleeves): Ch 3, dc in same st, dc in next 8 sts, 2 dc in next st, dc in next 8 sts, 2 dc in next st, dc in next 15 sts, 2 dc in next st, dc in next 8 sts, 2 dc in next st, dc in next 8 sts, 2 dc in last st. Turn. (61 dc)
Place stitch markers at each increase point. These mark your raglan shaping lines.
Row 4: Ch 3, dc in each st across. Turn. (61 dc)
Row 5 (Increase row): Ch 3, dc in same st, *dc to 1 st before marker, 2 dc in next st, move marker, 2 dc in next st*, repeat from * to * 3 more times, dc to last st, 2 dc in last st. Turn. (71 dc)
Row 6: Ch 3, dc in each st across. Turn. (71 dc)
Rows 7 through 10: Repeat Rows 5 and 6 two more times. You should have 91 dc after Row 9.
At this point, the bodice should measure approximately 3 inches from the neckline.
Creating the Armholes
Now we separate for the armholes. This is where the bodice becomes the front and back panels with openings for the arms.
Row 11: Ch 3, dc in next 14 sts (this is the back right section), ch 5, sk next 17 sts (this creates the armhole), dc in next 23 sts (front section), ch 5, sk next 17 sts (second armhole), dc in last 15 sts (back left section). Turn.
Row 12: Ch 3, dc in next 14 sts, dc 5 times in ch-5 sp, dc in next 23 sts, dc 5 times in ch-5 sp, dc in last 15 sts. Turn. (68 dc)
Rows 13 and 14: Ch 3, dc in each st across. Turn. (68 dc)
The bodice is now complete. Do not fasten off.
Joining for Skirt and First Tier
Here is where the dress really starts to take shape. We join in the round and begin the beautiful tiered skirt.
Round 1 (Joining round): Ch 3, dc in each st across, sl st to top of beginning ch-3 to join. Do not turn. You will now work in continuous rounds. (68 dc)
Round 2: Ch 3, dc in same st, dc in next st, *2 dc in next st, dc in next st*, repeat around, sl st to join. (102 dc)
Round 3: Ch 3, dc in each st around, sl st to join. (102 dc)
Round 4: Ch 3, dc in each st around, sl st to join. (102 dc)
First Scallop Tier (Sage Green)
Round 5 (Setup for scallops): Ch 1, sc in same st, *ch 2, sk 2 sts, sc in next st*, repeat around, ending with ch 2, sl st to first sc. You should have 34 ch-2 spaces.
Round 6 (First scallop row): Sl st into first ch-2 sp, ch 3, 4 dc in same sp (this creates your first shell), *sc in next ch-2 sp, 5 dc in next ch-2 sp*, repeat around, ending with sc in last ch-2 sp, sl st to top of beginning ch-3.
Round 7: Ch 1, sc in same st, *ch 2, sc in center dc of next shell*, repeat around, ch 2, sl st to first sc.
Round 8: Repeat Round 6.
This completes the first tier of scallops. The overlapping shell pattern creates that lovely layered effect you see in the photos.
Second Scallop Tier (Sage Green)
Round 9: Repeat Round 7.
Round 10: Repeat Round 6.
Round 11: Repeat Round 7.
Round 12: Repeat Round 6.
Fasten off sage green yarn. Weave in ends.
Third Tier (Cream)
Now we switch to the cream yarn for the beautiful contrast bottom section.
Round 13: Join cream yarn with sl st in any sc from previous round. Ch 1, sc in same st, *ch 2, sc in center dc of next shell*, repeat around, ch 2, sl st to first sc.
Round 14: Sl st into first ch-2 sp, ch 3, 4 dc in same sp, *sc in next ch-2 sp, 5 dc in next ch-2 sp*, repeat around, ending with sc in last ch-2 sp, sl st to top of beginning ch-3.
Rounds 15 through 20: Repeat Rounds 13 and 14 three more times for three full rows of cream scallops.
Round 21 (Final edging): Ch 1, sc in each st around, working 3 sc in the center dc of each shell to create a smooth scalloped edge. Sl st to first sc.
Fasten off. Weave in all ends.
Neckline Edging
The neckline needs a clean finished edge. This step is quick and makes the dress look polished.
Round 1: With right side facing, join sage green yarn at center back of neckline with sl st. Ch 1, sc evenly around entire neckline opening, working approximately 55 to 60 sc total. Sl st to first sc to join.
Round 2: Ch 1, sc in each st around. Sl st to join.
Fasten off. Weave in ends.
Making the Bow Accent
The little bow adds such a sweet finishing touch. You can make it in any color, but the dusty pink creates a lovely complement to the sage green.
Bow Center Piece:
Ch 6. Sc in 2nd ch from hook, sc in next 4 ch. Turn. (5 sc)
Rows 2 through 4: Ch 1, sc in each st across. Turn. (5 sc)
Fasten off, leaving a long tail.
Bow Loop Piece:
Ch 21. Dc in 4th ch from hook, dc in each ch across. (18 dc plus turning chain)
Fasten off, leaving a long tail.
Assembly:
Fold the longer piece so both ends meet in the center, creating a loop on each side. Wrap the small center piece around the middle of the folded piece. Use the long tails to secure everything in place with a few stitches. Attach a small pearl bead to the center if desired.
Sew the completed bow to the center front of the bodice, just below the neckline, using matching thread or yarn.
Helpful Tips for This Crochet Baby Dress Pattern
Blocking matters. After weaving in all your ends, wet block the dress by soaking it in lukewarm water, gently squeezing out excess moisture, and laying flat to dry. This evens out your stitches and helps the scallops lay beautifully.
Sizing up or down. To make a smaller size (0 to 6 months), reduce your starting chain by 6 and work fewer increase rows on the bodice. For larger sizes (12 to 18 months), add 6 to your starting chain and add one more increase row set.
The scallop tiers can feel fiddly at first. Take your time on Round 5 when setting up the chain spaces. Once that foundation is correct, the shells fall into place easily.
Do not stress about perfection. Handmade items have character. Small variations in stitch tension or scallop placement will not be visible once the dress is worn.
Final Thoughts on the Sage Green Tiered Baby Dress
This crochet baby dress pattern combines classic techniques with modern color choices for a truly beautiful result. The tiered construction looks impressive but breaks down into simple, manageable sections. Each tier builds on the last, and before you know it, you have a complete dress that looks like it took weeks to make.
I hope this step by step crochet tutorial gives you everything you need to create something special. Whether you are making this for your own little one, a baby shower gift, or a charity donation, this dress is sure to be treasured.
Thank you so much for choosing this pattern. I genuinely appreciate you being here and trusting me to guide you through this project. If you make this dress, I would absolutely love to see it! Tag me on Instagram or share your photos in our Facebook group. There is nothing better than seeing your creations come to life.
If you loved this pattern, go ahead and save it to your Pinterest boards so you can find it easily when you are ready to start. And please drop a comment below if you give it a try. I read every single one and love hearing about your crochet adventures!
