These boots are RIDICULOUSLY impressive for how straightforward they actually are to make! I’m talking about a project that looks like it took weeks but actually works up in just a few evenings. The lacy shell stitch leg combined with that solid, sturdy sole creates the perfect summer boot that everyone will think you bought from a fancy boutique. If you’ve been wanting to try crocheted footwear but felt intimidated, THIS is your pattern. Trust me on this one.
About This Crochet Pattern
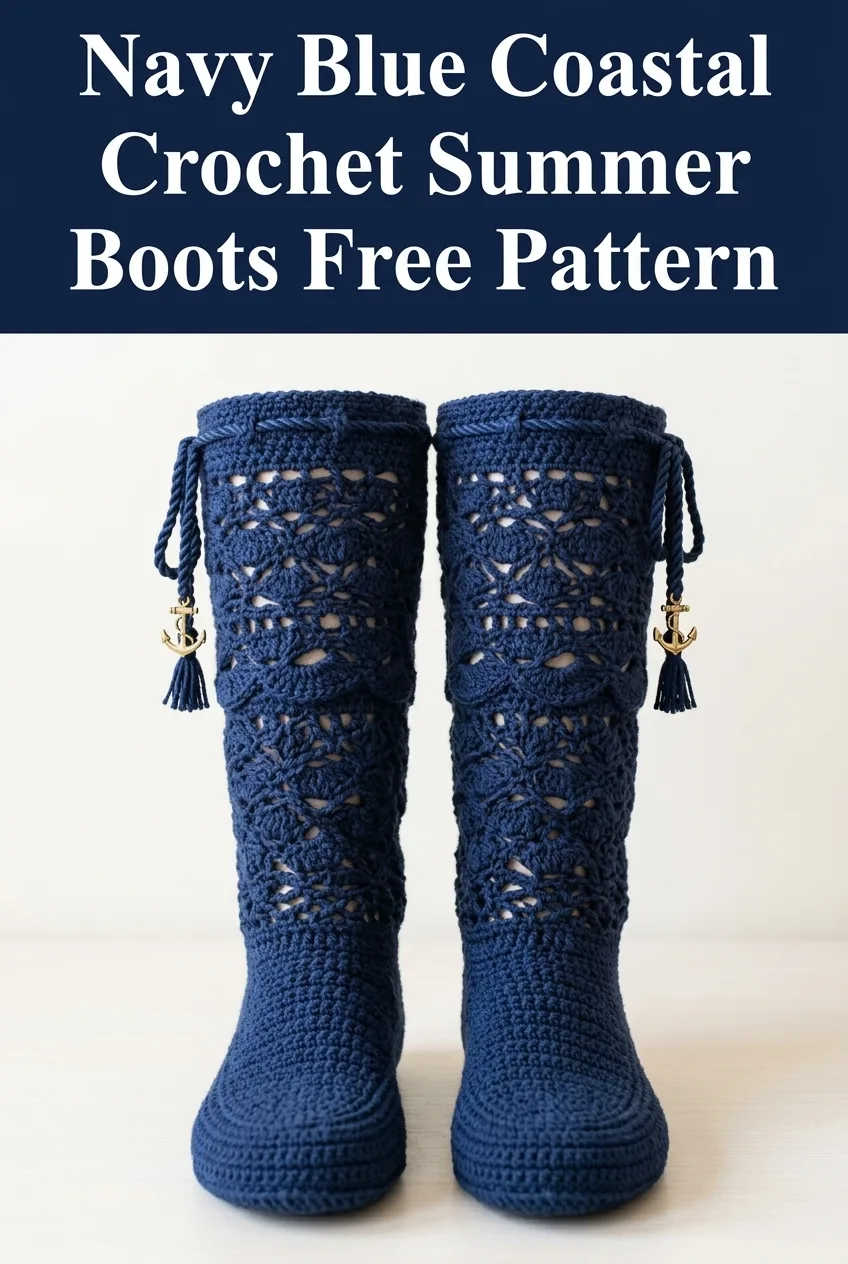
These navy blue coastal crochet summer boots combine two techniques that complement each other beautifully. The foot portion features tight, dense single crochet stitches that create a durable base for walking around the house. The leg portion opens up into an airy shell and openwork pattern that gives these boots their breezy, coastal vibe.
The decorative tassels with anchor charms at the top add a nautical touch that makes these perfect for beach house weekends or just lounging at home on lazy summer mornings. You can absolutely skip the charms if you prefer a simpler look, or swap them for different embellishments that match your style.
Skill level: Intermediate. You should be comfortable with basic stitches and working in the round before starting this project.
Materials Needed
Yarn: Approximately 300 yards of worsted weight yarn (weight category 4) in navy blue. I recommend a cotton or cotton blend for summer wear. A yarn with good stitch definition will show off the lace pattern best.
Hook: 5.0mm (H/8) crochet hook for the main boot, 4.5mm (G/6) hook for tighter sole construction
Notions:
Gauge
14 single crochet stitches and 16 rows = 4 inches square using 5.0mm hook
Gauge matters for footwear! Take time to check your gauge before starting. If your gauge is too loose, your boots will stretch out and become floppy. Too tight and they won’t fit over your foot comfortably.
Sizing
This pattern is written for women’s size medium (US 7-8). The finished sole measures approximately 9.5 inches long.
To adjust sizing, add or subtract rounds in the sole section and adjust the toe shaping accordingly. Each round added or removed changes the length by roughly half an inch.
Abbreviations and Stitch Definitions
ch = chain: Yarn over, pull through loop on hook
sl st = slip stitch: Insert hook, yarn over, pull through stitch and loop on hook in one motion
sc = single crochet: Insert hook, yarn over, pull through stitch (2 loops on hook), yarn over, pull through both loops
dc = double crochet: Yarn over, insert hook, yarn over, pull through stitch (3 loops on hook), yarn over, pull through 2 loops, yarn over, pull through remaining 2 loops
shell = 5 double crochet stitches worked into the same stitch or space, creating a fan shape
sk = skip: Pass over the indicated stitch without working into it
inc = increase: Work 2 stitches into the same stitch
Pattern Notes Before You Begin
These boots are worked from the sole up. You’ll create an oval sole first, then build the foot portion with single crochet, and finally work the decorative lace leg section.
The entire boot is worked in continuous rounds for the sole and foot sections. The leg portion switches to joined rounds to maintain the shell pattern alignment.
I recommend using a stitch marker at the beginning of each round. Move it up as you work so you always know where your round starts.
Don’t worry if your first boot takes a while. The second one always goes faster because you’ve already figured out the rhythm of the pattern.
Step by Step Crochet Tutorial
Part 1: The Sole
Using your 4.5mm hook (the smaller one for a firmer base), chain 16.
Round 1: Starting in the 2nd chain from hook, work 1 sc. Continue working 1 sc in each chain across until you reach the last chain. In the last chain, work 3 sc (this turns the corner). Now rotate your work to crochet along the opposite side of the foundation chain. Work 1 sc in each chain across until you reach the last stitch. Work 2 sc in the last stitch to turn the corner. Place a stitch marker. (32 sts)
Round 2: Work 1 sc in each of the next 14 stitches. In each of the next 3 stitches, work 2 sc (these are your toe increases). Work 1 sc in each of the next 14 stitches. In the last stitch, work 2 sc. (38 sts)
Round 3: Work 1 sc in each of the next 14 stitches. *Work 2 sc in the next stitch, work 1 sc in the next stitch* repeat 3 times total. Work 1 sc in each of the next 14 stitches. Work 2 sc in the next stitch, work 1 sc in the next stitch, work 2 sc in the last stitch. (44 sts)
Round 4: Work 1 sc in each of the next 15 stitches. *Work 2 sc in the next stitch, work 1 sc in the next 2 stitches* repeat 3 times. Work 2 sc in the next stitch. Work 1 sc in each of the next 15 stitches. Work 2 sc in the next stitch, work 1 sc in the next 2 stitches, work 2 sc in the last stitch. (52 sts)
Round 5: Work 1 sc in each stitch around. (52 sts)
Your sole should now measure approximately 9.5 inches long and 3.5 inches at the widest point. If it’s too small, add another increase round following the same pattern. If too large, try a smaller hook.
Part 2: Building the Foot
Switch to your 5.0mm hook for this section.
Round 6: Working in the back loops only for this round (this creates a nice edge where the sole meets the sides), work 1 sc in each stitch around. (52 sts)
Rounds 7-12: Work 1 sc in each stitch around, working through both loops as normal. (52 sts per round)
At the end of round 12, your boot sides should be approximately 1.5 inches tall. The foot portion should cover the sides of your foot snugly but not too tight.
Part 3: Toe Shaping and Decreases
Now we shape the toe box. You’ll be working decreases across the front of the boot.
Round 13: Work 1 sc in each of the next 18 stitches. *Work sc2tog (single crochet 2 together: insert hook in next stitch, yarn over, pull up a loop, insert hook in following stitch, yarn over, pull up a loop, yarn over, pull through all 3 loops)* repeat 8 times. Work 1 sc in each remaining stitch around. (44 sts)
Round 14: Work 1 sc in each of the next 16 stitches. Work sc2tog 6 times. Work 1 sc in each remaining stitch around. (38 sts)
Round 15: Work 1 sc in each of the next 14 stitches. Work sc2tog 5 times. Work 1 sc in each remaining stitch around. (33 sts)
Round 16: Work 1 sc in each stitch around. (33 sts)
Part 4: Ankle Transition
Round 17: Work 1 sc in each stitch around, then slip stitch to the first sc to join. Chain 3 (counts as first dc). (33 sts)
This is where we transition from continuous rounds to joined rounds for the lace section.
Part 5: Lacy Shell Stitch Leg
Round 18 (Foundation for shells): Skip the first stitch (where you joined), *work 1 dc in each of the next 2 stitches, skip 2 stitches, work 1 shell (5 dc) in the next stitch, skip 2 stitches* repeat around, adjusting the last repeat as needed to end evenly. Slip stitch to the top of the beginning chain 3 to join. (Approximately 4-5 shell repeats)
Round 19: Chain 3. Work 1 dc in each dc until you reach the center of the first shell. *Work 1 shell in the center dc of the shell below, skip to the next shell* repeat around. Work remaining dc stitches to complete the round. Slip stitch to join.
Rounds 20-26: Repeat round 19, maintaining the shell pattern. Each shell should stack directly above the shell from the previous round. The open spaces between shells create the beautiful lacy effect.
Your leg portion should measure approximately 5-6 inches from the ankle join.
Part 6: Top Edging
Round 27: Chain 1. Work 1 sc in each stitch around the top edge, including 1 sc in the top of each dc and 1 sc in each space. Slip stitch to join. (Approximately 45-50 sts depending on your shell count)
Round 28: Chain 1. Work 1 sc in each stitch around. Slip stitch to join. Fasten off and weave in your end.
Making the Second Boot
Repeat the entire pattern to create a matching second boot. I know it’s tempting to rush through it, but try to maintain the same tension so both boots look identical.
Adding the Decorative Tassels (Optional)
The tassels pictured have small anchor charms attached. To attach tassels to your finished boots:
1. Thread the tassel cord through a tapestry needle
2. Insert the needle through the top edge of the boot at the center back
3. Pull through and tie securely on the inside
4. Trim any excess cord
If you don’t have premade tassels, you can easily make your own by wrapping yarn around a piece of cardboard, tying at one end, and cutting the loops at the other end.
Care Instructions
Hand wash these boots in cool water with mild detergent. Gently squeeze out excess water (never wring or twist). Lay flat to dry, reshaping while damp. Stuffing the foot portion with tissue paper helps maintain the shape as they dry.
For extra durability, consider applying fabric paint or puffy paint dots to the bottom of the soles. This adds grip and prevents slipping on smooth floors.
Troubleshooting Tips
My shells don’t line up: Count your stitches at the end of each round. The shells should stack directly on top of each other. If they’re shifting, you may have accidentally added or skipped a stitch somewhere.
The foot is too tight: Try going up a hook size, or add a few extra stitches to the sole foundation chain.
The leg is too loose and floppy: Your gauge may be looser than mine. Try dropping down a hook size for the lace section only.
I can’t get my foot in: Make sure you’ve completed all the toe decrease rounds. The opening at round 16 should be wide enough to slip your foot through before the lace section begins.
I really hope you love making these coastal crochet summer boots as much as I loved designing them. They make such a thoughtful handmade gift, or treat yourself to a cozy pair for padding around the house on cool summer mornings.
If you make these boots, I would absolutely love to see them! Tag me on Instagram or share a photo in our Facebook group. Nothing makes my day like seeing your finished projects pop up in my feed.
Save this crochet boot pattern to your Pinterest boards so you can find it whenever you’re ready to cast on. And please drop a comment below if you give these a try. I read every single one and love hearing how your projects turn out!
