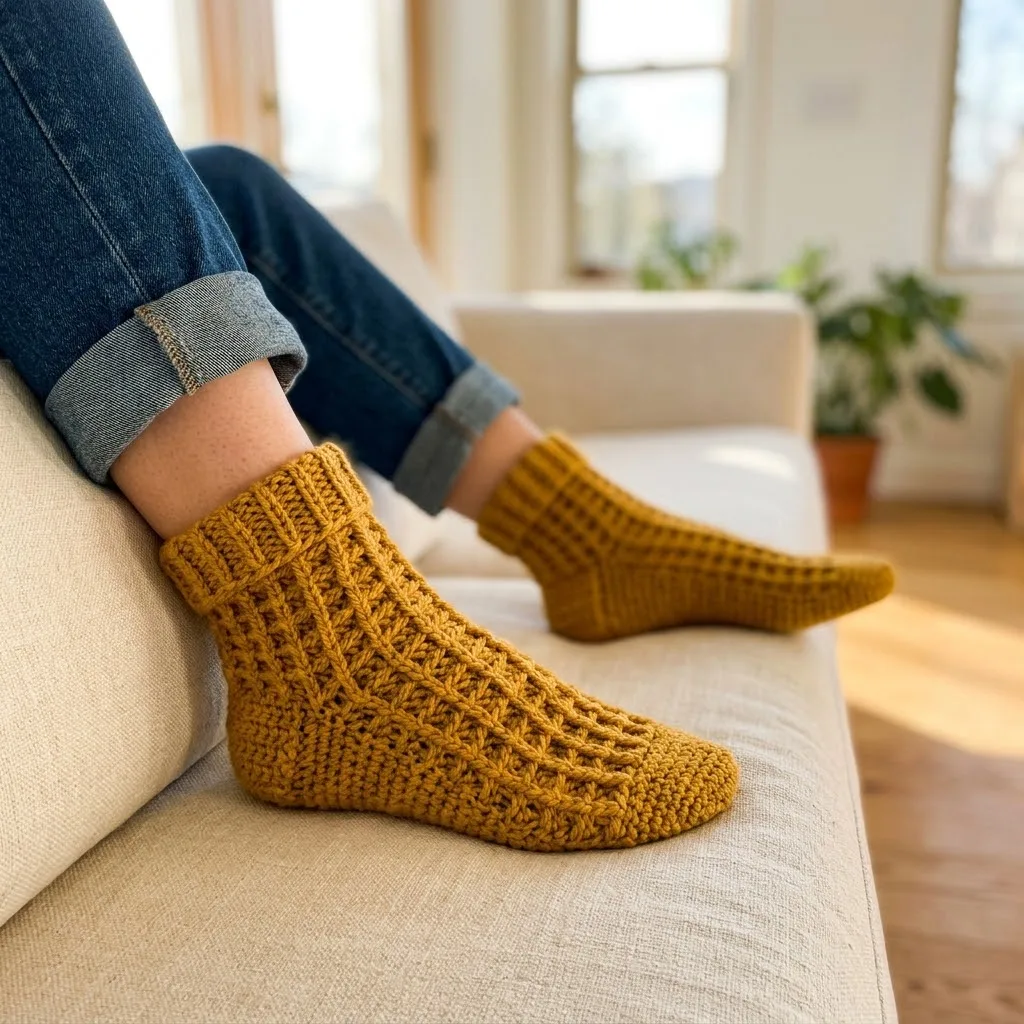
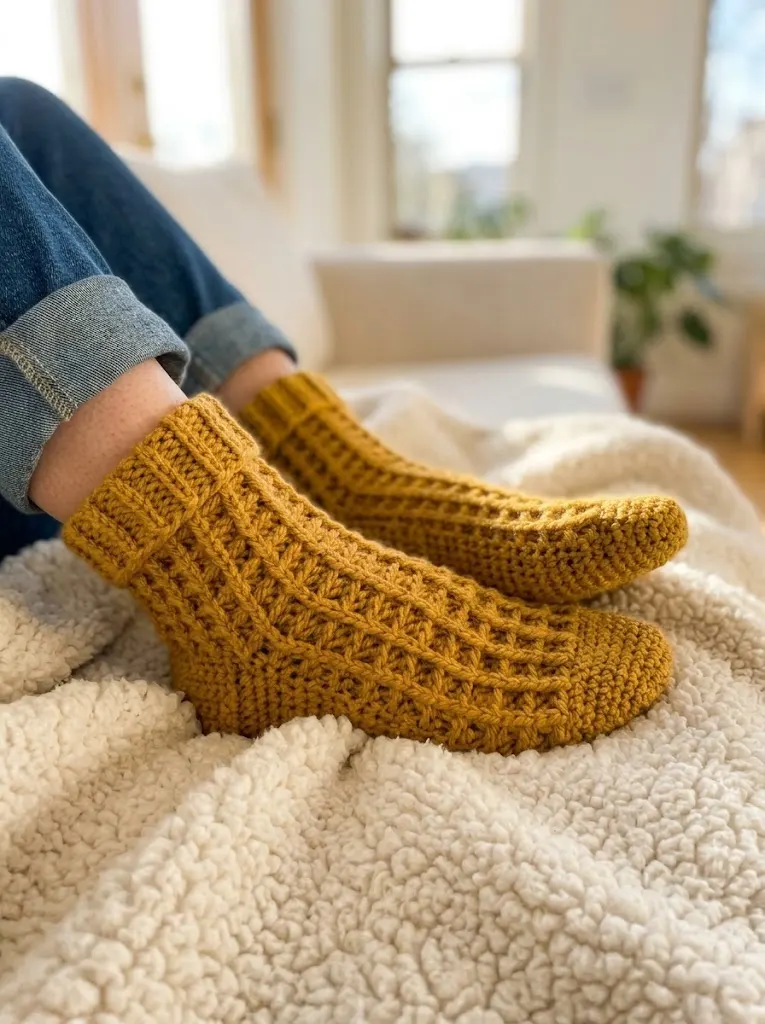
I set out to design a sock pattern that looked impressive but wouldn’t make you want to throw your hook across the room. These Mustard Yellow Sunshine Socks needed to hit every mark on my list. Comfortable fit, interesting texture, toe-up construction for easy sizing, and a stitch pattern that creates visual interest without constant counting. After testing multiple yarn weights and tweaking the heel shaping more times than I care to admit, I am SO pleased with how these turned out! The waffle-like texture on the leg portion adds cushion and stretch while the solid foot section keeps things practical for everyday wear.

Why You’ll Love This Crochet Sock Pattern
Crocheted socks have a reputation for being bulky and uncomfortable, but that reputation is outdated. When you choose the right yarn weight and stitch combinations, you get socks that rival their knitted cousins. These Sunshine Socks use a worsted weight yarn for quick results while keeping the fabric breathable enough for indoor wear.
The construction method here is toe-up, which means you start at the very tip of your toes and work your way up to the cuff. This approach has a huge advantage. You can try the sock on as you go and adjust the length of the foot and leg sections to fit your exact measurements. No more guessing, no more socks that bunch at the ankle or squeeze your toes.
The beautiful textured pattern you see on the leg portion uses a combination of front post double crochet (fpdc) and back post double crochet (bpdc) stitches. These create raised ridges that look complex but follow a simple two-round repeat. Once you get the rhythm, your hands will know what to do.
Materials Needed for Your Crochet Socks
Yarn: Approximately 250 yards of worsted weight yarn (weight category 4). The sample uses a golden mustard shade. Look for a yarn with good stitch definition, minimal fuzz, and a bit of nylon content for durability. A superwash wool blend works beautifully here.
Hook: 5.0mm (US H/8) crochet hook for main sock body, 4.5mm (US 7) hook for ribbed cuff
Notions:
Gauge: 14 stitches and 16 rows = 4 inches in single crochet using 5.0mm hook. Gauge matters for socks! Take time to check yours before starting.
Finished Size: Women’s medium (fits US shoe size 7-8). The toe-up construction allows easy customization for other sizes.
Skill Level
This crochet sock pattern sits at an intermediate level. You should feel comfortable with basic stitches and be ready to learn post stitches if they are new to you.
Skills you’ll use:
Don’t let the skill level scare you if you’re a confident beginner ready for a challenge. I’ll walk you through every step.
Stitch Abbreviations and Definitions
ch = chain: Wrap yarn over hook, pull through loop on hook. This creates the foundation for many projects.
sl st = slip stitch: Insert hook into stitch, yarn over, pull through both the stitch and the loop on your hook in one motion. Used for joining and moving across stitches without adding height.
sc = single crochet: Insert hook into stitch, yarn over and pull up a loop (2 loops on hook), yarn over and pull through both loops. The shortest and most dense of the basic stitches.
sc2tog = single crochet two together: A decrease stitch. Insert hook into first stitch, pull up a loop, insert hook into next stitch, pull up a loop (3 loops on hook), yarn over and pull through all 3 loops. You’ve turned 2 stitches into 1.
dc = double crochet: Yarn over, insert hook into stitch, yarn over and pull up a loop (3 loops), yarn over and pull through 2 loops (2 loops remain), yarn over and pull through remaining 2 loops.
fpdc = front post double crochet: Yarn over, insert hook from front to back to front around the post (vertical bar) of the stitch below, complete as a regular double crochet. This pushes the stitch forward, creating a raised texture.
bpdc = back post double crochet: Yarn over, insert hook from back to front to back around the post of the stitch below, complete as a regular double crochet. This pushes the stitch backward, creating a recessed texture.
inc = increase: Work 2 stitches into the same stitch.
How to Crochet the Mustard Yellow Sunshine Socks
This crochet tutorial walks you through every section of the sock. Read through the entire pattern before starting so you understand how the pieces connect.
Toe Section
The toe uses a magic ring start and increases evenly to create a smooth rounded shape.
Round 1: Using 5.0mm hook, create a magic ring. Ch 1 (does not count as a stitch throughout), work 6 sc into the ring. Pull ring closed. Place stitch marker in first stitch. Work in continuous rounds, moving marker up each round. (6 sts)
Round 2: Inc in each st around. (12 sts)
Round 3: *Sc in next st, inc in next st* repeat around. (18 sts)
Round 4: *Sc in next 2 sts, inc in next st* repeat around. (24 sts)
Round 5: *Sc in next 3 sts, inc in next st* repeat around. (30 sts)
Round 6: *Sc in next 4 sts, inc in next st* repeat around. (36 sts)
Round 7: *Sc in next 5 sts, inc in next st* repeat around. (42 sts)
Round 8: *Sc in next 6 sts, inc in next st* repeat around. (48 sts)
Your toe should measure approximately 2.5 inches across at this point. If you need a wider toe, continue increasing in pattern for additional rounds.
Foot Section
Now we work even (no increases or decreases) until the foot reaches the correct length. The foot uses simple single crochet for a smooth, comfortable fabric against your skin.
Rounds 9-35: Sc in each st around. (48 sts)
This creates approximately 6.5 inches of foot length. For a longer foot, add more rounds here. For a shorter foot, work fewer rounds. The foot portion should reach from your toes to approximately 2 inches before the back of your heel when tried on.
Tip for beginners: Try the sock on at this point! Slip it over your toes and see where the fabric lands. This is the beauty of toe-up construction.
Heel Section
The heel uses short row shaping to create a cup that wraps around your heel. This section looks complicated in writing but makes perfect sense once you work it.
We’ll work back and forth across half the stitches (24 stitches) for the heel, leaving the other 24 stitches unworked for now. These unworked stitches form the top of the foot (the instep).
Heel Turn, Part 1 (decreasing):
Row 1: Sc in next 24 sts, turn. Leave remaining 24 sts unworked. (24 sts)
Row 2: Ch 1, sc in next 22 sts, turn. Leave last st unworked. (22 sts)
Row 3: Ch 1, sc in next 20 sts, turn. Leave last st unworked. (20 sts)
Row 4: Ch 1, sc in next 18 sts, turn. (18 sts)
Row 5: Ch 1, sc in next 16 sts, turn. (16 sts)
Row 6: Ch 1, sc in next 14 sts, turn. (14 sts)
Row 7: Ch 1, sc in next 12 sts, turn. (12 sts)
Heel Turn, Part 2 (increasing):
Now we work back outward, picking up those unworked stitches.
Row 8: Ch 1, sc in next 12 sts, sc in next unworked st from Row 6, turn. (13 sts)
Row 9: Ch 1, sc in next 13 sts, sc in next unworked st, turn. (14 sts)
Row 10: Ch 1, sc in next 14 sts, sc in next unworked st, turn. (15 sts)
Continue in this manner, working across all stitches and picking up one unworked stitch at the end of each row until all 24 heel stitches have been incorporated.
Row 15: Ch 1, sc across all 24 heel sts. Do not turn. (24 sts)
Now we rejoin for working in the round. Continue in rounds around all 48 stitches.
Rejoining Round: Sc evenly around the entire sock opening, working 24 sc across the instep stitches you left unworked, then continuing around. Place marker in first stitch. (48 sts)
Ankle Section
Work 4 rounds of single crochet to transition from the heel to the textured leg.
Rounds 1-4: Sc in each st around. (48 sts)
Leg Section with Textured Stitch Pattern
This is where the beautiful waffle-like texture appears! The post stitches create vertical ribbing that stretches nicely around your leg.
Setup Round: Dc in each st around. (48 sts)
Pattern Round 1: *Fpdc around next st, bpdc around next st* repeat around. (48 sts)
Pattern Round 2: *Bpdc around next st, fpdc around next st* repeat around. (48 sts)
Repeat Pattern Rounds 1 and 2 for a total of 20 rounds, or until leg reaches your desired height. The sample shows approximately 5 inches of textured pattern.
What’s happening here: By alternating which stitches get front posts and which get back posts on each round, you create a checkerboard effect that produces the raised grid texture visible in the finished sock.
Ribbed Cuff
Switch to your smaller 4.5mm hook for a snugger cuff that won’t slide down.
Cuff Round 1: *Fpdc around next st, bpdc around next st* repeat around. (48 sts)
Repeat Cuff Round 1 for 8 rounds total. This creates a 1×1 ribbing that matches the leg pattern but feels tighter due to the smaller hook.
Final Round: Sl st in each st around. Fasten off and weave in end securely.
Making the Second Sock
Repeat the entire pattern to create your matching sock. I recommend starting the second sock immediately while the pattern is fresh in your mind and your tension is consistent.
Finishing Your Crochet Socks
Weave in all yarn tails using your tapestry needle. For socks, I recommend weaving through at least 2 inches of fabric in multiple directions so the ends stay secure through wear and washing.
Block your socks by soaking them in lukewarm water for 15 minutes, gently squeezing out excess water (never wring), and laying flat to dry. You can also slip them over sock blockers if you have them. Blocking evens out your stitches and relaxes the fabric for a better fit.
Tips for Crochet Sock Success
Yarn choice matters. Look for yarns labeled as sock yarn or containing nylon for durability. Pure wool will felt and pill quickly on your feet.
Check your gauge. Socks that are too loose will bunch and slide. Socks that are too tight will be uncomfortable and wear out faster.
Try on as you go. The toe-up construction exists specifically so you can check the fit at every stage.
Make notes. Write down how many rounds you worked for each section. Your second sock needs to match!
Consider adding a reinforcement. Working a strand of nylon thread alongside your yarn in the heel and toe areas extends the life of your socks significantly.
Customizing Your Sunshine Socks
For smaller sizes: Stop the toe increases one round earlier and work fewer foot rounds.
For larger sizes: Add one or two more increase rounds to the toe and extend the foot section.
For a taller sock: Continue the textured leg pattern for additional rounds.
For a different look: Try the textured pattern in a contrasting color by switching yarns at the ankle.
This step by step crochet pattern gives you the foundation, but don’t be afraid to make it your own.
Care Instructions
These socks do best with gentle handling. Machine wash on delicate cycle in cold water using a mesh laundry bag. Lay flat to dry or tumble on low heat briefly. Avoid high heat, which can damage wool fibers and cause shrinkage.
I really hope you enjoy making these cozy Mustard Yellow Sunshine Socks as much as I enjoyed designing them. If you give this pattern a try, I would absolutely love to see your finished socks! Tag me on Instagram or share a photo in my Facebook group. Seeing your creations honestly makes my entire week.
If this pattern caught your eye, go ahead and save it to your Pinterest boards so you can find it when you’re ready to cast on. And please drop a comment below if you make these socks. I love hearing which colors you choose and how they fit!
